Tour the Lightroom Interface — This video (Overview of the Lightroom Interface), will take you on a brief tour through the Lightroom interface to familiarize yourself with Lightroom’s tools and modular workflow.
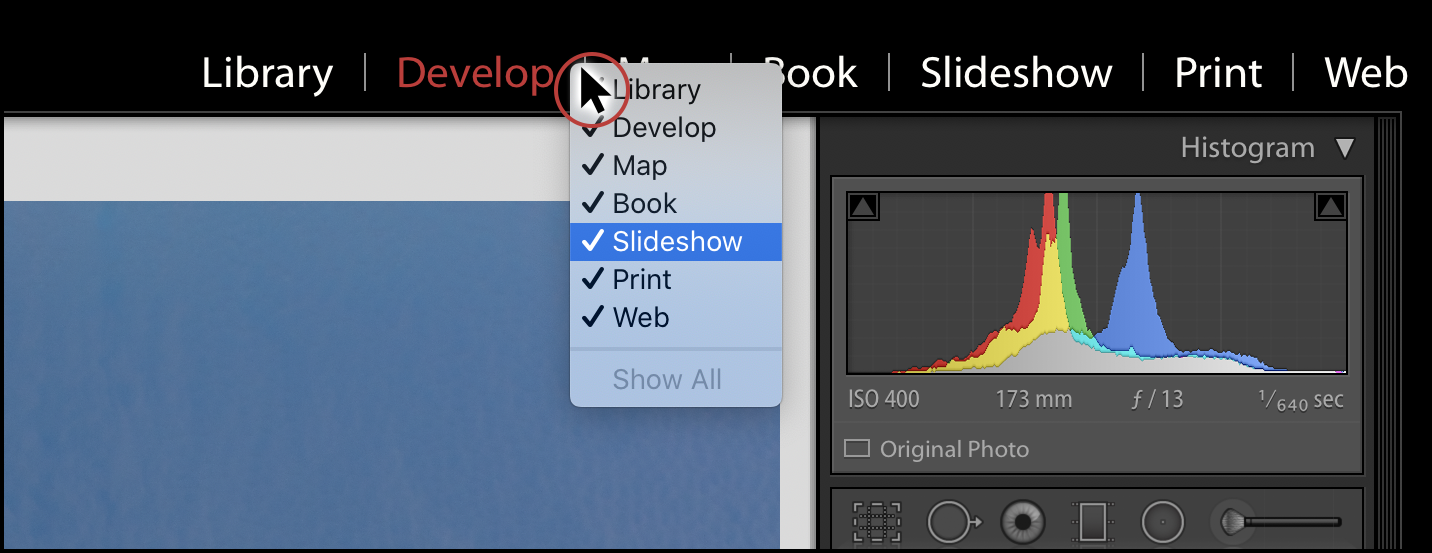
Show / Hide Modules— Rt-click (or Control Click Mac), on the name of any module in the Module picker to show/hide modules.
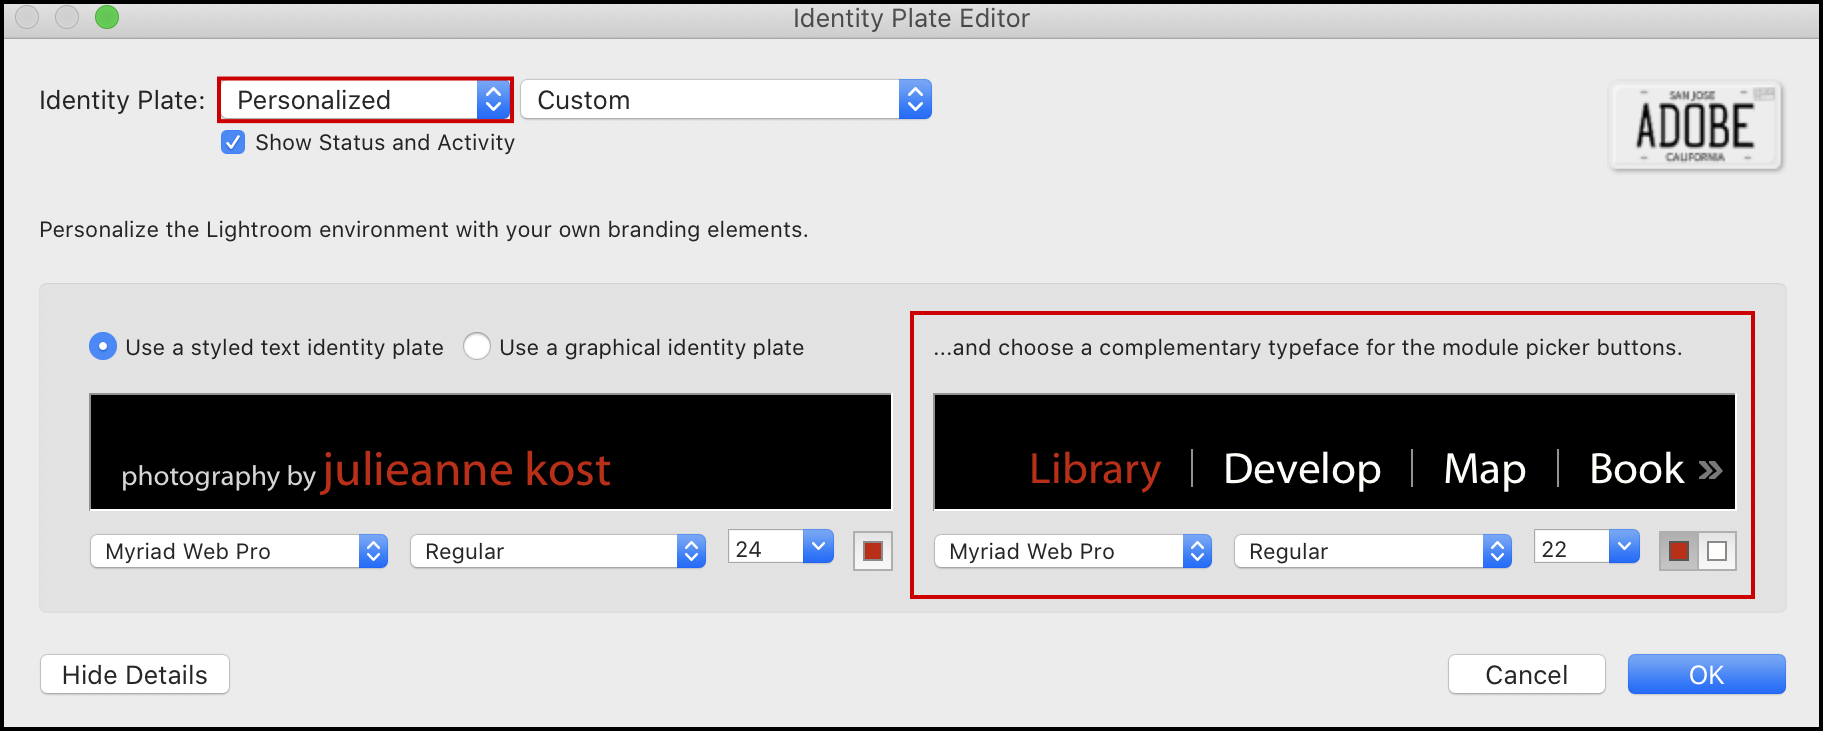
Customize the Module Picker — To customize the font, size and color of the modules, choose:
(Mac) Lightroom Classic > Identity Plate Setup
(Win) Edit > Identity Plate Setup
For Identity Plate, choose Personalized. Then, use the options on the right to customize the typeface, size, and color. Note: you can customize the color for both the selected and rollover state.
Moving from one Module to Another — There are several different ways to quickly move from one module to another including:
• Command + Option + 1-7 (Mac) | Control + Alt + 1-7 (Win) moves to the Library/Develop/Map/Book/Slideshow/Print/Web module.
• Command + Option + Up Arrow (Mac) | Control + Alt + Up Arrow (Win) toggles between the current/previous selected module.
• Tapping the shortcut key for many of the views/tools in Lightroom will automatically take you to the module and select the corresponding view/tool (for example, tap “G” for Grid, “E” for Loupe, “C” for Compare, “N” for Survey, “D” for the Develop module, “W” for White Balance, “R” for Crop, “Q” for Spot Removal etc.).
• Option -double click (Mac) | Alt -double click (Win) an image thumbnail in Grid view to move to the Develop module. Likewise, Option -double click (Mac) | Alt -double click (Win) an image in the Develop module will take you to the Grid View in the Library module.
Show and Hide Panel Visibility — Tap the Tab key to toggle the visibility of side panels. Shift + Tab toggles visibility of all panels (panels + Module picker + filmstrip). While the panels are hidden, positioning the cursor at the edge of the monitor will display the panels in order to access the tools/options that you need and, when you move your cursor away, Lightroom will automatically hide them (similar to a roll-over effect).
• In addition, F5 toggles the module picker, F6 toggles the filmstrip, F7 toggles the left panels, and F8 toggles the right panels.
Expanding Panel Width — Drag the edge of a panel towards the center of the screen to expand its width. Option -drag (Mac) | Alt -drag (Win) to expand even farther.
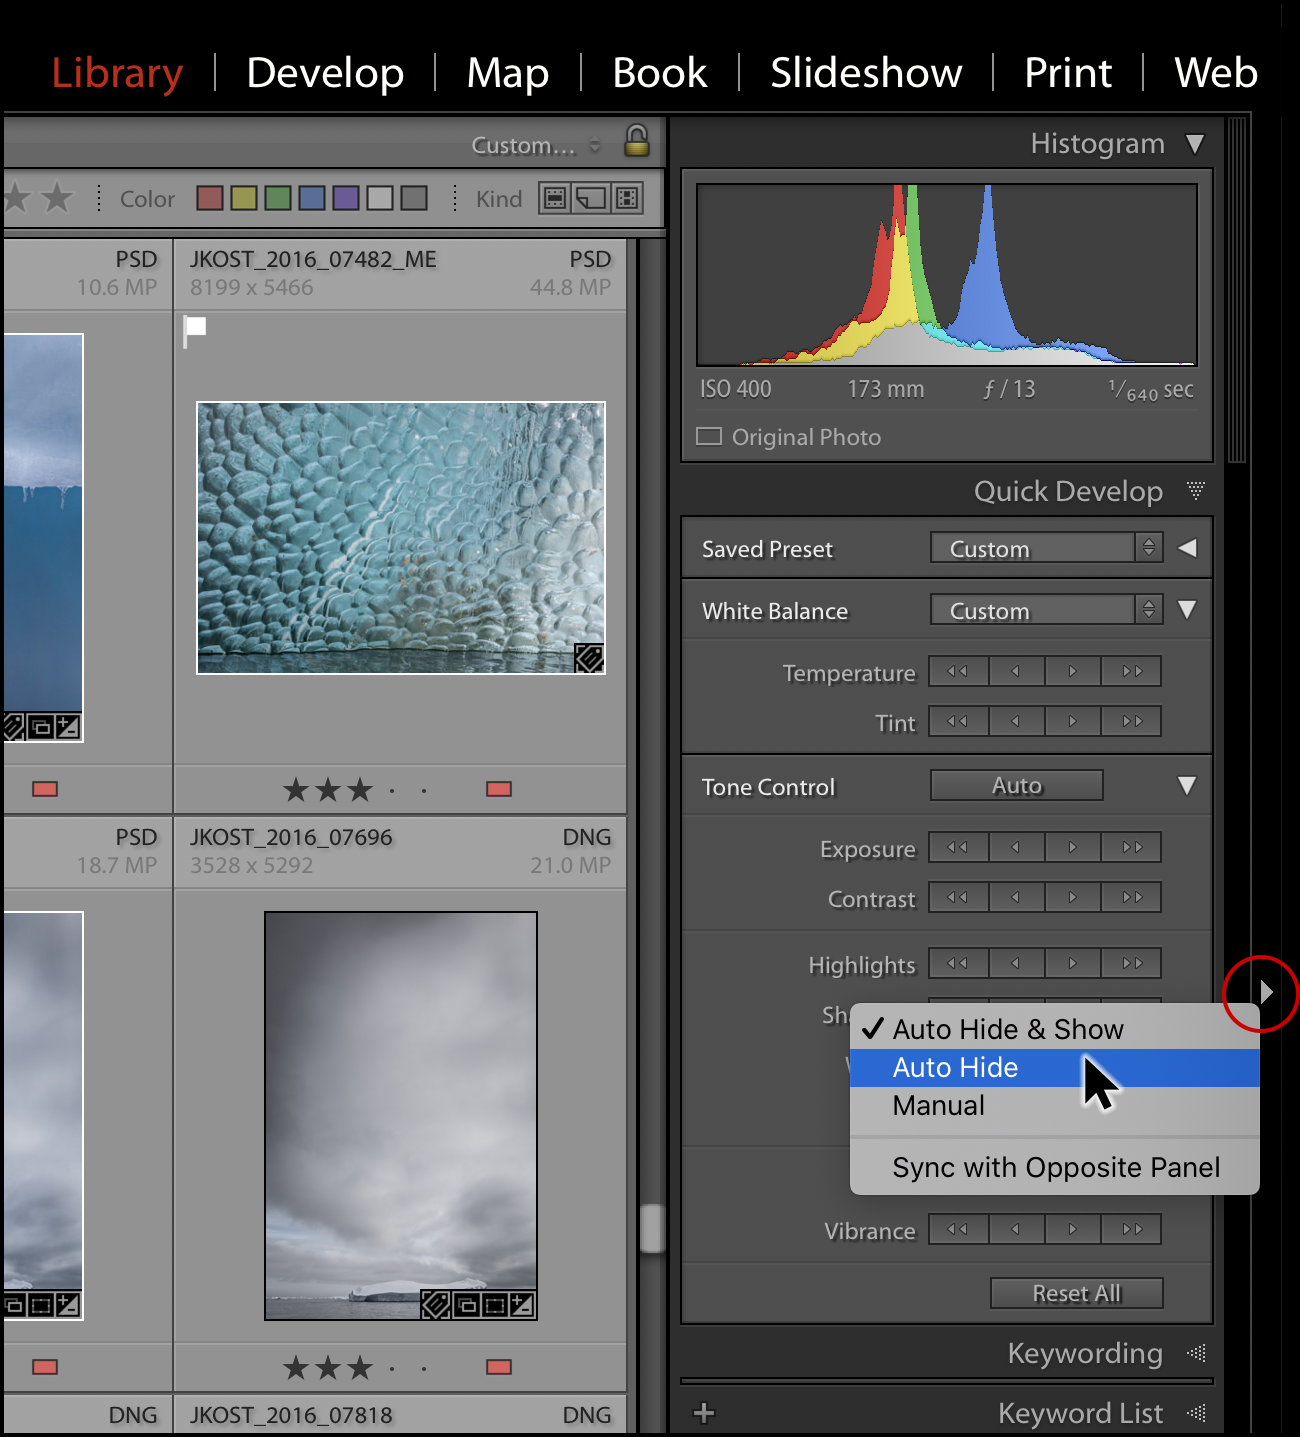
Auto Show and Hide Panels — Control -click (Mac) | Right -click (Win) the small triangle along the outer edge of the panel midway down the screen to change panel hide/show options. Choose bettween:
• Auto Hide & Show – Displays the panel as you move the pointer to the outside edge of the application window. Hides the panel as you move the pointer away from the panel.
• Auto Hide- Hides the panel as you move the pointer away from the panel. You must open the panel manually.
• Manual – Turns off automatic show/hide behavior.
• Sync With Opposite Panel- Applies the same hide/show panel behavior to the left and right panels.
Note: each panel can be controlled separately.
Panel Shortcuts — Each Panel has it’s own shortcut depending on it’s placement in the panel.
• Command + Control + 0, 1, 2, 3, etc. (Mac) | Control + Shift +0, 1, 2 3 etc. (Win) expands/contracts the left side panels.
• Command + 0, 1, 2, 3, etc. (Mac) | Control + 0, 1, 2, 3, etc (Win) expands/contracts the right side panels.
Hiding Unused Panels — To toggle the visibility of a panel, Control -click (Mac) | Right -click (Win) on the panel header and select/deselect it from the list. There are a few panels that can’t be hidden (although their contents can still be collapsed using the disclosure triangle). The exceptions are:
Library and Develop Module: Navigator and Histogram panels
Map Module: Navigator and Metadata panels
Book, Slideshow, Print, and Web Modules: Preview panel
Single -Click Expand / Collapse All Panels — Command -click (Mac) | Control -click (Win) a panel header to expand/collapse all panels with a single click. Or, Control -click (Mac) | Right -click (Win) on any panel header and choose Expand All / Collapse All from the list. Note, the Navigator, Histogram, Metadata (in the Map Module), and Preview panels are exceptions to this rule.
Working in Solo Mode — To only display the options for one panel at a time, Control -click (Mac) | Right -click (Win) on any panel header and select Solo Mode. While in Solo Mode, clicking on a panel header expands the contents of that panel while collapsing any other open panels (which can be especially useful when working on a laptop or smaller display as it eliminates the need to scroll through several open panels to access options). Or, Option -click (Mac) | Alt -click (Win) on the disclosure triangle (on the panel header) to quickly toggle Solo Mode. Note: the disclosure triangle icon is solid gray when Solo Mode is disabled and changes to dots when enabled. To display more than one panel while still in Solo Mode, Shift -click an additional panel’s header.
Swap Panel Positions — To swap the left and right hand panels, choose Preferences > Interface and enable “Swap only Develop Left and Right Panel Groups” or “Swap left and Right Panel groups” and restart Lightroom Classic. Note: This feature was designed primarily for accessibility on tablets.
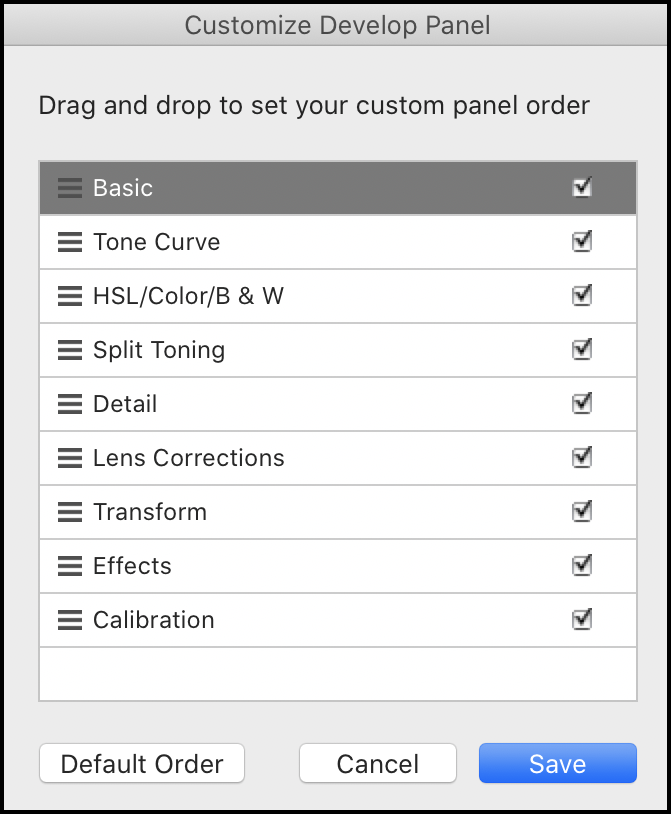
Specific to the Develop Module: Reorder Panels — Control -click (Mac) | Right -click (Win) on any of the panel headers on the right side of the screen in the Develop module, (except the Histogram panel), and select Customize Develop Panels. Drag the three lines to reorder the panels, use the check to toggle toggle panel visibility.
Specific to the Develop Module: Show and Hide Edits — (Updated 04-2023) In the Develop module, Option -click (Mac) | Alt -click (Win) the eye icon next to a panel header to swap from the the eye icon to the “light switch” icon. Clicking the “light switch” shows/hides the visibility of changes made within the panel whereas clicking the eye icon only toggles the visibility of changes on mouse-down. The Healing and Red Eye tools also have this feature (however the eye icon is displayed at the bottom left of the tool’s options) and for Masking, the eye icon is at the top left of the Masks panel. 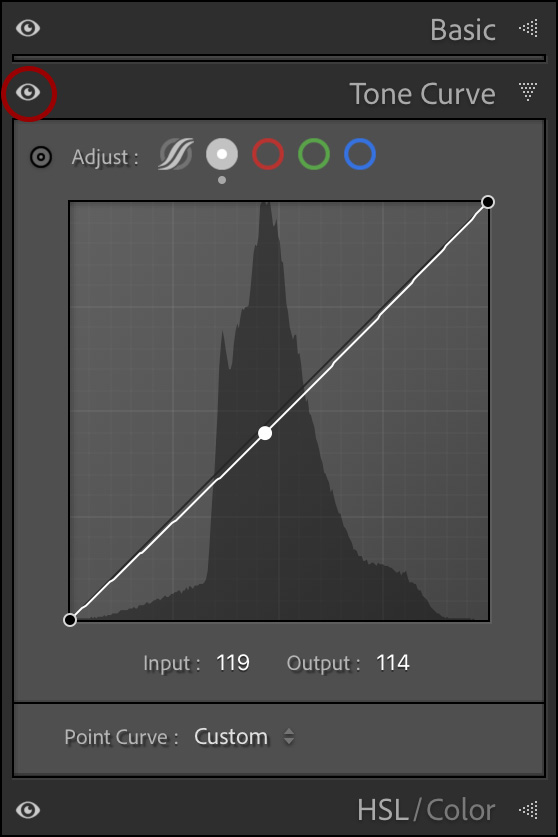
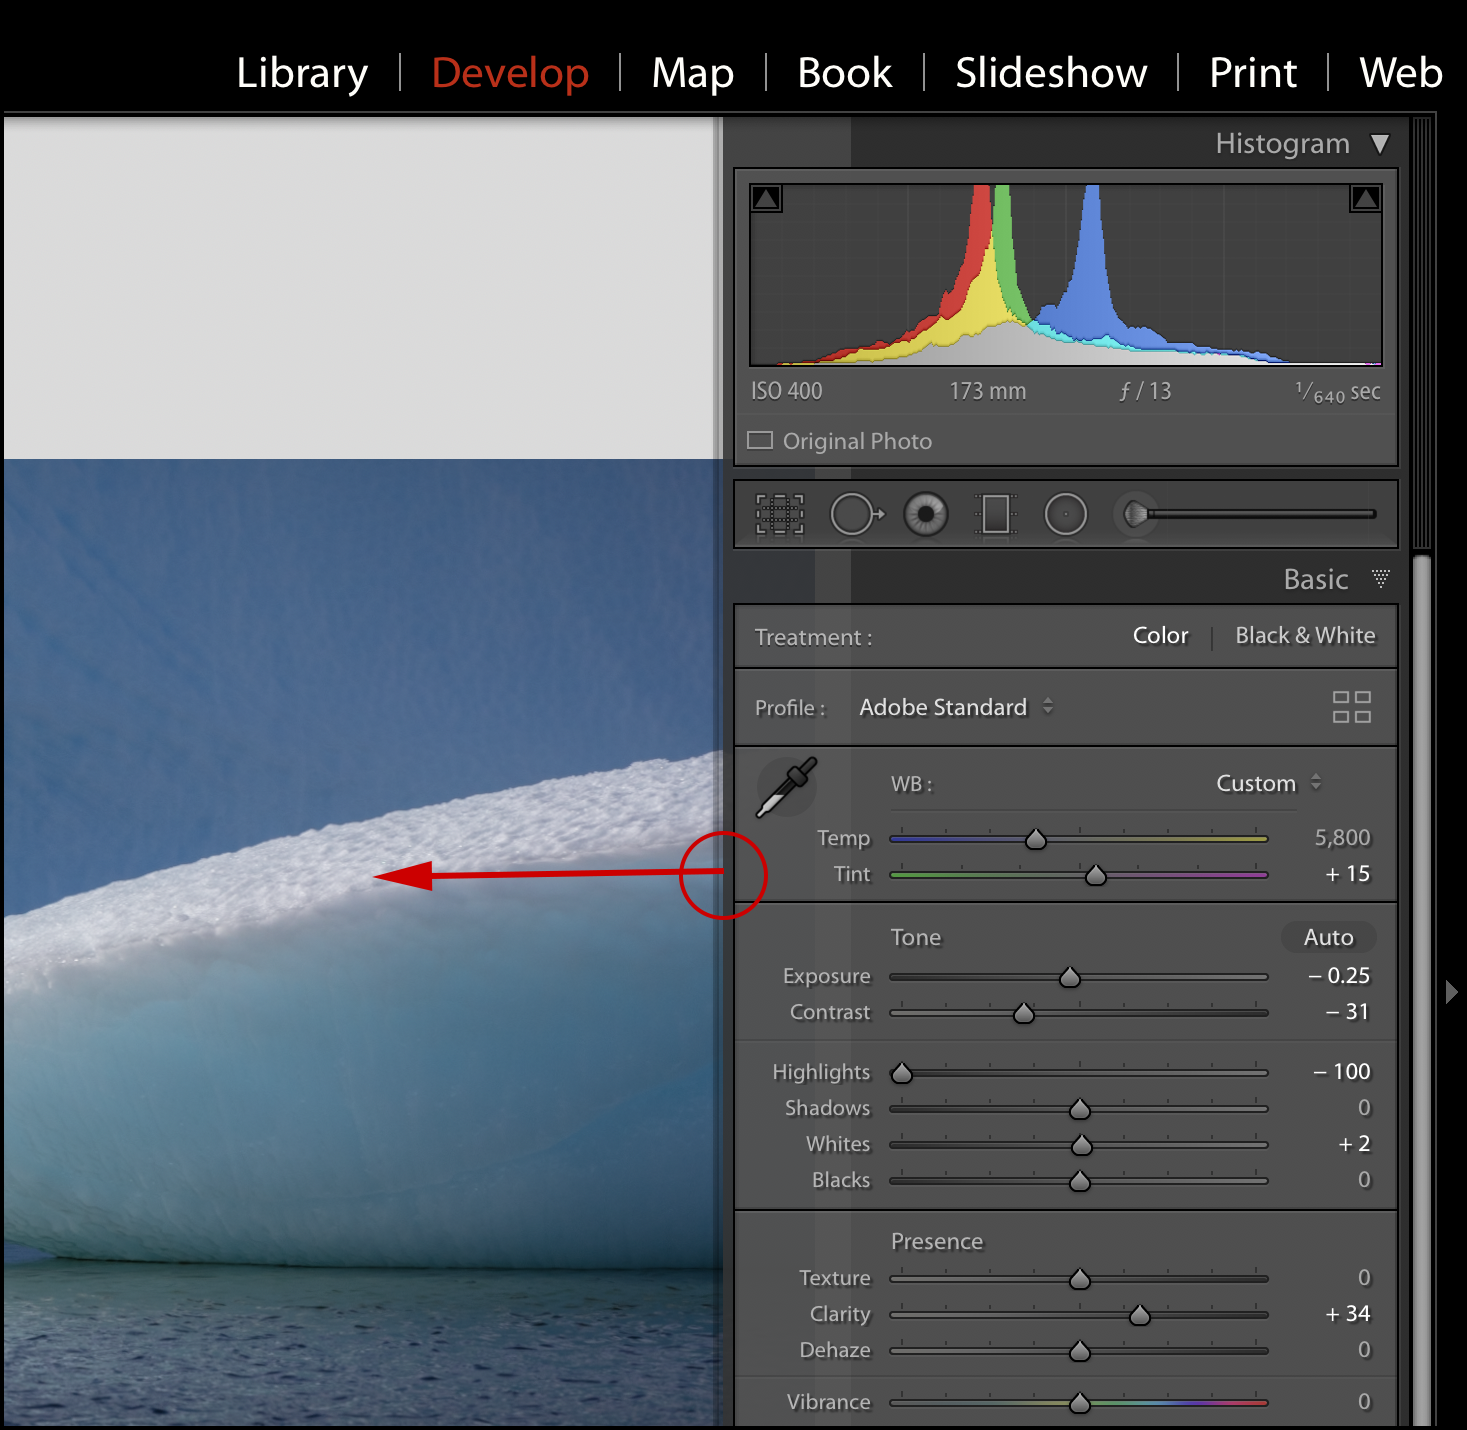
Customize the Background Color — In the Develop module, right -click (Control -click Mac) in the gray background behind the image to change the Background Color. Selecting Light Gray can help avoid accidentally underexposing images when making adjustments. You can also use this feature to preview what the image will look like when displayed against a particular background color.
Working with Sliders —In order to reset any slider in Lightroom Classic, double click on the name of the slider.
• Holding down the Option (Mac) | Alt (Win) key modifies the names of groups of sliders. For example, in the Basic Panel, holding the Option (Mac) | Alt (Win) toggles “Tone” to “Reset Tone”. In order to quickly reset the entire group of sliders, click the modified name (“Reset Tone”).
• Option (Mac) | Alt (Win) -dragging many of the sliders in Lightroom evokes various different behaviors. For example, in the Detail panel, under Sharpening, Option (Mac) | Alt (Win) -dragging the Detail and Masking sliders displays a black and white preview of the mask used to suppress sharpening in lower contrast edge areas in the image. In the Basic panel, Option (Mac) | Alt (Win) -dragging the Exposure, Highlights, Shadows, Whites, and/or Blacks slider displays any areas of the image that are being clipped to pure black or white (on a per channel basis).
Click in any text entry area to enter specific numeric values. Tap the Tab key to move to the next slider. Use the up/down arrow keys to modify existing values. Add the Shift key to modify in larger increments.
Exclusive to the Basic Panel, you can navigate from one slider to the next by tapping the “.” (period) key. Then, use the + and – keys to increase/decrease individual slider settings. Add the Shift key to move the sliders in larger increments and the Option (Mac) | Alt (Win) to move in smaller increments. Note, for these shortcuts to work, you must click on the name of the slider – not the text entry box.
The Tool Bar — while “technically” not a panel, tapping “T” toggles the visibility of the Tool bar.Click the downward facing triangle (on the far right of the Tool bar) to customize what options are displayed.
Persistent Panels — The Collections panel is persistent to all modules making it easy to select different Collections of images while in another module (without having to return to the Library module).
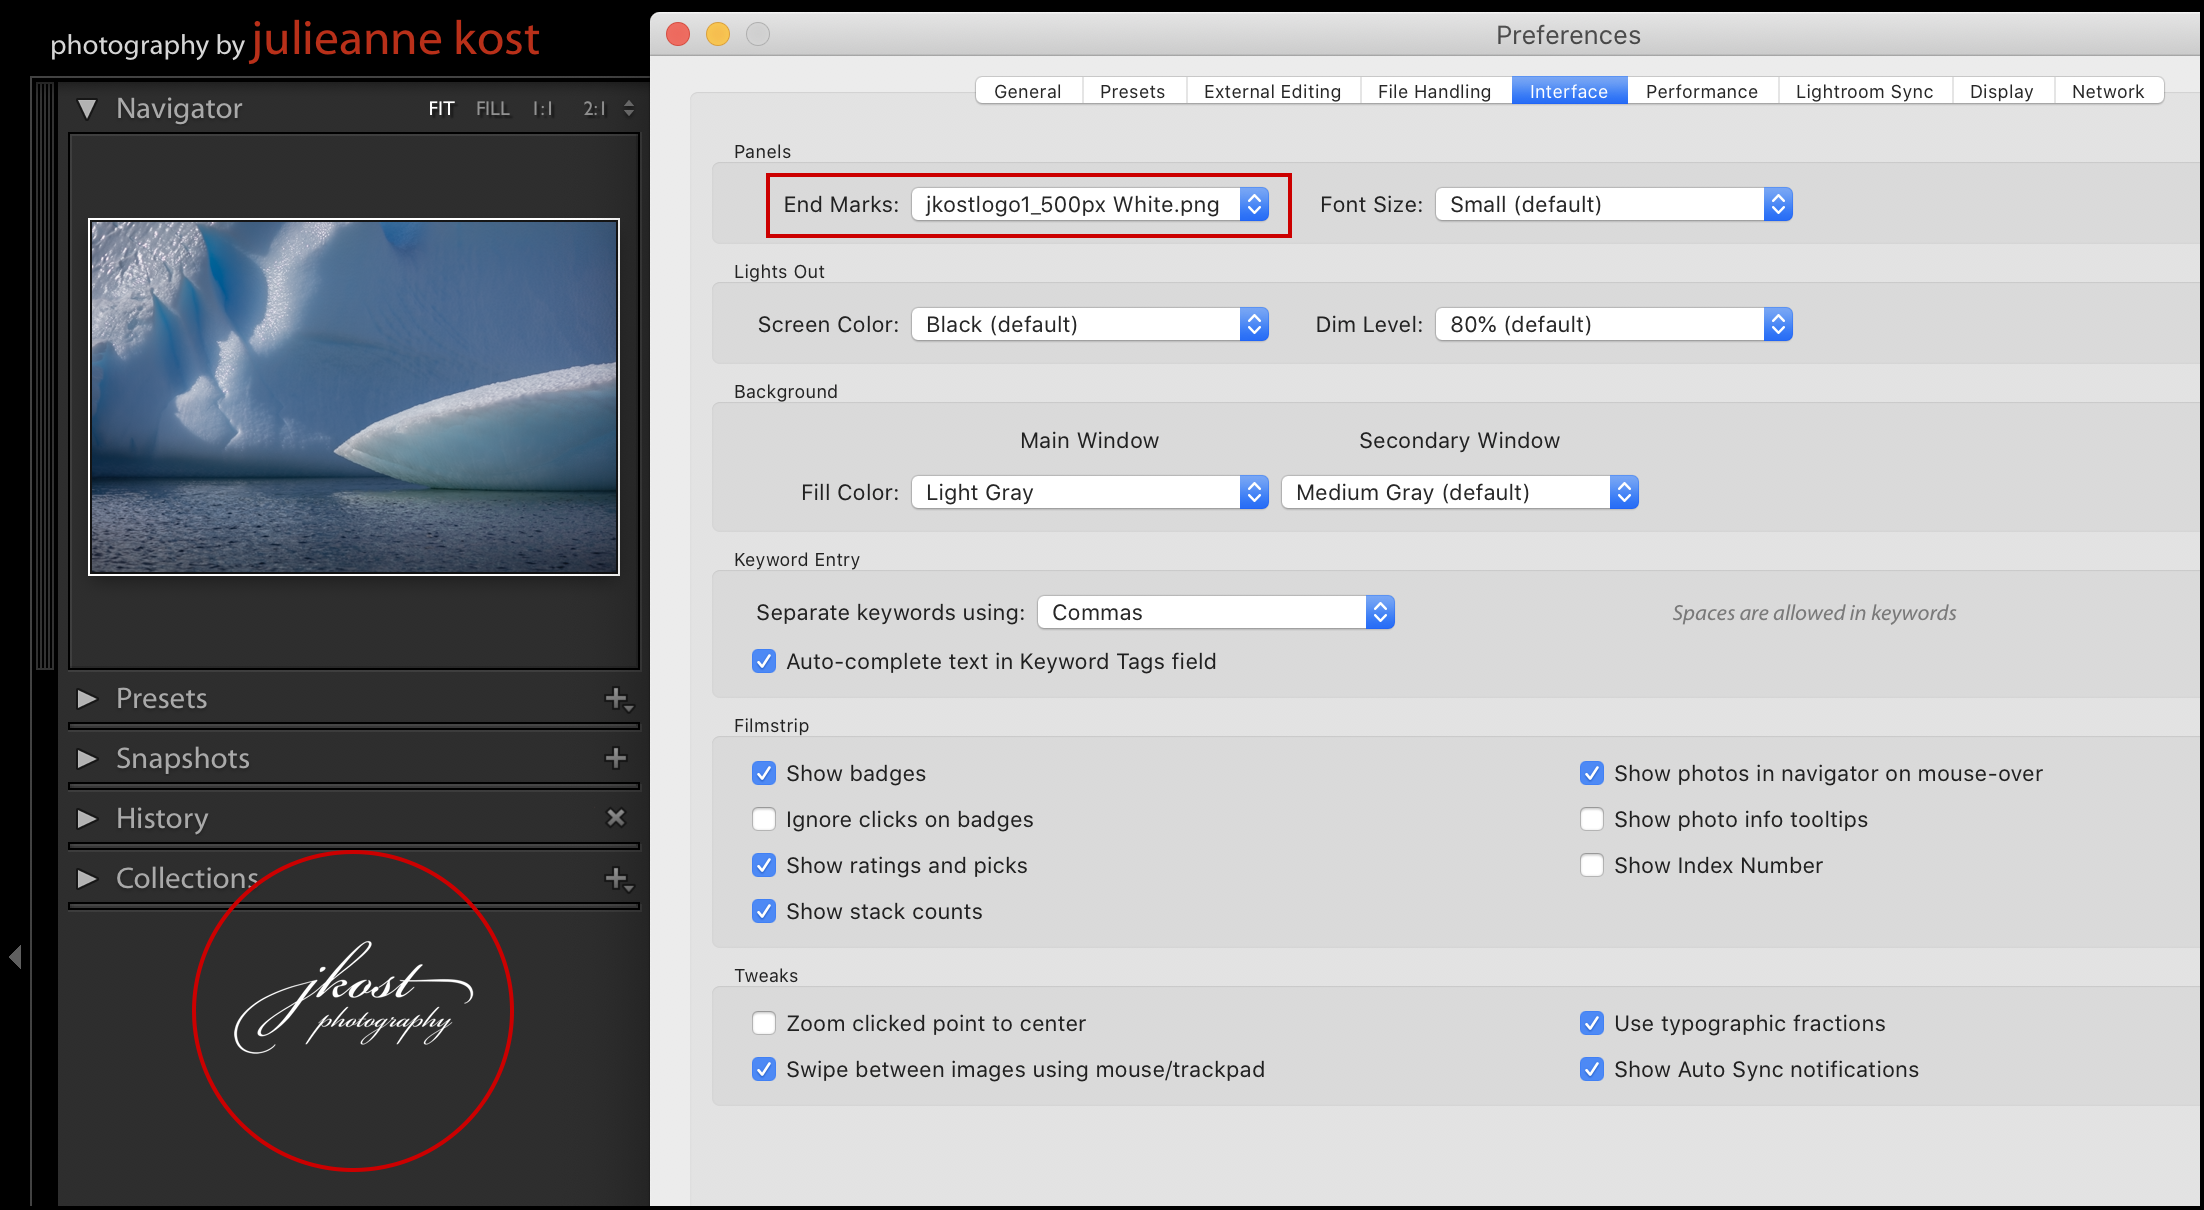
Create a Custom End Mark — A great way to add branding to the Lr interface is using a custom End Mark.
• Create your graphic (using Photoshop or Illustrator), and save it as a .png. Note: you can also save the file as a PSD file or JPEG however the JPEG file will not support transparency.
• Choose Preferences > Interface > Panels. For End Marks, choose Go To Panel End Marks Folder.
• Using the operating system, copy your graphic into the End Mark folder.
• Close the preferences dialog if still open, then reselect Preferences > Interface > Panels and choose your graphic from the End Marks menu to display it at the end of each set of panels.
Appreciate your survey of navigation and shortcuts. Even a user from Day 1 of Lightroom learned several handy bits. Thanks.