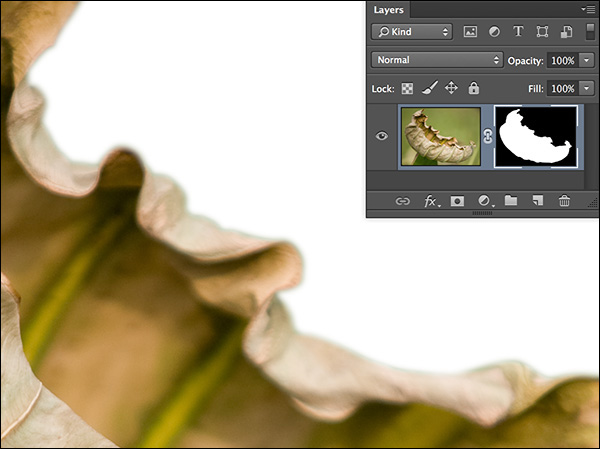
If a section of a mask isn’t quite correct, try using the Dodge or Burn tool in the mask to subtly adjust the edge (by lightening or darkening the grayscale values within the transitional area). In this example, the original mask is too soft and as a result, we can see a green halo around the edge of the leaf.
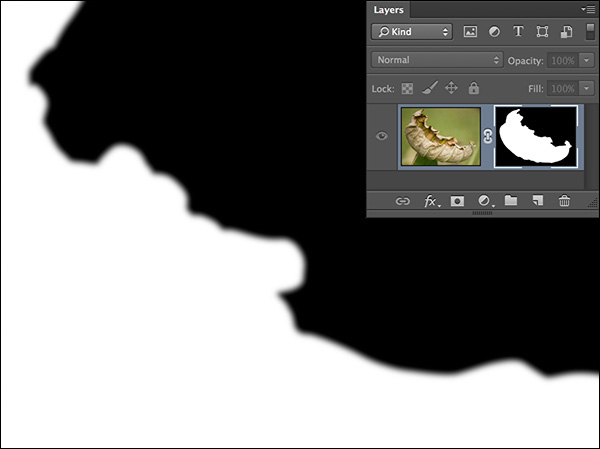
Looking at the original mask, we can see that the edge of the mask needs to be reduced in width as well as shifted towards the edge of the leaf. Note: This is also known as “choking” the mask. Moving in the other direction would be “spreading” the mask.
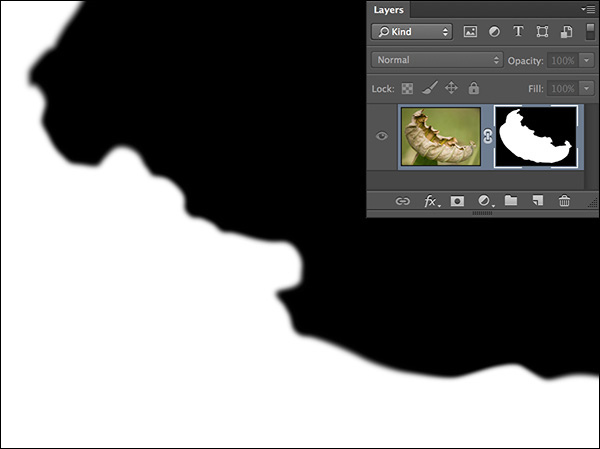
Using the Burn tool on the mask’s edge, darkens the values in the transitional areas of the mask, narrowing the transitional area and moving the mask in towards the leaf. (I realize that the change is subtle in this illustration, but notice how the edge of the mask in the illustration below appears sharper than in the illustration above.)
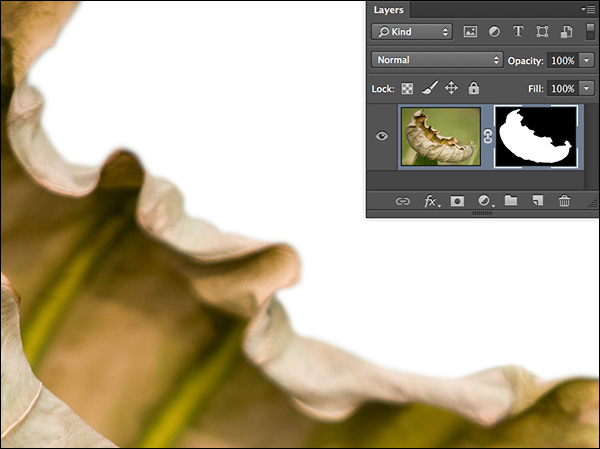
As a result of choking the mask, the green halo is removed from around the edge of the leaf.
Hi, I’ve been doing this forever, but with the Brush tool, black & white as needed, is there something different using the Burn & Dodge tools instead?
Thanks