In the video below, you’ll discover when and why you would want to create and work with Snapshots in Lightroom Classic and Photoshop.
Creating a Snapshot in Lightroom Classic “captures” all of the settings applied to an image and saves them as a single entry in the Snapshot panel. We then have the freedom to experiment, taking images in another direction with the security of knowing that we can quickly return to the Snapshot “state” with a single click. I prefer using Snapshots in the following scenarios:
When multiple versions of the image are needed in a layout in Photoshop. When working on an image that I know will need to be published in both B/W and in color, I’ll create Snapshots for both “versions” of the image (one optimized for B/W, the other for color). I can then open the image into Photoshop as a Smart Object, transform the layer, add masks, overlay type etc. When finished, I can easily swap between the color and B/W version of the photo by selecting Layer > Smart Object > Edit Contents and, in the Camera Raw dialog, choosing the desired Snapshot.
When working with high volumes of images. When I need multiple version of a large number of images (again, think color and B/W for example), I use Snapshots (instead of Virtual Copies) to minimize the number of thumbnails that I have to manage in Lightroom’s catalog.
When collaborating with others. Snapshots can be saved within an image so, when I need to hand off an image to another person, I save the metadata to the file (Metadata > Save Metadata to File or Command + S (Mac) | Control + S (Win)) so that the Snapshot(s) travels with the file.
When demonstrating my workflow As an educator, I take Snapshots of the changes that I make to an image and click through them when presenting to show my workflow in a clear and concise manner.
Here are my favorite shortcuts for working with Snapshots:
Create a new Snapshot — Command + N (Mac) | Control + N (Win) creates a new Snapshot (in the Develop module).
Rename a Snapshot — Snapshots auto name with a time/date stamp, but you can rename the Snapshot when creating it or, at any time by Control -clicking (Mac) | Right -clicking (Win) on the Snapshot and selecting “Rename”.
Updating a Snapshot — If you make changes to an image and want to update the Snapshot, Control -click (Mac) | Right -click (Win) on the Snapshot and choose “Update with Current Settings”.
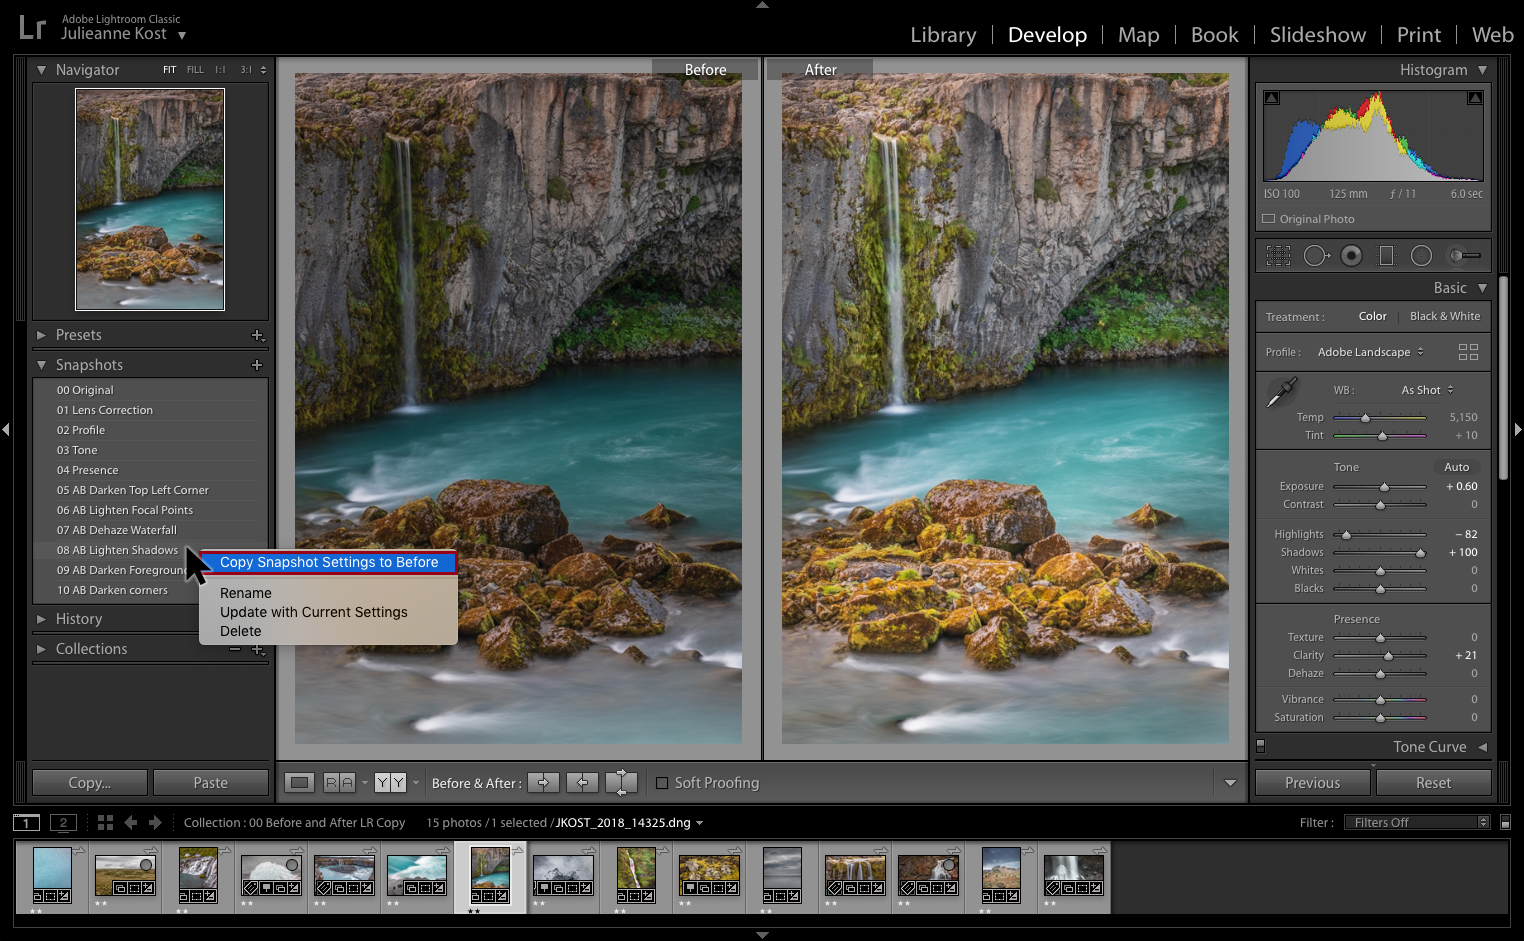
Comparing Snapshots in History — Unlike states in the History panel, you can not simply drag Snapshots into the “before” state in the Develop module. You can, however, Control -click (Mac) | Right -click (Win) on a Snapshot and choose “Copy Snapshot Settings to Before”.
Snapshots and Virtual Copies — When you save a Snapshot, that Snapshot is automatically made available in all Virtual Copies of the image.
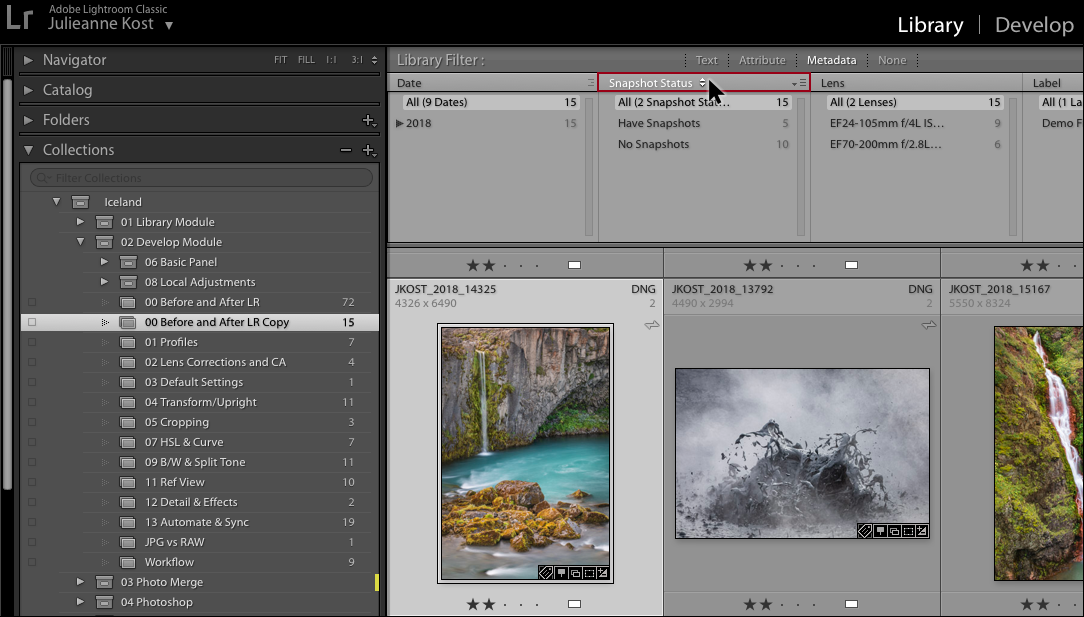
Finding photos with Snapshots — To quickly find all of your images with Snapshots, in the Library module, click the Metadata option in the Filter bar and select “Snapshot Status” as the Search Criteria and choose “Have Snapshots” or “No Snapshots”.
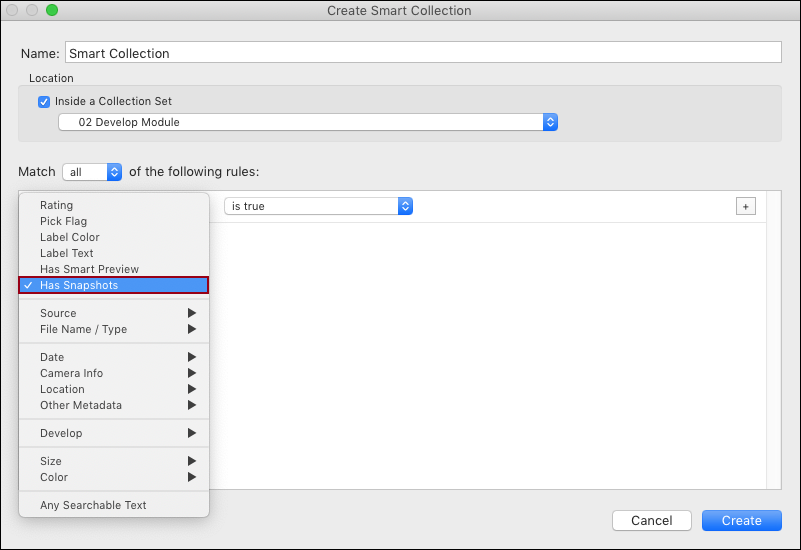
You can also create a Smart Collection, choose “Has Snapshots”, and then choose between “is true” or “is false” to quickly find your images.
Julienne,
I’m trying hard to get into lightroom.
I’ve retired and getting back to photography.
Loving your series on LRc and looking forward to many more posts.
Would love to see one on the sliders and how they affect the picture.( You touched on it in one of the previous posts)