I’m pleased to announce new features and updates including custom Raw Defaults, Versions, Local Hue editing, watermark syncing across devices, Shared Album notifications, and new ways to connect, learn, and be inspired using Inspirational Edits, in Lightroom v3.3.
Custom Raw Defaults
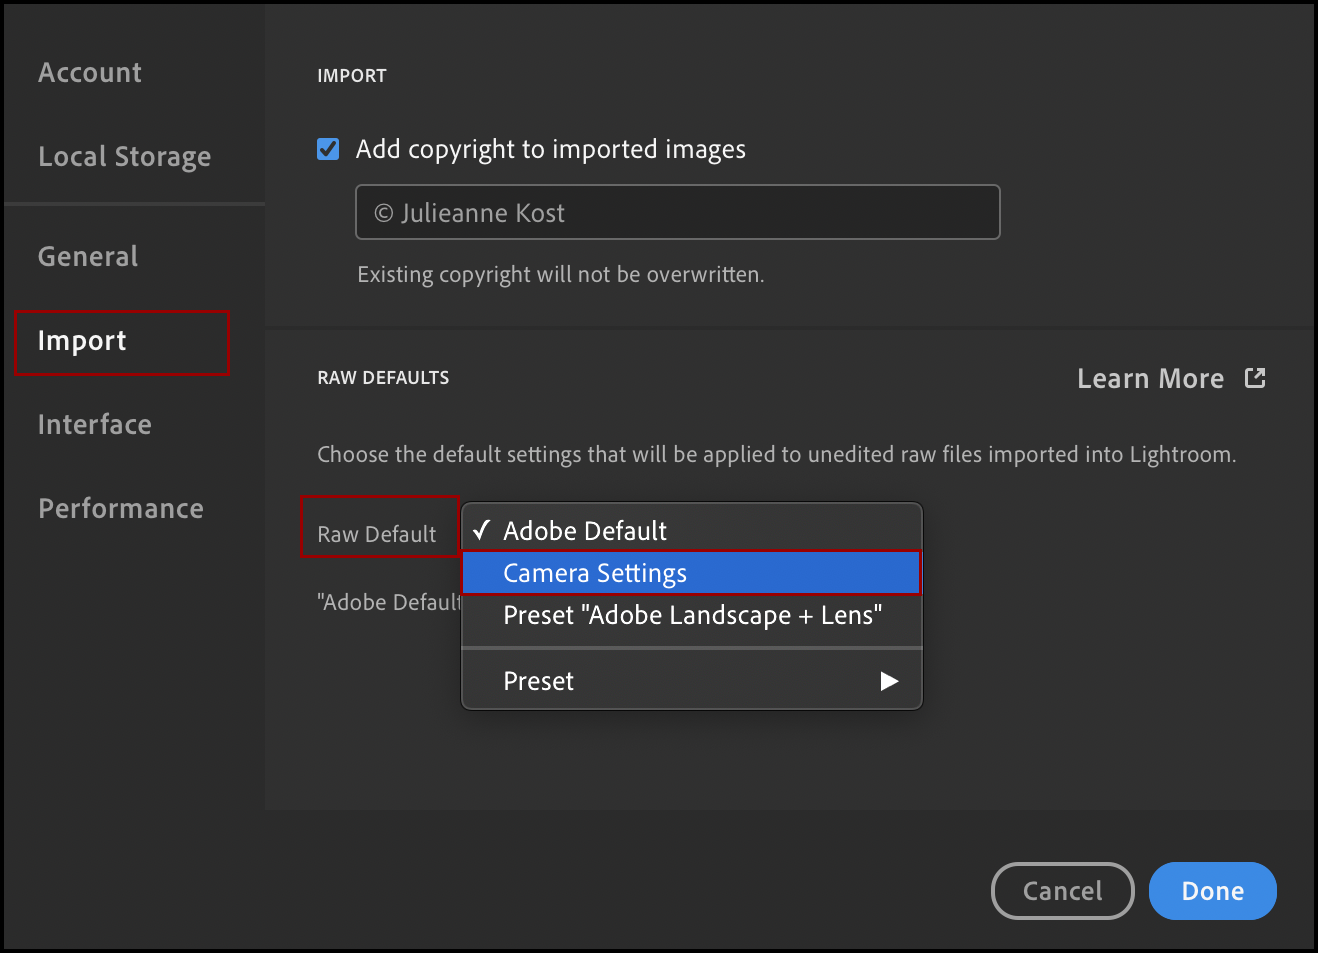
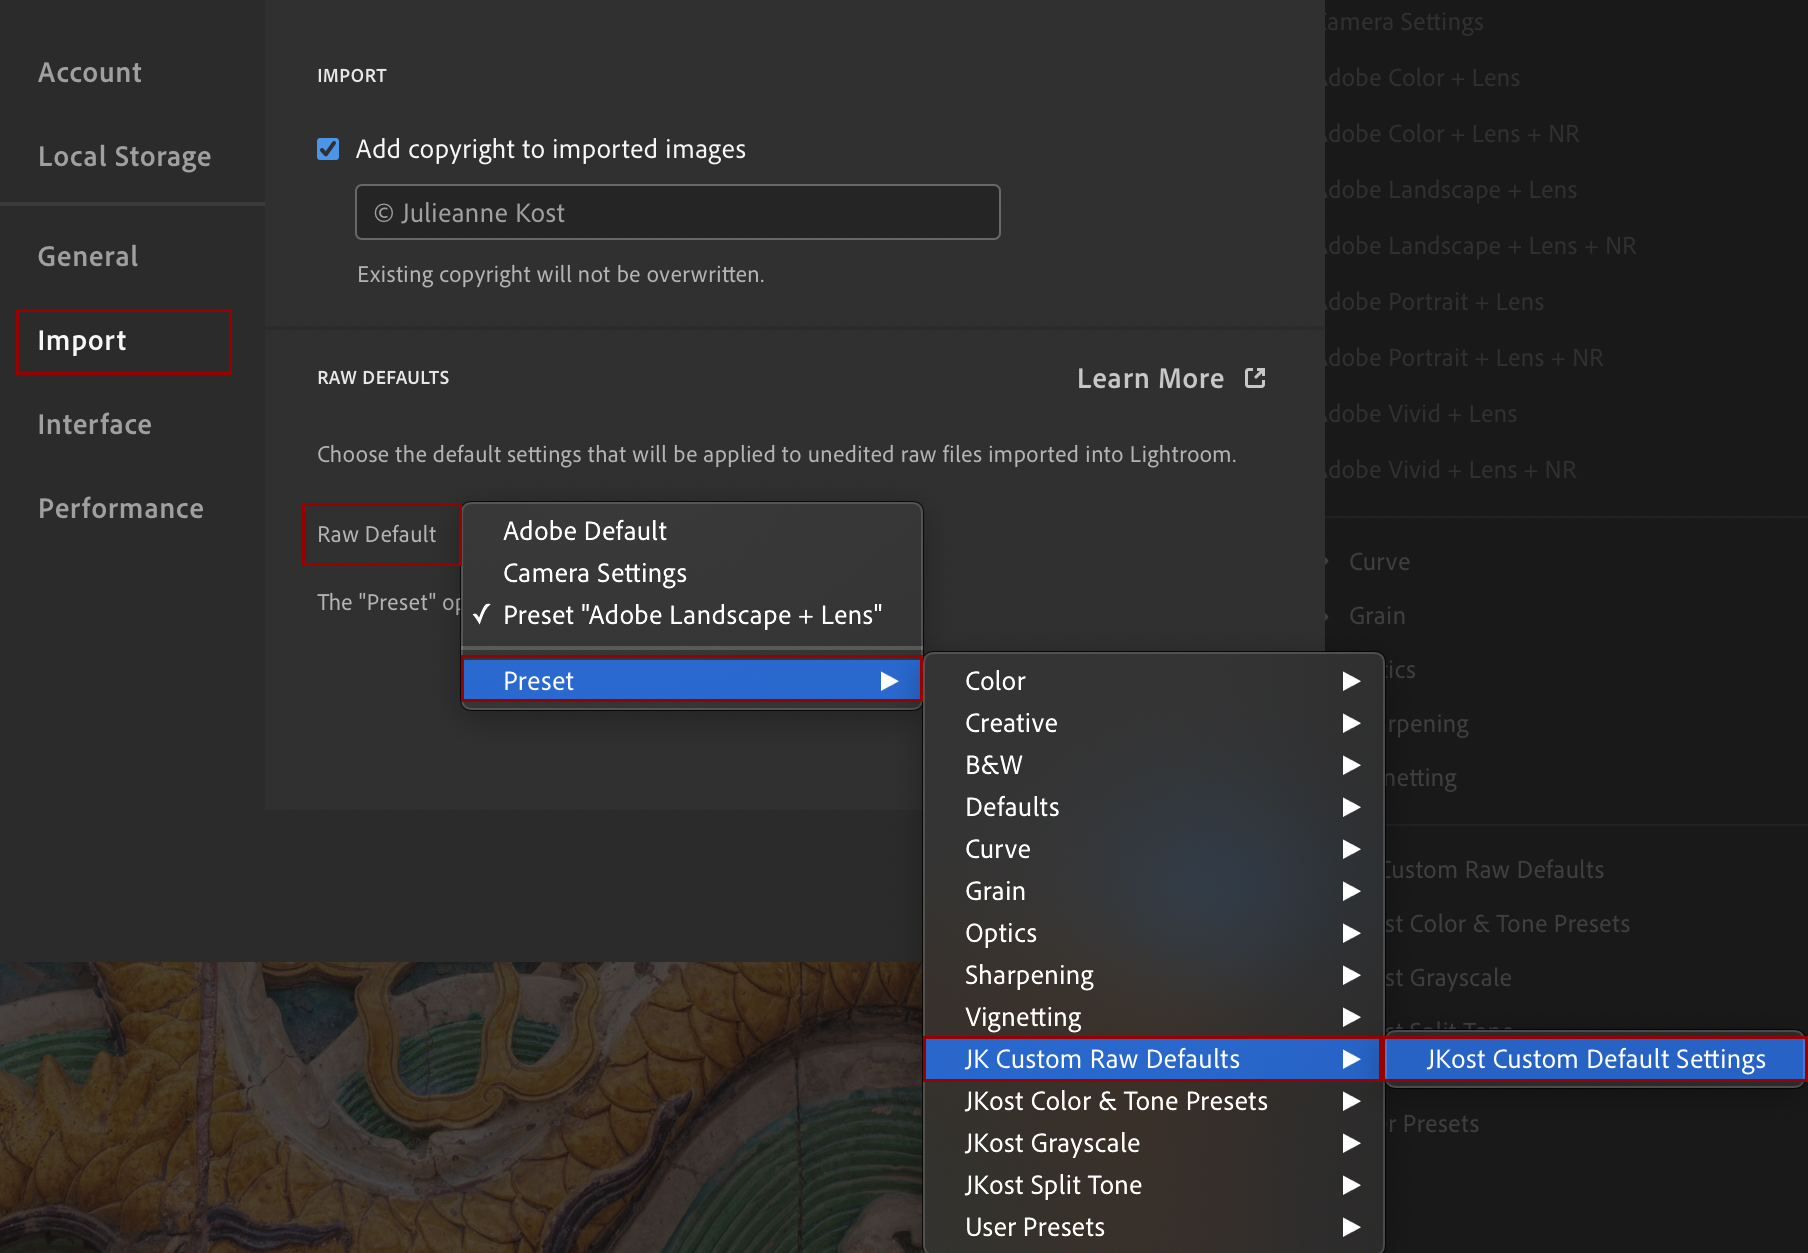
With the new Raw Default preferences, you now have more control than ever before over the default rendering of your raw files. Instead of importing raw files and then having to change the settings, you can specify your preferred look and feel of your images as they are imported. Because Raw Defaults are applied to all of your images, you will want to choose your settings with care.
There are two primary options for customizing Raw Default settings. The first is to use Camera Settings – this will honor picture styles or profiles settings that you’ve set in-camera and preserve the “as shot” look whenever possible (Creative Styles for Sony, Picture Styles for Canon, Film Simulations for Fuji, or Picture Controls for Nikon). The second is to apply a preset that you’ve created in Lightroom with the edits that you want to apply.
• To apply Camera Settings as your Raw Defaults, choose Preferences > Import and, under Raw Default, select Camera settings from the list.
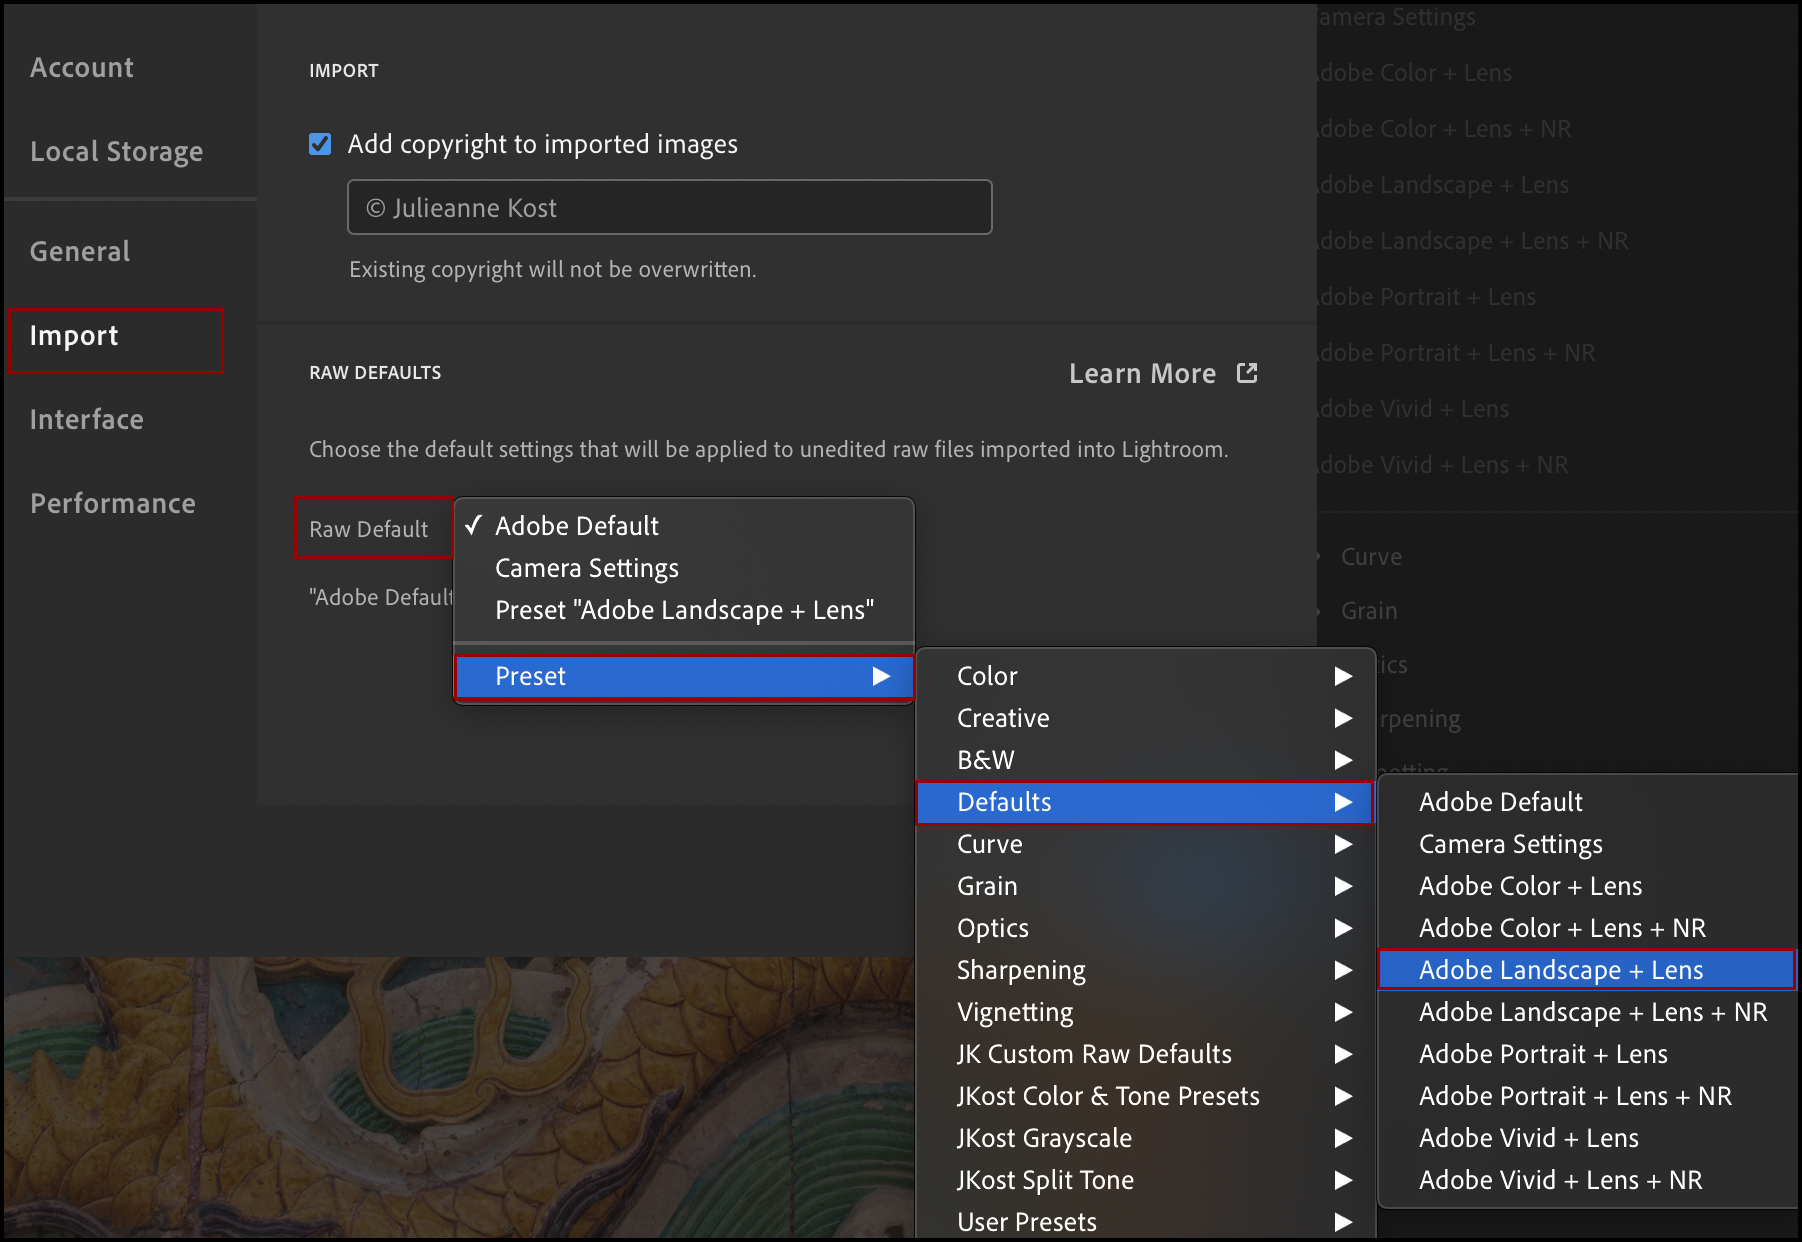
• To use a preset as your Raw Defaults settings, choose from any available preset or, create your own. Note: Lightroom installs several presets in the Default folder in the Presets panel specifically designed to be used as Raw Defaults. As their names imply, they apply different profiles (Adobe Color/Landscape/Portrait/Vivid), enable Lens Corrections/Chromatic Aberration, and include custom Noise Reduction settings.
• To create and apply your own preset as Raw Defaults, follow the steps below:
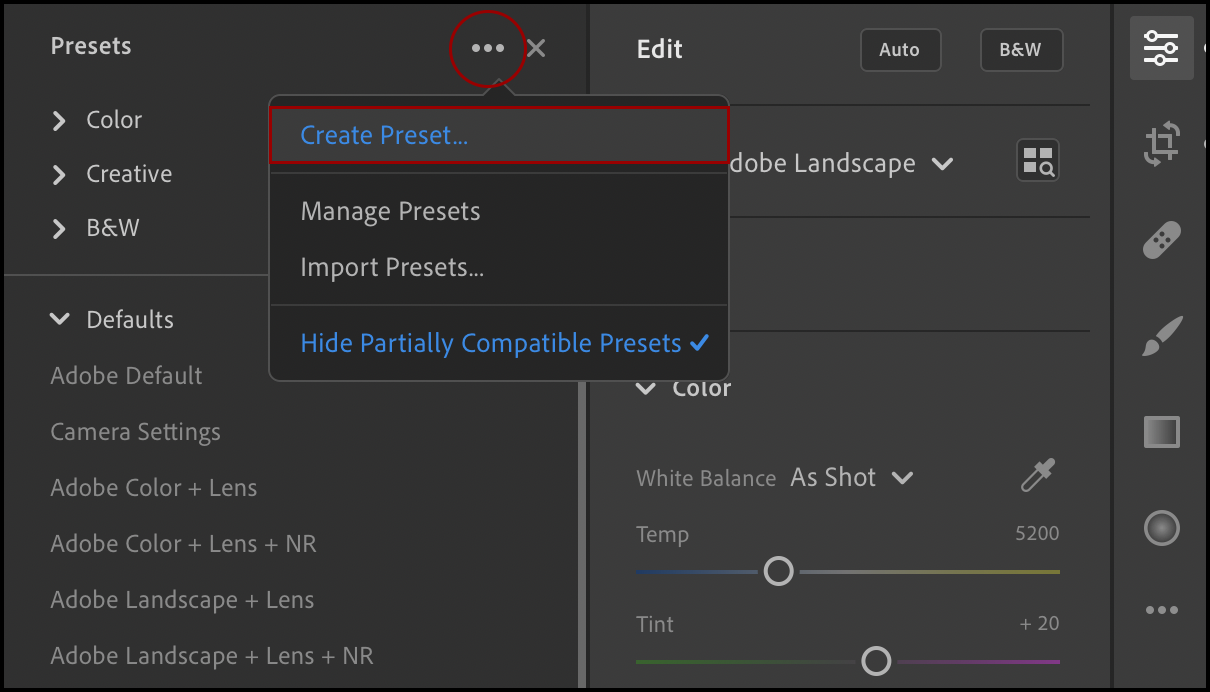
1) Apply the desired settings to the raw image.
2) In the Edit panel, click Presets to display the Presets panel. Click the more icon (the three dots), and choose Create Preset.
3) Name the preset, check the settings that you want to be included, and click Save.
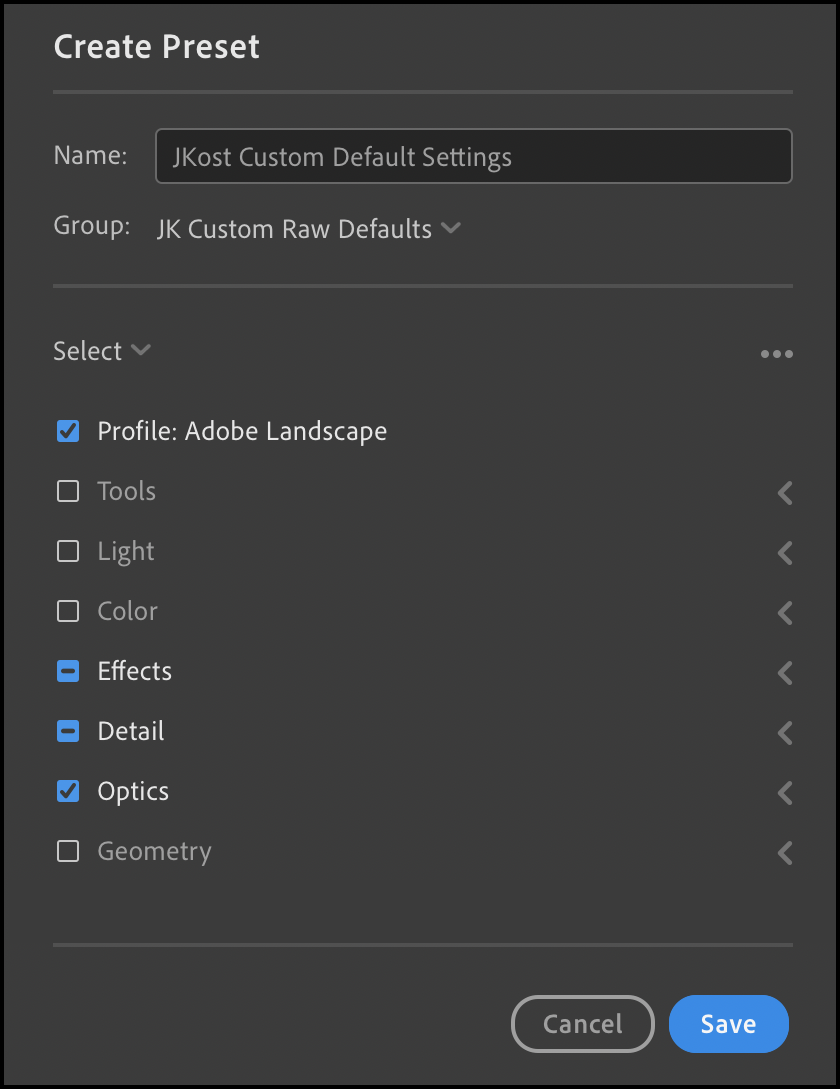
4) Select Preferences > Import and select your custom preset from the dropdown menu.
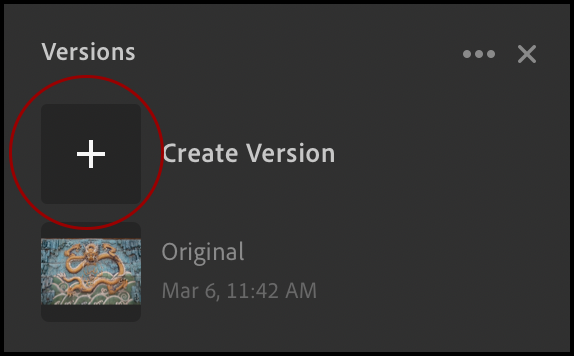
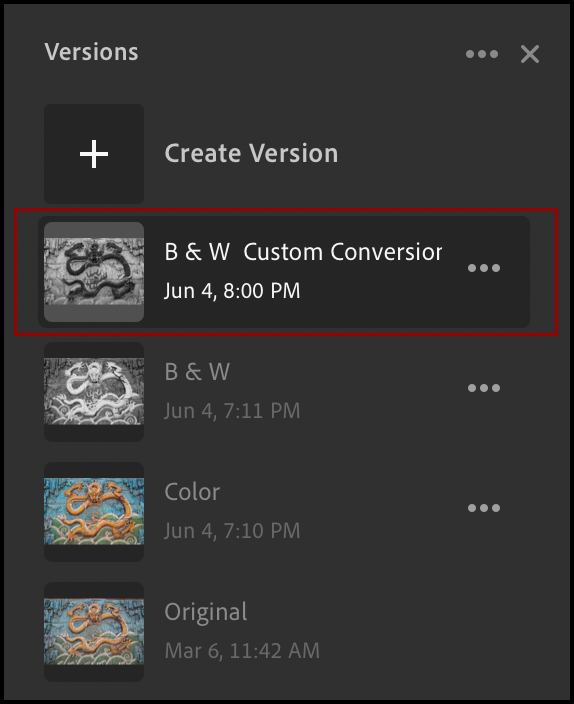
Versions
Versions enable you to “capture” all of the settings applied to an image and save them as a single “state” in the Version panel. You can then experiment with different settings with the security of knowing that you can quickly return to the Version with a single click. Versions can also help when different settings (such as black and white and color or a variety of different crops) need to be applied to the same image.
• To create a Version in Lightroom, make the desired edits and click Versions in the lower right of the Edit stack.
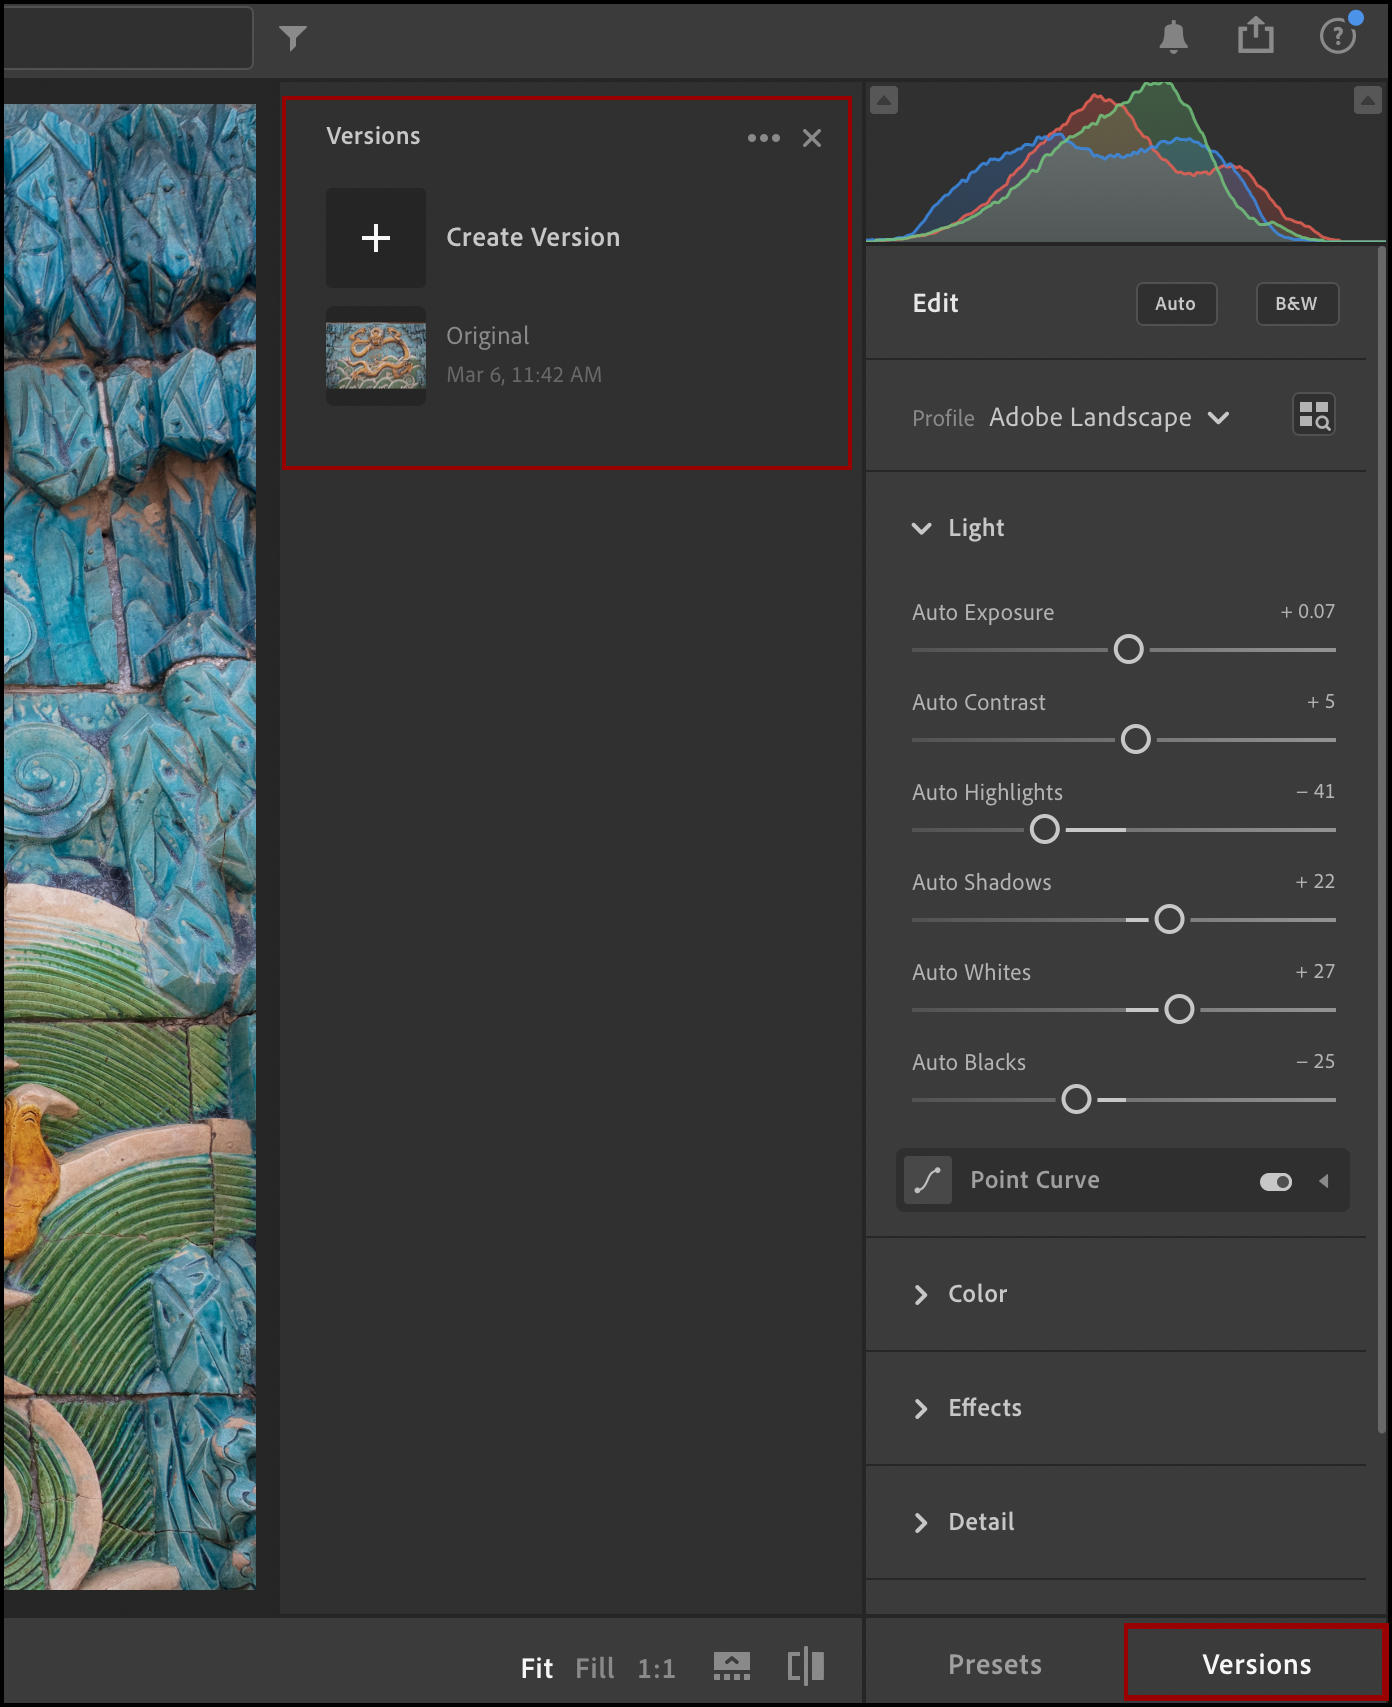
• Click the Plus (+) icon, name the Version, and click Create.
• Then, make any additional edits to the image (such as converting the image to Black and White), and repeat the process to create additional Versions as needed.
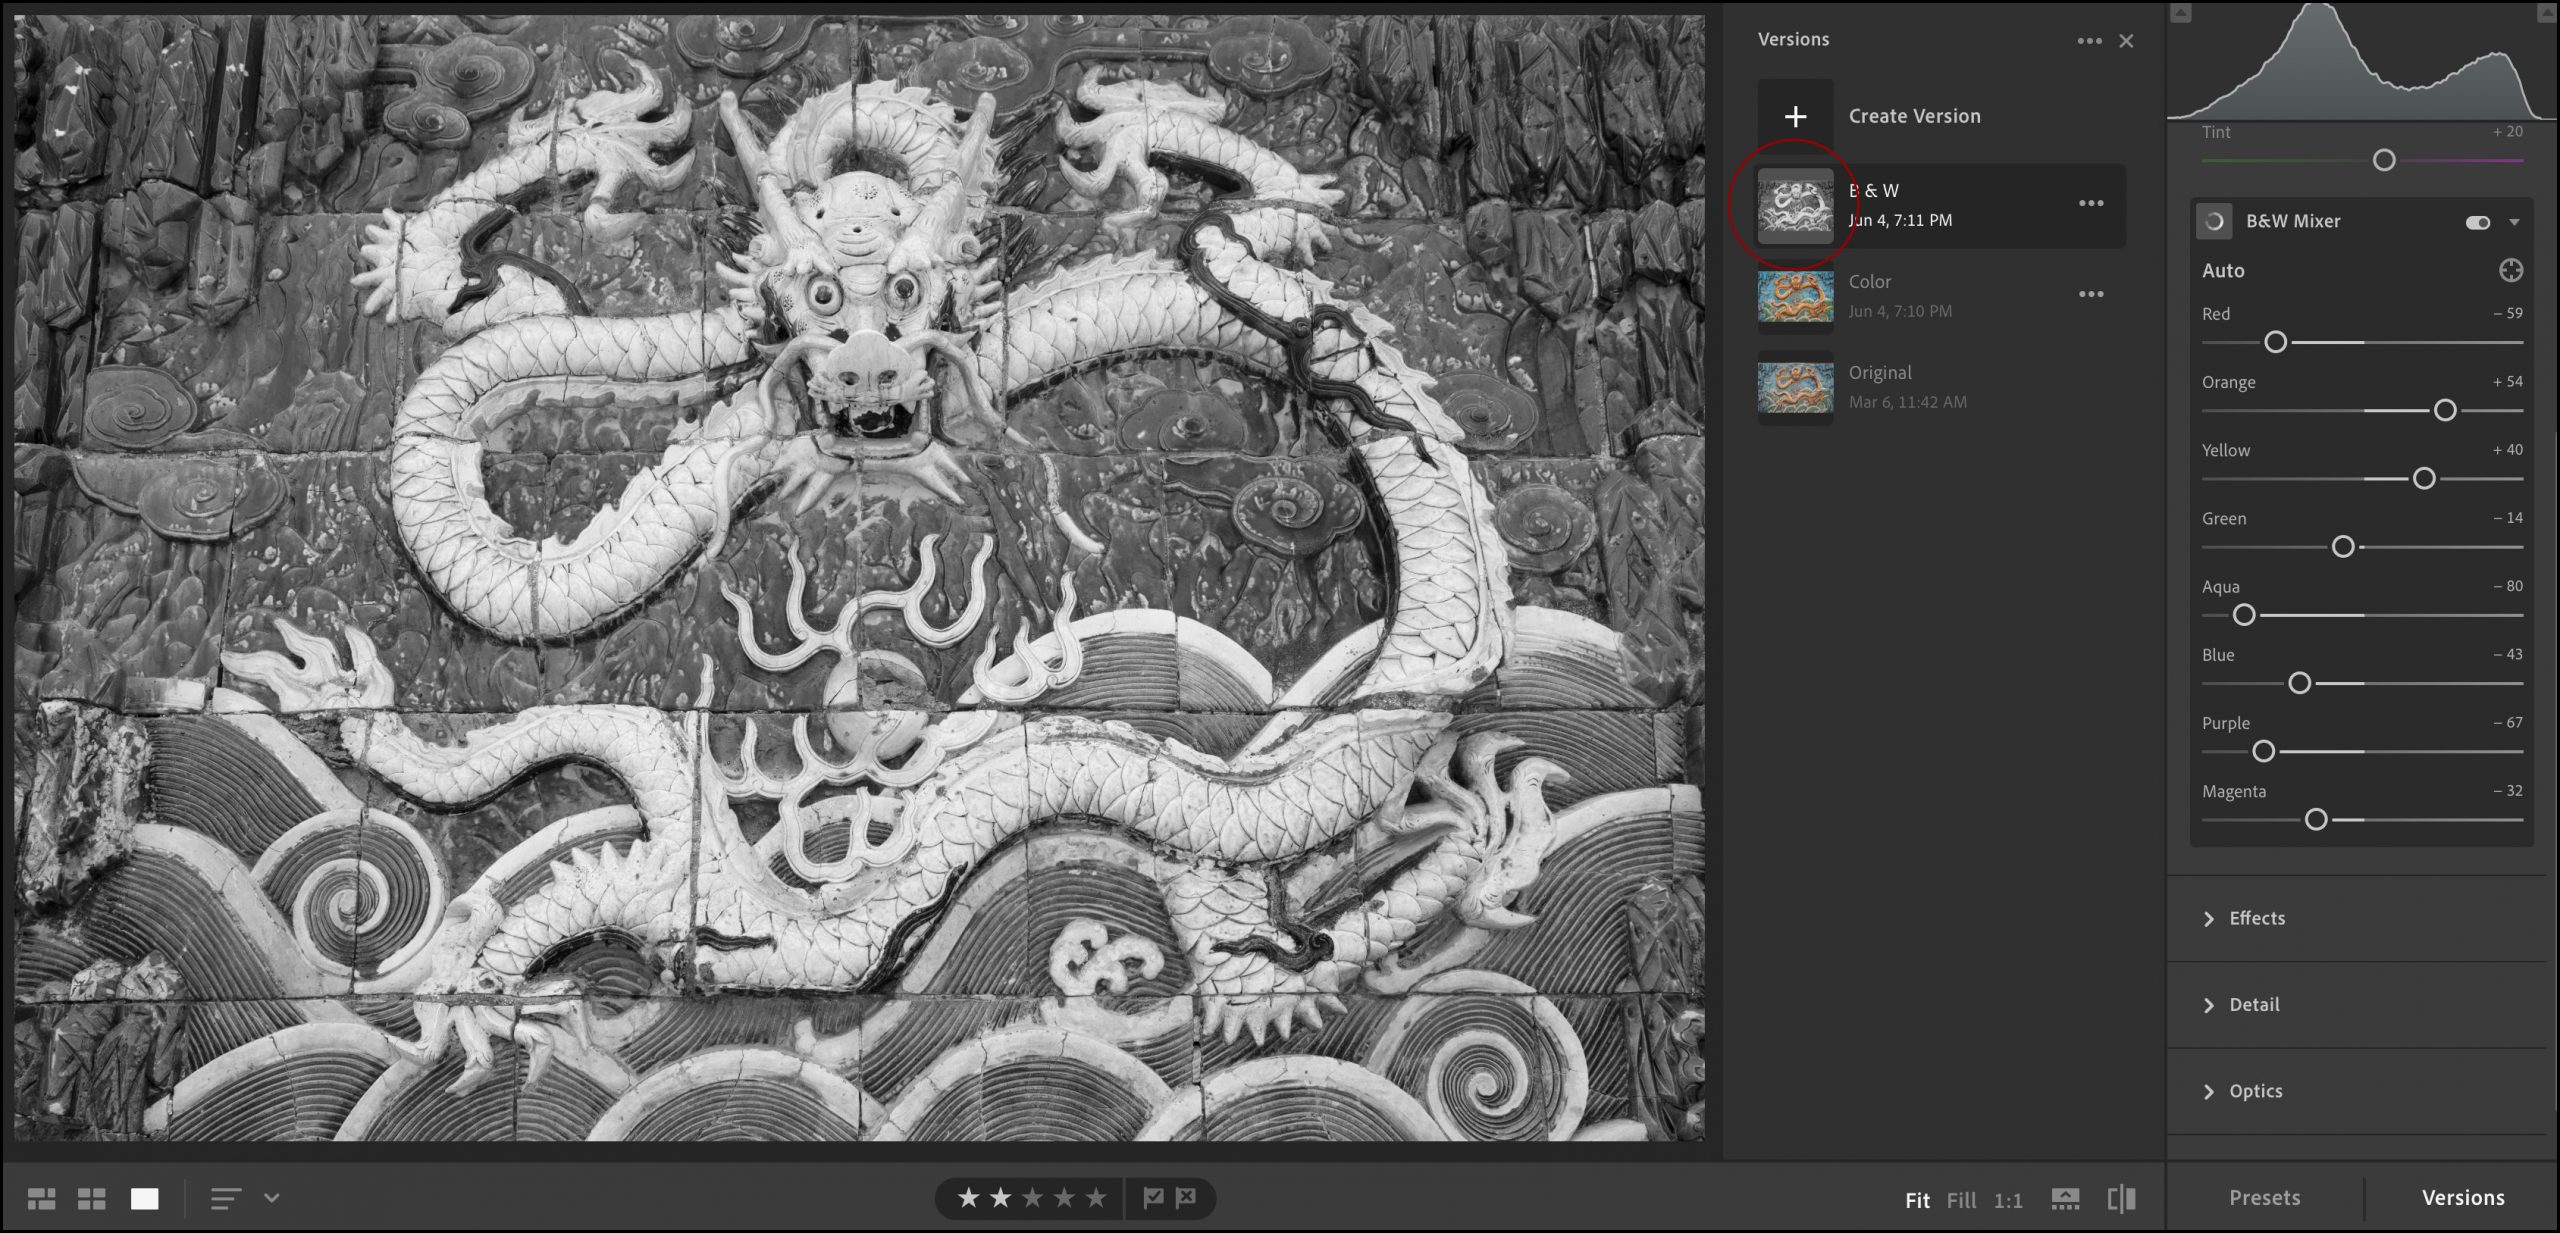
• Click on a Version to return to that edit state.
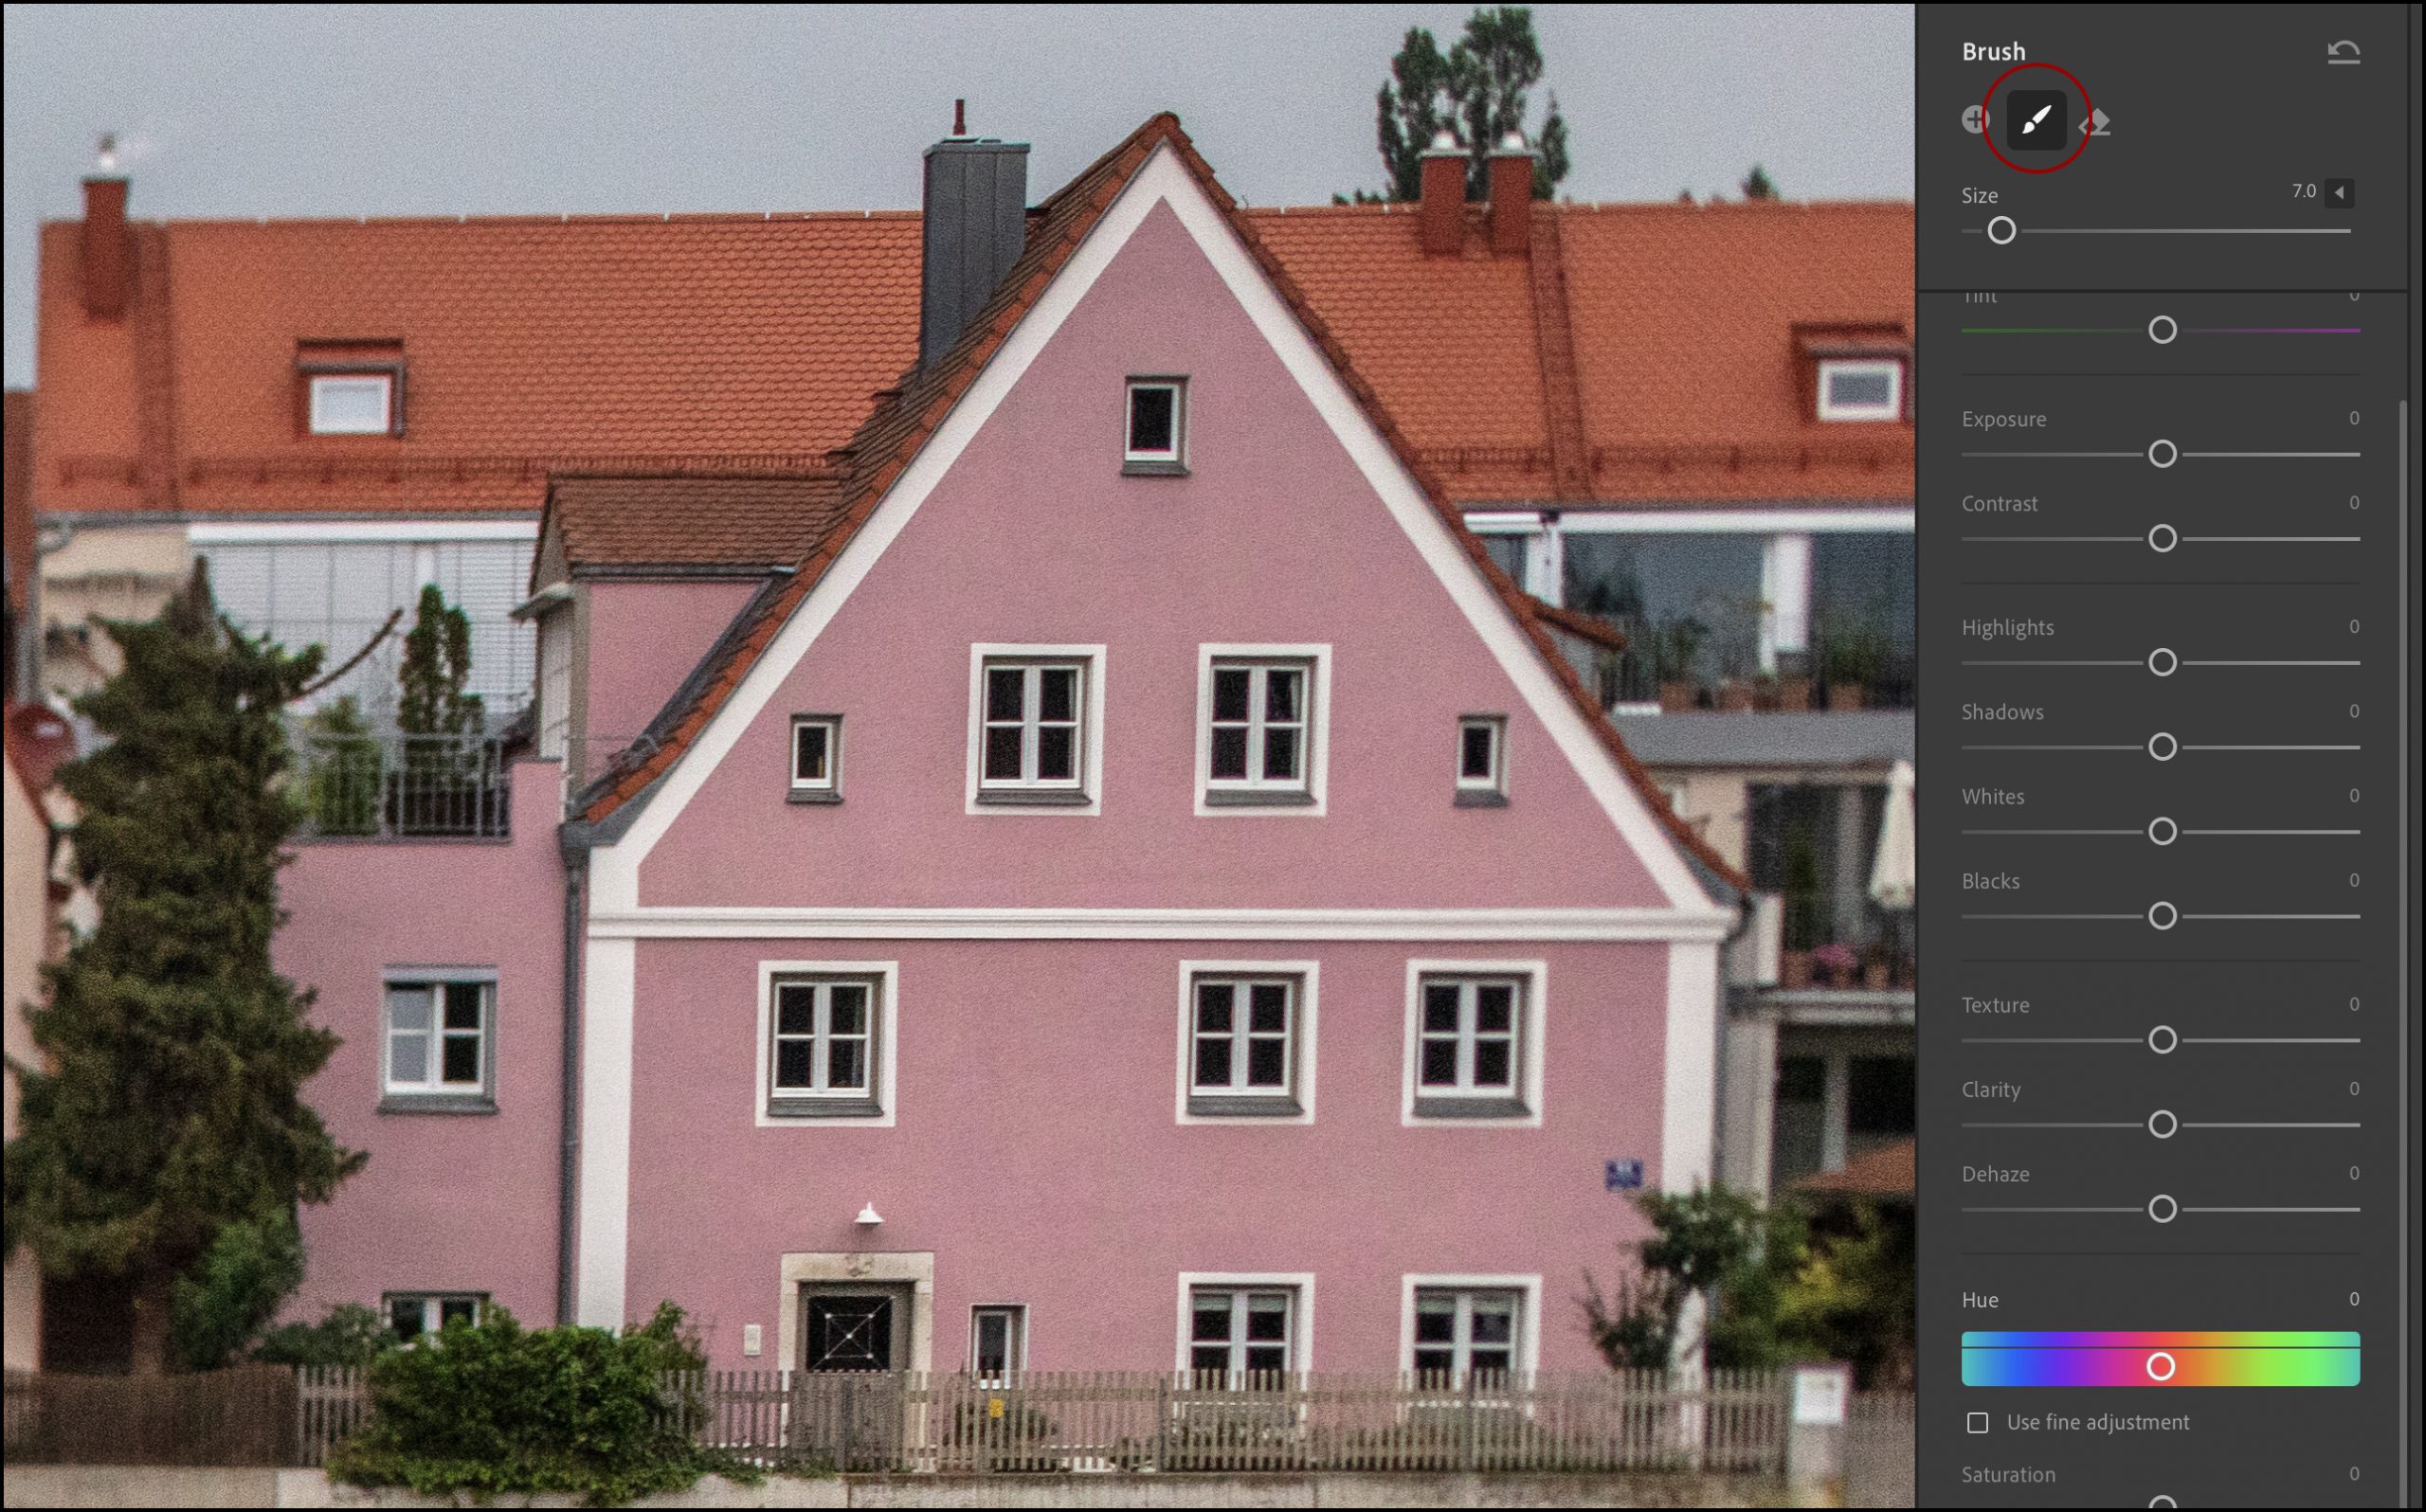
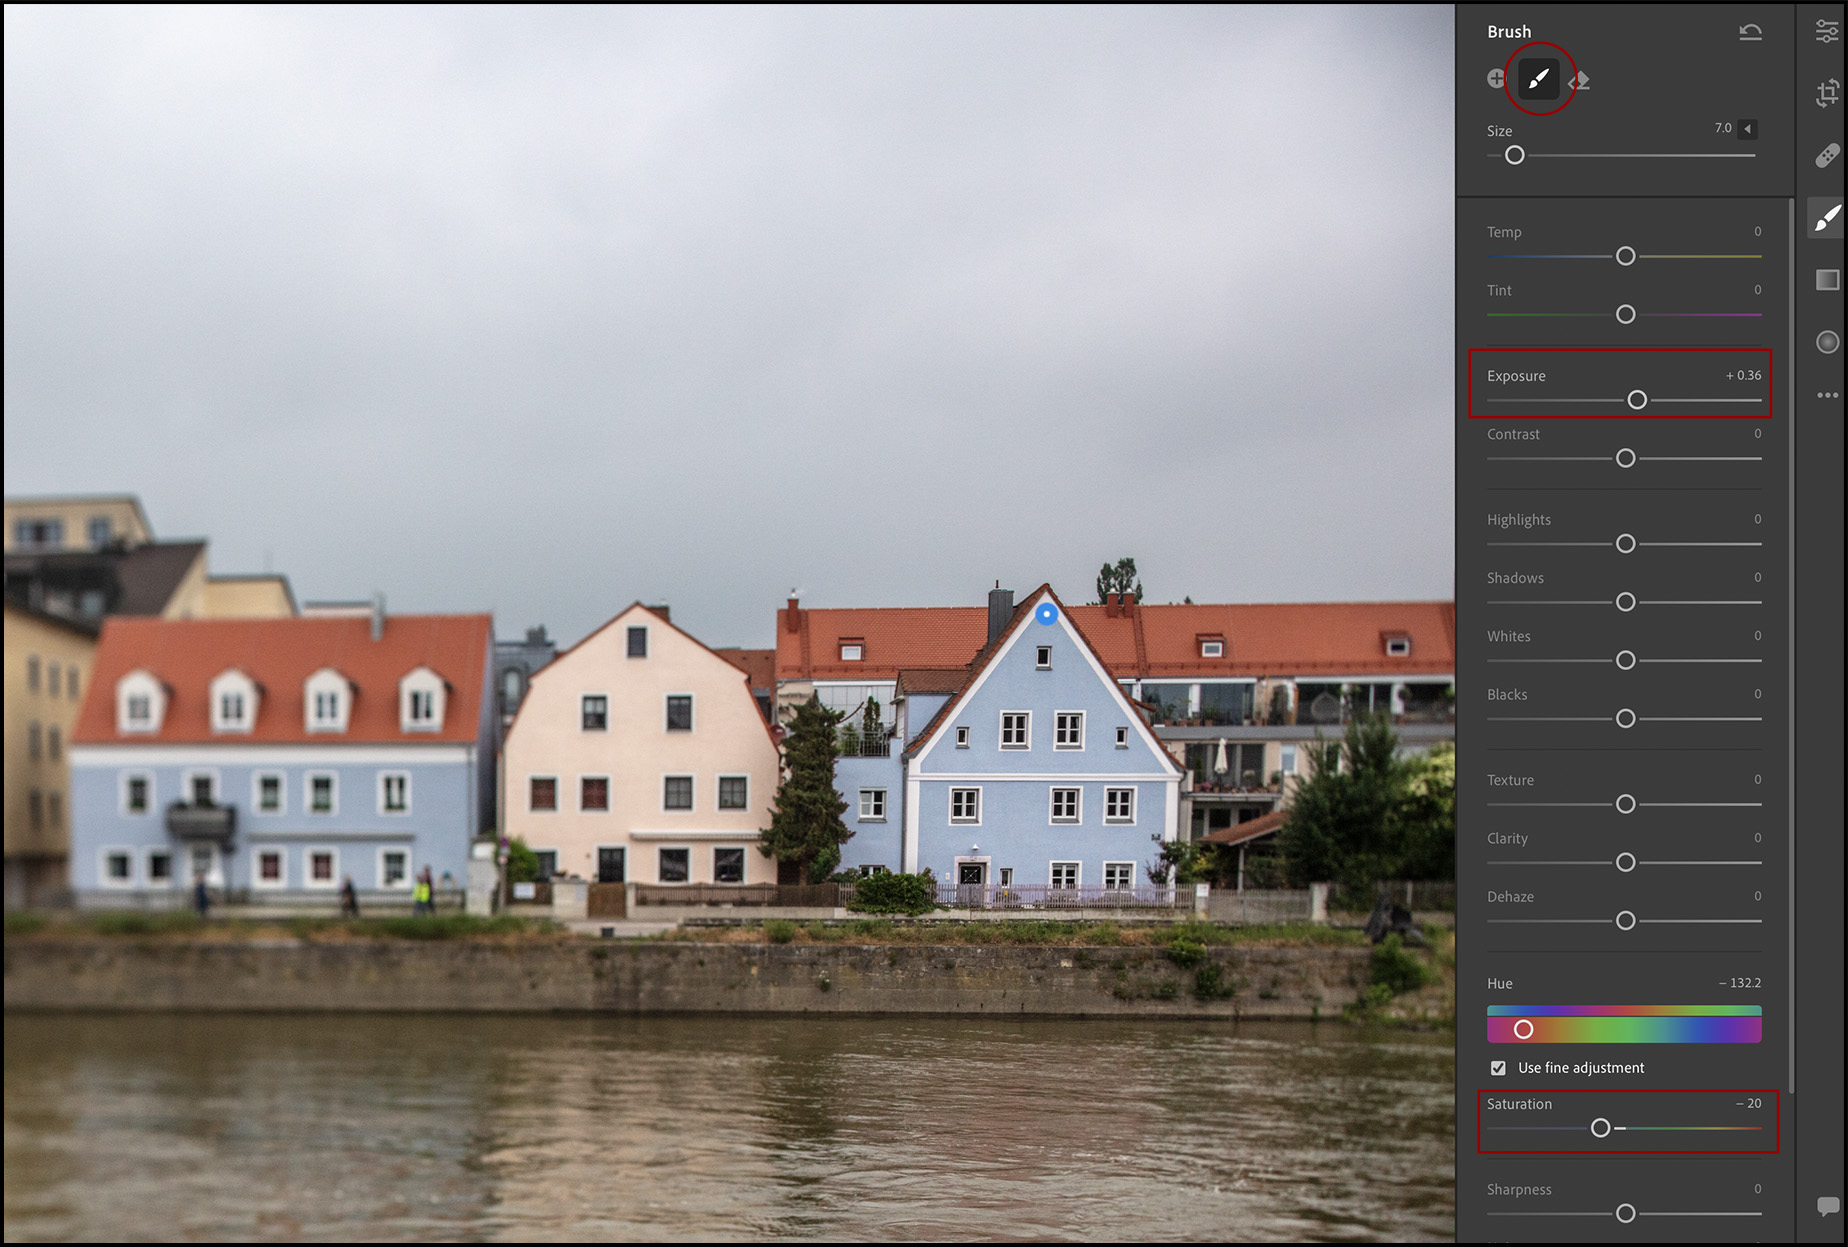
Local Hue Editing
The new Local Hue slider provides the ability to shift the color in a masked (selected) area of a photo while keeping the saturation and luminosity values unchanged. After masking (selecting) the desired area using any of the local adjustment tools (Adjustment Brush, Radial and Linear Gradients), dragging the Hue slider enables a full, 360-degree hue shift that is perfect for both corrective and creative adjustments.
• The two gradient bars can be used to help visualize the color shift in either direction. The top bar will shift to display the primary color from the masked (selected) area. As the Hue slider is repositioned, the hues in the image (as well as the bottom gradient bar) shifts to reflect the change. In the illustration below, I masked the pink house using the Adjustment Brush so the gradient displays red/pink in the center.
• As the Hue slider is moved to the left, the image is updated and the top bar displays the newly appointed hue (cyan/blue).
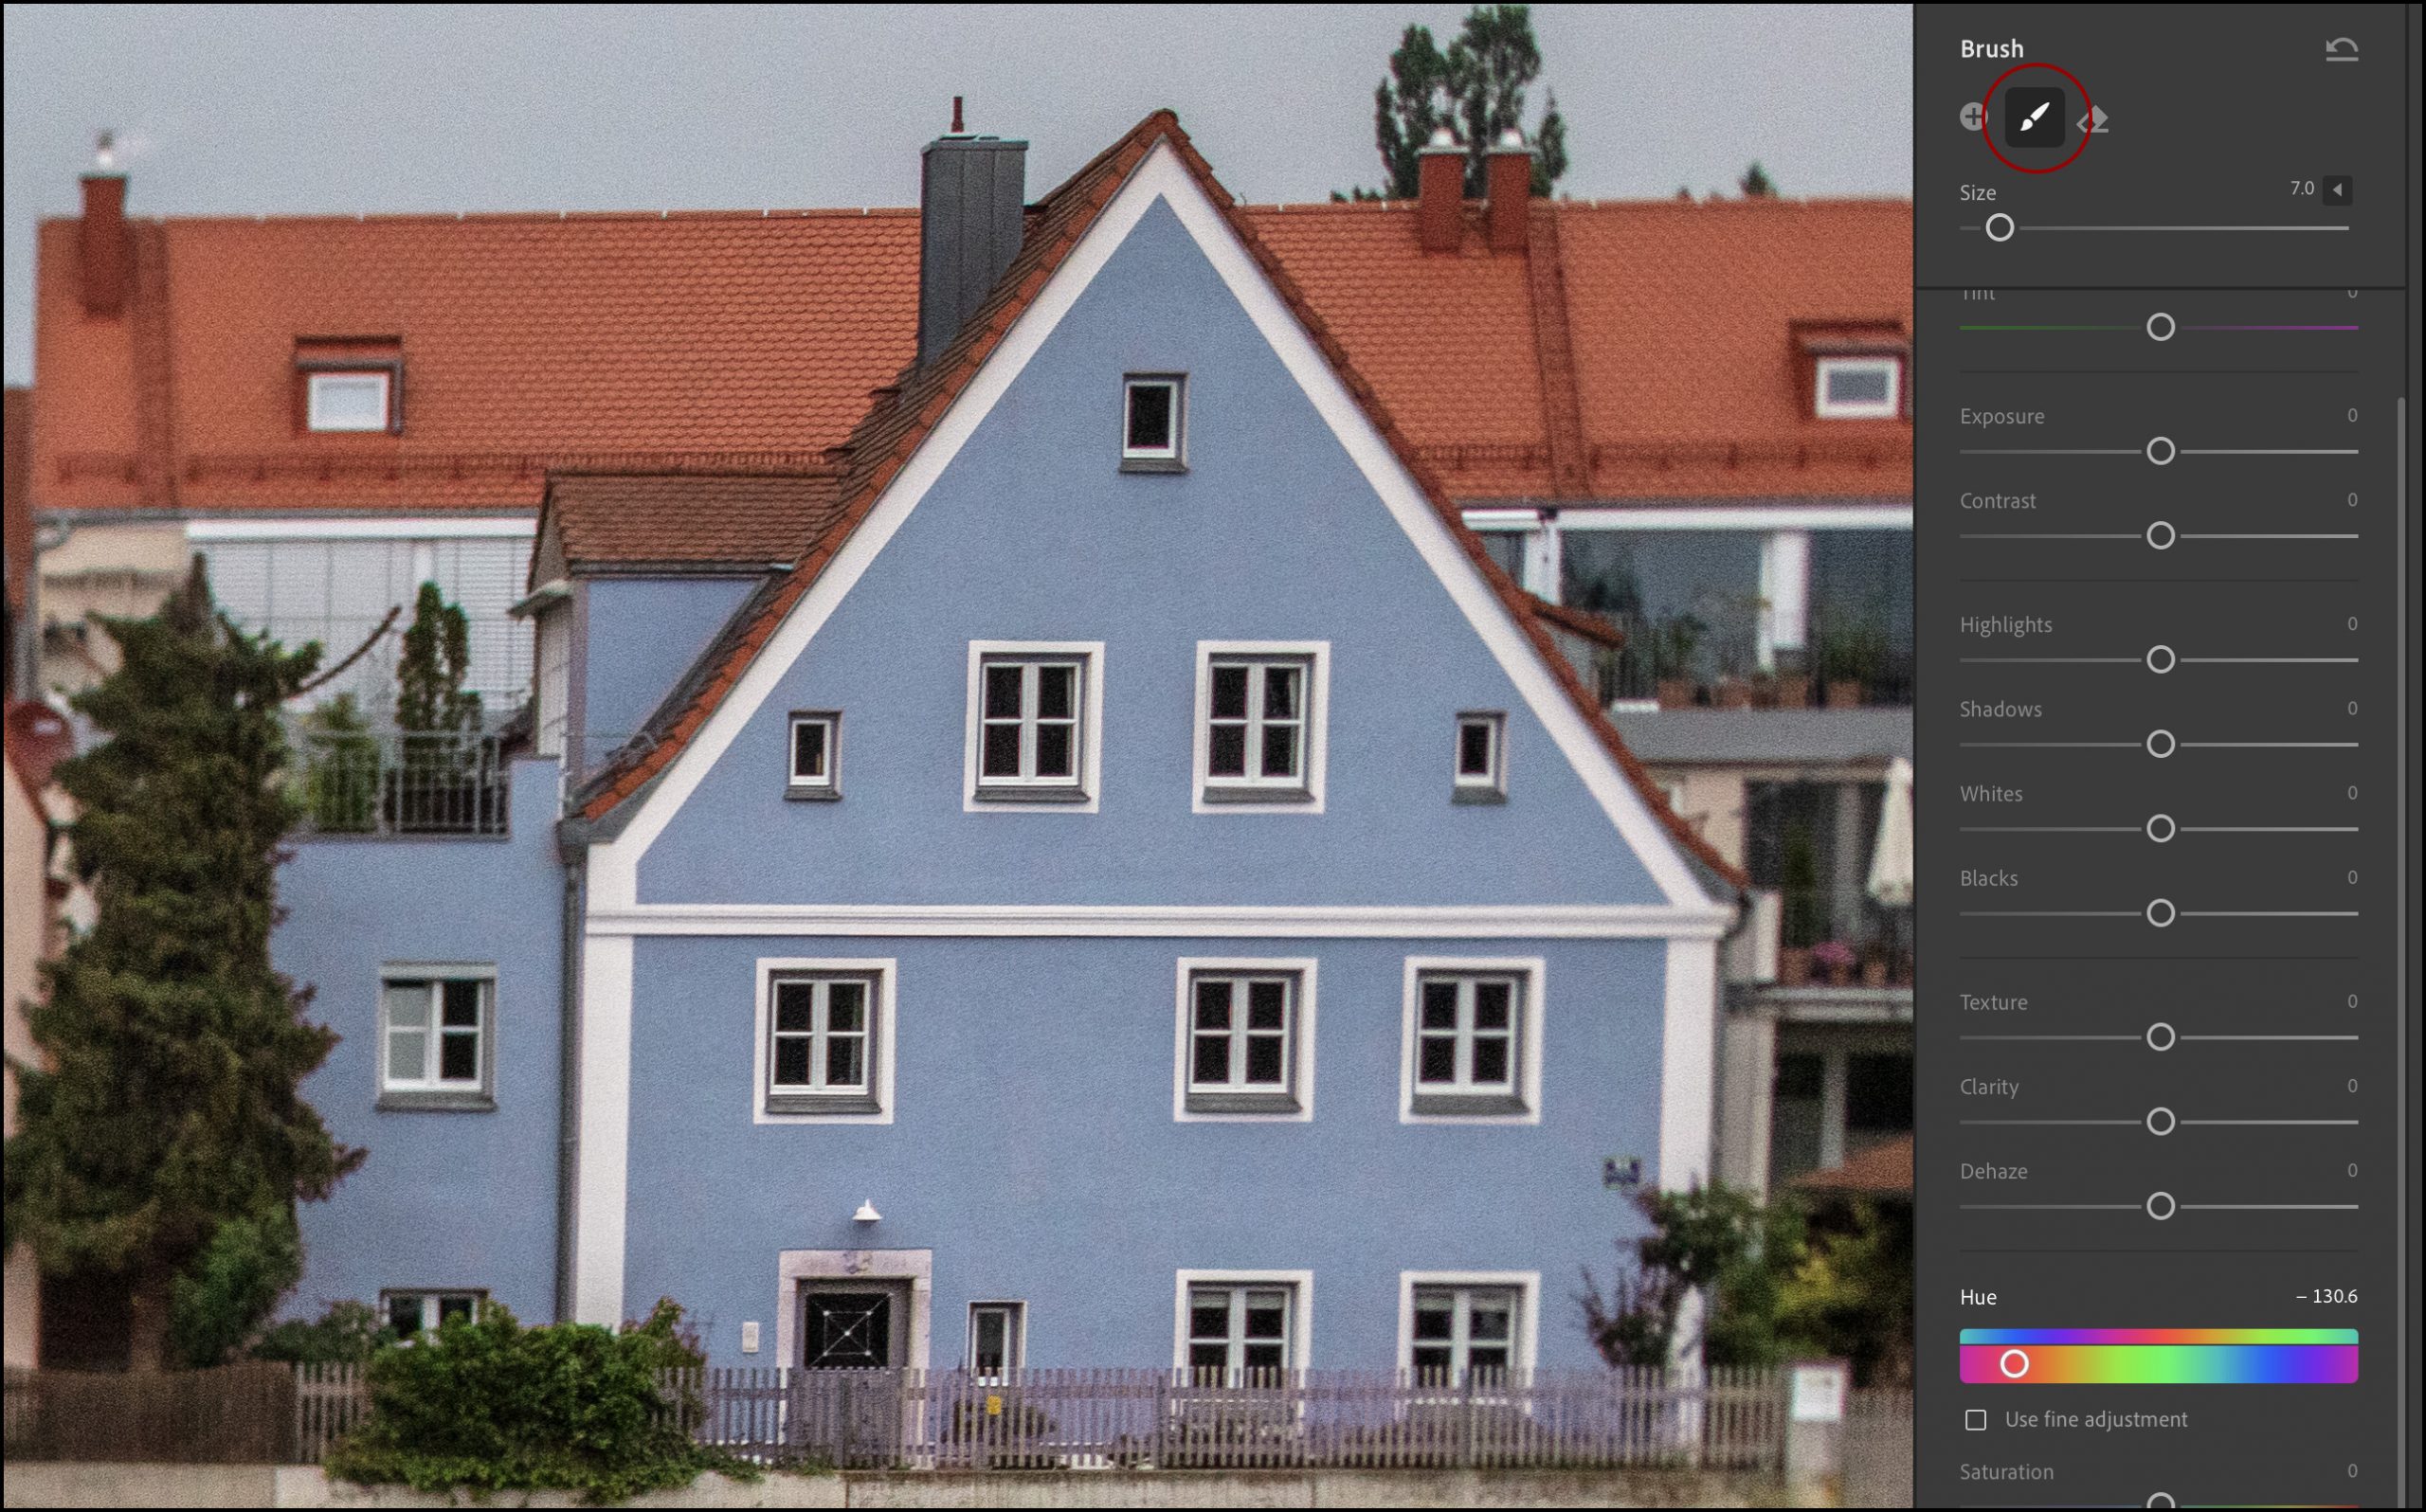
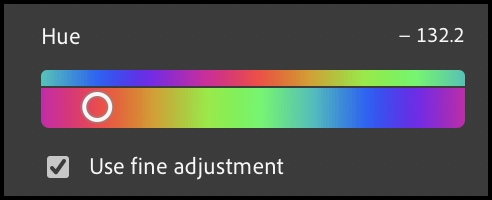
• For more control, enable “Use Fine Adjustments” to slow the rate of change as the slider is scrubbed left/right.
• In this example, because our eyes can perceive colors brighter or more saturated relative to others (and because I wanted to more closely match the blue of the two houses), I chose to also adjust the exposure and saturation.
Click here for more information about Local Hue Correction direct form the Camera Raw team.
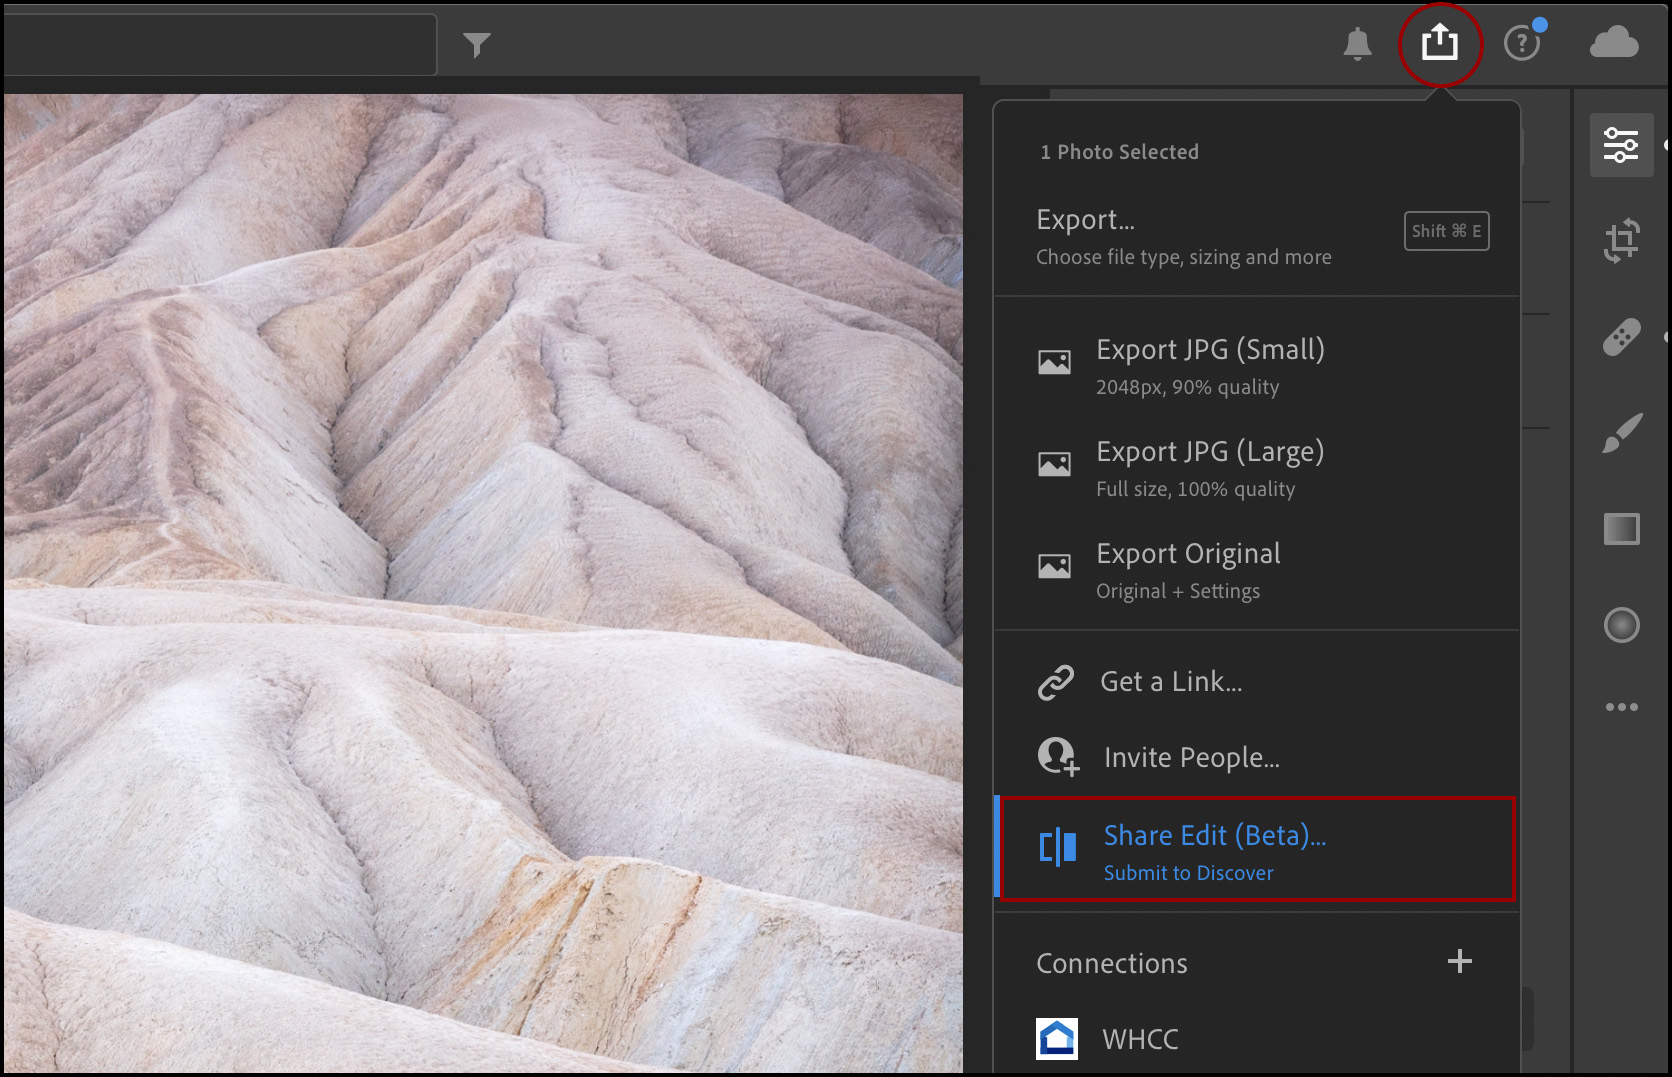
Interactive Tutorials and Inspirational Edits
Over the past year, Adobe has continuously expanded it’s library of Interactive Tutorials (available in the Lightroom Learn section) and Inspirational Edits (available in the Lightroom Discover section) to cover a wider set of topics to help photographers learn how to better edit their photographs. With this release, you can contribute your own photographs to share as an Inspirational Edit and choose to follow others photographers who’s work you admire using Lightroom on either Mac or Windows.
• To contribute your Inspirational Edit, apply the desired edits, click the Share icon, and choose “Share Edit (Beta)…” from the list.
• Before sharing, you can choose do the following:
— Enter a Title and Description for the photograph.
— Choose to enable/disable the ability for others to download and save your edits as a preset (so that they can apply the same look and feel to their images).
— Choose whether or not to share the location data from the file.
— Select up to three categories for your photograph to help your Edit get discovered.
— Enter/edit your copyright.
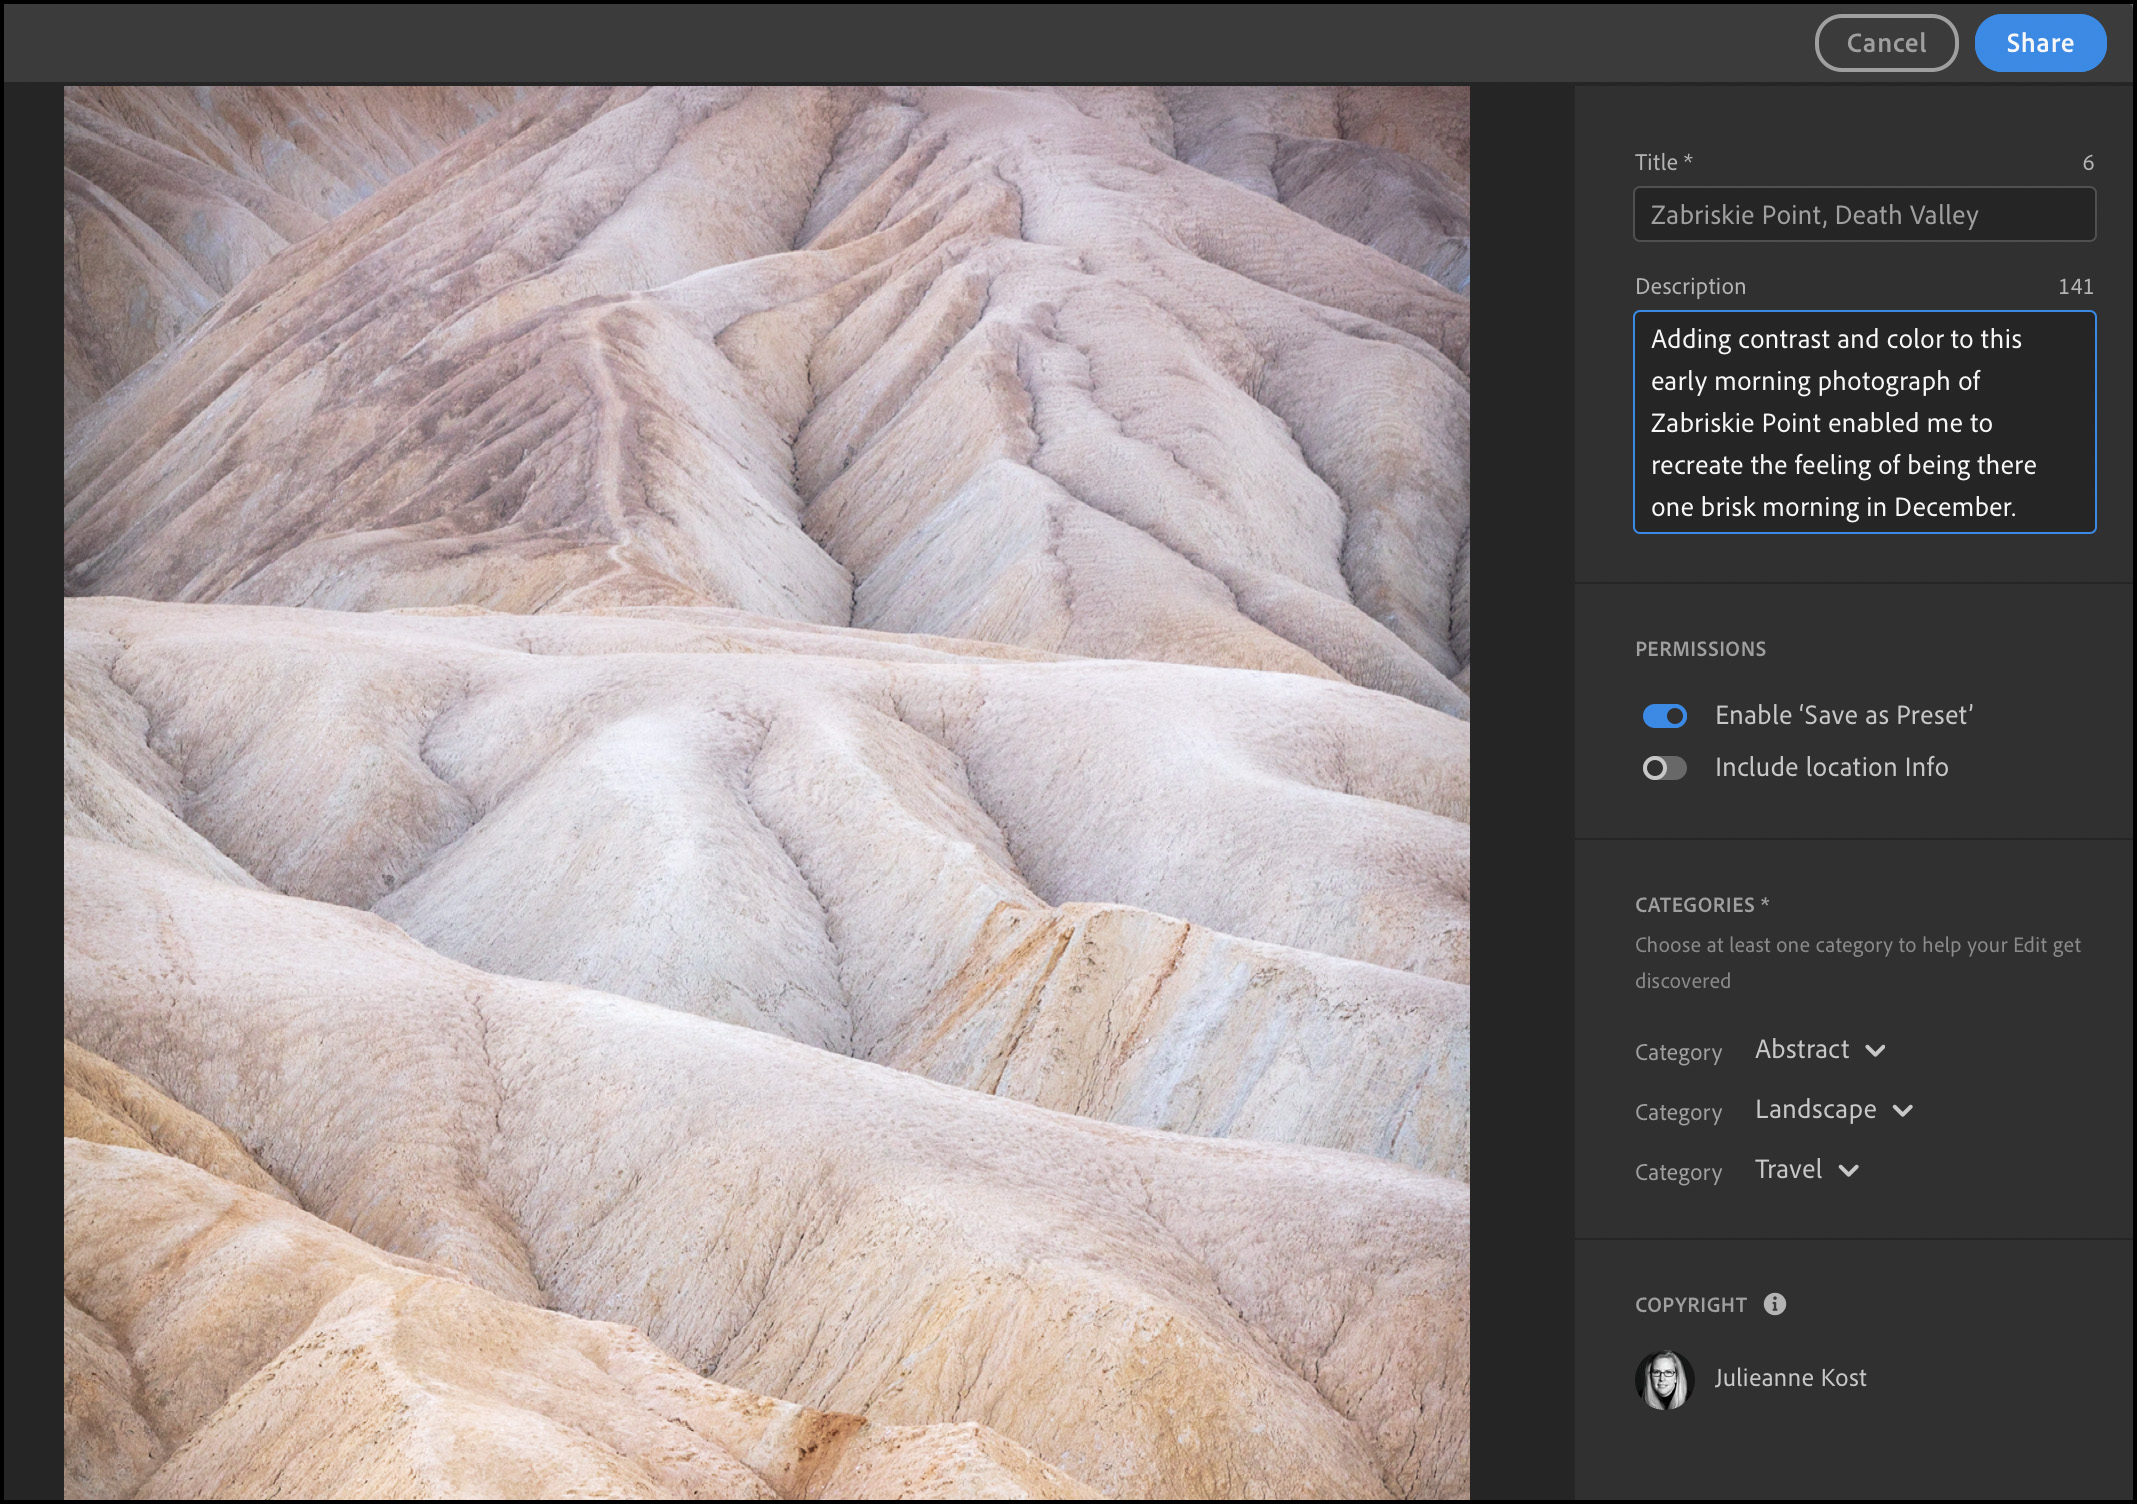
• Click Share to upload your photograph as an Inspirational Edit.
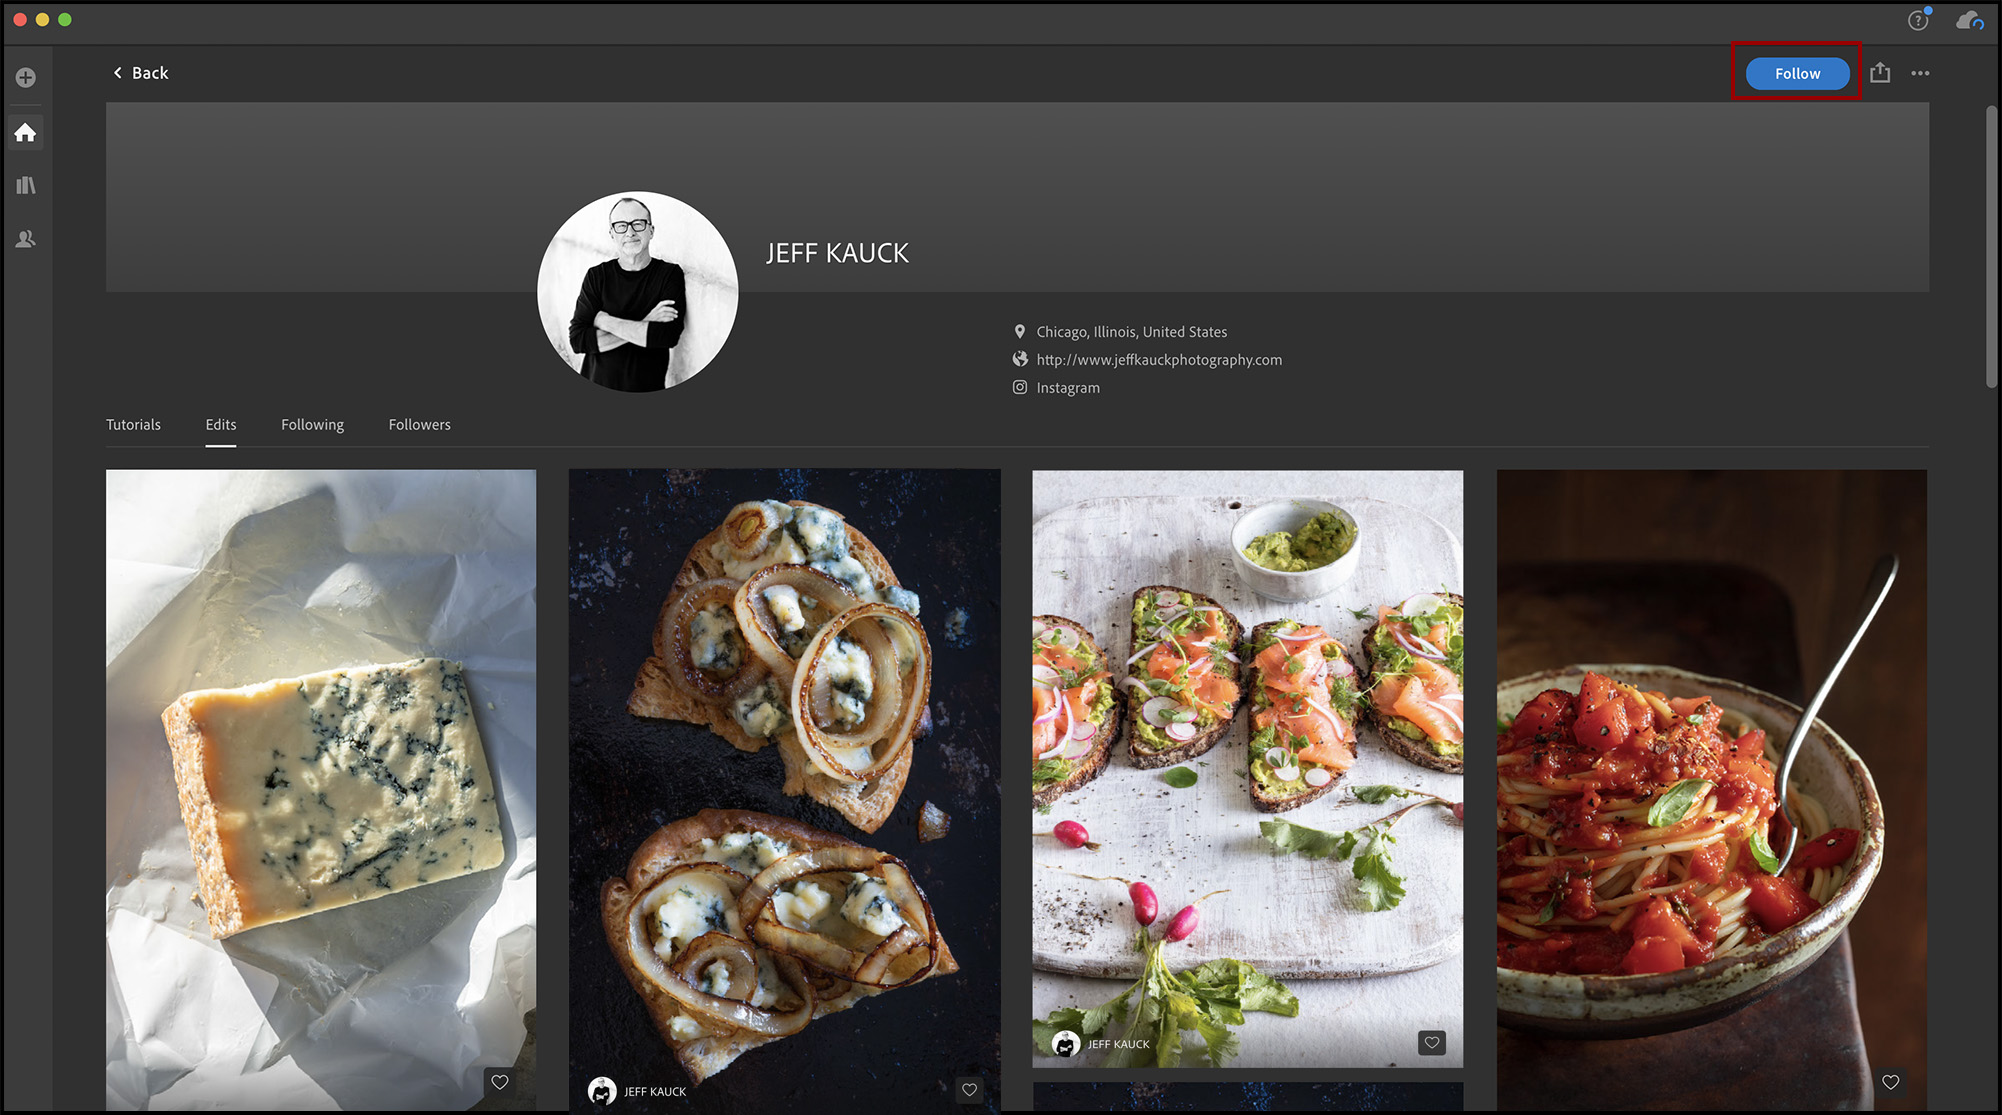
• Once your photograph is shared, Lightroom displays your Author page where you can use the popup in the upper right to copy the link and/or share directly to Facebook and Twitter.
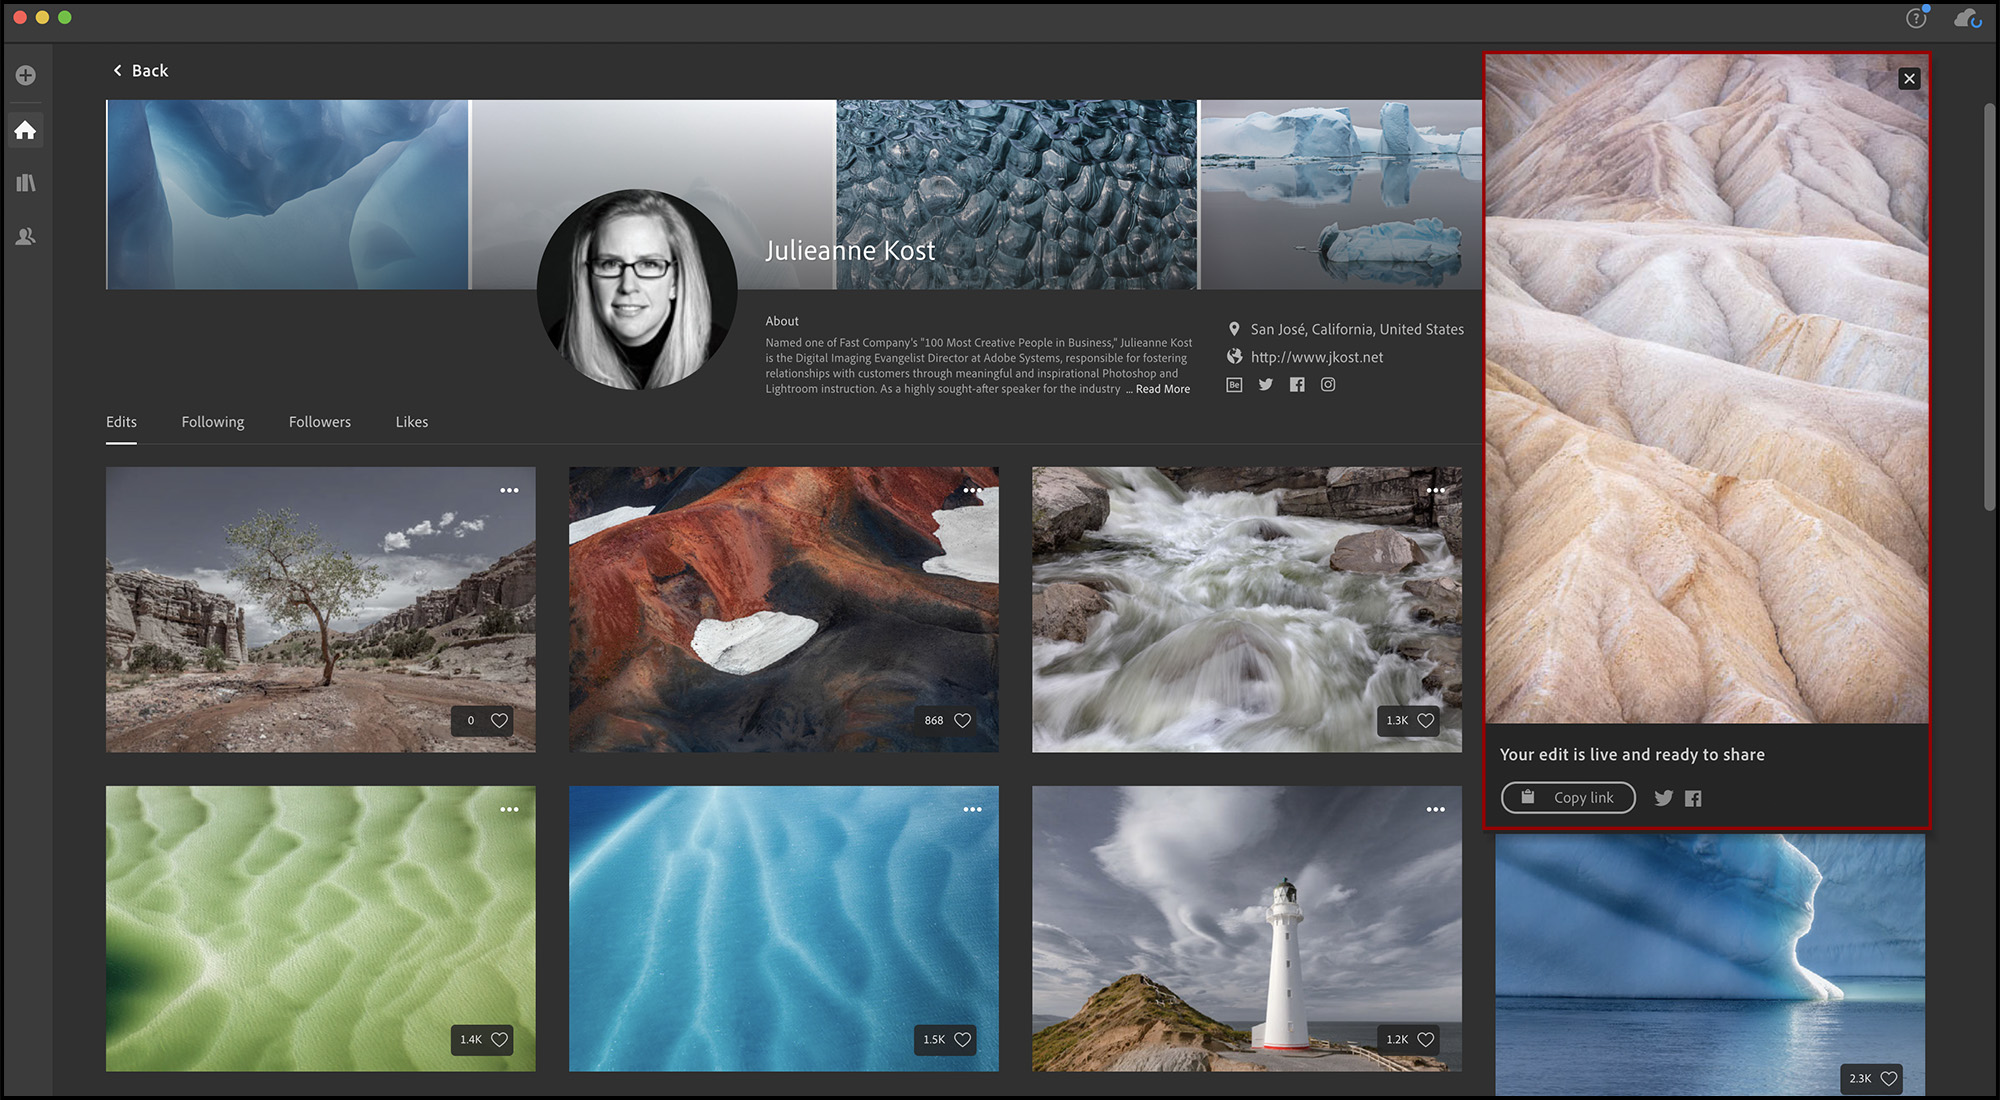
Note: Be sure to take a few moments and customize your Author page to reflect your photography and artistic intent. From your Author page, you can view edits that you’ve contributed, people you follow, people who are following you, and the posts that you’ve liked.
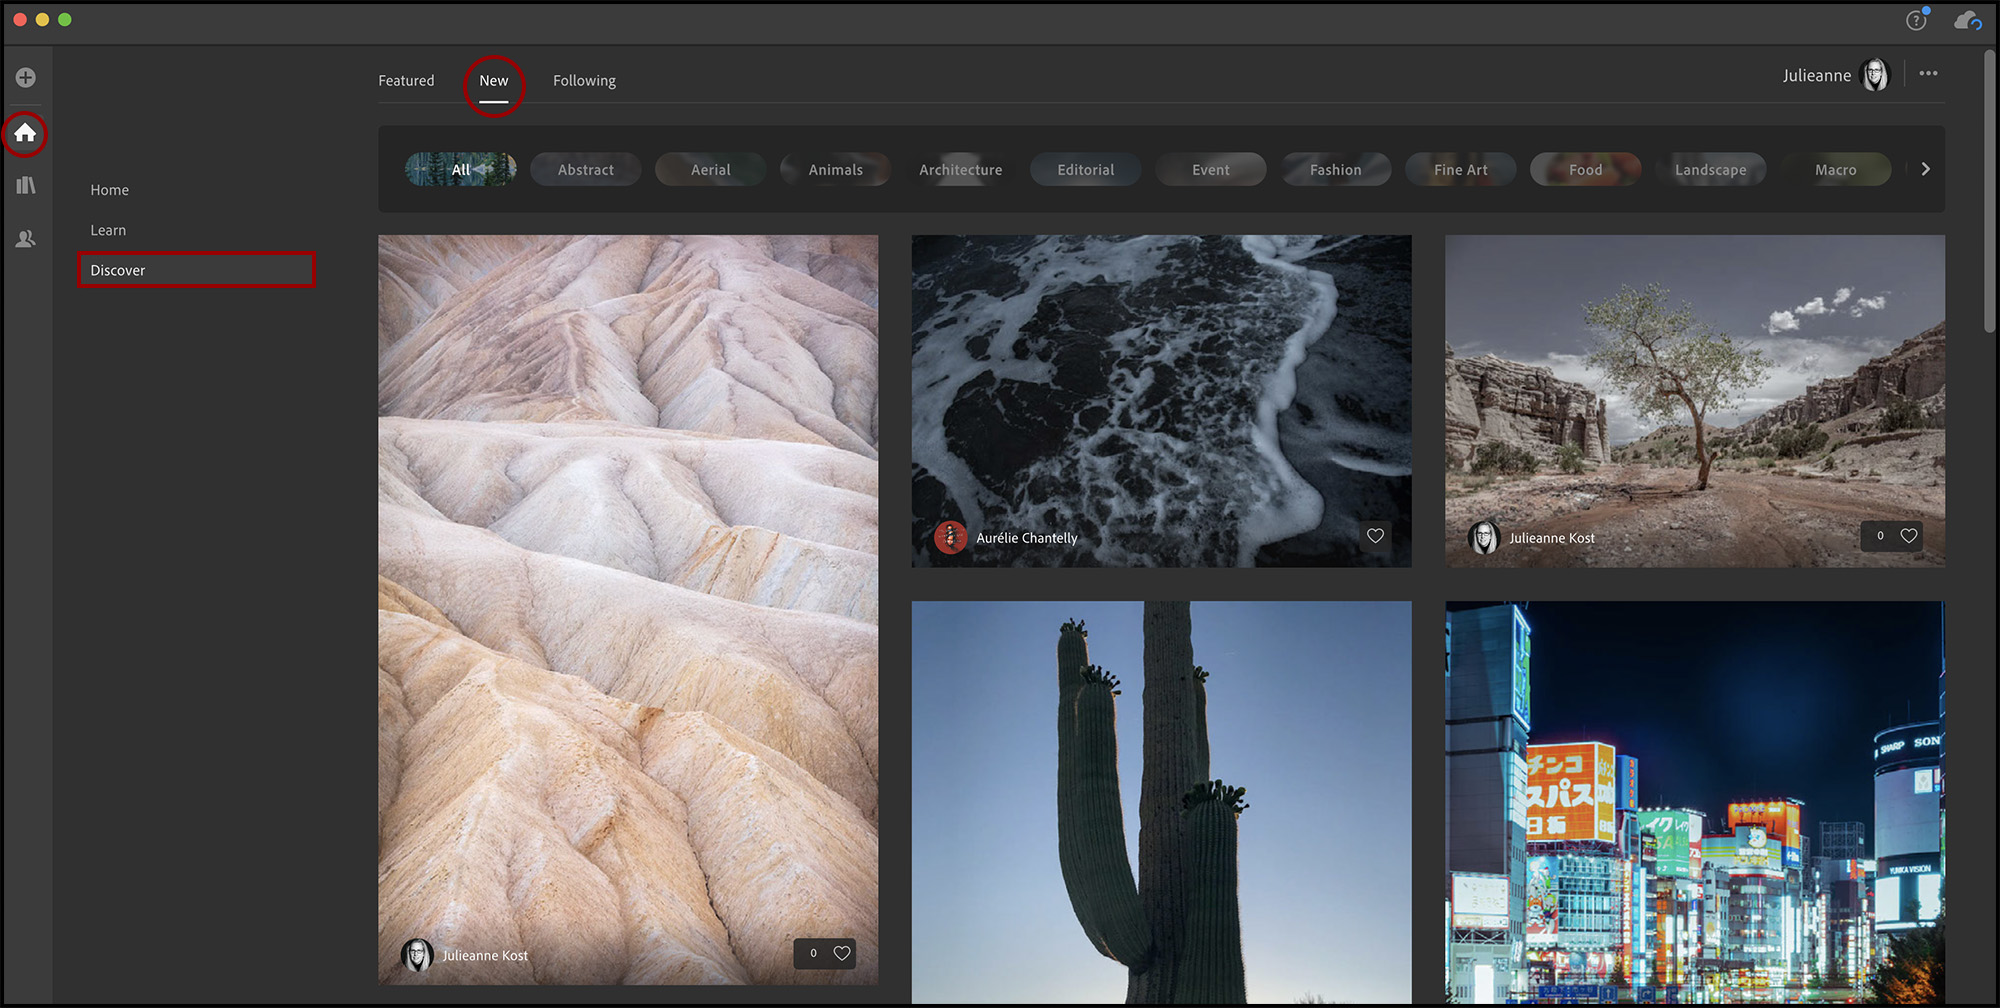
• View your Inspirational Edit by clicking Home, then Discover, then New.
• You can follow another artists work by clicking Follow on their Inspirational Edit or from their Author page.
• To view Inspirational Edits by the photographers that you follow, click Home, then Discover, then Following.

Additional New Features include:
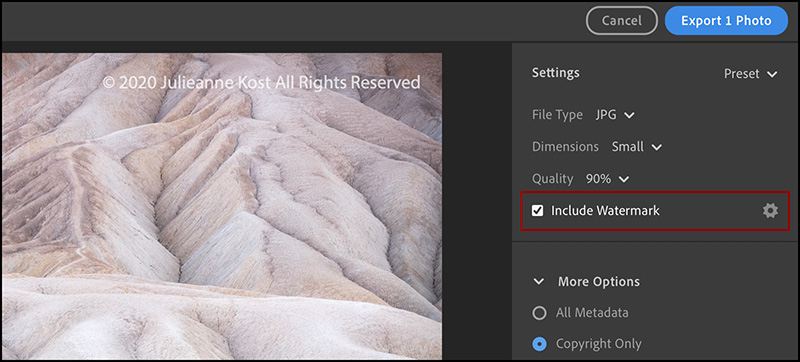
• Synced Watermarks — When you create a watermark to be applied when exporting images from Lightroom, the custom settings will be synced across your devices, so you can create your watermark once and have it available everywhere. Click the Share icon and choose Export As. Check Include Watermark to enable the watermark and click the gear icon to customize it.
• Notifications for Shared Albums — The Activity panel will now display comments and likes from Shared Albums.
• Language Support — Lightroom now supports Russian and Thai languages.
• Search Improvements — Improved results when searching on common items such as “cat” and “dog”.
This release also includes additional camera raw and lens profile support and addresses bugs that were introduced in previous releases of Lightroom.
great new feature to already edit the settings of the edits to the images as they are imported. saves time when you have a specific project or concept of editing the pictures.