In the video below, you’ll learn how to seamlessly move photographs between Lightroom and Photoshop and discover when and why to use the many different “Edit In Photoshop” commands including opening multiple photos as Layers and Smart Objects.
Depending on your workflow, you may want to change the default settings that Lightroom Classic uses to hand off files to Photoshop. Begin by selecting Preferences > External Editing and select your preferred version of Photoshop, file format, color space, bit depth, and resolution and compression (if available). Note: the default editor is what will be used when using the shortcut Command + E (Mac) | Control +E (Win).
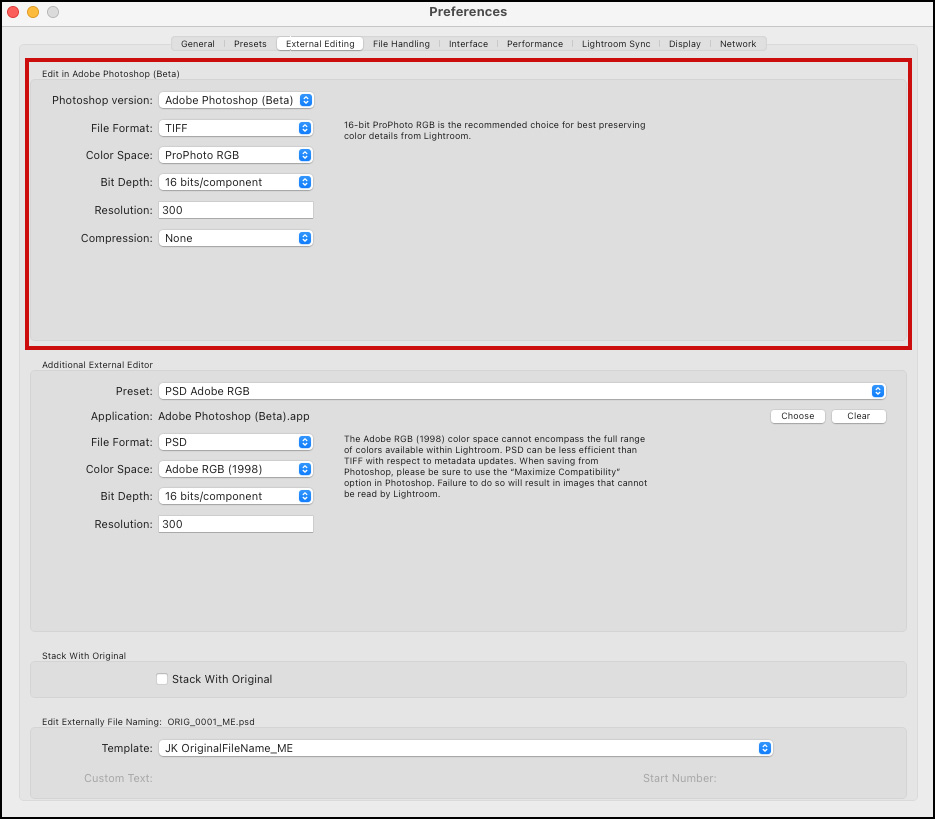
If you often use different settings for different projects (different versions of Photoshop, bit depth, color spaces, etc.), select your alternate options in the Additional External Editor section. Then, use the Preset drop down menu to Save Current Settings as New Preset. Additional External Editor presets will appear under Photo > Edit In, making it easy to select between different settings.
While in the External Editing Preferences, choose whether or not to stack the edited photo with the original. (Click here for more info on stacking in Lightroom Classic.

To create a custom filename template for images edited externally, select a template from the drop down list or create your own. For example, I keep the original file name and add _ME (for “master edited”) to my edited files.

Select Photo > Edit In Photoshop. When working with raw files, Lightroom Classic applies any Lightroom Classic adjustments you’ve made to a copy of the file and sends that file to Photoshop for editing. When working with other file formats, you may see the Edit Photo dialog box when sending files to Photoshop. If this is the case, choose from one of the following:
- Edit A Copy With Lightroom Classic Adjustments — Applies any Lightroom Classic adjustments you’ve made to a copy of the file and sends that file to Photoshop for editing.
- Edit A Copy — Edits a copy of the original file without Lightroom Classic adjustments.
- Edit Original — Edits the original file without Lightroom Classic adjustments.
After making changes in Photoshop, saving, and then closing that file, Photoshop will hand back the edited file to Lightroom Classic where it will be automatically imported into the catalog. Note: if you choose Edit in Photoshop and then create a duplicate of the edited image in Photoshop, choose Save As, or copy and paste the photo into another document and then save and close that duplicated file, Photoshop will not return the file to Lightroom Classic and therefore it will not be auto-imported. Instead, you will need to return to Lightroom Classic and manually import the file (or, if you saved it to a folder that Lightroom Classic is already aware of, you can choose to synchronize the folder).
There are several options for opening multiple files from Lightroom Classic into Photoshop as layers and Smart Objects:
- Photo > Edit In > Open as Layers in Photoshop — Opens all selected files into a single Photoshop document with each photo on it’s own layer.
- Photo > Edit In > Open As Smart Object In Photoshop — Opens all selected files in separate documents as Smart Objects.
- Photo > Edit In > Open as Smart Object Layers in Photoshop — Opens all selected files into a single document with each photo as a Smart Object. Note: See below for more information about Smart Objects.
The video below demonstrates six benefits of working with Smart Objects in Photoshop including; transforming and distorting Smart Objects, editing and replacing the contents of Smart Objects, creating duplicated instances, and more!
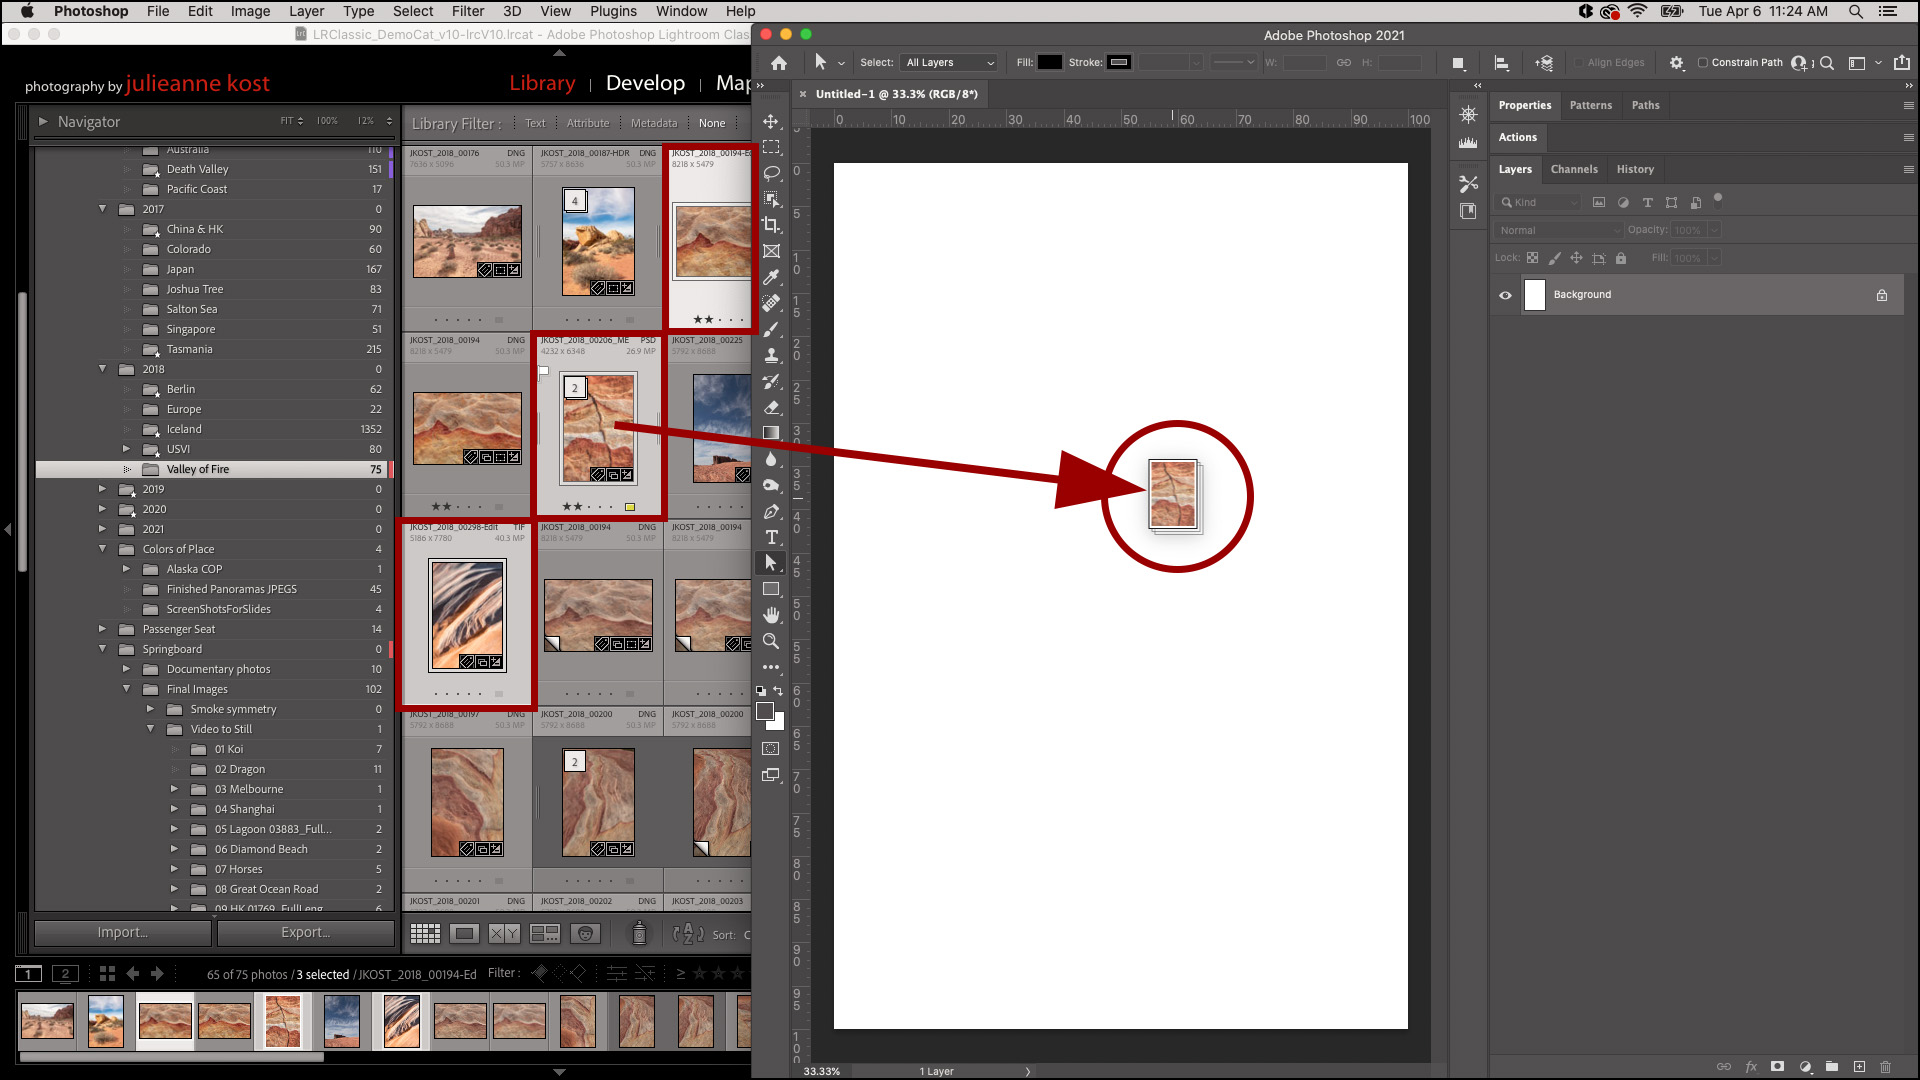
Note: the following feature is Mac only. To open multiple files from Lightroom Classic into Photoshop as Smart Objects and place them into an open document, first, open the document in Photoshop. Then, with both applications visible, select the images in Lightroom Classic and drag and drop them on top of the open Photoshop document. Each image will be converted to a Smart Object and placed into the open document. Note: the options to “Resize Image During Place” as well as “Place or Drag Raster Images as Smart Object” are controlled in Photoshop’s General Preferences/Settings.