In this video you’ll discover the power of the Parametric and Point Curves when using the Tone Curve panel in Lightroom Classic.
There are two different curves within the Tone Curve panel – the Parametric and the Point curve. While both curves can be used to make adjustments to the tonal values in an image, the Point Curve can also be used to change color values.
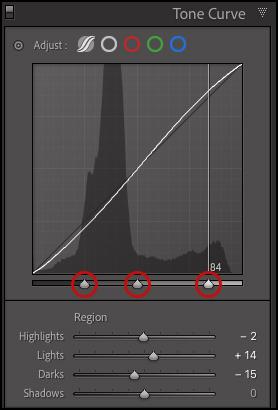
The Parametric Curve — Use the icon across the top of the Tone Curve panel to select the Parametric Curve.
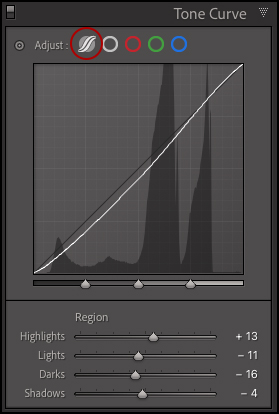
- Click -drag up/down on the Parametric curve to lighten/darken the image or, use the Highlights, Lights, Darks, and Shadows sliders (below the curve) to make adjustments.
- To change the tonal range affected by any of these sliders, reposition the triangles (directly under the curve).
- To reset a single slider, double click its name. To reset all sliders, double click the word “Adjust”.
- Control -click (Mac) | right-click (Win) in the Point Curve grid area to access additional options including: Reset Regions, Reset Splits, Reset Regions and Splits, Reset Curve, and Reset All.
- Click the “light switch” in the upper left of the Tone Curve panel to hide/show changes made in that panel.
The Point Curve — Click the gray circle at the top of the Tone Curve panel to select the Point Curve. A maximum of 16 points can be added to the curve to make fine adjustments.
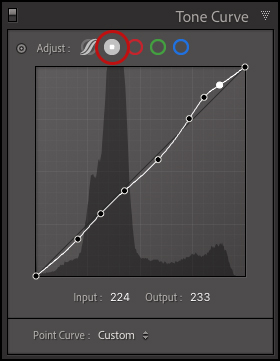
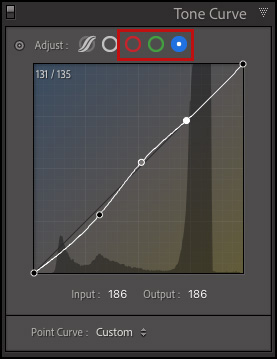
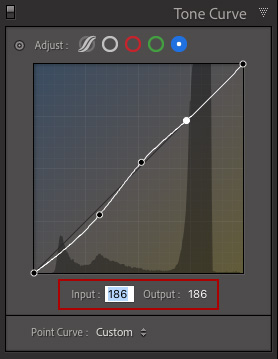
- To make adjustments to the colors in an image, click the red, green and blue circles to access and adjust the individual red, green, and blue channels. When an individual channel is selected, color gradients appear in the curve making it easier to anticipate adjustments.
- For finer control, use the Input/Output text boxes to adjust the value of any selected control point. Or, hover the cursor over a selected control point and use the up/down arrow keys to refine the adjustment. Note: When using the Point Curve, values are displayed as absolute values (instead of percentages).
- To delete individual points on the Point Curve, click -drag the point off the curve.
- To reset the Point Curve, double click on the words “Point Curve”.
- To Save a Custom Point Curve (to apply to other images), create the curve, then use the drop-down menu (to the right of “Point Curve”) and choose Save. Note: saving the curve to its default location will make it available in both Lightroom Classic and Adobe Camera Raw.
- Control -click (Mac) | right-click (Win) in the Point Curve grid area to access additional options including: Reset Channel, Reset All Channels, Copy/Paste Channel Settings, Snap to Grid, and Show All Curves.
The Targeted Adjustment Tool — To make on-screen adjustments to the either the Parametric or Point Curve, use the Targeted Adjustment tool (the small, circular icon located in the upper left of the Tone curve panel).

- Command + Option + Shift + T (Mac) / Control + Alt + Shift + T (Win) selects the Targeted Adjustment tool.
- Click -drag up/down in the image preview area with Targeted Adjustment Tool to make adjustments.
- Escape puts the Targeted Adjustment Tool back (while keeping changes that have been made).
- To make small adjustments with the Targeted Adjustment tool, try positioning the cursor in the image preview area over the value that you want to change. Then (without clicking), use the up/down arrow keys to nudge the curve. Add the Shift key to nudge the point in greater increments.
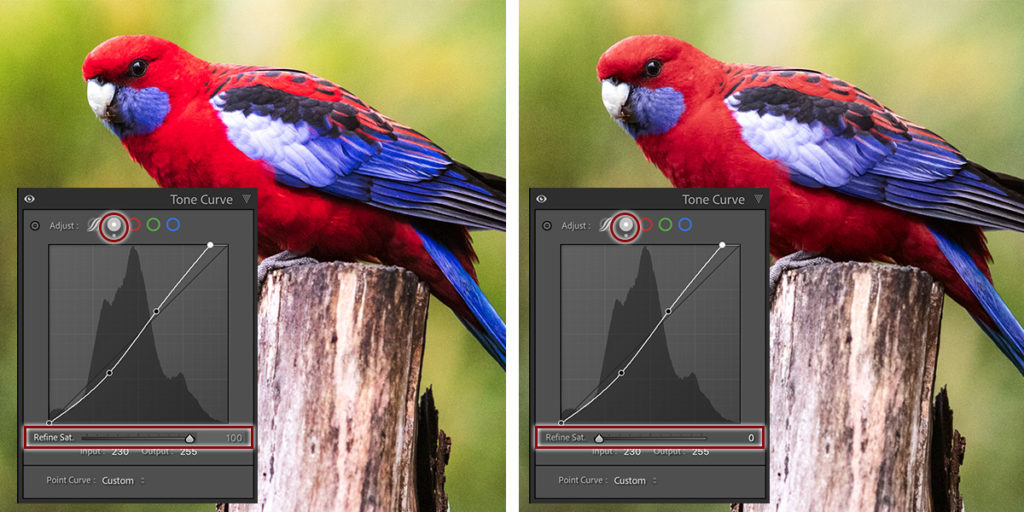
Refine Saturation — When making adjustments using the Point Curve, Lightroom will automatically change both luminance and saturation values to create a more visually pleasing image. To decrease the changes made to saturation use the Refine Saturation slider. The default setting of 100 will create the same results as in previous versions of Lightroom while decreasing the value will lessen the changes made to saturation. Setting the slider to 0 restricts the effects of the Point Curve to only the luminance values.
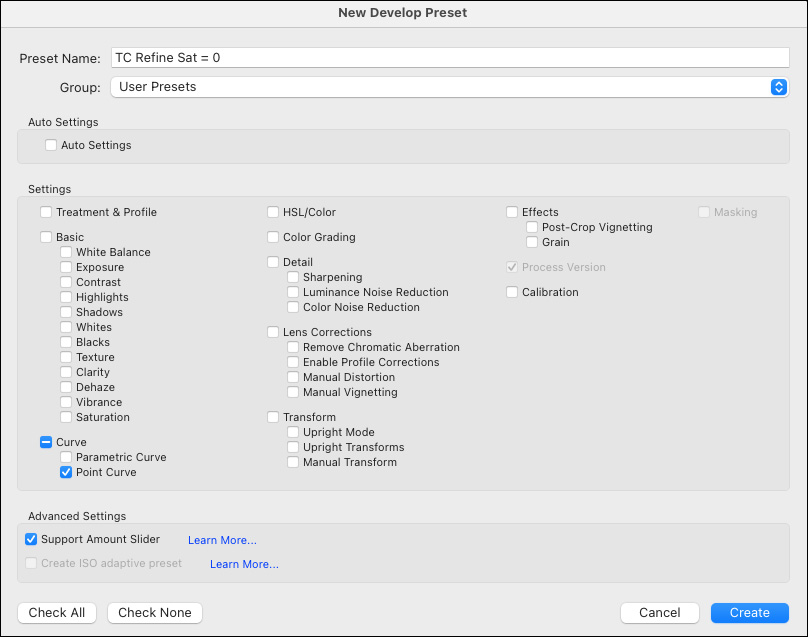
Copy/Paste and Presets — When Copying / Pasting settings as well as when creating Presets, you can choose to include the Parametric Curve, Point Curve, or both.