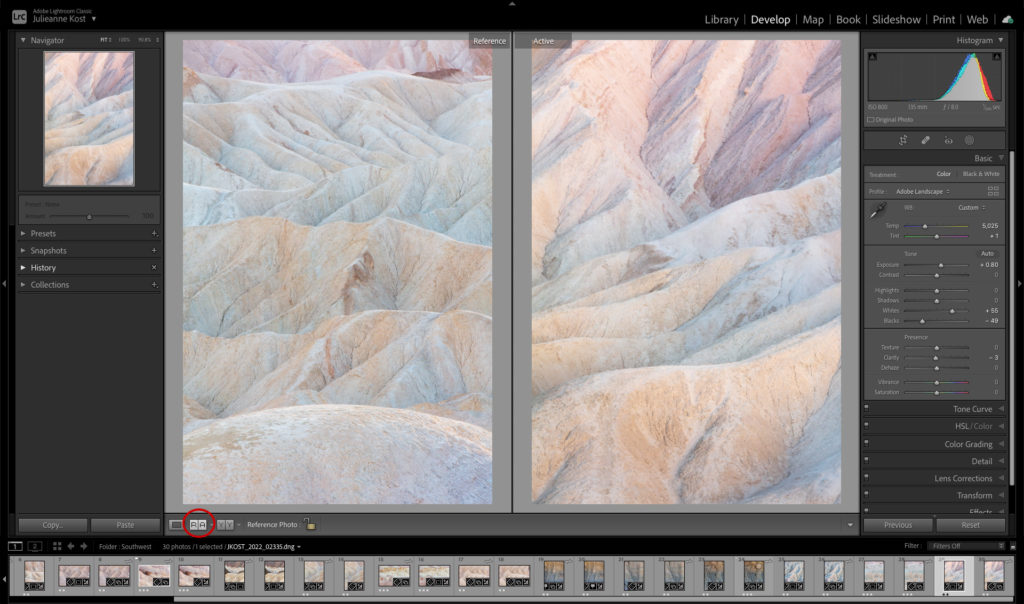
In the video below, you’ll discover how to use Reference View to make cohesive edits between images in the Develop module in Lightroom Classic.
Reference View provides a dedicated 2-up view in Lightroom Classic’s Develop module in order to view and compare a Reference photo (static) while making edits to an Active (editable) photo. This view is incredibly useful when you’re trying to “match” the look and feel of one image to another and essential when preparing multiple images to use together in a layout or presentation.
To enable Reverence view, click the “R|A” icon below the image preview area in the Develop module or, use the shortcut Shift + R. Then, either drag a reference photo from the filmstrip to the Reference view to compare with the active photo or, right-click (Control -click on Mac) on any image in the filmstrip and choose “Set as Reference Photo” from the context sensitive menu. Note: use the second method (the context sensitive menus) when multiple images are selected in the filmstrip.

Lightroom Classic clears the current Reference photo when you switch modules. To lock the current Reference photo to the Reference window, click the Reference Photo lock icon in the toolbar before switching to another module.
Note: Selecting the Crop tool will exit Reference View.