Did you know that Photoshop has the ability to create really cool trees by selecting Filter > Render > Trees? You can choose from over 30 tree types and refine them using several parameters including the ability to change the size and type of leaves as well as the height of branches. It’s important to note that these trees are not clip art. They can be altered (randomized) to create slightly different, unique trees every time the filter is run.
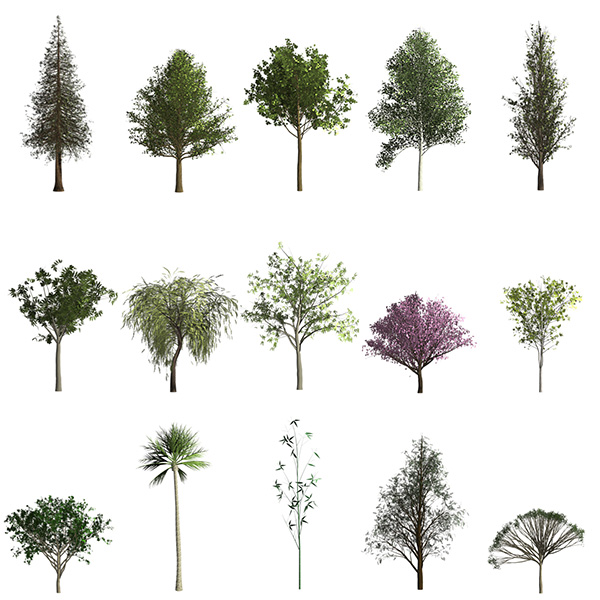
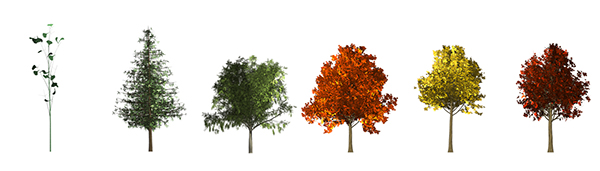
Here are examples of some of the different types of trees (shown with their default leaves). If you would like to see all of these examples larger (and with more detail), click here to download the PDF.2015 Trees

And, you can change the angle of the light.
The camera angle can be changed as well.
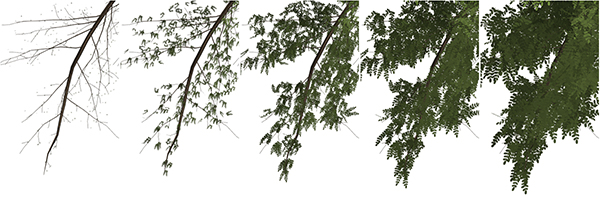
You can choose anywhere between bare branches to thick, bushy, leaves.
The leaf size is also adjustable.
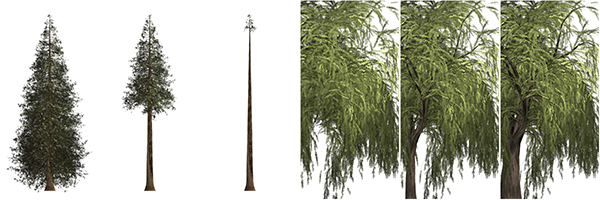
You can alter the branches height (where the branches begin extruding from the tree), as well as the branches thickness.
Of course you can create your own tree/leaf (not-of-this-world) combination as well as customize the leaf color.
Leaves can be “locked” so that they don’t rotate (this can result in more of an illustrative look). Leaves and Branches can have natural or flat shading and leaves can be rendered with additional contrast. Even the color of the branches can be modified.
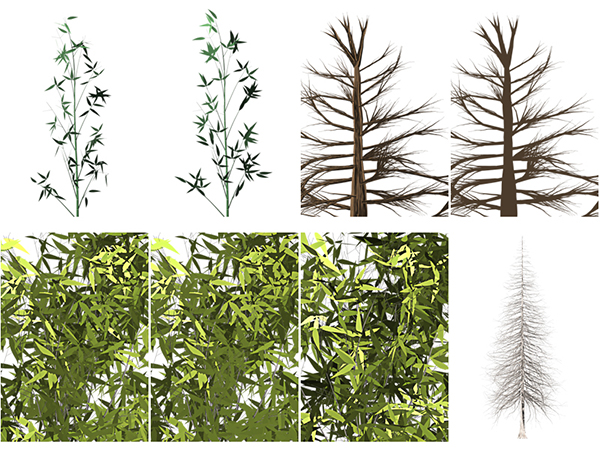
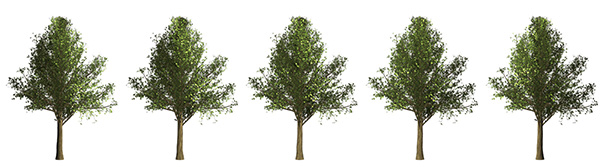
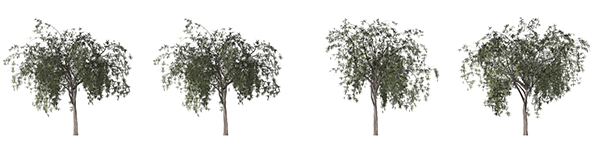
If you check the “Randomize Shapes” option, the branches and leaves change every time (even if you keep all other options the same). In other words, you have no control over the branch/leaves shapes – it’s completely random. (even if you keep all of the other options the same). This can be very useful if you want to make a number of trees that are are similar to one another, but not identical. For example, if you automate the Tree filter using Actions, each tree will be unique in the forest.
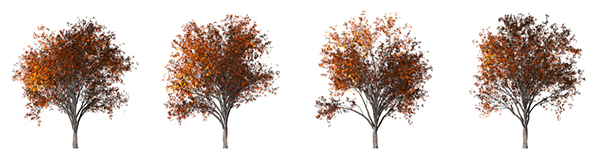
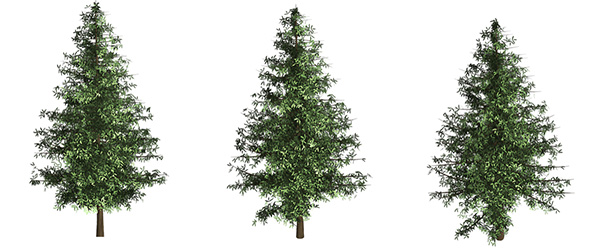
If, on the other hand, you uncheck “Randomize Shapes”, you can render trees with identical branches and leaves. In the illustration below, the first and second tree was rendered with the Randomize Shapes checked and you can see that they’re identical. If, however, you do not like the shape of the branches and leaves on the tree you can use the Arrangement slider to modify them. In the third and fourth tree below, I kept the Randomize Shapes unchecked but moved the arrangement slider to create a different combination of branches and leaves.
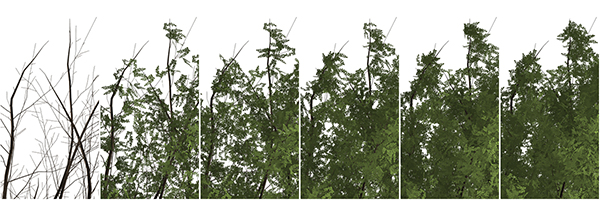
After you have created the desired tree, use the Custom menu at the top of the Trees dialog to save those settings to use in the future or share with friends. And, a little known fact, the Tree filter can follow paths! For example, using the custom shape tool to create a heart and then creating a Willow or Pine tree without any leaves is illustrated below.

I have also found that Puppet warp can be very helpful when trying to make small adjustments to a tree to reshape them.
Have Fun!
I must be blind or confused… I can’t find this anywhere in the Filter menu (PS CC2014). The only reference I can find in help is to the fill location, and it’s not there anymore.
Where exactly should I be looking?
Thanks.
Rob
To creat trees in Photoshop CC 2014, go to Filter > Render > Tree…
Where’s the pdf?
Rob: It’s under Filter: Render: Tree
I have a different problem. Apparently my older graphics card and/or VRAM can’t handle this. So it’s grayed out.
I can’t find the PDF link to download to see all the examples of the trees.
I looked all over the click here area and nothing.
Thank you
Sorry! I couldn’t log on this morning to upload it! It’s there now. : )
Thank you for the PDF file and not a problem. I thought I was just not seeing it.
I appreciate the information you give out on Photoshop!
Good grief!
Excellent report. I didn’t realize there were SO many combinations possible.
. . . found it . . . . . . it’s still under EDIT/FILL . . .
Melvyn, if you found it under Edit > Fill, then you aren’t running Photoshop CC 2014.
ABOUT says PS is version 14.2.1 – downloaded less than a week ago. UPDATE check says it;s all up-to- date . . . something is not right ?.
Tried to update again – this time using CC interface, before I used UPDATE in PHOTOSHOP. Version is now 2014.2.2. TREES is in Filter / Render. Looking better . . .
OK – so now I have PS correct installed – how do I
1 – place the tree on the part of the photo I want
2 – Adjust the size of tree
3 – Move the tree once created
or is this a wishlist ? Can’t see much on the net about this, apart from http://www.creativepro.com/article/how-to-create-trees-photoshop-part-1 . . . and that makes it look easy, but skips over my questions . .
Thx
MJ
. . . got it with some help from the forum – https://forums.adobe.com/message/7094941#7094941
. . .