Here are my favorite tips for selecting and filtering layers in Photoshop.
From the Layers panel — Command -click (Mac) | Control -click (Win) to the right of the layer thumbnail to select multiple, non-contiguous, layers on the Layers panel. Shift -click to select a range of contiguous layers in the Layers panel.
With the Move Tool: To quickly select multiple layers from the image area, with the Move tool selected, enable Auto-Select (in the Options bar) and choose Layer or Group from the pull-down menu. Then, click in the image area over the desired layer to select it. Press the Shift key to select additional layers. Press “.” to toggle between Auto Select layer and Auto Select Group.
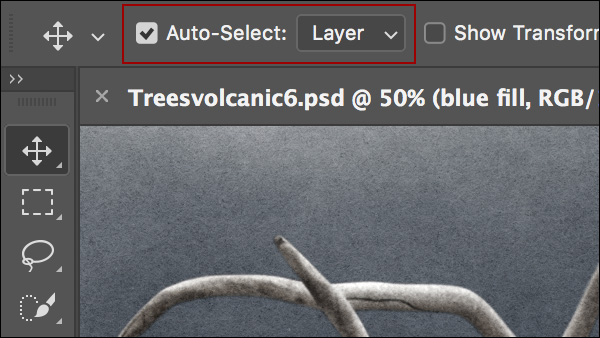
If you prefer to leave the Auto-Select feature disabled, pressing Command (Mac) | Control (Win) will temporarily activate Auto-Select with the Move tool selected.
Note: you can also drag-select multiple layers, using the Move tool, which works well if you have multiple layers and a Background. Otherwise, with the Auto Select feature enabled, clicking in the image area will select the first layer that you click on and begin to move it instead of selecting additional layers (because the Background is locked by default, it can’t be selected and is skipped by the Auto Select Feature). If you have layers that you do not want to be automatically selected, lock them.
Using Context Sensitive Menus — With the Move tool selected, Control -click (Mac) | Right -click (Win) in the image area over the desired layer and select it from the list.
From the Select Menu — Command + Option + A (Mac) / Control + Alt + A (Win) will select all layers. Note: hidden layers are included in this selection, however the Background is not selected with this shortcut.
Using Keyboard Shortcuts (Layer > Arrange)
- Option + “[“ or “]” (Mac) | Alt + “[“ or “]” (Win) targets the layer above or below the currently targeted layer.
- Option + Shift + “] “or + “[“ (Mac) | Alt + Shift + “] “or + “[“ (Win) adds the next layer up or down to the targeted layer(s) (note when you get to the top or bottom of the layer stack, Photoshop will “wrap around” to continue adding/subtracting layers).
- Option + “,“ or “.” (Mac) | Alt + “,“ or “.” (Win) targets the bottom/top -most layer.
- Option + Shift + “,“ or “.” (Mac) | Alt + Shift + “,“ or “.” (Win) targets all layers that fall between the currently targeted layer to the top or bottom of the layer stack.
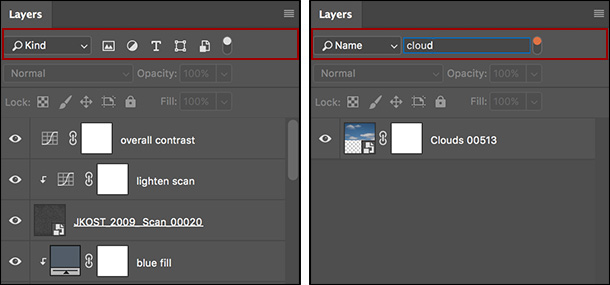
Using the Layer name — Option + Command + Shift + F (Mac) | Alt + Control + Shift + F (Win) will toggle on “Layer Search” (in the Layers panel), and automatically select “Filter By Name”. Just type in the name of the layer to quickly find it. This is very convenient if you have named your layers and know the name of the layer that you are looking for. : )
Filtering by Type of layer — Choose a “Filter Type” by clicking the drop down menu at the top left of the Layers panel and choose from Kind, Name, Effect, Mode, Attribute, Color, Smart Object, Selected, or Artboard. Then, use the corresponding options that appear to the right of the Filter Type to narrow down the search.
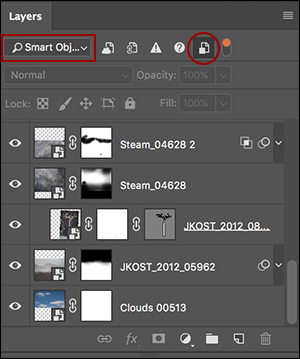
The “light switch” to the right of the Filter options toggles the filtering on and off. Note: when filtering by Kind and Smart Object, you can click on more than one icon at a time in order to narrow down the search. Click an icon again to toggle if off.
Isolate Layers — The Isolate Layers feature helps reduce the complexity of the layers panel by toggling the visibility of unselected layers on the Layers panel. To enable the feature, select the desired layers in the Layers panel, and choose Select > Isolate Layers. Only the layers that are selected will be displayed in the Layers panel.
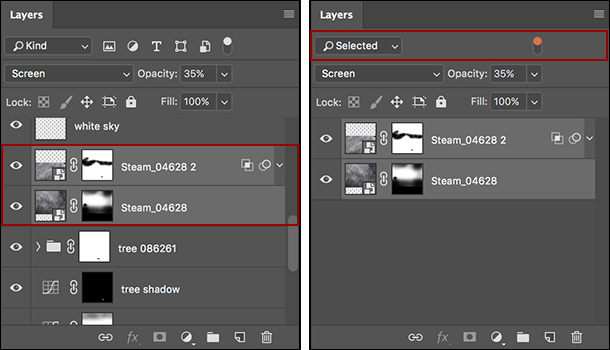
Choose Select > Isolate Layers again to toggle it off. Note: you might want to add a custom keyboard shortcut to Select > Isolate Layers to make toggling the feature easier. To temporarily disable Isolate layers (in order to change which layers are selected for example), toggle the Filter switch to the right of the filter criteria on the layers panel.
Another method of enabling Isolate Layers is to choose “Selected” from the Filter pull-down menu the Layers panel. To turn off Isolation mode, choose Kind (or another filter option) from the filter menu.
Note: Isolation Mode is inactive when using the Direct/Path Selection tools in Active Layers mode.
Very informative, thank you
Any updates for printing?