I’m excited to announce several updates to Camera Raw starting with the new and enhanced Raw and Creative Profiles. While the concept of Profiles isn’t new to Camera Raw, in this release, their power has been greatly enhanced. This video demonstrates how:
If you’re not familiar with raw profiles, here is a overview of the key concepts covered in the video above:
Profiles
A profile is a set of instructions that is used to render a photograph, converting it from raw camera information into the colors and tones that we see.
- Every raw image must have a profile applied (and can only have one profile at a time).
- Profiles are nondestructive and can be changed at any time without any loss of quality.
Previous to this release, Adobe applied the Adobe Standard profile (v2) to all raw files by default. While a few customers changed their default profile (to a camera matching profile for example), the majority of customers, the application of a profile just happened magically.
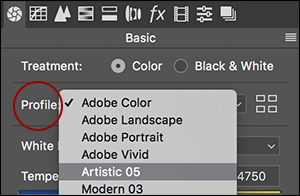
- In this release, profiles have been moved from the Camera Calibration tab to the Basic tab, making them easier to access.
- There are no “right” or wrong” profiles: they’re like filling in a pie – some people will choose cherry and others prefer peach.
Adobe Raw Profiles
There are six new Adobe Raw profiles which can be applied to raw files. The new default profile for raw files in Camera Raw is Adobe Color for color images and Adobe Monochrome for Black & White images.
Adobe Color — was designed to be a great starting point for any image. The goal of this profile is to render a relatively neutral, baseline image that closely matches the original colors and tones in the original scene. It assumes that you want the ultimate control over refining and adjusting images in order to achieve the exact look that you want. In comparison to the previous default profile, Adobe Color is a bit warmer in the reds, yellow and oranges, has a very small increase in contrast, and, it does a better job of moving highlights between color spaces.
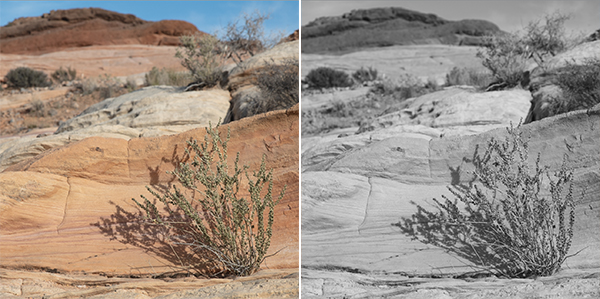
Adobe Monochrome — was carefully tuned to be the best starting point for any black and white image. This profile slightly shifts colors as they are converted to grayscale – brightening the warmer colors and darkening the cooler colors. It also adds a small amount of contrast but allows lots of headroom for editing.
The additional four Adobe Raw profiles that were created as starting points for specific types of images:
Adobe Landscape — adds a bit more saturation to all of the colors in an image and renders more vibrant blues and greens. While this profile adds a slight amount of contrast to the overall image, it also helps to maintain details by slightly compressing the highlight and shadow values in scenes with significant contrast.
Adobe Neutral — reduces color saturation as well as contrast , rendering a flatter, low contrast version of the image. It‘s designed to give you the most headroom for post processing. This a great profile to start with if you have an image with delicate colors and gradients.
Adobe Portrait — is tailored especially for portrait images. It has a slightly more gentle tone curve and is optimized for skin tones.
Adobe Vivid — adds vibrance and contrast while still rendering natural skin tones and is a great place to start for images of people in a landscape.
Note: Standard V2 was the default profile in previous versions of Camera Raw.
If the image that you’re working with isn’t set to Adobe Color by default, most likely one of three things is happening:
- You’re working on a non-raw photograph (like a JPEG or TIFF) – in which case the profile will just say Color because all of the rendering was done already (either in another raw processor or within the camera itself) and you can’t apply a raw profile to a non-raw file.
- You’re working on an image captured as DNG via Lightroom on a mobile device and the default profile is Camera Default because images are be optimized differently for images captured on mobile devices.
- You’re working with a legacy file – in which case you will see the previously embedded profile which you can choose to change at any time (Camera Raw won’t automatically update legacy files using the new profiles as doing so would change the look of the image.)
Adobe Camera Matching Raw Profiles
In addition, Adobe created and ships Adobe Camera Matching profiles. These profiles are designed to match the preset “styles” that can be set using the menus on a camera. Because the style options differ among camera manufacturers, this list of profiles will change depending on your camera.
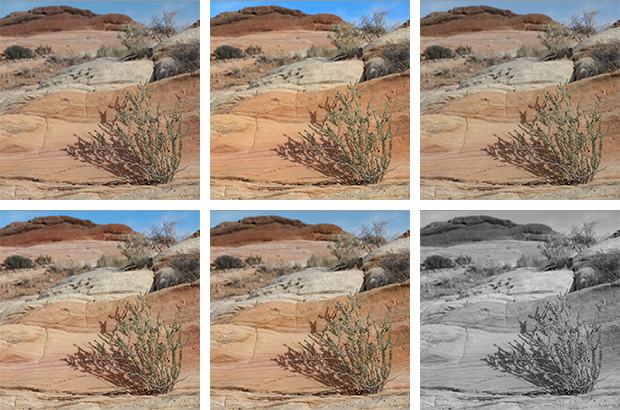
The Camera Matching monochrome profiles behave differently from other Black and White profiles (Adobe Monochrome, Legacy, and the Creative Profiles), by discarding the color information in the file. Therefore, the Black and White Mix sliders, are not available. You can however add color tints to these images using the Tone Curve, Split Tone, and color swatch with Local Adjustment tools.
Legacy Raw Profiles — Legacy Raw profiles are also included in order to maintain backwards compatibility when working with legacy files.
Creative Profiles — In addition to Raw profiles, are several groups of Creative profiles. These profiles are designed to apply more creative, stylistic effects to an image and can be applied to non-raw photographs (like JPEG’s and TIFFs). Creative Profiles can (but aren’t required to) use color lookup tables (LUTs) to remap color and tones enabling new and unique ways of processing images. Camera Raw ships with several different Creative profiles including:
Artistic Profiles — these profiles were designed to be more edgy, and typically have stronger color shifts.
B & W Profiles — these profiles were designed to create a more dramatic interpretation of the original image, some of these profiles increase/decrease contrast, others limit the dynamic range, and several emulate the effects of using color filters with film.
Modern Profiles — these profiles were designed to create unique effects that fit in with current photography styles.
Vintage Profiles — these profiles were designed to replicate the effects of analogue imagery.
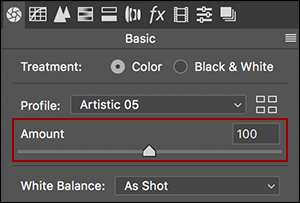
Creative profiles have an Amount slider which can be used to decrease/increase the intensity of the profile. Note: it is up to the creator of the profile to define exactly how far the “intensity” can be changed. In other words, you might see subtle or more aggressive changes on a per-profile basis.
Previewing and Applying Profiles
You can hover the cursor above a profile to preview the effect in the preview area, however you need to click the profile to apply it.
Double click a profile to simultaneously apply it as well as close the Profile Browser.
Once a profile has been applied, use any of the other slider controls in any of the other panels to make additional modifications to your images – profiles don’t change slider values.
Quickly Accessing Favorite Profiles
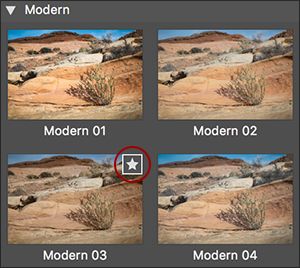
Click the star icon to add a profile to the Favorites group. Click again to remove it.
Quickly access Favorites from the Profile drop-down menu (without having to use the Profile Browser).
Including Profiles in a preset
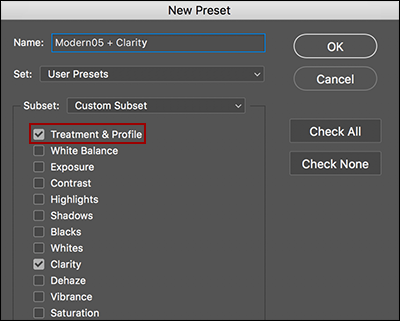
When saving a preset, you can choose to include Treatment & Profile to save the profile as a part of a preset (just as you would any other attribute or setting in Lightroom).
Presets are saved as XMP files, making them compatible and accessible across Camera Raw, Camera Raw as a filter in Photoshop, and all of the Lightroom products.
Applying Camera Raw Presets in Bridge
To make presets available in Bridge, first mark them as Favorites in Camera Raw, then select them from the Edit > Develop Settings menu.
The SDK info for creating custom profiles can be downloaded from this link: http://www.adobe.com/go/profile-sdk
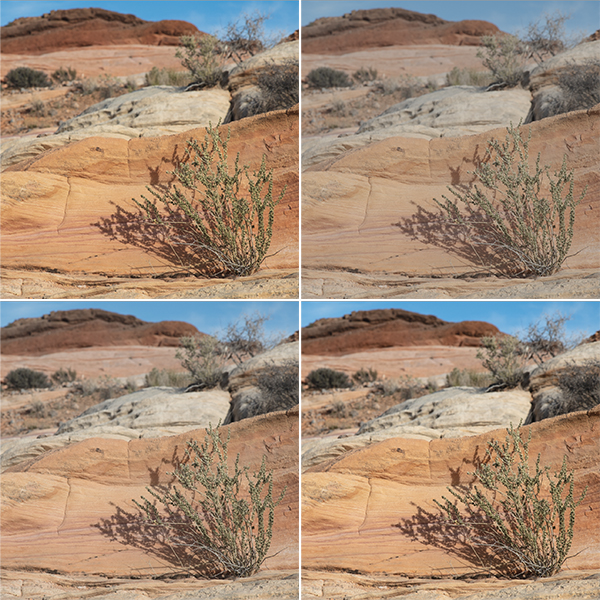
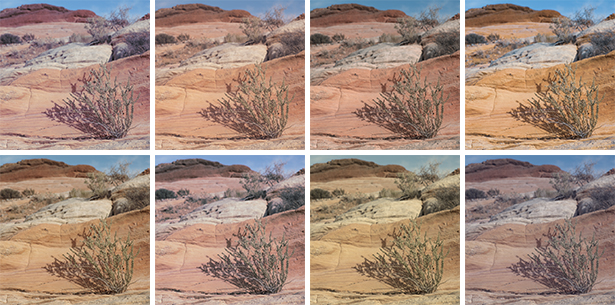
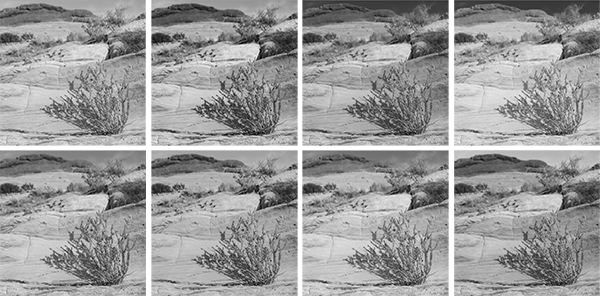
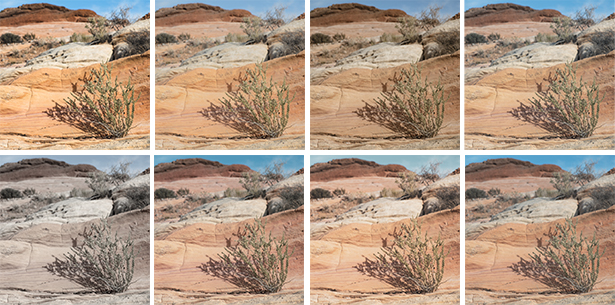
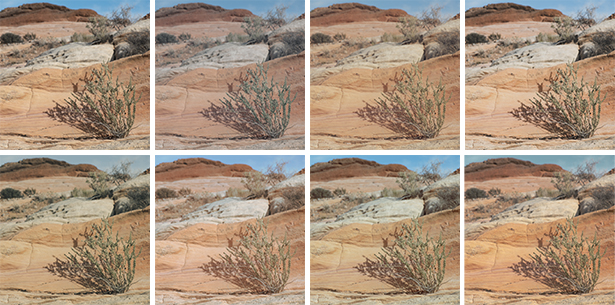
“Creative Profiles can (but aren’t required to) use color lookup tables (LUTs) to remap color and tones enabling new and unique ways of processing images.”
How can I import a .cube LUT and make a custom profile?
The SDK info for creating custom profiles can be downloaded from this link: http://www.adobe.com/go/profile-sdk
After updating, Camera Raw’s version of the file and it’s adjustments are not reflected in the exported file opened in Photoshop. This not a problem with adjustments and exports from Lightroom. I have tested several ARW and CR2 Raw files and all have the same problem. After applying profiles, making any kind of adjustment the resulting export does not look like the file rendered in Camera Raw. There are subtle color shifts to the Cyan and a lowering of contrast in the export files when compared to the Camera Raw version of the file.
Thanks for the great video and comprehensive information! I want to make my own profiles in Photoshop, using the color lookup table adjustment layer and blend modes. I know I can export the Ps file as a color look up, but there’s no option to create a XMP file so I can use it in Lr. How is that done?
There seems to be some discrepancies between a Lightroom processed image and that same processed image in Photoshop — a color shift and a loss of contrast. Images that look great in LR, when then opened in PS look considerably flatter and considerably more orange. I don’t know if anyone else is experiencing this, but it will make it impossible for me to go from LR to PS for any reason at all.
I have examples of what I’m seeing on my blog. Please, please, someone tell me if I’m the only one having this problem.
Hi Don, I would check you Lightroom preferences for External Editing and your color setting in Photoshop to make sure that no unwanted color conversions are taking place. If that’s not the issue, I would post your question to feedback.photoshop.com Thanks!
Hello Julieanne! I only have color and monochrome available in Lightroom on all of the .psd photos that I have edited in photoshop and saved. Is this how it is supposed to work? Before the update all of my photos that were edited and saved back to Lightroom the calibration panel was available. So once I edit in photoshop none of those options are available to me anymore in case I want to tweak.
With PSD files, if you click the Profile Browser icon you can still access the Creative profiles. The raw profiles are not available to non-raw files.
After the most recent update, my saved settings are no longer available in the Apply Favorite Preset menu, although the XMP file is in the Settings folder and I can apply it by choosing it there through Load Settings… How can I mark a setting as a Favorite in Camera Raw, as you suggest above?