1) Blend Modes can be applied to multiple layers at one time. Select the layers, then select the Blend Mode to apply.
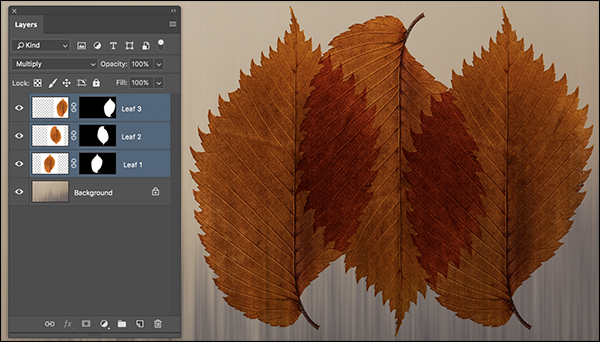
Applying the Multiply Blend Mode to all three selected layers at once.
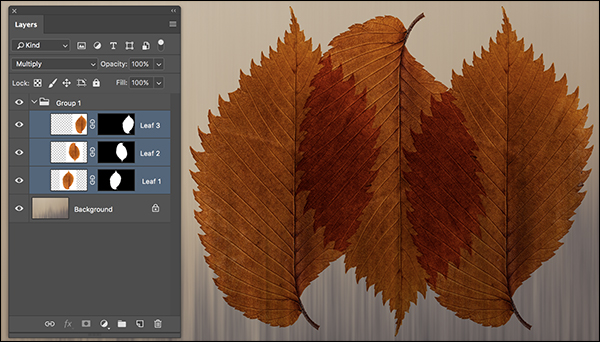
2) Second, instead of changing the Blend Mode for each individual layer within a Layer Group, you can change the Blend Mode for the Layer Group. When assigning a Blend Mode to a group, Photoshop treats the contents of the group as if they are flattened before adding the Blend Mode. As long as none of the layers have content that is overlapping, they layers will appear no differently than if the Blend Modes was applied to each layer, but if the content does overlap, then the results will blend differently.
In this first example, each individual leaf layer’s Blend Mode is set to Multiply. Therefore the top leaf is blended with the two beneath it. The middle leaf is blended with the leaf below it, and all three leaves are blended with the Background.
In the second example, the individual leaf layer’s Blend Mode is set to Normal and the Layer Group is set to Multiply. Because Photoshop treats the content of the group as if they’re flattened before applying the Blend Mode, the leaf layers are only being Multiplied (blended) with the layer below the group (in this case the Background).
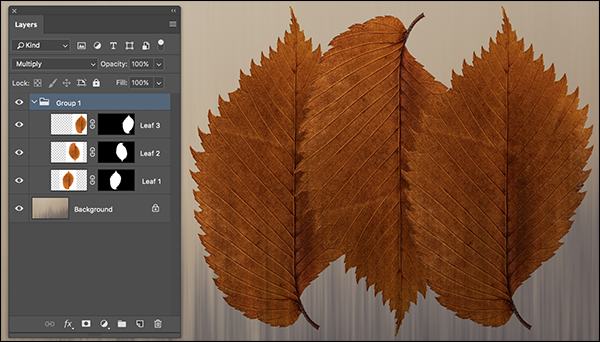
3) Layer Groups have a unique blend mode called Pass Through which is only visible when a Layer Group is targeted in the Layers panel. It is the default Blend Mode for Layer Groups and allows any Blend Modes, adjustment layers, advanced blending options, opacity and fill values applied to layers within a Layer Group, to affect the layers below the Group. To restrict the blending of layers within a Group, change the Layer Group’s Blend Mode to Normal. Note: Option + Shift + P (Mac) | Alt + Shift + P (Win) sets the Blend Mode of the currently selected group to Pass Through.
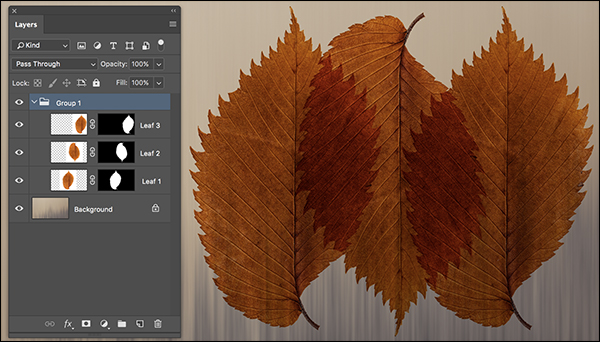
With the Layer Group’s blend mode is set to Pass Through, Blend Mode applied to layers with in the Group “pass through” the bottom of the group and affect the layers below the Layer Group.

When a Layer Groups blend mode is set to Normal, Blend Mode assigned to layers with in a group are restricted to only affect layers with in the group (they leaves set to the Multiply Blend Modec an’t blend with layers beneath the group).
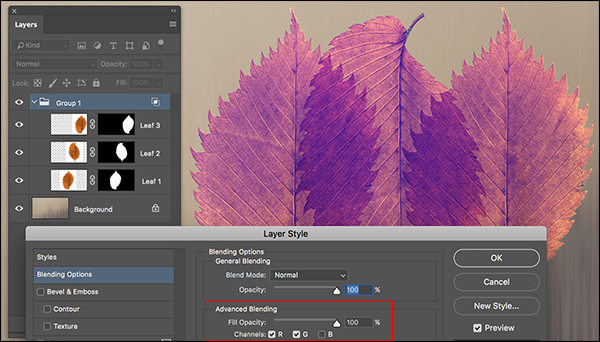
4) For more advanced blending of channels within Groups, choose Layer > Layer Style > Blending Options (or Control -click (Mac) | Right -click (Win) the Layer Group icon in the Layers panel and select Blending Options) to specify which channels to use for special effect blending of layers.
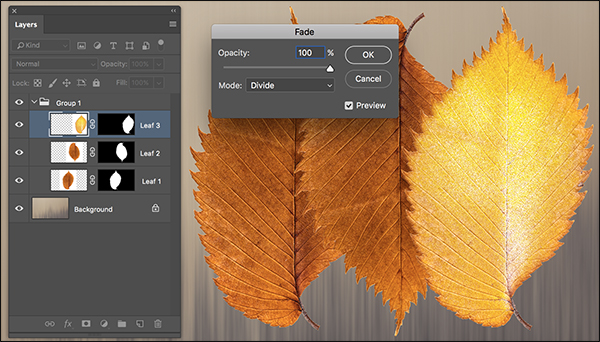
5) Select Edit > Fade (or use the shortcut Command + Shift + F (Mac) | Control + Shift + F (Win) ) to access Opacity and Blend Mode setting for several different commands. For example:
• Immediately after creating a brush stroke, select Edit > Fade to change the Blend Mode or opacity for the most recently created stroke.
• Directly after applying a filter, select Edit > Fade to change the Blend Mode or opacity of the filter using the Fade dialog.
The Blend Mode of the Diffuse Glow filter is changed using the Fade command.
Note: filters applied to a Smart Object are automatically “Smart Filters”. To change the Opacity and Blend Mode of the Smart Filter, double click the Filter Blending Option to the right of the filter name in the Layers panel.