In this video you’ll discover how to quickly find your photos using text, attribute, and metadata filters in Lightroom Classic.
Lightroom Classic’s filter options can save hours of time when looking for images. Here are several shortcuts to help increase your productivity:
Displaying the Filter Bar — While in Grid View, tap the “\” (backslash) to toggle the visibility of the filter bar.
Highlight the Text Filter — Command + F (Mac) | Control F (Win) automatically selects the Text filter and highlights the text entry field enabling you to immediately start typing. (Add a “!” to the beginning of a word to exclude it.)
Toggle the Filter On/Off — Command + L (Mac) | Control + L (Win) toggles the last filter used on/off.
The Attribute Filter — The Attribute filter options do more than just filter on Flags, Ratings and Colors. Use the Edits icons to quickly filter on images that have (or have not had) edits applied, click to the right of Rating to choose to filter Greater Than, Equal To, or Less Than the specified rating, and use the Kind options to quickly filter on Master Photos, Virtual Copies, and/or Video files.

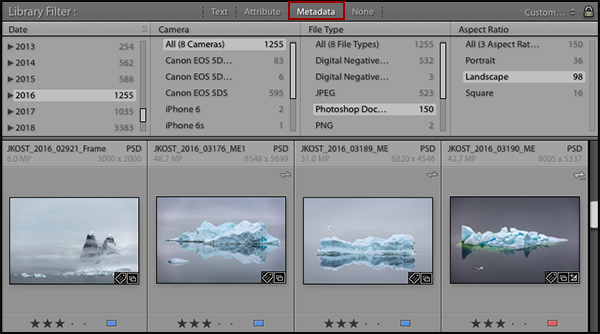
Using Metadata — the Metadata filters can be extremely powerful! Not only can any/all columns filter options be modified by clicking on the name of the column and selecting another option from the list, additional columns can be added by clicking the icon on the top right of the column. There are several Metadata filter options that I feel are often overlooked and worth pointing out:
- Choose File Type as one of the column headers to find all of your PSD files (or TIFF etc.) .
- Choose Edit as a column header and select Edited to see which images have already been edited in the Develop module.
- Choose ISO as a column header to find images taken at a high ISO (perhaps helpful to batch apply noise reduction).
- Choose Copyright Status as a column header (to see if you have mistakenly neglected adding a copyright to a photograph).
- Choose Aspect Ratio to quickly see images taken in portrait/landscape to fit in a layout/book.
- Choose Treatment to quickly find all images set to Black & White.
- Shift-click on multiple parameters (such as dates or file types) as needed to refine the filter options.
Combining Filters — filters can be used in combination with one another. For example, you can filter on a keyword using Text, add the Rating is Greater than or Equal to two stars using the Attribute options, and choose specific dates from the Metadata options.
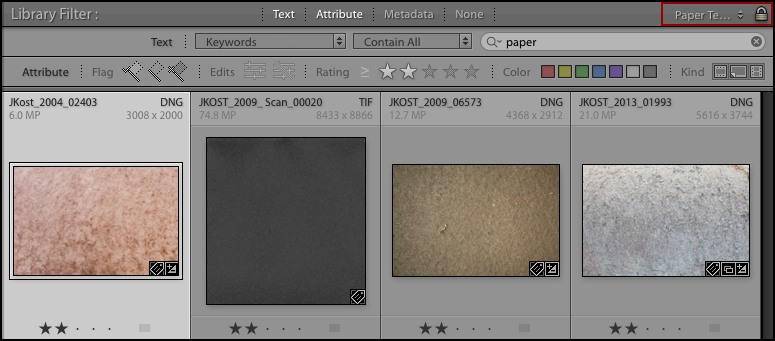
Create Filter Presets — if you find that you are constantly filtering your photographs using the same criteria, you can streamline the process by saving your custom filter as a preset. For example, when working on my composite images, I often look for photographs of rough paper to use as texture overlays. This requires that I click on the Text option, select Keywords and type in the desired keyword. Then, I refine the filter by clicking the Attribute option and selecting 2 or greater stars. Instead of doing this each time I need to filter for paper photos, I set up the criteria once, then click the double headed arrow to the left of the Filter Lock icon and select “Save Current Settings as New Preset”.
Locking Filters — by default, Lightroom Classic removes filters when moving from one source to another (folder/collection/publish services etc.). Click the lock icon (at the right of the filter bar), locks the currently selected filter attributes “on” when moving from one source to another. This works well if, for example, you’re filter is set to view 2 stars or greater and you want to view only the 2 star images in each folder/collection that you click on. If you want each filter to be sticky for the folder that you apply it to, go to File > Library Filters > Remember Each Source’s Filters Separately. Now you can filter a folder, move to another and choose not to filter it, but when you return to the first folder, the filter will still be applied.
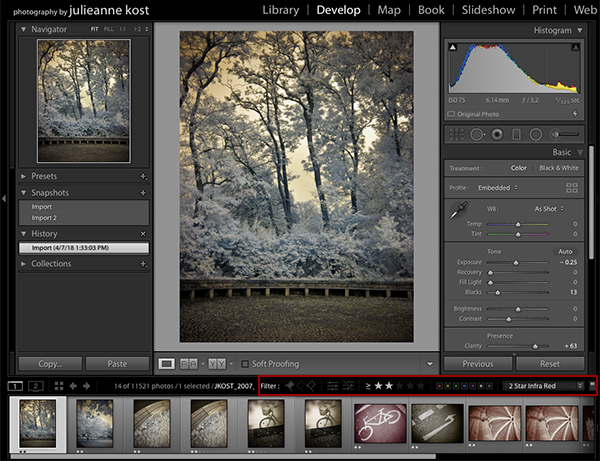
Filtering in Other Modules — to filter images based on Attributes and/or presets while in another module (the Develop module for example), use the filter options in the black bar above the filmstrip.
Select Based on Filter Attributes — while technically not a filter, a great tip for selecting images is to Command (Mac) | Control (Win) -clicking the Flags or Color Labels attributes in the filter bar. This will select images tagged with that filter (it actually selects them, it doesn’t filter them).
Finding Photos based on Process Version — Selecting Library > Find Previous Process Photos displays all images which have been changed (in the Develop Module or using Quick Develop) using a process version prior to the most current. Note: this command searches the entire catalog regardless of which folder or collection is selected.


