I recently had the opportunity to spend a few days in Death Valley and thought that I would share 10 quick tips that I was reminded of while I was making photographs.
1) Even though I agree that the best camera is the one that you have with you, the equipment you use does matter so choose your tools wisely! In the example below, we can see the difference that a simple polarizing filter makes (yes, there were a lot of little bugs in the water).
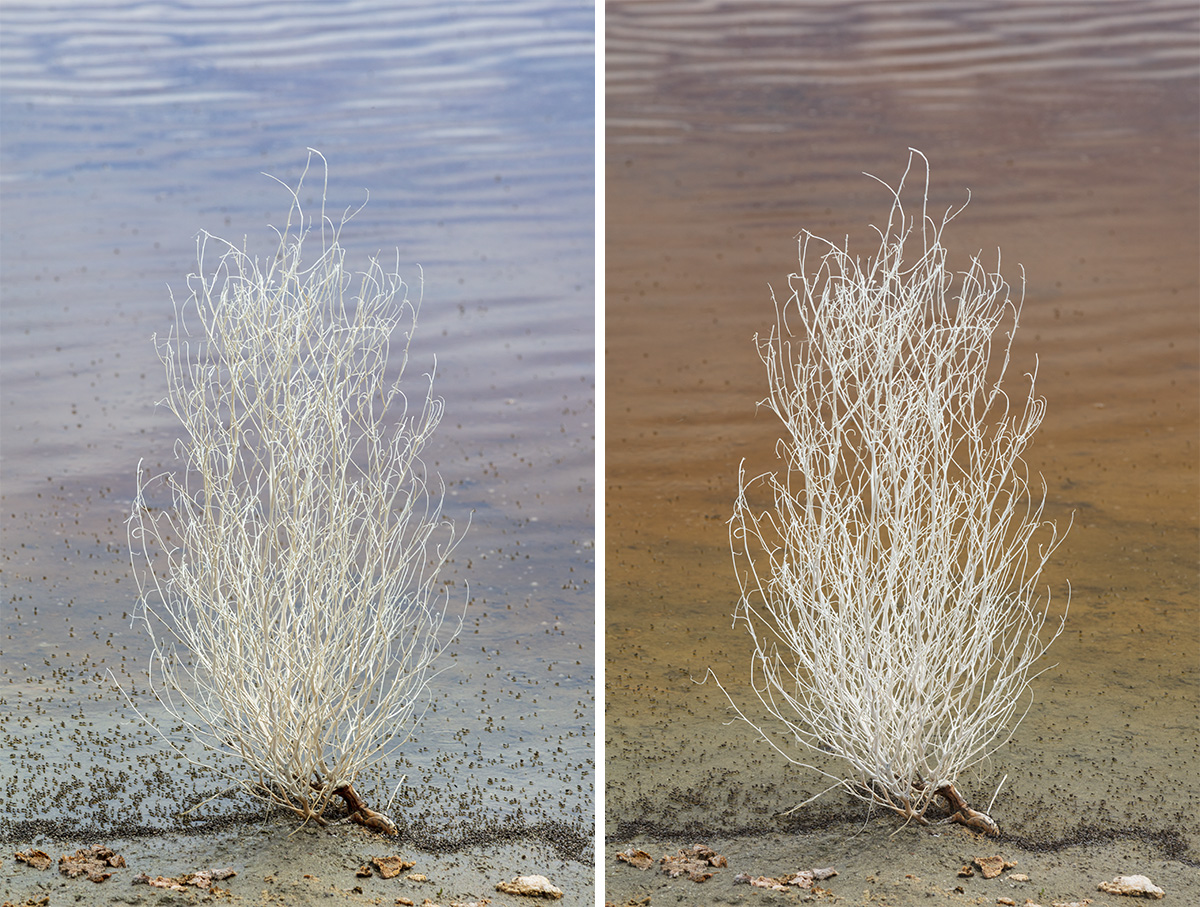
The same scene without (left) and with (right) a polarizing filter.
2) It’s important to remember that when you use the light meter in your camera to make an exposure, the camera is directed to take the values measured and set them in the middle of the histogram. In the example below, this means that the salt flats would have been recorded as middle gray. While the tonal values in the image can be increased in post processing, this will amplify the noise in the originally underexposed areas of the image as their values are increased. In this case, it’s better to manually override the camera during capture (by “overexposing” the scene) to place the brighter values where they should fall on the histogram – recording the true tonality of the scene at the time of capture. (Conversely, you would want to underexpose if the scene was dark).
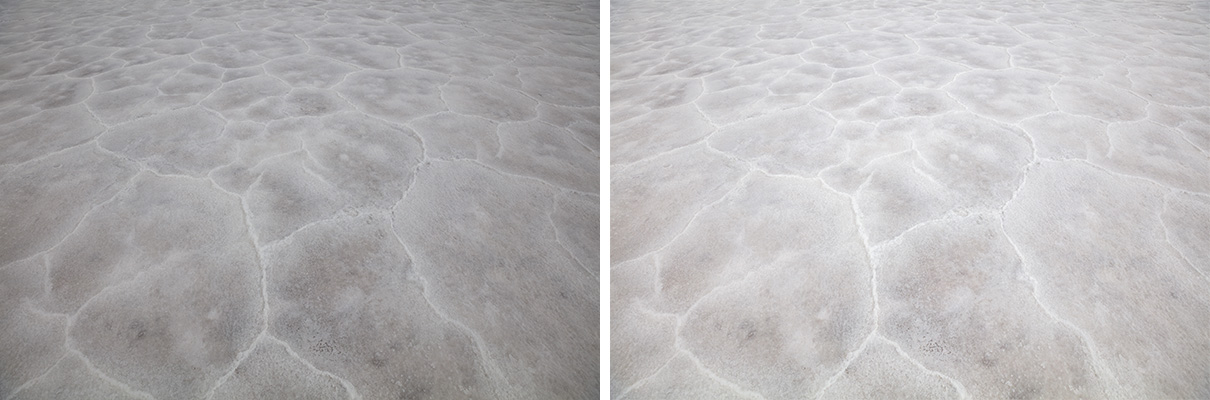
The same scene without (left) and with (right) exposure compensation.
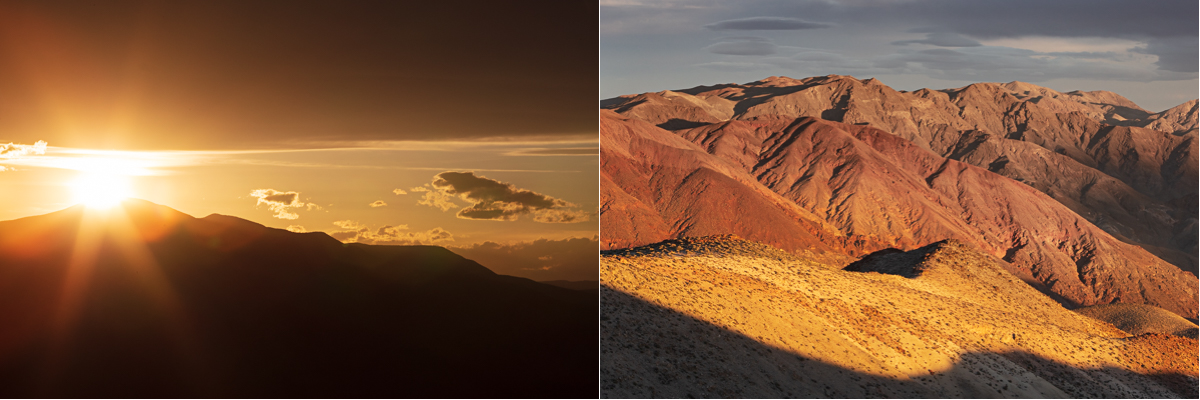
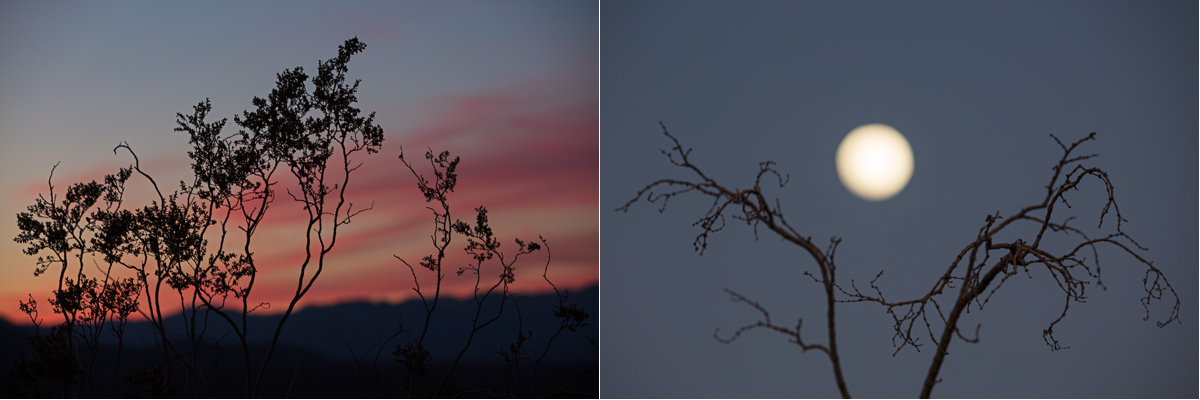
3) Be patient, and be sure to look behind you. As I was watching the sunset, I almost missed the gorgeous light on the mountains behind me. And on another night, I almost missed the moon rising behind me.
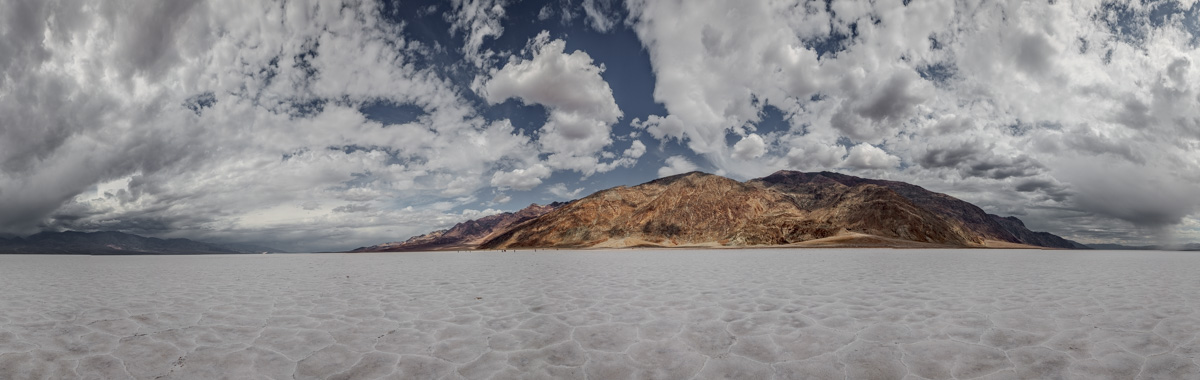
4) If your camera has the capability to save custom settings, I would recommend that you take advantage of them. On my camera, it is as easy as setting the camera options (such as ISO, shutter speed, etc.), and then assigning them to C1, C2, or C3 using the menus (your camera manual should have instructions to show you how). Once they’re set, I can use the mode dial on the top of the camera to quickly switch between my current and saved custom settings. In the example below, I used my custom C3 settings to take a series of bracketed exposures of the salt flats, then used Lightroom Classic to create an HDR panorama.
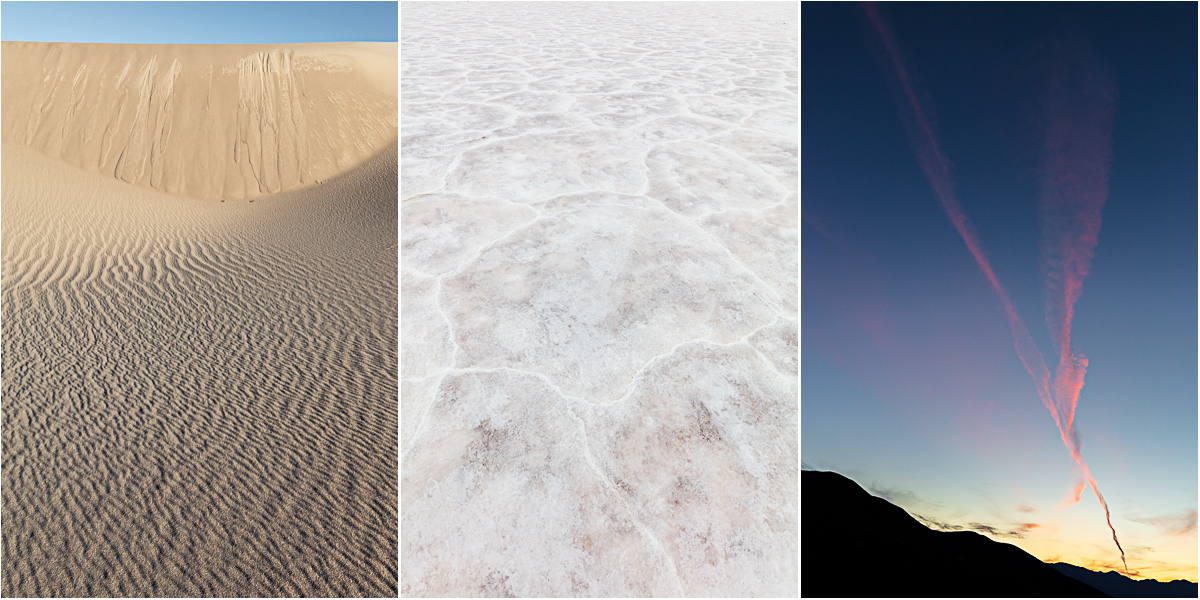
5) If you have the resources, aways take a second camera body. I know it can be cumbersome, but if you have a spare, not only will you have a backup if something happens to your primary camera, but you also can avoid changing lenses in suboptimal conditions (like when you find yourself on the top of a sand dune on a windy day).
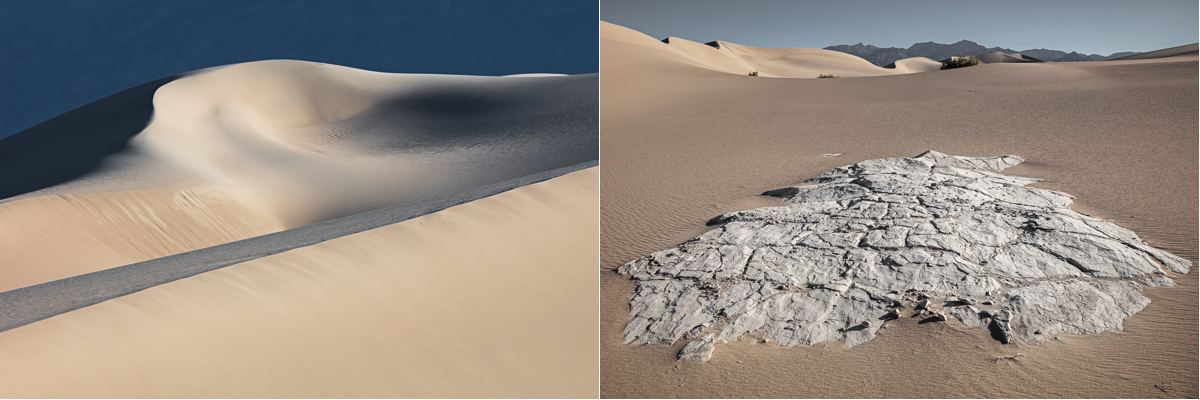
Having two camera bodies give me flexibility of shooting with my 200 mm lens (left) and 16mm (right) without having to change lenses while in the dunes.
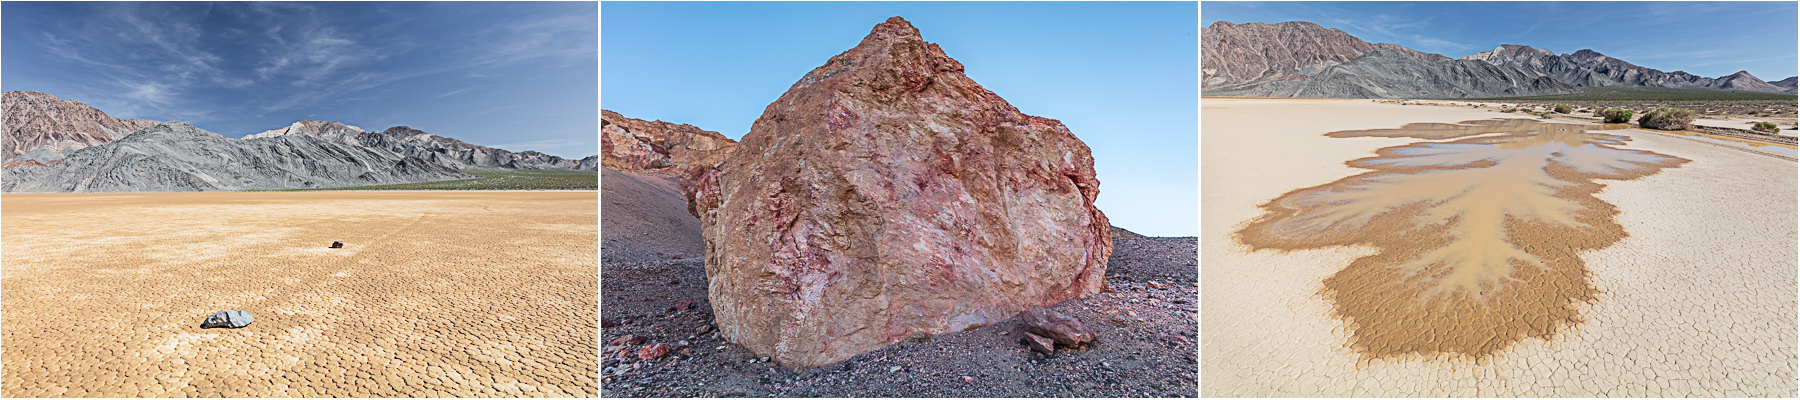
6) When you think you have “the image” that you want from a location, challenge yourself to find three more images before you leave. Investigate different perspectives or change the angle of view (move closer or farther away or change lenses). Or look for additional details and supporting photographs – basically, work the scene until you think you’ve exhausted it.
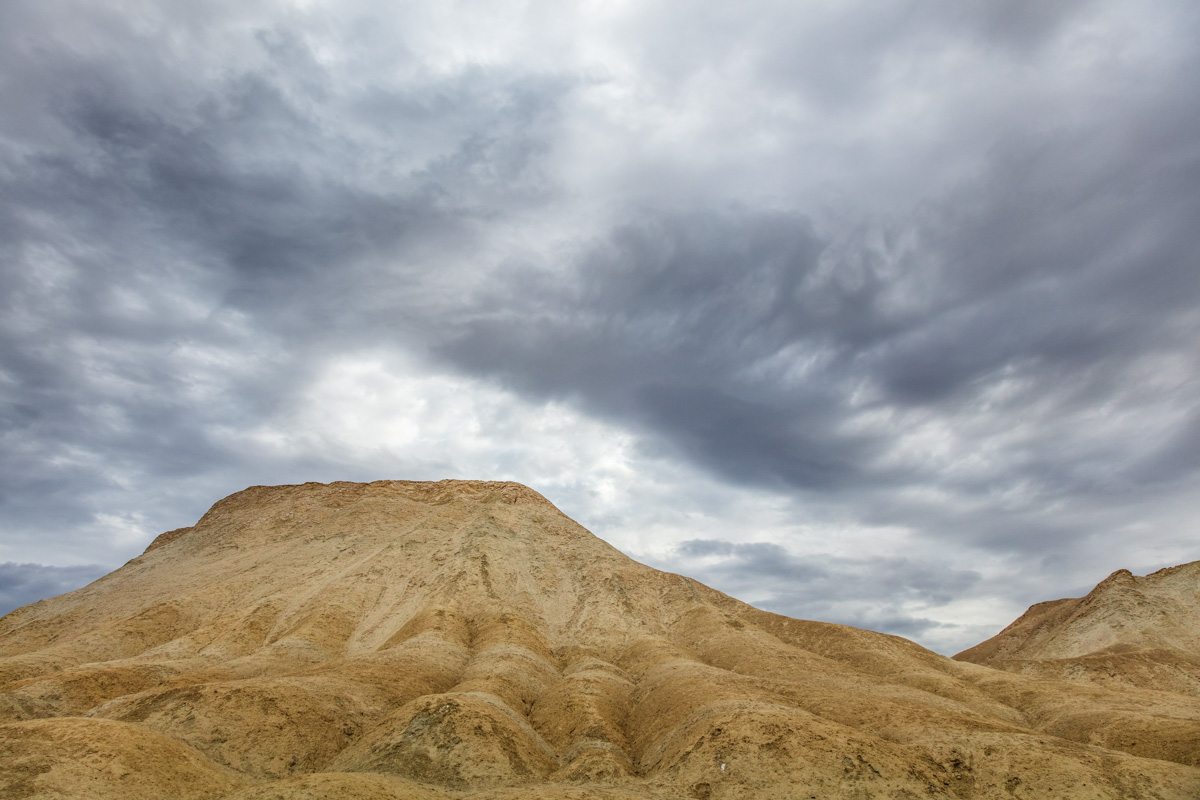
While I liked the clouds in this image, I decided to explore the area to see what else I could find.
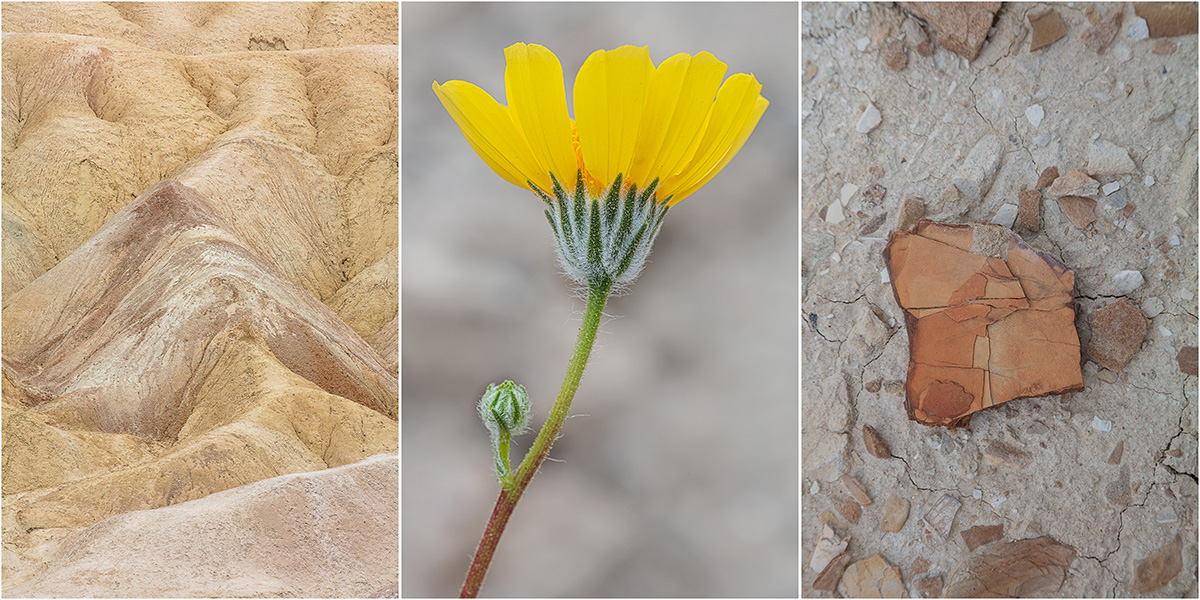
I appreciate how these detail shots support the image above.
7) Your choice of aperture can help isolate and focus the viewers attention on the primary subject while playing down less significant details in the background. (Or, it might be more appropriate to have everything in focus, it depends on your intention and the story that you’re telling.)

Both f-stop and lens length effect depth of field. These images were made using a 200mm lens: the f-stop for the image on the left was set to f/2.8, while the image on the right was set to f/9.
8) It’s always worth the effort to get up early. Sure, it can be frustrating when the sunrise you were hoping for is concealed by overcast skies. But even when I don’t get the photograph that I was hoping for, there’s always an opportunity to find another different, image that you didn’t foresee. And, maybe the sun will surprise you when you least expect it.
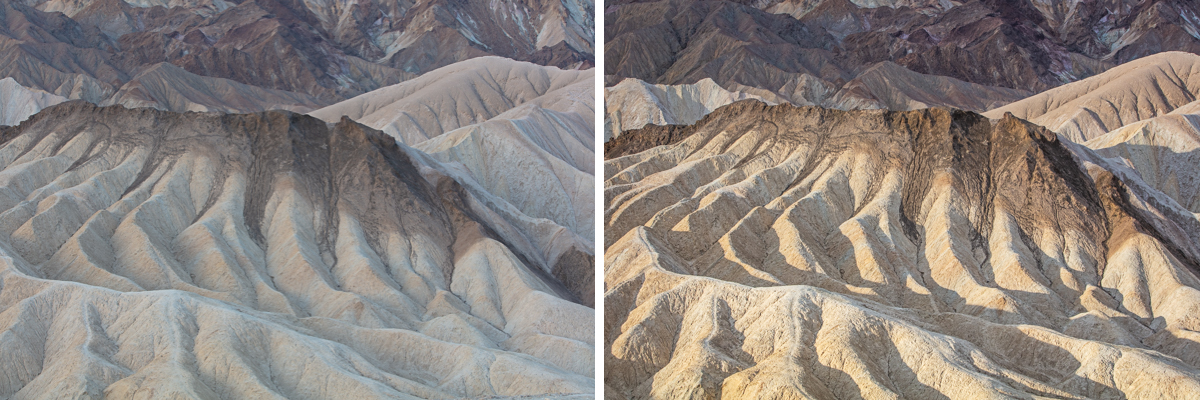
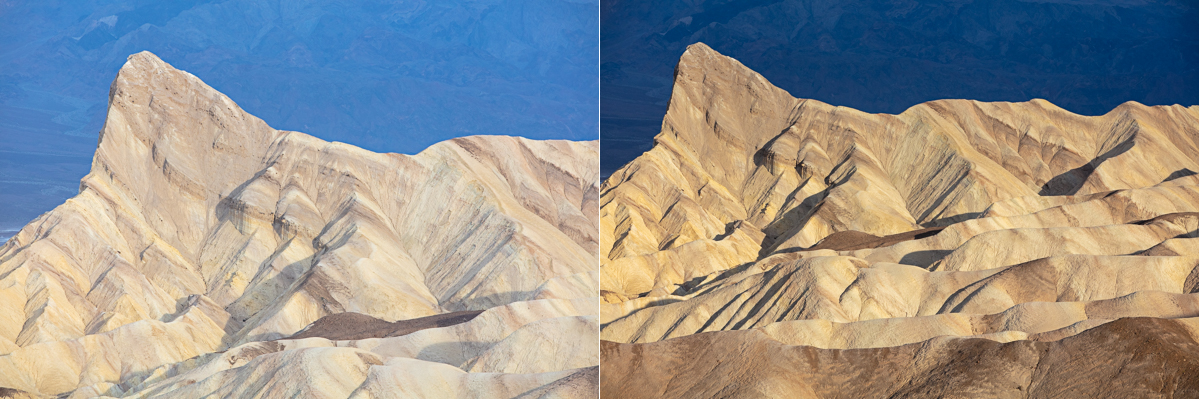
The overcast skies create flat lighting early in the morning (left images) but I prefer the added contrast and depth that was created when the sun peaked through the clouds (right).
9) I always try to encourage myself to learn something new. On this trip I gave myself the challenge of becoming better friends with my “least favorite” lens. It’s not because I don’t like the lens, I just have a more difficult time arranging elements when I use wide angle lens as a result tend to gravitate towards telephotos and macros. These little projects (or “self-assignments”) help me to stay creative, play, and encourage me to explore different technologies and equipment.
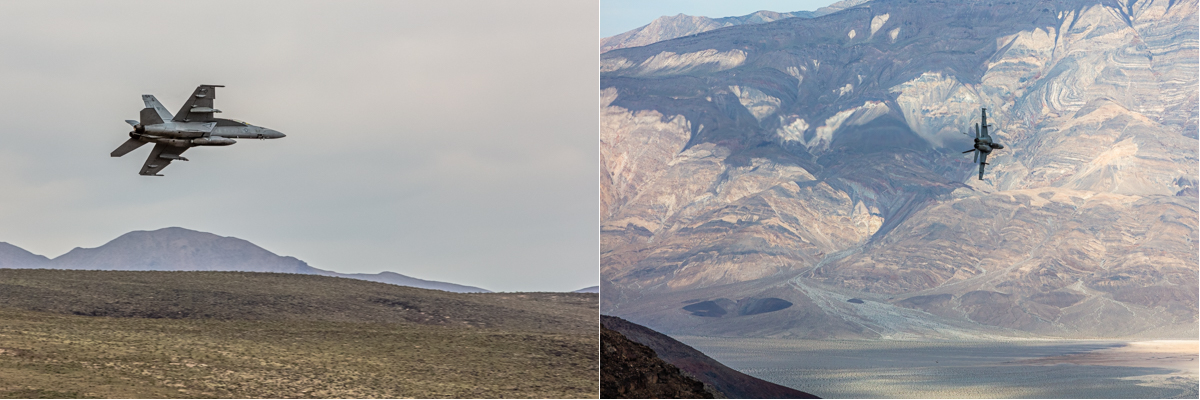
10) Finally, I want to stress how important it is to know where and when you can fly a drone – some areas have very real (though perhaps not immediately apparent) safety reasons for no-fly zones – and that includes most (all?) national parks in the USA. When I first arrived in Death Valley, I saw a man and his son getting ready to put their drone in the air. I politely mentioned that it was my understanding that it was illegal to fly a drone in the park (unless he had permission) and that doing so might carry a heavy penalty. Less than 5 minutes layer, I captured the images below. I didn’t hear the plane until it was practically along side of me, and I don’t think that it could have been more than 500 feet in the air when it came down the canyon. Safety first! : )
I’m glad you mention the custom setting that cameras have. I have mine set for bird photos. U1 for perched and u2 for in flight. It is overlooked but so handy to helping get the shot.
Thank you for your inspiring images and excellent instruction.
The images are great and very pleasing to the eye. I am curious to know what cameras you used? All images are nicely captured but I notice a lack of details in a few images.