Most photographers use a combination of Folders and Collections to organize their images in Lightroom Classic. A Folder will typically hold all of the images from a specific shoot, client, or date for example, whereas a Collection is used to combine groups of images together “virtually”. For example, I might have twenty Folders, each one containing landscapes from different location shoots. I would create a Collection and add my favorite image(s) from each shoot to the Collection in order to create a custom sort order, sync with Lightroom mobile, show to a client, post on my portfolio etc. without moving the original images from their Folders and/or duplicating the images on the hard drive.
You can create as many Collections as you need, add as many photographs to each Collection as you want (even adding the same photograph to multiple Collections), and add Collection Sets to help organize the Collections. And, if you make changes to an image, the changes are automatically updated across Collections.
In this video you’ll learn how to organize your photos using Quick Collection, Collection Sets, and Collections in Lightroom Classic.
In the video below, you’ll discover how to use search criteria and Smart Collections to quickly find your photos in Lightroom Classic.
Quick Collection — Quick Collection (in the Catalog panel), was designed to create a temporary collection of images.
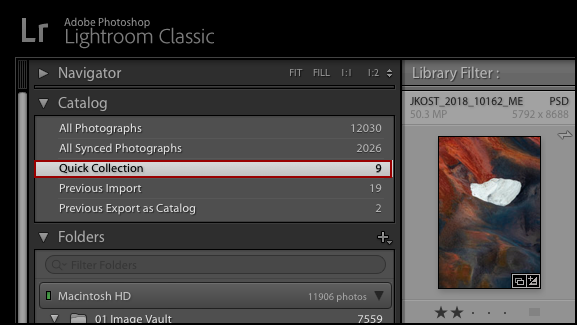
- Tapping the “B” key adds the selected image(s) to a Quick Collection. Tap “B” again to remove the image(s).
- Command + B (Mac) | Control + B (Win) will display the contents of a Quick Collection. Tapping it again returns you to your previous location (folder, collection etc.).
- Command + Shift + B (Mac) | Control + Shift + B (Win) will delete the contents (clear) of a Quick Collection.
- Command + Option + B (Mac) | Control + Alt + B (Win) will convert (or save) a Quick Collection to a regular Collection.
Collection Sets — In order to organize your collections, use the plus (+) icon on the Collections panel header and select Create Collection Set, name it, and then drag and drop your Collections and Smart Collections into the Set.
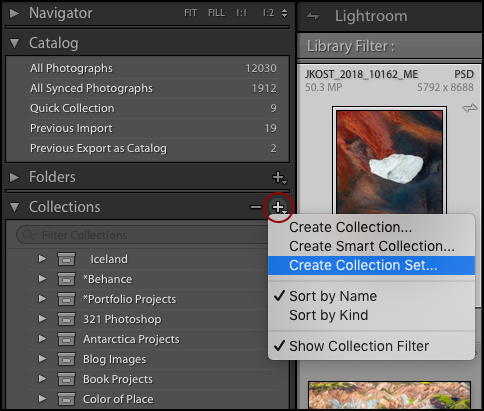
- Click the plus (+) icon on the Collection Panel header to choose to sort Collections by Name or by Kind.
- Clicking on a Collection Set will display ALL of the images within ALL of the Set’s collections.
Creating Collections — To create a new Collection:
- Click the plus (+) icon on the Collections panel and select Create Collection.
- Use the shortcut: Command + N (Mac) | Control + N (Win).
- Control -click (Mac) | right -click (Win) on the Collection Set (in the Collections panel), that you want the new collection to be contained within, and choose Create Collection (Lightroom Classic will automatically choose the correct Collection Set in the Location area of the Create Collection dialog).
Removing Images from Collections — When in Grid view (in a Collection) tapping the Delete/Backspace key will remove the selected photo(s) from the Collection but not from the folder/catalog.
- Cmd + Shift + Option + Return (Mac) | Ctrl + Shift + Alt + Backspace (Win) removes an image from a Collection and moves the image(s) to the Trash (Mac) | Recycle Bin (Win).
- When in Loupe view (in a Collection) tapping the Delete/Backspace key will remove the active photo from the Collection but not from the folder/catalog.
- When in Loupe view (in a Collection) Shift + Delete (Mac) | Shift +Backspace (Win) will remove all selected photos from the Collection but not from the folder/catalog.
Create Collections and Collection Sets from Folders — To create a collection from a folder, drag the folder from the folder panel to the Collections panel. Or, Control -click (Mac) | right -click on the folder and choose Create Collection “folder name”.
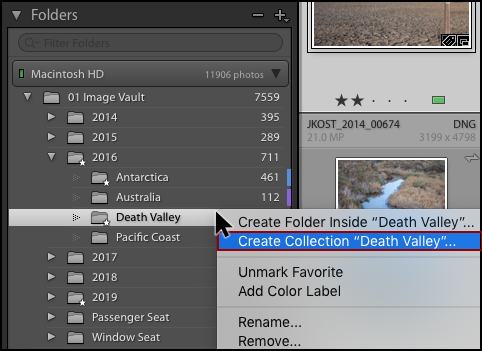
- To convert a folder with subfolders to a Collection Set with collections that maintain the same hierarchy as the folders, Control -click (Mac) or Right -click on the parent folder (the one that has subfolders) and choose Create Collection Set “folder name”.
- To create a single collection of all of the photos from a parent folder (including images within subfolders), Control -click (Mac) or Right -click on the parent folder and choose Create Collection “folder name”.
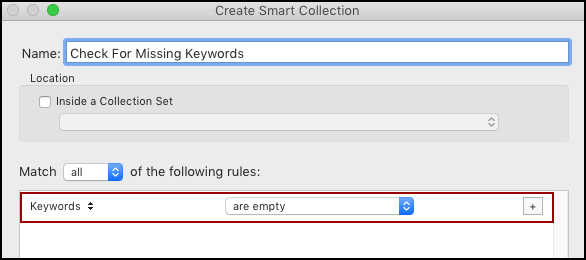
Smart Collections — The difference between a Smart Collection and a regular Collection is that a Smart Collection is based on search criteria specifed in the Smart Collection dialog. Once a Smart Collection is created, Lightroom Classic dynamically adds and/or removes images form the Smart Collection as changes are made to images (adding/removing images that match/don’t match the criteria).
- To create a new Smart Collection, click the plus icon on the Collections panel and select Create Smart Collection or, Control -click (Mac) | right -click (Win) on the Collection Set that you want the new collection to be contained within, and choose Create Smart Collection (Lightroom Classic will automatically choose the correct Collection Set in the Location area of the Create Smart Collection dialog).
- One way to use Smart Collections is to double check if “tasks” in a workflow have been completed. For example, creating a Smart Collection which displays all images that are missing keywords will let you quickly see if you’re neglected to apply that important information to your photographs. There are plenty of additional Smart Collection search parameters that you can choose from as well, including (but not limited to) date range, folder, treatment, aspect ratio, has adjustments, has Depth Map etc., so be sure to take a minute and check out all of the possibilities!
- To further refine the search criteria for a Smart Collection, hold Option (Mac) | Alt (Win) while in the New Smart Collection dialog. The plus (+) icon will change to a hash/pound sign. Click the hash/pound sign to add to add additional rule options (Any/All/None of the following are true).

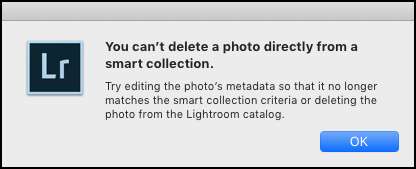
- Tapping the Delete/Backspace key when in a Smart Collection will display a dialog instructing you to change the photo’s metadata of the image so that it no longer matches that of the Smart Collection’s “rules” (for example you might need to remove a star rating or add a keyword).
- Control -click (Mac) | right -click (Win) a Smart Collection to Import/Export Smart Collection settings.
Duplicating Collections — In the Collection panel, Option -drag (Mac) | Alt -drag (Win) a collection to duplicate it. More specifically, if the collection is loose (not in a Collection Set), Option -drag (Mac) | Alt -drag (Win) until a thicker line appear between two items (indicating that the collection will be duplicated), and release.
- To duplicate a collection within a Collection Set or to duplicate the collection into a different Collection Set, Option -drag (Mac) | Alt -drag (Win) the collection on top of the Collection Set icon (watch for the highlight) and release.
Adding Images to a “Target” Collection — While you can drag and drop images to a collections, I find it more efficient to Control -click (Mac) | right -click (Win) on a collection and “Set as Target Collection”. Then, tapping the “B” key will add selected images(s) into the targeted collection (instead of the default Quick Collection). Enable Caps Lock to auto advance to the next image while adding to the Target Collection.
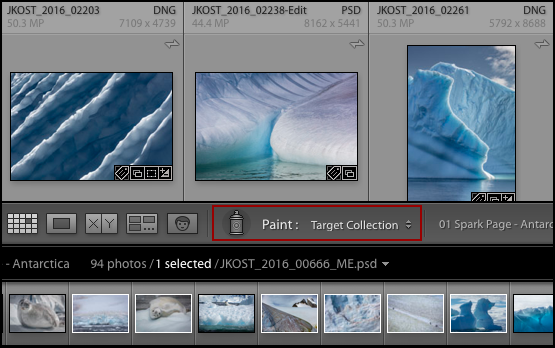
- Or, use the Painter tool to add images to a Collection. Control -click (Mac) | right -click (Win) on a Collection and choose “Set as Target Collection”. Then, select the Painter tool and choose “Target Collection” from the list of Paint options. Clicking on an image in the grid will add the image to the Target Collection (click –drag across multiple images to add them to the Target Collection).
- After a collection has been created, or to change the Target Collection, Control -click (Mac) / Right -click (Win) a collection and enable/disable “Set as Target Collection”.
Custom Sort Orders — Once your images are in a Collection, you can drag and drop them to reorder in Grid view (as well as in the Filmstrip). Custom Sort orders are not available for Smart Collections.
Filtering / Searching the Collections Panel — To quickly find a Collections (especially those that might be burred deep within your hierarchy of Collections and Collections Sets), click in the Filter/Search bar at the top of the Collections panel and start typing the name of the Collection.
Color Coding Collections — You can assign Color Labels to Collections, Smart Collections, and Collection Sets by Control -clicking (Mac) | right -clicking (Win) the collection and selecting “Add Color Label” from the context sensitive menu. Then, use the “filter by” drop down menu in the Collections panel to filter based on the labeled collections. To remove a color label, Control -click (Mac) | right -click (Win) and select “None” from the “Add Color Label” option.
Auto Add Images to a Collection — You can choose to automatically add images to a Collection when:
- Shooting tethered (File > Tethered Capture > Start Tethered Capture)
- Importing images (File > Import > File Handling)
- Importing images via a watched folder (File > Auto Import > Auto Import Settings)
Custom Color Labels Names — Select Metadata > Color Label Sets to change the name of color labels. You can assign different names to color labels for Images, Folders, and Collections.
Color Labels for Collections and Published Collections — You can assign Color Labels to Collections, Smart Collections, Collection Sets and Published Collections by Control -clicking (Mac) | right -clicking (Win) the collection and selecting “Add Color Label” from the context sensitive menu. Then, use the “filter by” drop down menu in the Collections panel to filter based on the labeled collections (same as the Labeled Folders in the Folders Panel). To remove a color label, Control -click (Mac) | right -click (Win) and select “None” from the “Add Color Label” option.
Custom Color Labels Sets — Previously changing the name of color labels was a global operation, now you can assign different names to color labels for Images, Folders, and Collections by selecting Metadata > Color Label Sets.
Collections Panel — The Collections panel is available across Lightroom Classic’s modules (Develop, Print, Book, etc.), enabling you to quickly change from one Collection of image to another without having to first return to the Library.
Export a Collection as a Catalog — Control -click (Mac) | right – click (Win) a Collection Set and choose Export this Collection as a Catalog. This video (How to Remove Unwanted Collections when Exporting Catalogs in Lightroom Classic) demonstrates how to quickly clean up an exported catalog of any extraneous collections.
- Control -click (Mac) | right – click (Win) a Smart Collection to import and export Smart Collection settings.
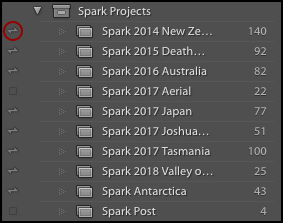
Syncing Collections Across Mobile Devices — Use Collections in Lightroom Classic to access, edit, and share images via a mobile device. First, enable sync for Lightroom Classic by clicking the cloud icon (in the upper right of the screen in the module picker) and click Start to begin syncing.
- Then, click in the empty well to the left of the collections to enable syncing for a collection (Lightroom Classic creates Smart Previews of the image and upload them to the cloud). Click the icon again to stop syncing the collection.
- When deleting photos from a synced collection, Lightroom displays the following warning dialog:
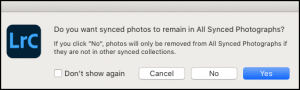
- If you want to remove the photo(s) from the collection, yet still have them accessible via the All Synced Photographs view on your mobile devices, choose “Yes”. If you want Lightroom to remove the photo(s) from the collection as well as from All Synced Photograph, click “No”. Note: To set Lightroom’s default behavior (and skip this dialog), check the “Don’t show again” checkbox, and select your option. From then on, Lightroom will do whatever you elected to do this time. For example, if you click “No” with the “don’t show again” checkbox checked, then it will do “No” in the future, without asking you. You can reset this warning in Lightroom’s Preferences > General > Prompts: Reset all warning dialog.
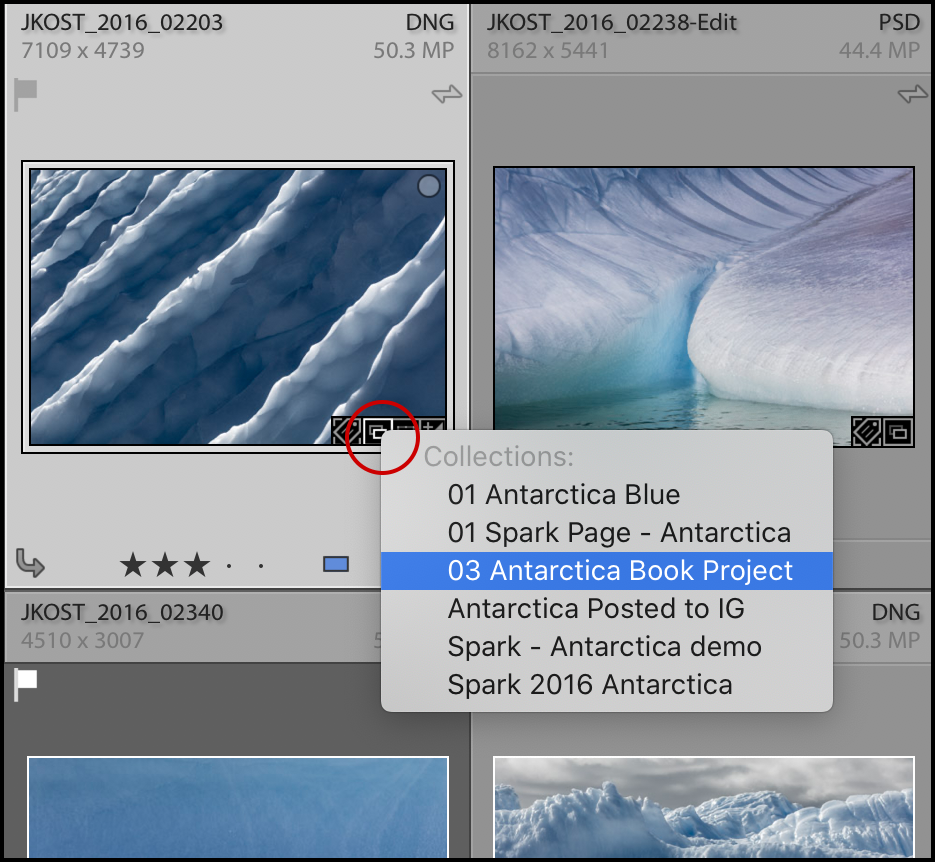
Collection Badges — In Grid View, click on the Collection badge in the image thumbnail to quickly select the collection.
And if you prefer videos, here are a few of my favorites that cover Collections in Lightroom Classic.
- In this Quick Tip (Rapidly Reordering Photos in Collections), you’ll find out how to quickly reorder photos by selecting multiple images rather than the time-consuming technique of dragging (and dragging, and dragging!) photos into position.
- In this Quick Tip – How to Quickly add Photographs to a Collection in Lightroomm Classic, you’ll learn how to quickly add photos to a Target Collection using a single keystroke.
- In this Quick Tip, you’ll see how to View Your Best Photos from the Past Six Months in Lightroom Classic.