In the video below, you’ll discover how creating Virtual Copies can help you work with several different “looks” and aspect ratios for the same image in Lightroom Classic without duplicating the file on the hard drive.
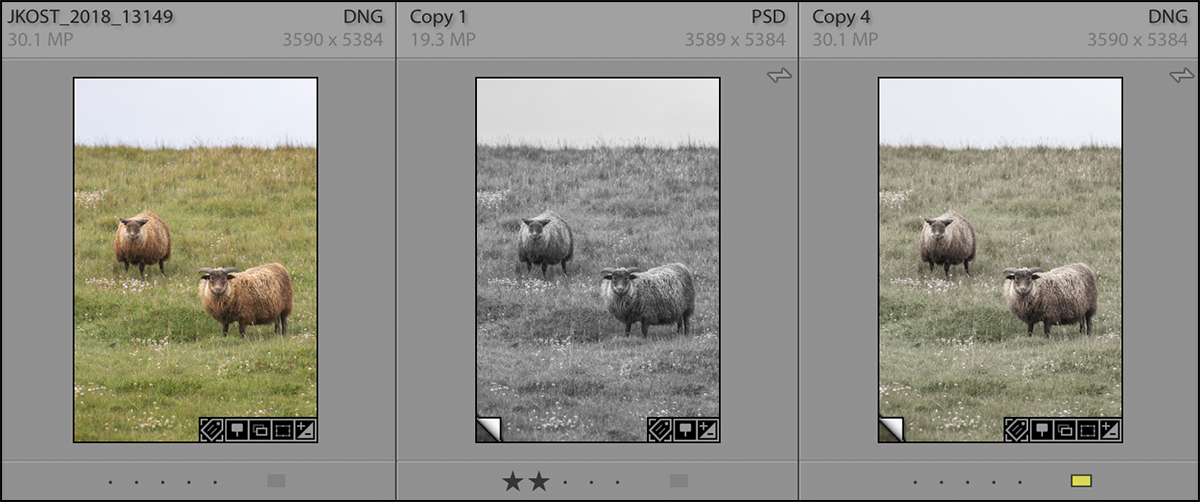
Virtual Copies are a great way to create multiple “versions” of a photograph without having to duplicate the original (Master) file on the hard drive, thereby saving storage space and limiting the number of original files that need to be managed. To create a Virtual Copy, select Photo > Create Virtual Copy. Lightroom displays the Virtual Copy as an additional thumbnail of the photograph (with a small page curl icon in the lower left) which can be then be edited, exported, printed etc., independently from the Master photo. Note: you can create as many Virtual Copies of a photo (or video) as desired and choose to Stack the Virtual Copies or not.
Below are several of my favorite tips and shortcuts for working with Virtual Copies in Lightroom Classic.
1. Command + “ (Mac) / Control + “ (Win) creates a Virtual Copy (Library, Develop and Map modules).
2. By default, Virtual Copies are stacked with the Master file.
- Command + Shift + G (Mac) | Control + Shift + G (Win) will unstack images.
- Tap “S” to show/hide the images in the stack.
- Shift + { or } moves an image up or down in the stack.
- Shift + S moves an image to the top of the stack.
3. To Delete a Virtual Copy:
- When in the Catalog/Folder panel, tap Delete (Mac) | Backspace (Win) to delete (remove) a Virtual Copy (but not the original).
- When in a Collection, tap Delete (Mac) | Backspace (Win) to remove the Virtual Copy from the Collection.
- When in a Collection, Option Shift+ Return (Mac) | Alt + Shift + Backspace (Win) to remove the Virtual Copy from the collection as well as delete it from the Library.
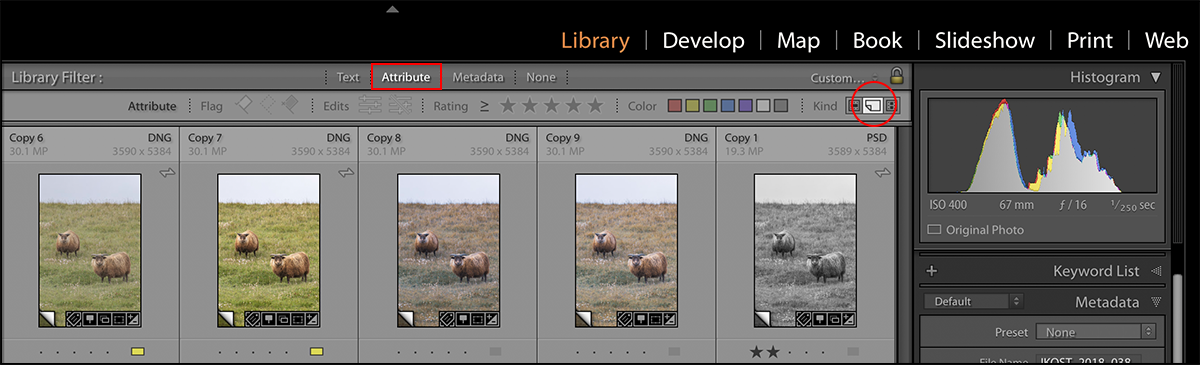
4. Click “Attribute” in the Library Filter bar and then click the Virtual Copy icon to quickly view all Virtual Copies in the currently targeted Folder or Collection.
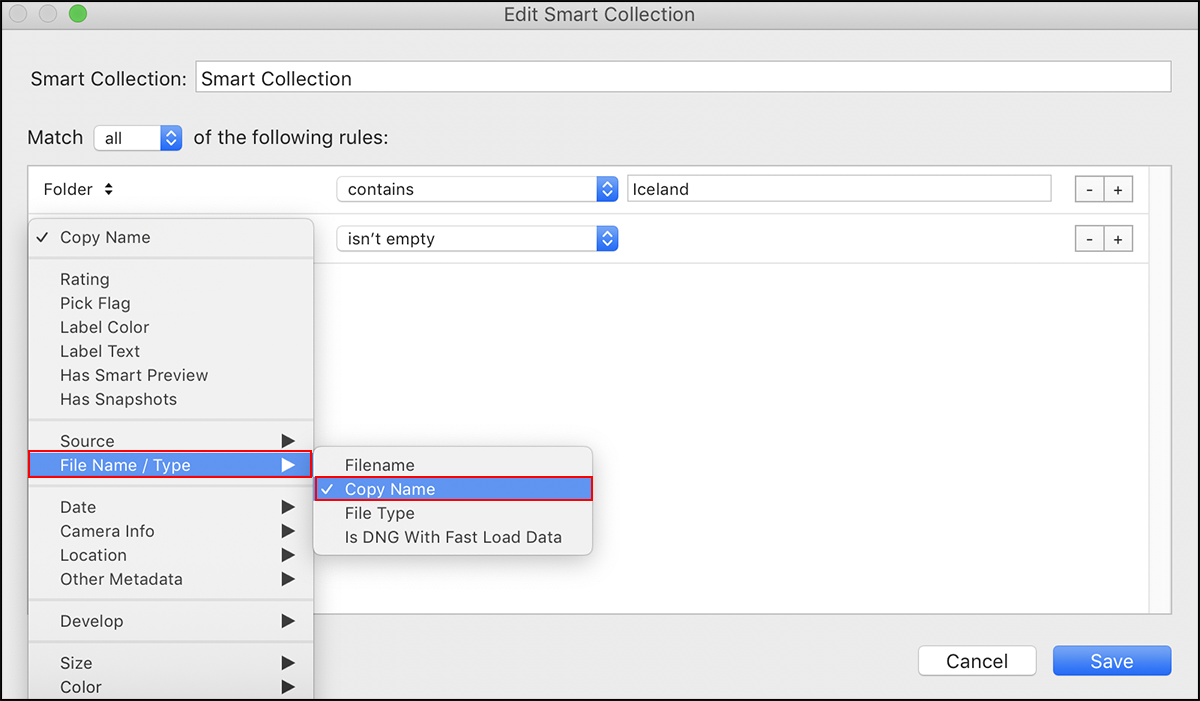
5. To create a Smart Collection that will find all Virtual copies, choose Library > New Smart Collection. Then, select File Name/Type > Copy Name and set the pull down menu to “isn’t empty”.
6. To change a Virtual Copy into the Master file, choose Photo > Set Copy as Master (this can be helpful when you prefer the settings applied to the Virtual copy and want to make it the Master and then delete the Virtual Copy).
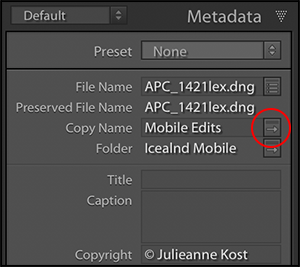
7. By default, Lightroom automatically gives each Virtual Copy a sequential copy name: (“Copy 1”, “Copy 2”, “Copy 3”, etc.). To create a custom name for each Virtual Copy, in the Metadata panel (in the Library module) type the preferred name in the “Copy Name” field.
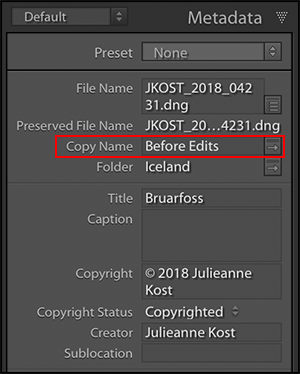
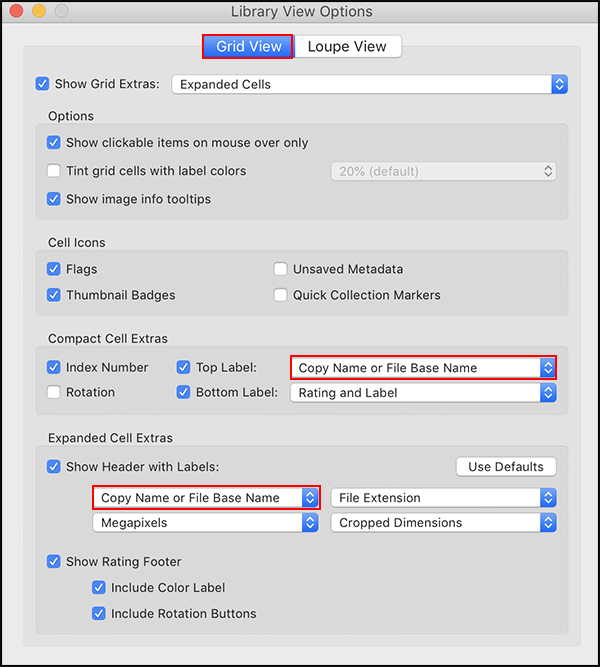
To view the custom file name in the Grid or Loupe views, choose View >View Options and set the Compact or Expanded Cell Extras to “Copy Name or File Base Name”.
8. When you save a snapshot in the Develop module in Lightroom Classic, that snapshot is automatically made available in every Virtual Copy of the image.
9. Virtual copies are always located in the same Folder as the Master file. However, depending on your sort order, the Virtual Copy and Master file might not be displayed next to one another. Therefore, if you’re in a collection, and want to go directly to the Master file, click on the arrow icon to the right of the Copy Name in the Metadata panel.
10. When scanning large volumes of photographs (or objects), instead of scanning each one individually, it might be more efficient to place as many photographs as will fit o n the scanner and scan them all at once. Then, import the scan into Lightroom, create Virtual Copies for each individual image, and crop each Virtual copy to a different photographs.
11. To “cut out” a portion of a video, create Virtual Copies and set new In and Out points as needed to edit the video.
12. By default, any changes made to an original (Master) file are stored in the catalog and can also be saved within the original DNG file (or in a sidecar file when working with proprietary raw files) by selecting Metadata > Save Metadata or, by enabling “Automatically Write Changes to XMP” in the Catalog Settings > Metadata area. In contrast, changes made to Virtual Copies are only stored in the Catalog because saving them to the Master file would override the Master image’s settings.