I’m excited to announce Lightroom (v3.0) with Fill Edges for Panorama Merge, in-app learning and inspirational content, Connectors, Search Suggestions, enhancements to Custom Sort Order, advanced Export and more powerful GPU processing.
Fill Edges for Panorama Merge with Content Aware Fill – When using Photo Merge > Panorama, you an use the new Fill Edges option to use Adobe’s Content-Aware Fill technology to fill the uneven edges of panoramas. The “fill” is applied to the resulting raw image so that you can still make use of all of the non-destructive raw edits after merging the image!
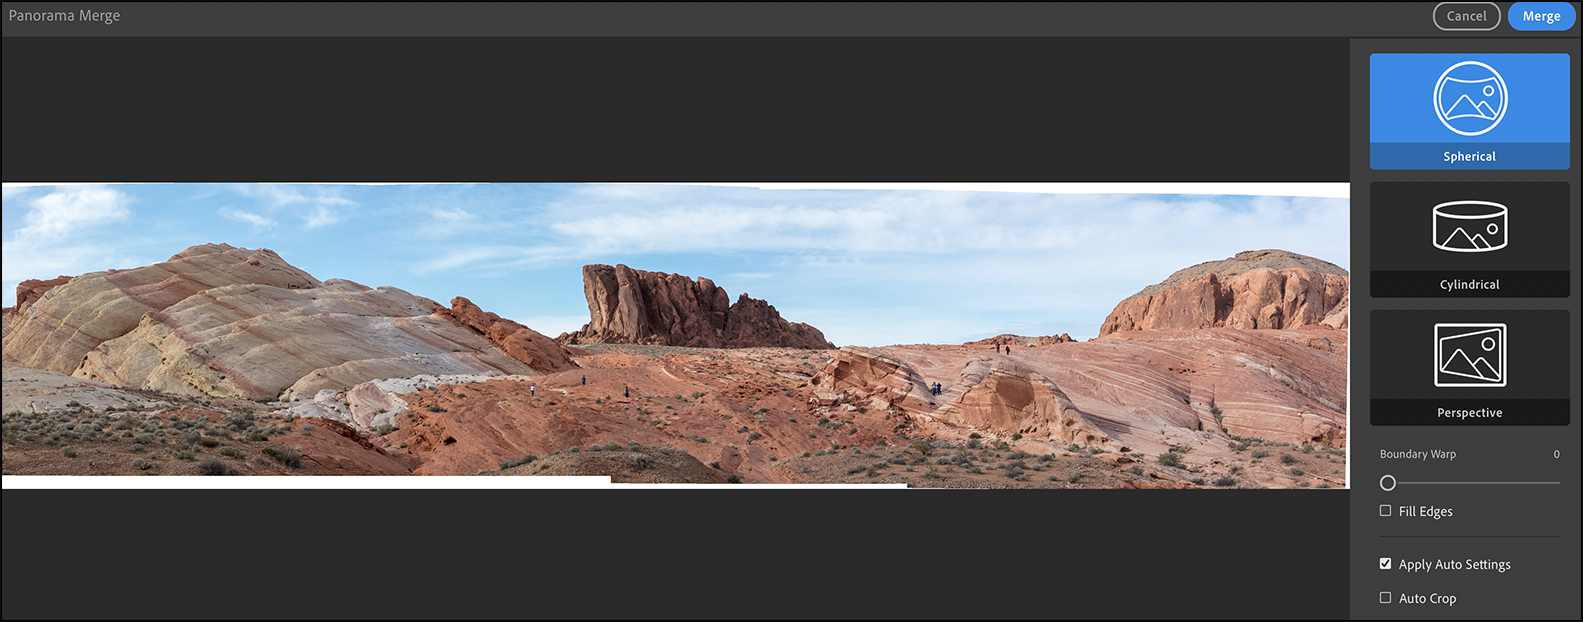
The original Photo Merge Panorama.
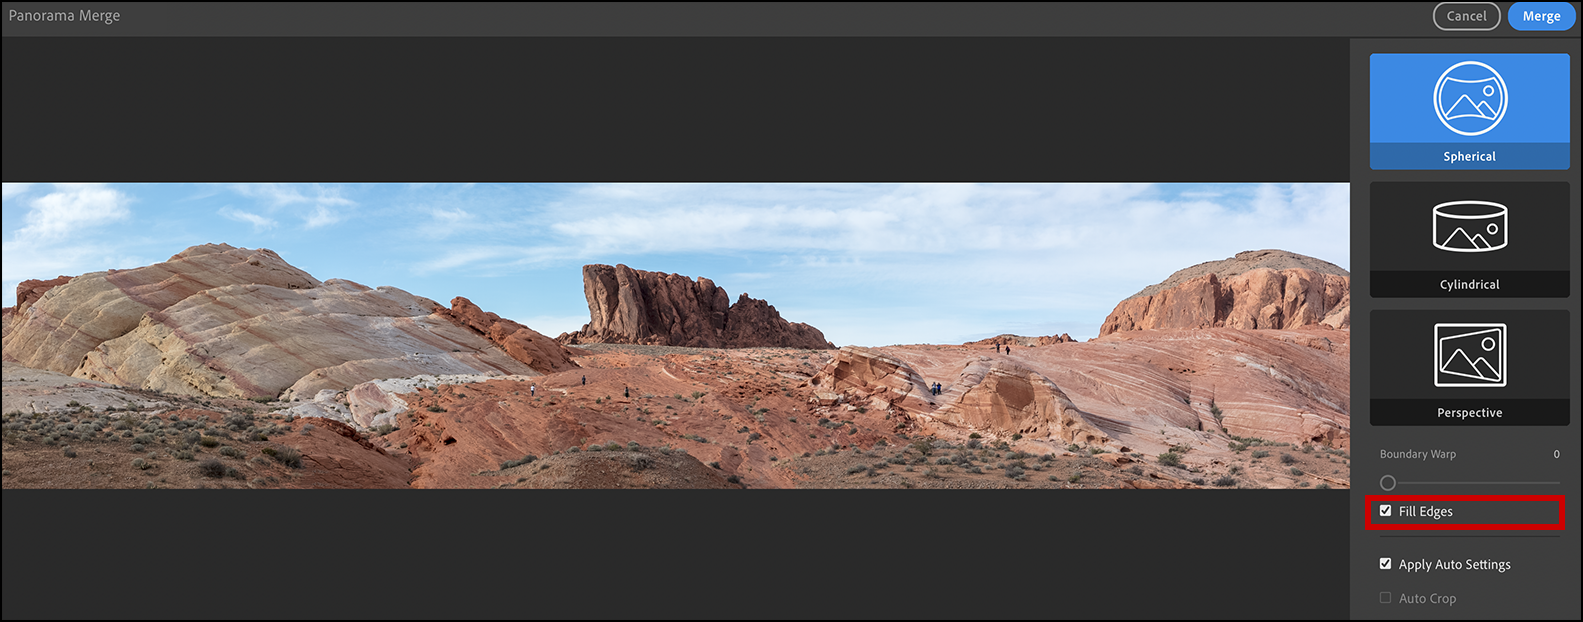
The same panorama with Fill Edges enabled.
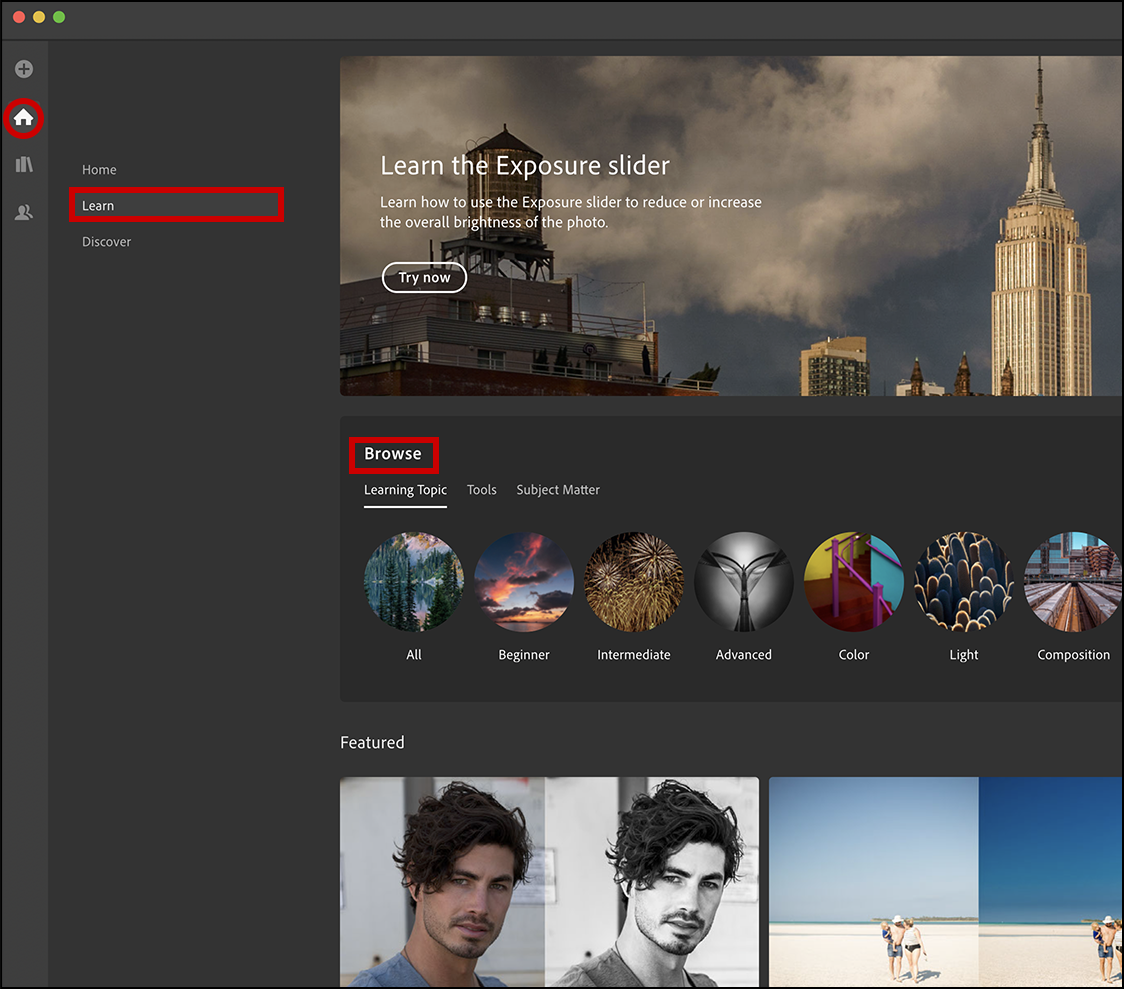
In-app learning – Quickly improve your editing skills using the new guided tutorials and interactive edits. Click the Home icon to choose between interactive tutorials (Learn) and inspirational (Discover) content – both of which are being updated regularly with new content from a variety of diverse authors. To quickly find interesting and relevant content to your style of photography, in the Browse area, choose to filter tutorials by Learning Topics, Tools, and/or Subject Matter.
Selecting an interactive tutorial downloads the photograph, allowing you to walk through the the tutorials step-by-step, adjusting each slider with guidance and instruction provided along the way.

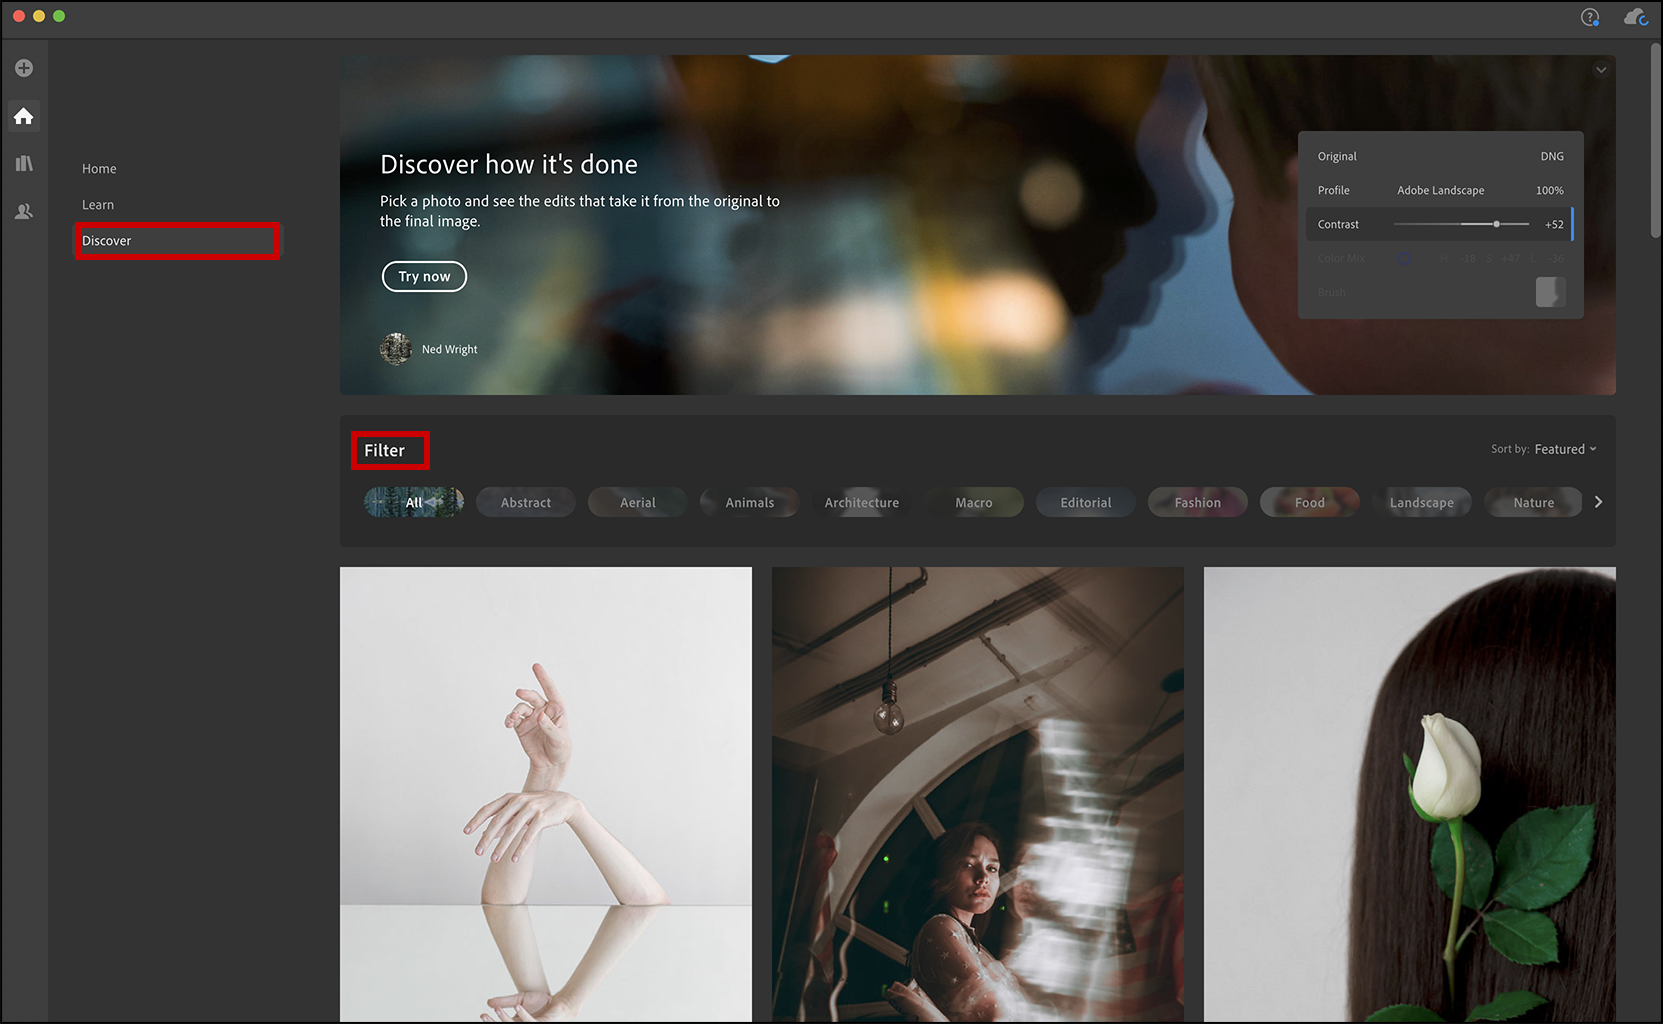
If you prefer to simply view the edits made by inspirational photographers (instead of following along with a step-by-step tutorial), click Discover and use the Filter to quickly find content relevant to your style of photography.
Selecting an image animates the edits applied to the photo. To get a more in-depth view and control the speed at which you view the edits being applied, click Edits (at the bottom of the interface) and click-through the edits using the list on the right.

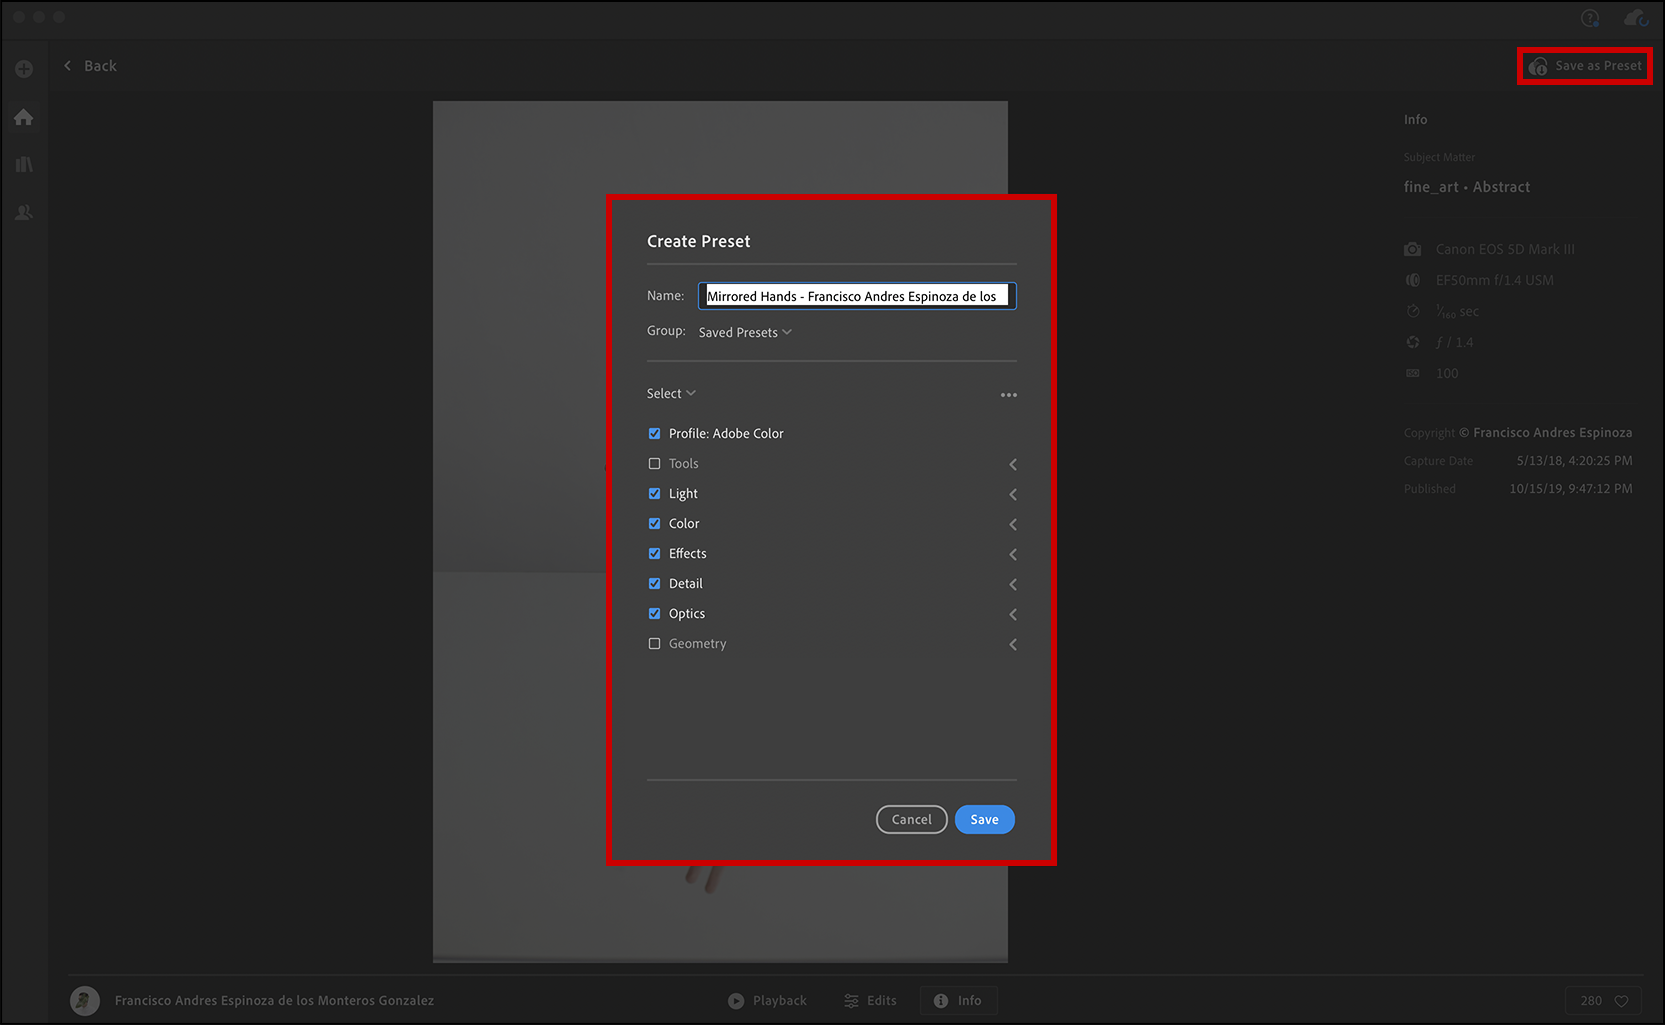
To turn the edits from a Discover post into a preset that you can apply to your photos, click Save as Preset (in the upper right corner), give the preset a name, choose a group, and select which edits to include in the preset. Click Save to save and download the edits as a preset.
The saved preset will appear at the bottom of the edit stack as a new preset which you can then apply to additional images.
Note: You can also access in-app learning while organizing and editing your images by clicking the (?) icon in the upper right. Then, use the Search Bar, get information about tools, and watch tutorials – directly from within the app.
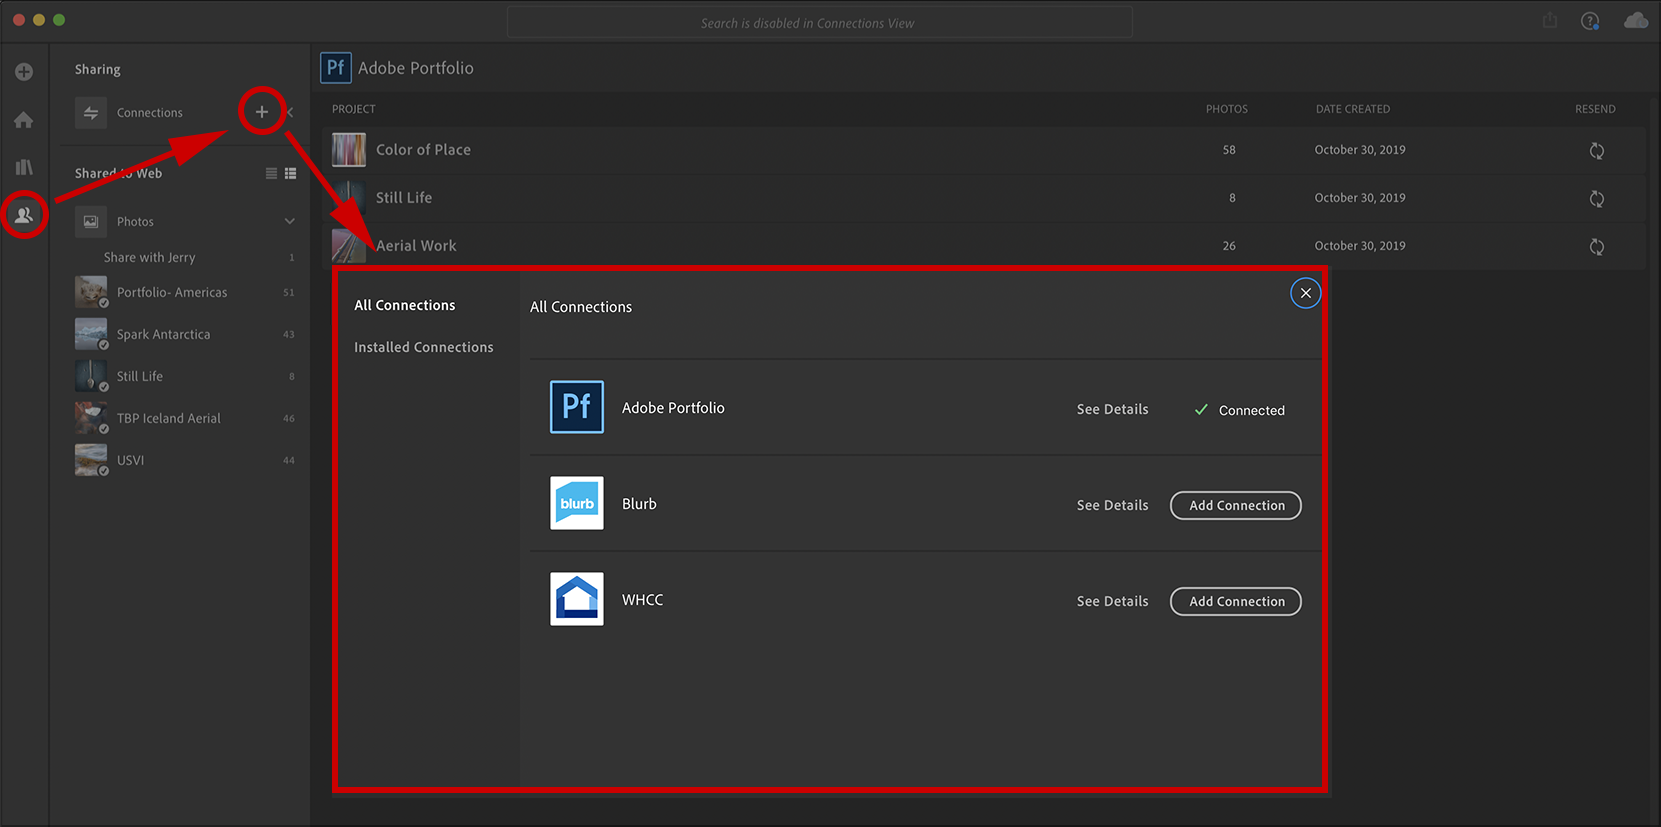
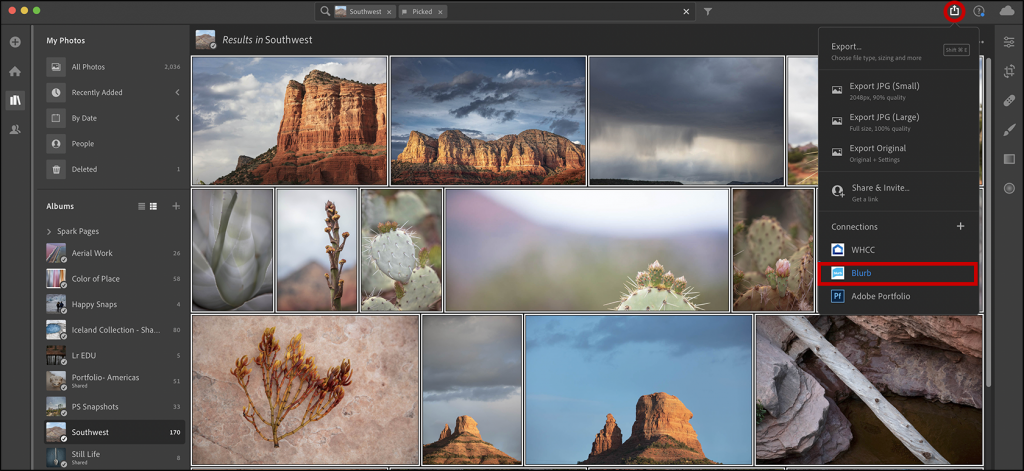
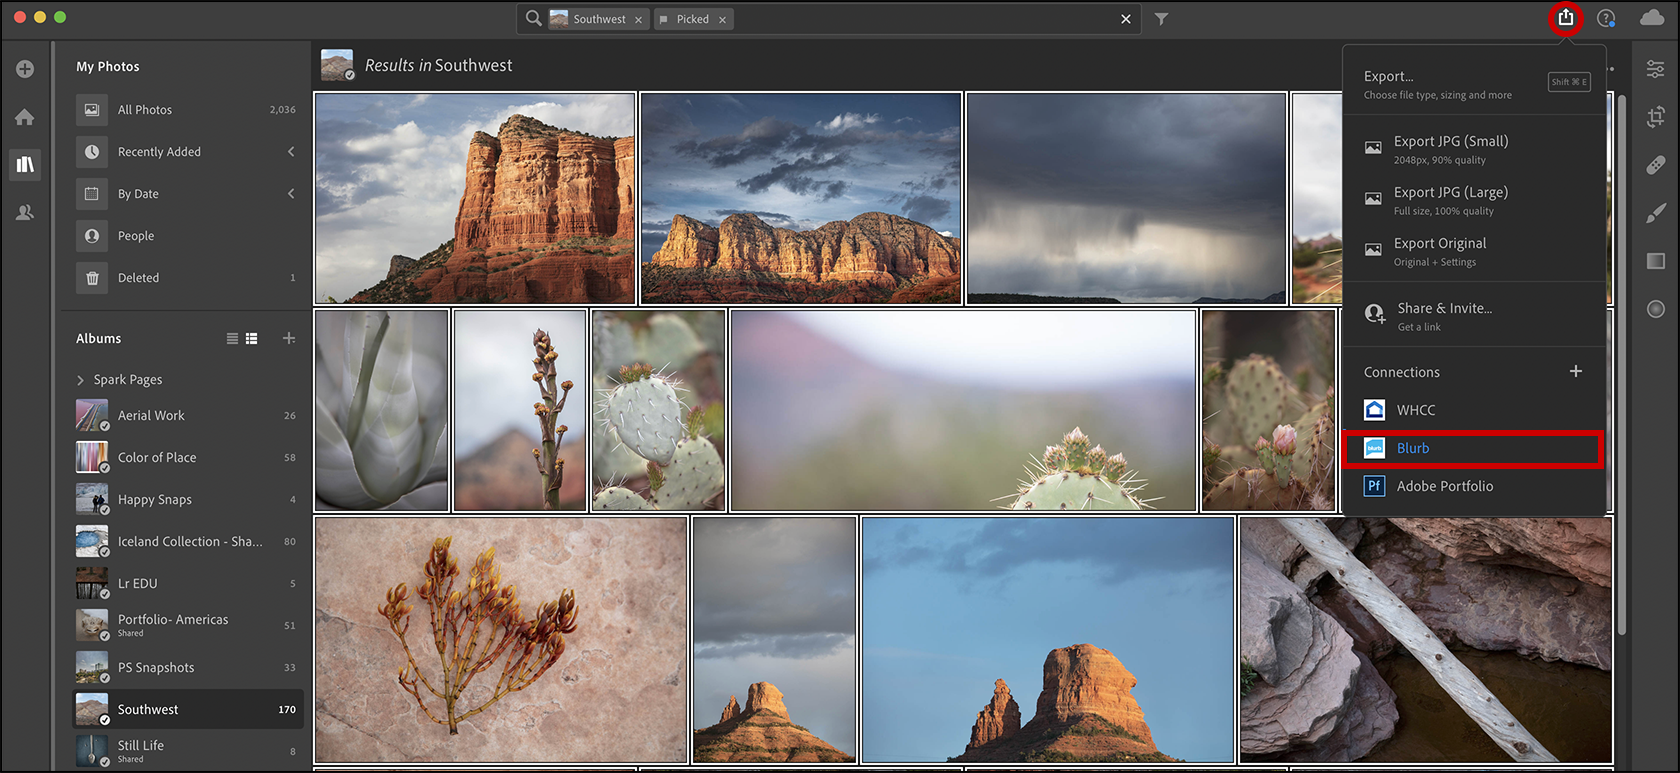
Connectors – you can now create and share photos using “Connectors” to print professionals including Blurb (to create books) and WHCC (for professional printing). Once you add a connection to the third party, you will be able to access your photos within their apps, select options, and checkout. This is a first step towards sending your photos directly from the Lightroom servers to the third party servers, with the potential to increase efficiency and work with more flexibility in the process. To add a connection, click the Sharing icon, then the plus (+) icon and choose Add Connection.
Note: You can also access in-app learning while organizing and editing your images by clicking the (?) icon in the upper right. Then, use the Search Bar, get information about tools, and watch tutorials – directly from within the app.
Connectors – you can now create and share photos using “Connectors” to print professionals including Blurb (to create books) and WHCC (for professional printing). Once you add a connection to the third party, you will be able to access your photos within their apps, select options, and checkout. This is a first step towards sending your photos directly from the Lightroom servers to the third party servers, with the potential to increase efficiency and work with more flexibility in the process. To add a connection, click the Sharing icon, then the plus (+) icon and choose Add Connection.
After connecting, the services appear in the sharing area on the left of the interface.

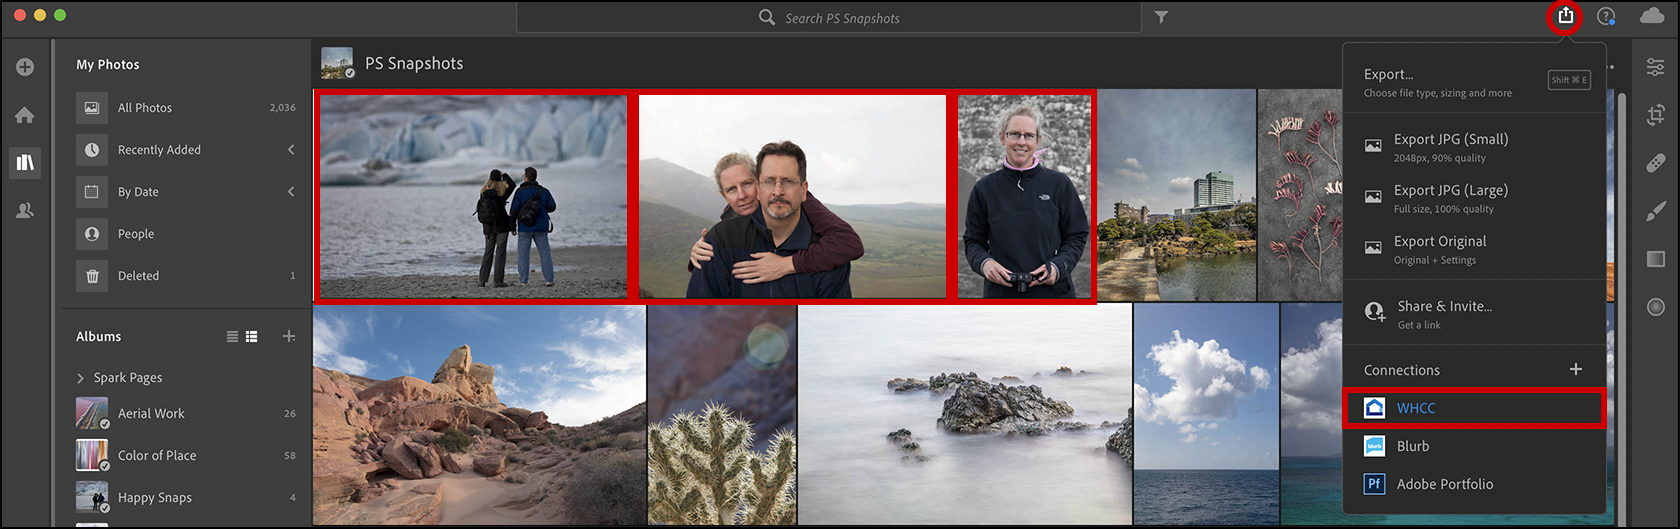
Let’s take a moment to see how these two new connectors work. I’ll use WHCC for the first example. First, select the images that you want to include in the connected album.

Then, click the Share icon and choose the connection.
Add to a New Project and give it a name (or choose an already created project to add the images to that project), and click continue.

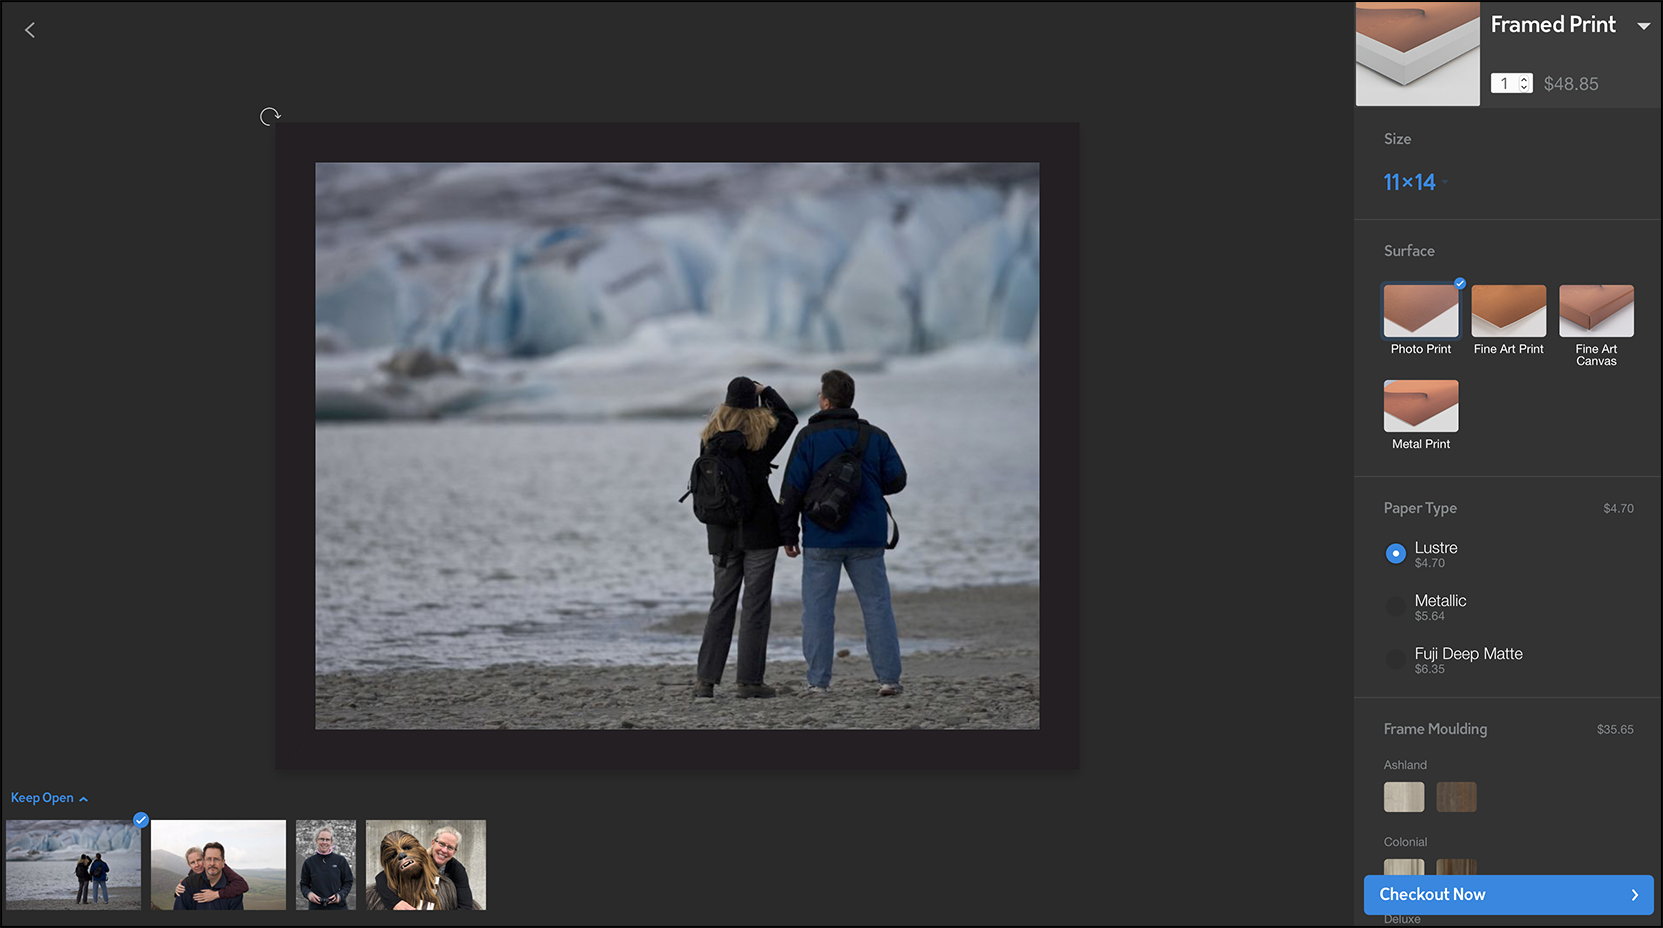
Lightroom will display a confirmation message when the photos are finished uploading. Click View Connection to view your images on lightroom.whcc.com where WHCC displays available print options.
Lightroom will display a confirmation message when the photos are finished uploading. Click View Connection to view your images on lightroom.whcc.com where WHCC displays available print options.
In WHCC’s software, select your desired wall display, then drag and drop your images into the preview area, reposition as needed, select additional options, and, when ready, click Checkout Now to place your order through WHCC.
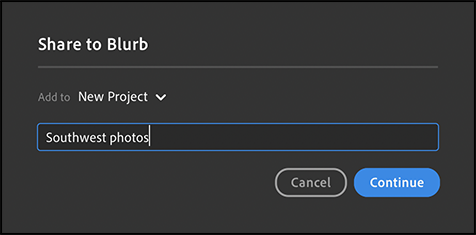
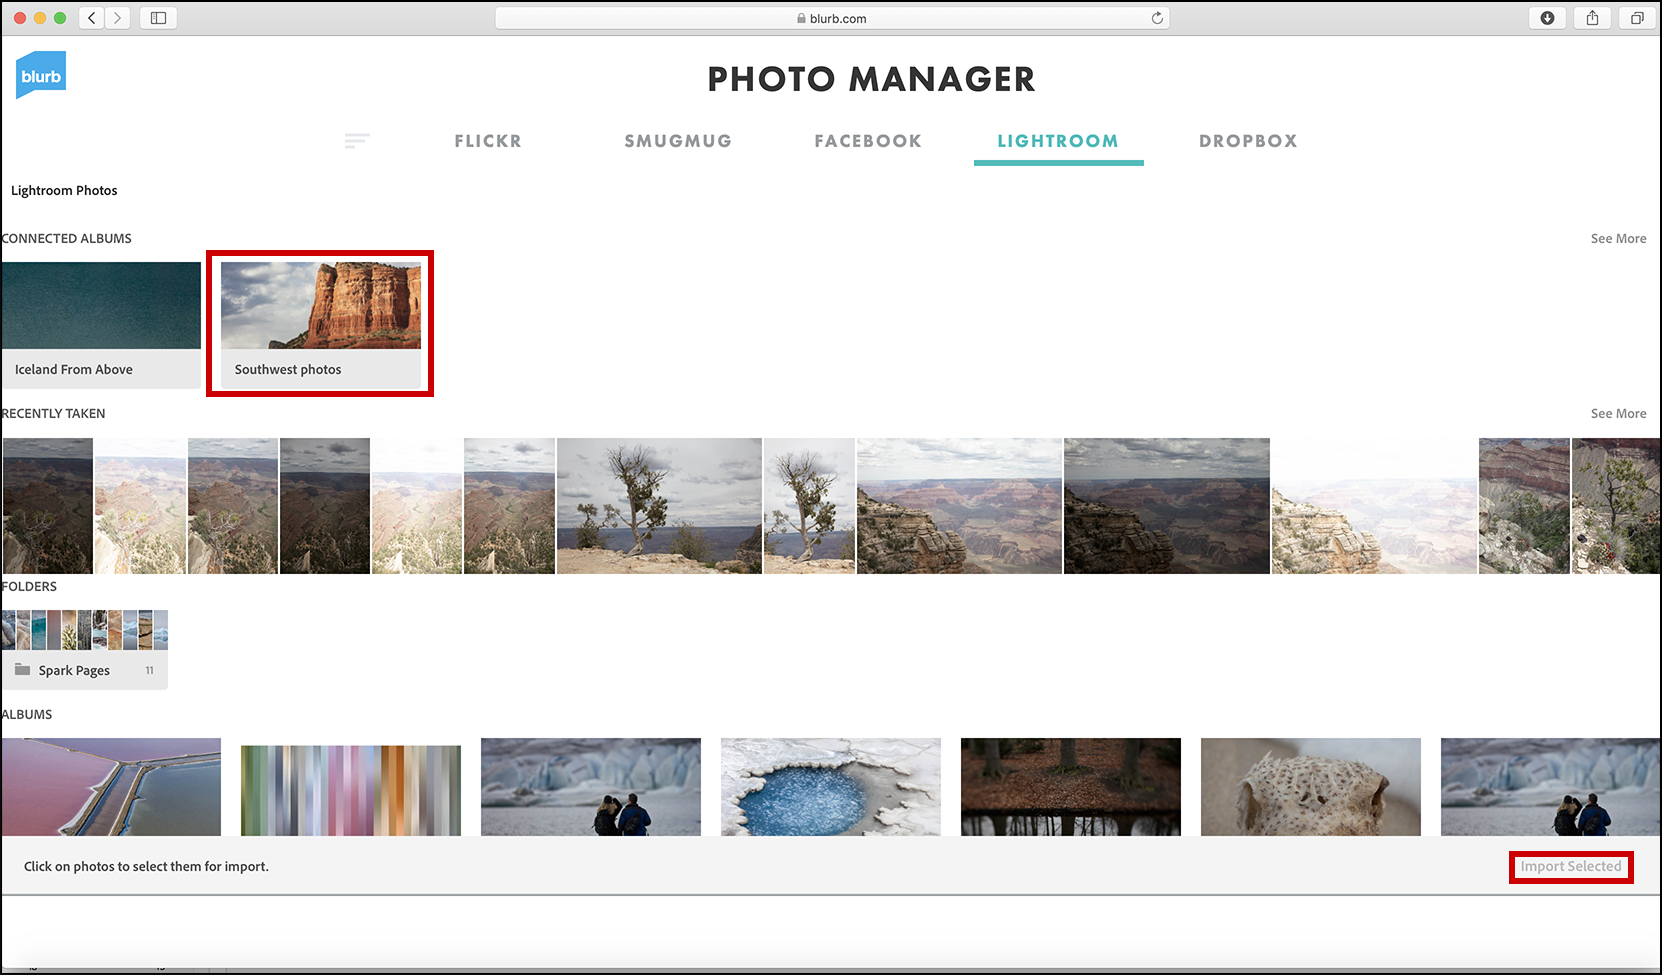
To use the Blurb connector, you’ll need to download, install and use Blurb’s BookWrite software. First, select the photos to be included in the book, click the share icon, and choose the Blurb connection.
Add to a New Project and give it a name (or choose an already created project to add the photos to that project), and click continue.
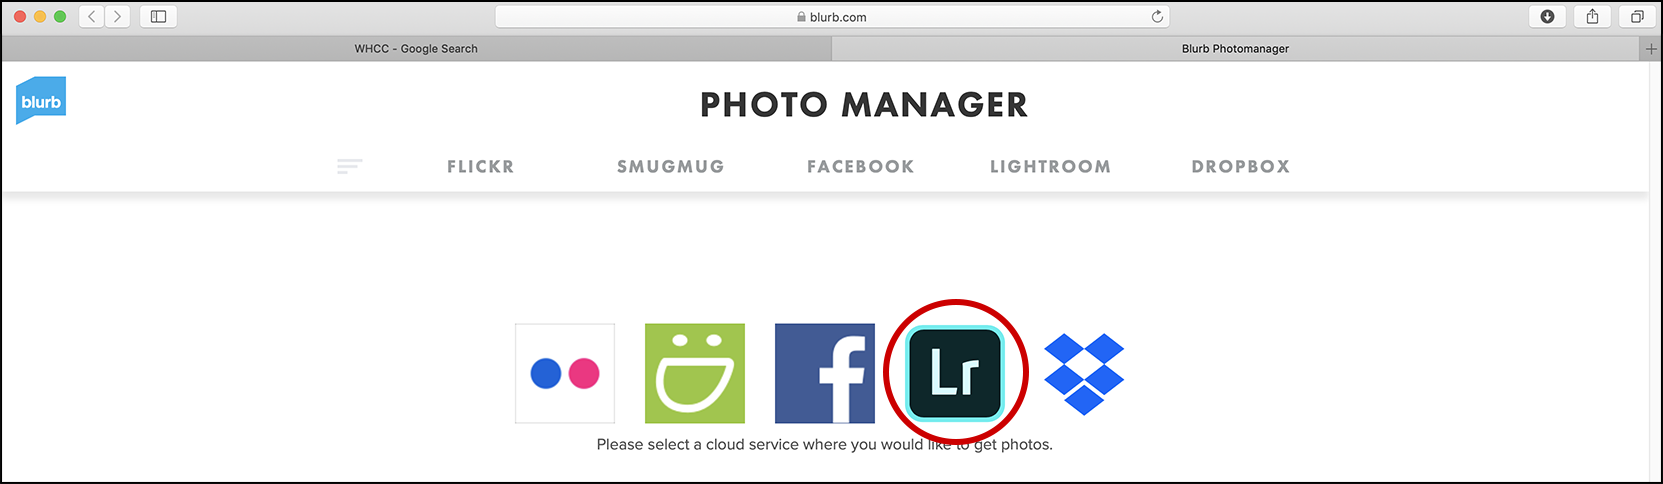
To access your connected photos in Blurb’s BookWrite software, click the Pages tab and then the cloud icon.

Blurb’s Photo Manager is displayed in a browser. Click the Lightroom icon.
You will be prompted to login to Lightroom after which you can access the connected album and your photos. Select the desired images and choose Import Selected.
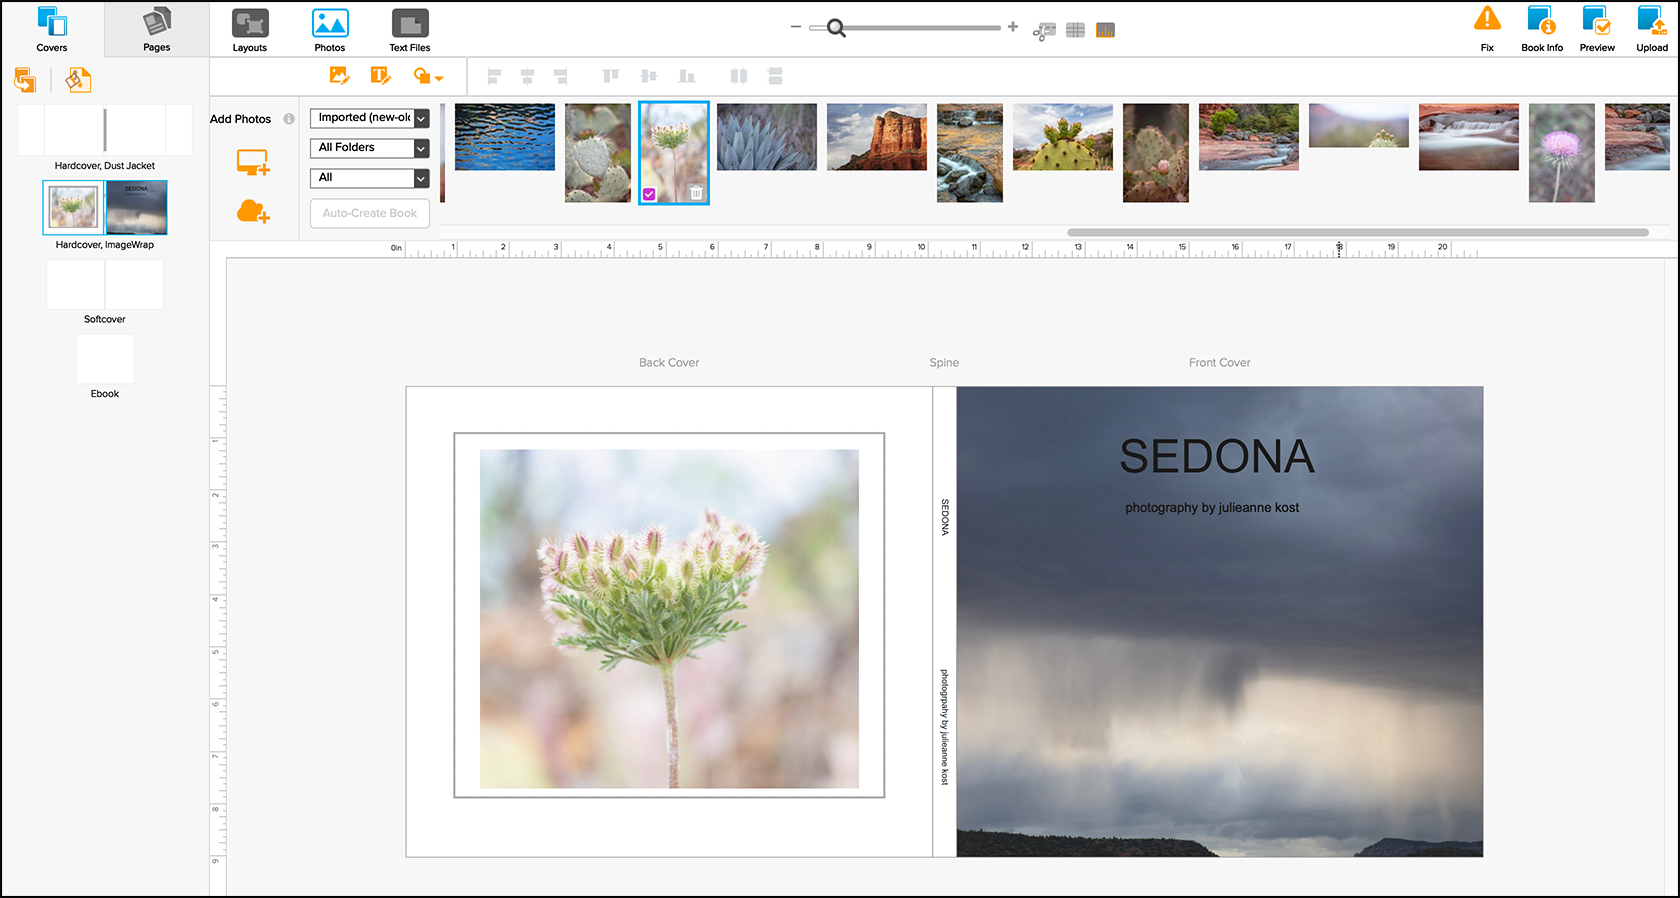
When the import is complete, you will be prompted to return to BookWright where can view can access your photos and begin laying out your book! You an find more information on Blurb and how to use the BookWrite software at www.blurb.com.
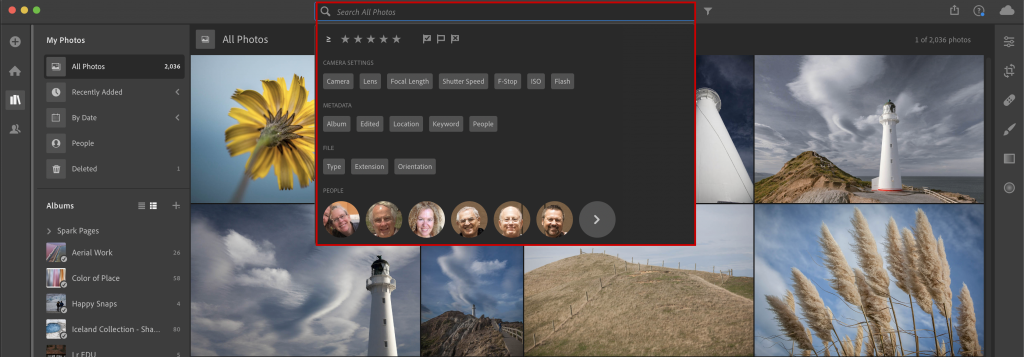
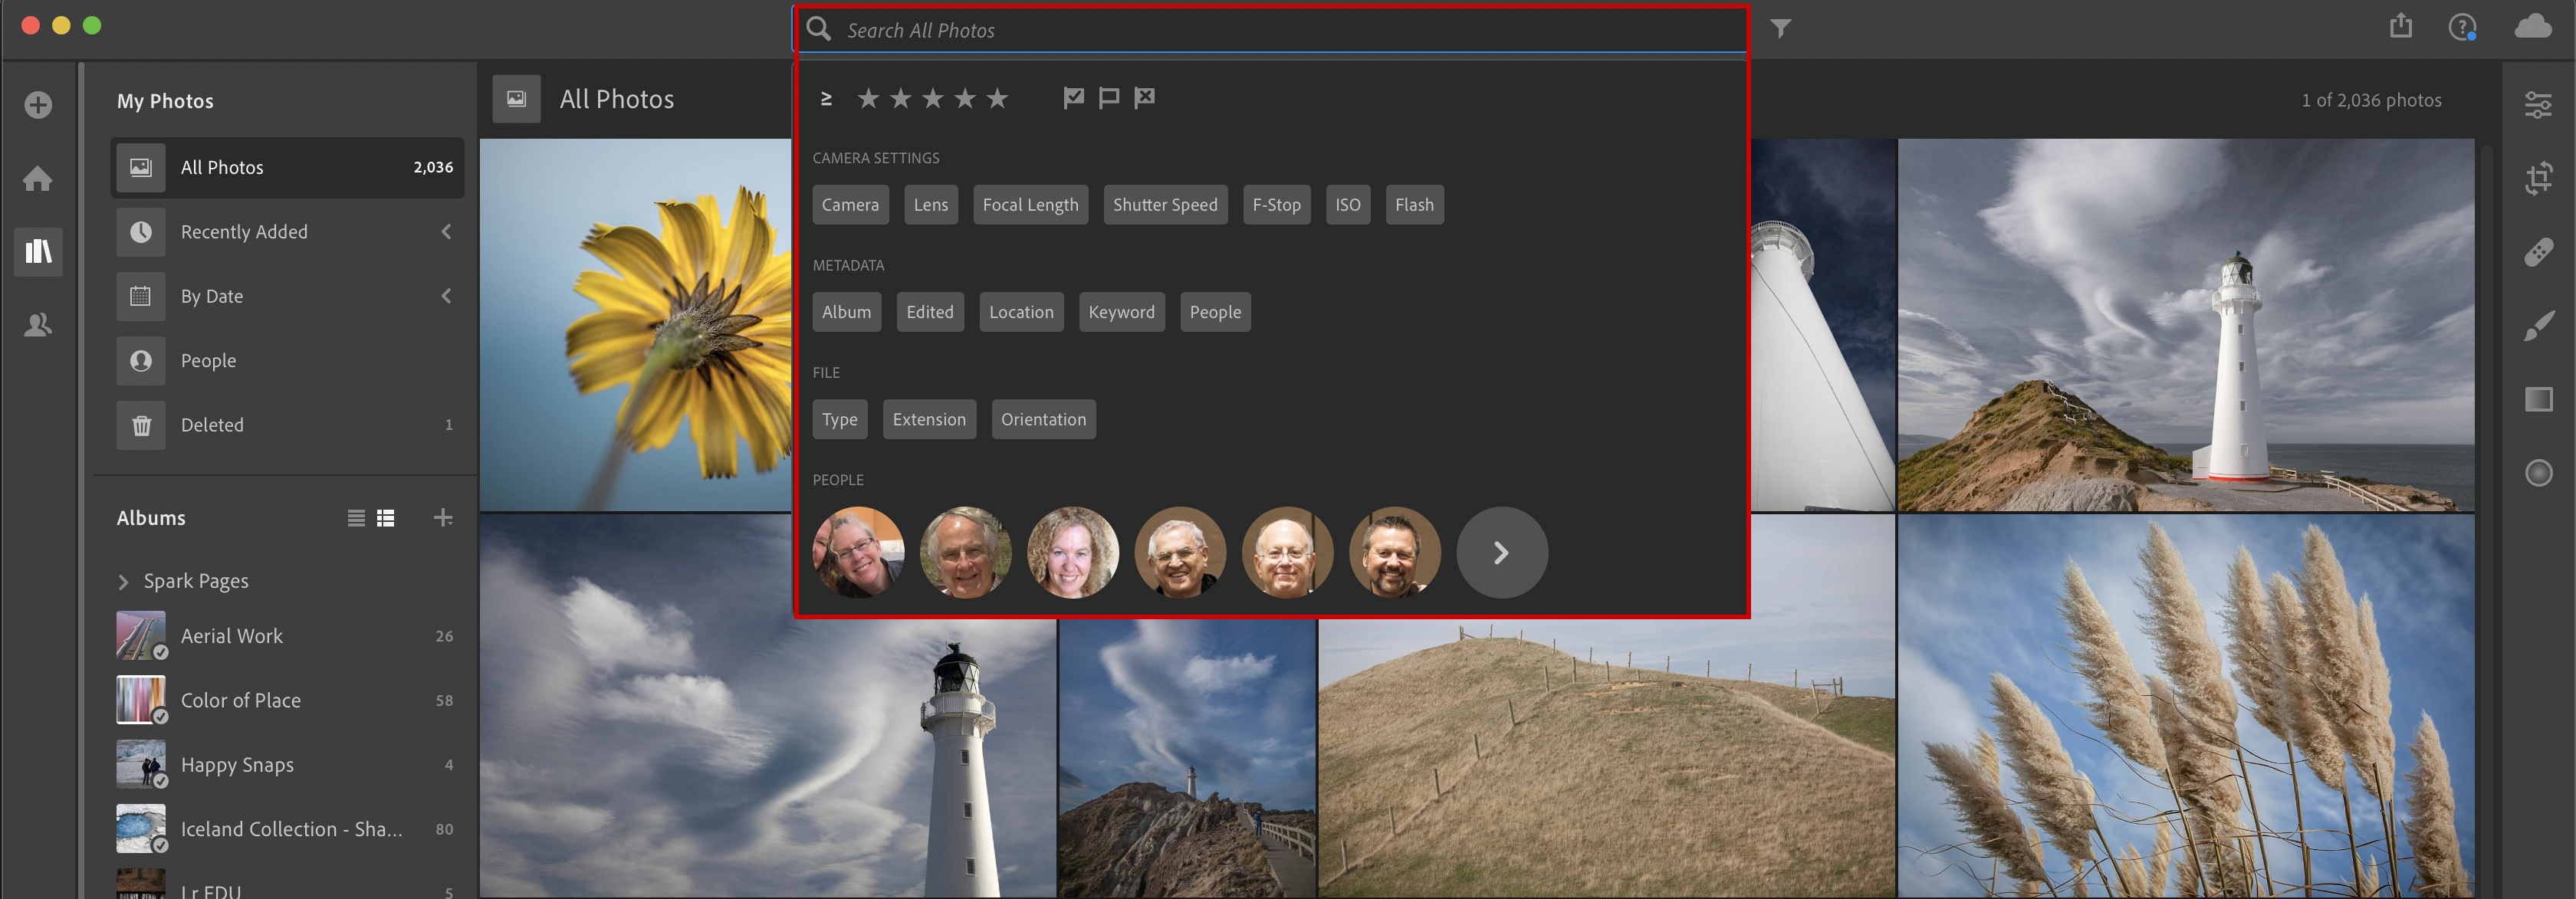
Find Photos Faster When using the filter bar to search for photos, Lightroom now offers additional suggestions such as camera setting (lens focal length, shutter speed etc.), metadata, (album, edited, keyword, etc.), file info (type extension, orientation), and people.
Custom Sort Order – Custom sort now is selected automatically when you first start reordering images in an album and supports Undo/Redo commands.
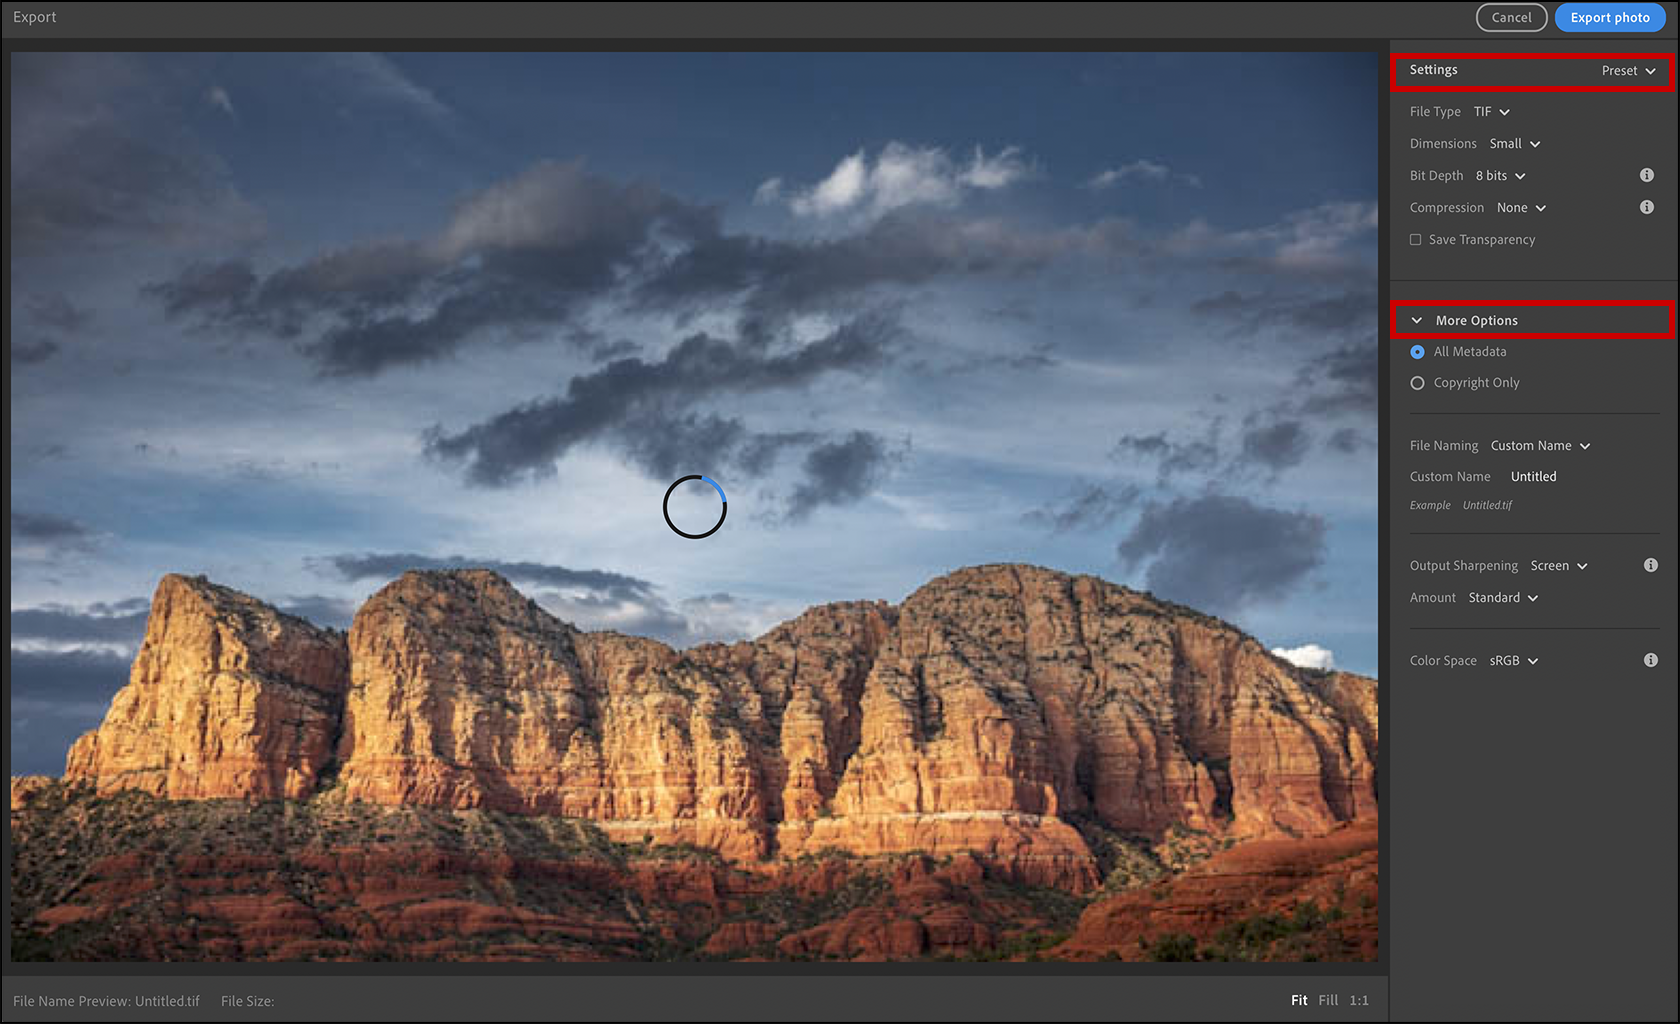
Advanced Export – Click the Share icon in the in upper right, to access quick export options for JPEG and Originals or, for more control, choose the Export… option.
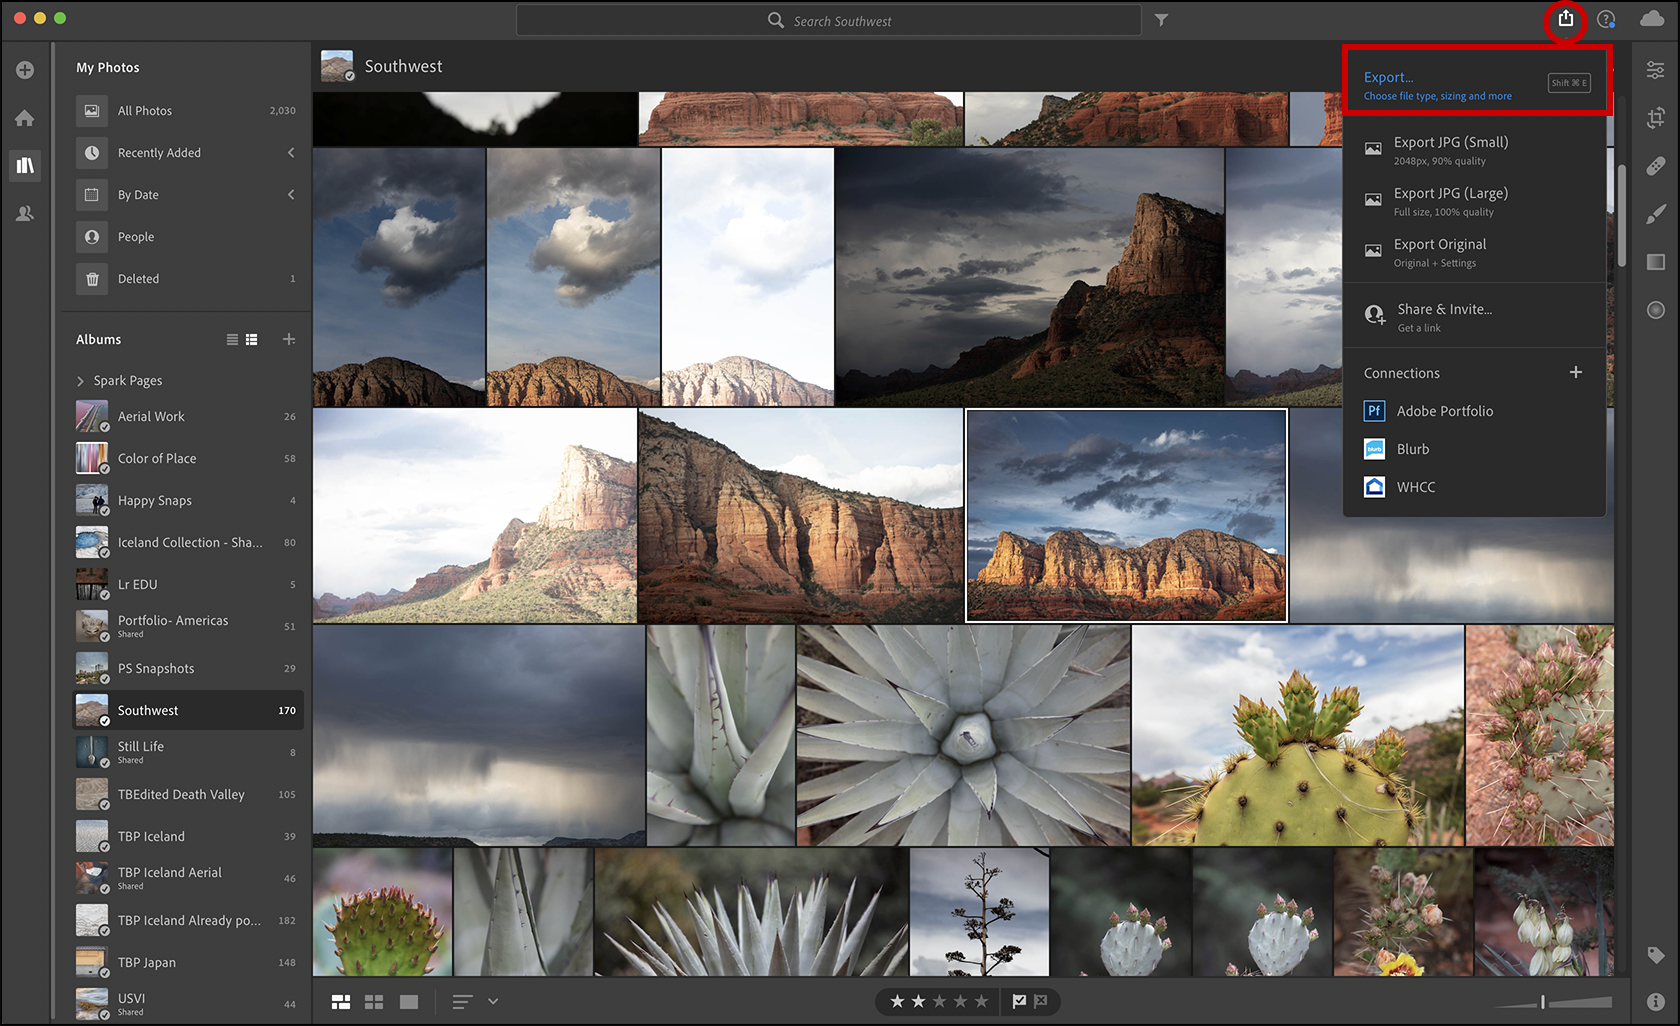
For file type, choose from JPEG, TIFF, or Original + Settings. Then, depending on the File Format selected, choose additional options such as Dimensions, Bit Depth, Compression, and Transparency options. Click More Options to control exported Metadata (all or copyright only), File Naming (original, Custom, or Date-Filename), Output Sharpening (screen/matte/glossy paper and low/standard/high amount), and Color Space (sRGB, Display P3, AdobeRGB, ProPhotoRGB).
More Powerful GPU Processing – Lightroom can now take advantage of powerful graphics cards (GPUs) while editing, providing a smoother and more responsive experience. GPU acceleration is more pronounced with larger resolution monitors (4k and above) as well as with more powerful GPUs.
Migrate from Photoshop Elements For those photographers looking to migrate from Photoshop Elements to Lightroom, you can use the new Photoshop Elements Migrator to move your original and edited images, along with their associated organizational metadata (such as star rating, flags, keywords), directly into Lightroom.
This release also includes additional camera raw and lens profile support and addresses bugs that were introduced in previous releases of Lightroom.
Enjoy!