Here are ten shortcuts for working with Vector Masks in Photoshop.
• If a layer has no mask, clicking the Add Layer Mask icon will add a Layer mask. Clicking the Add Layer Mask icon again will add a Vector mask. Or, to add a Vector mask without first adding a Layer mask, Command -click (Mac) | Control -click (Win) the Add Layer Mask icon. Note: if a path is selected, Command -clicking (Mac) | Control -clicking (Win) the Add Layer Mask icon will create the mask based on the currently selected path.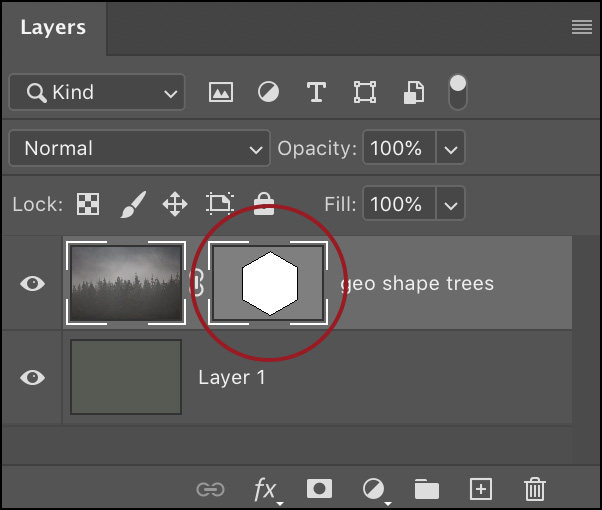
• Drag the Vector mask thumbnail in the Layers panel to move it from one layer to another. Option -drag (Mac) | Alt -drag (Win) the Vector mask thumbnail in the Layers panel to create a copy of the mask.
• To invert a Vector mask, select the path (using the Path Selection tool) and choose “Subtract Front Shape” from the Path Operations in the Options bar.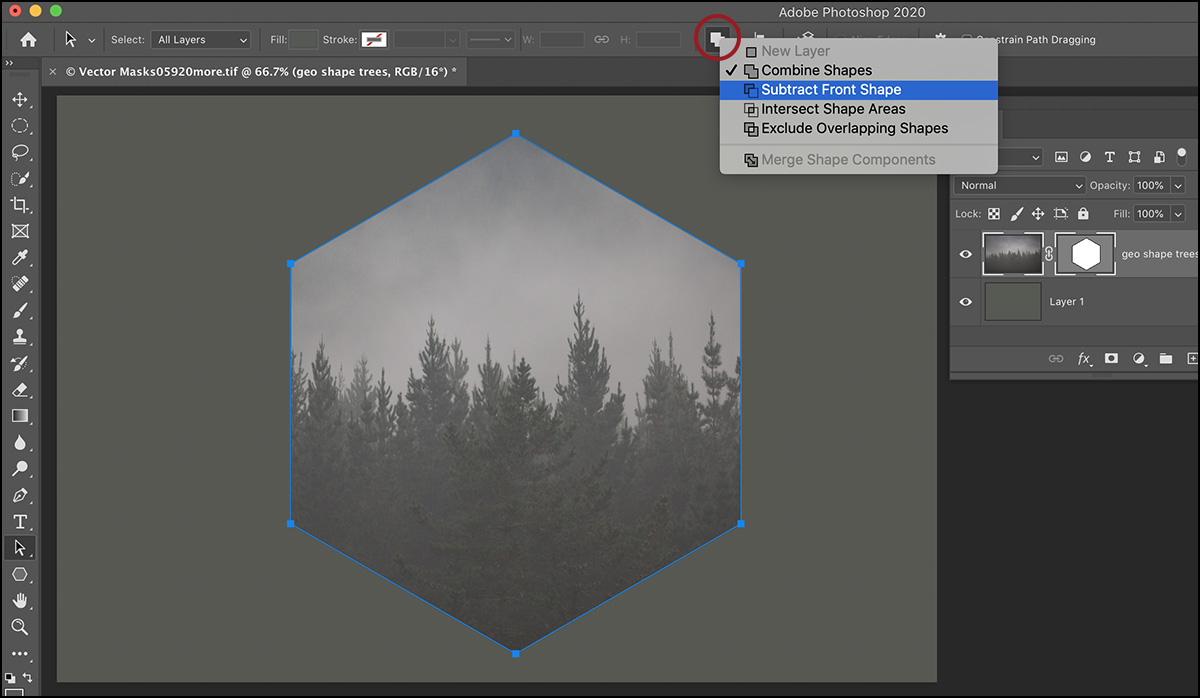
• Shift-click in the Vector mask thumbnail in the Layers panel to temporarily disable the mask. Shift -click the thumbnail again to enable it. Or, Control -click (Mac) | right -click (Win) on a Vector mask thumbnail and choose Enable/Disable Vector Mask from the context sensitive menu.
• Command + H (Mac) | Control (Win) + H toggles the visibility of the path. Click the Vector mask thumbnail in the Layers Panel to select/deselect the mask.
• Command -click (Mac) | Control -click (Win) the Vector mask thumbnail (in the Layers Panel) to convert the Vector mask to a selection.
• To add additional paths to a Vector mask using the Pen tool, first target the Vector mask in the Layers panel, then draw additional paths. Note: if the Vector mask is deselected (or if the Vector path is hidden), drawing with the Pen tool, will create a new Work Path.
• To add additional shapes to a Vector mask, select the Shape Tool and set the Shape’s Tool Mode in the Options bar to Path. Then, make sure that the Vector mask is targeted in the layers panel and drag out the shape. Note: use the Path Operations options (in the Options bar) to determine how multiple shapes are combined. 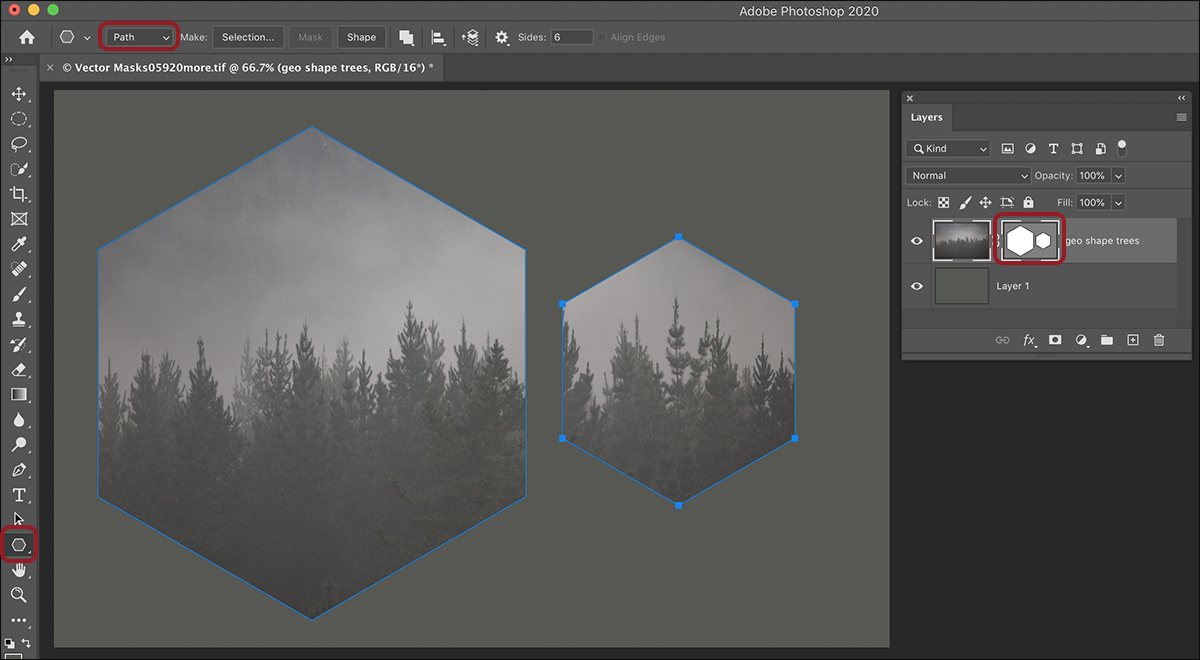
• To mask multiple layers with a single Vector mask, first put the layers into a Layer Group, then add a Vector mask to the Layer Group
• Use the Feather slider in the Properties panel to nondestructively soften the edges of a Vector mask. Use the Density slider (in the properties panel) to decrease the effect of the mask.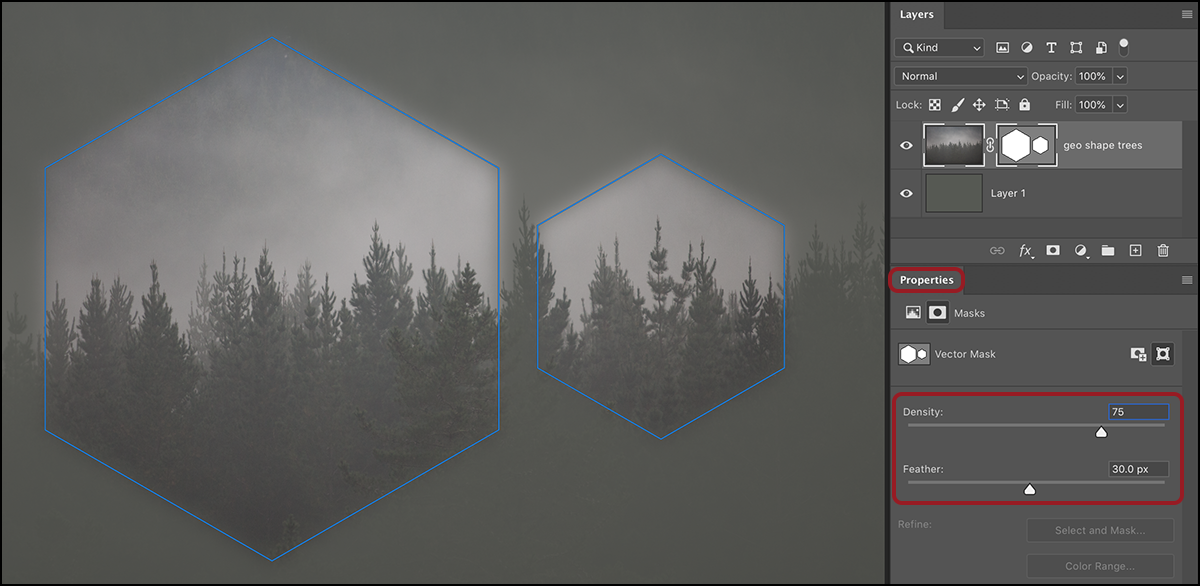
• When copying and pasting vectors from one document to another be aware that if you have a layer with a Vector mask, and the layer is targeted in the Layers panel (not the Vector mask), when you paste the path from the clipboard Photoshop will replace the contents of the Vector mask. But, if the Vector mask is targeted pasting the path will combine the shapes.
Note: the video below demonstrates several Vector Mask shortcuts.
https://youtu.be/uuQlidGLGdk