Local Hue Editing
The new Local Hue slider provides the ability to shift the color in a selected area of a photo while keeping the saturation and luminosity values unchanged. After selecting (masking) the desired area using any of the local adjustment tools (Adjustment Brush, Radial and Linear Gradients), dragging the Hue slider enables a full, 360-degree hue shift that is perfect for both corrective and creative adjustments.
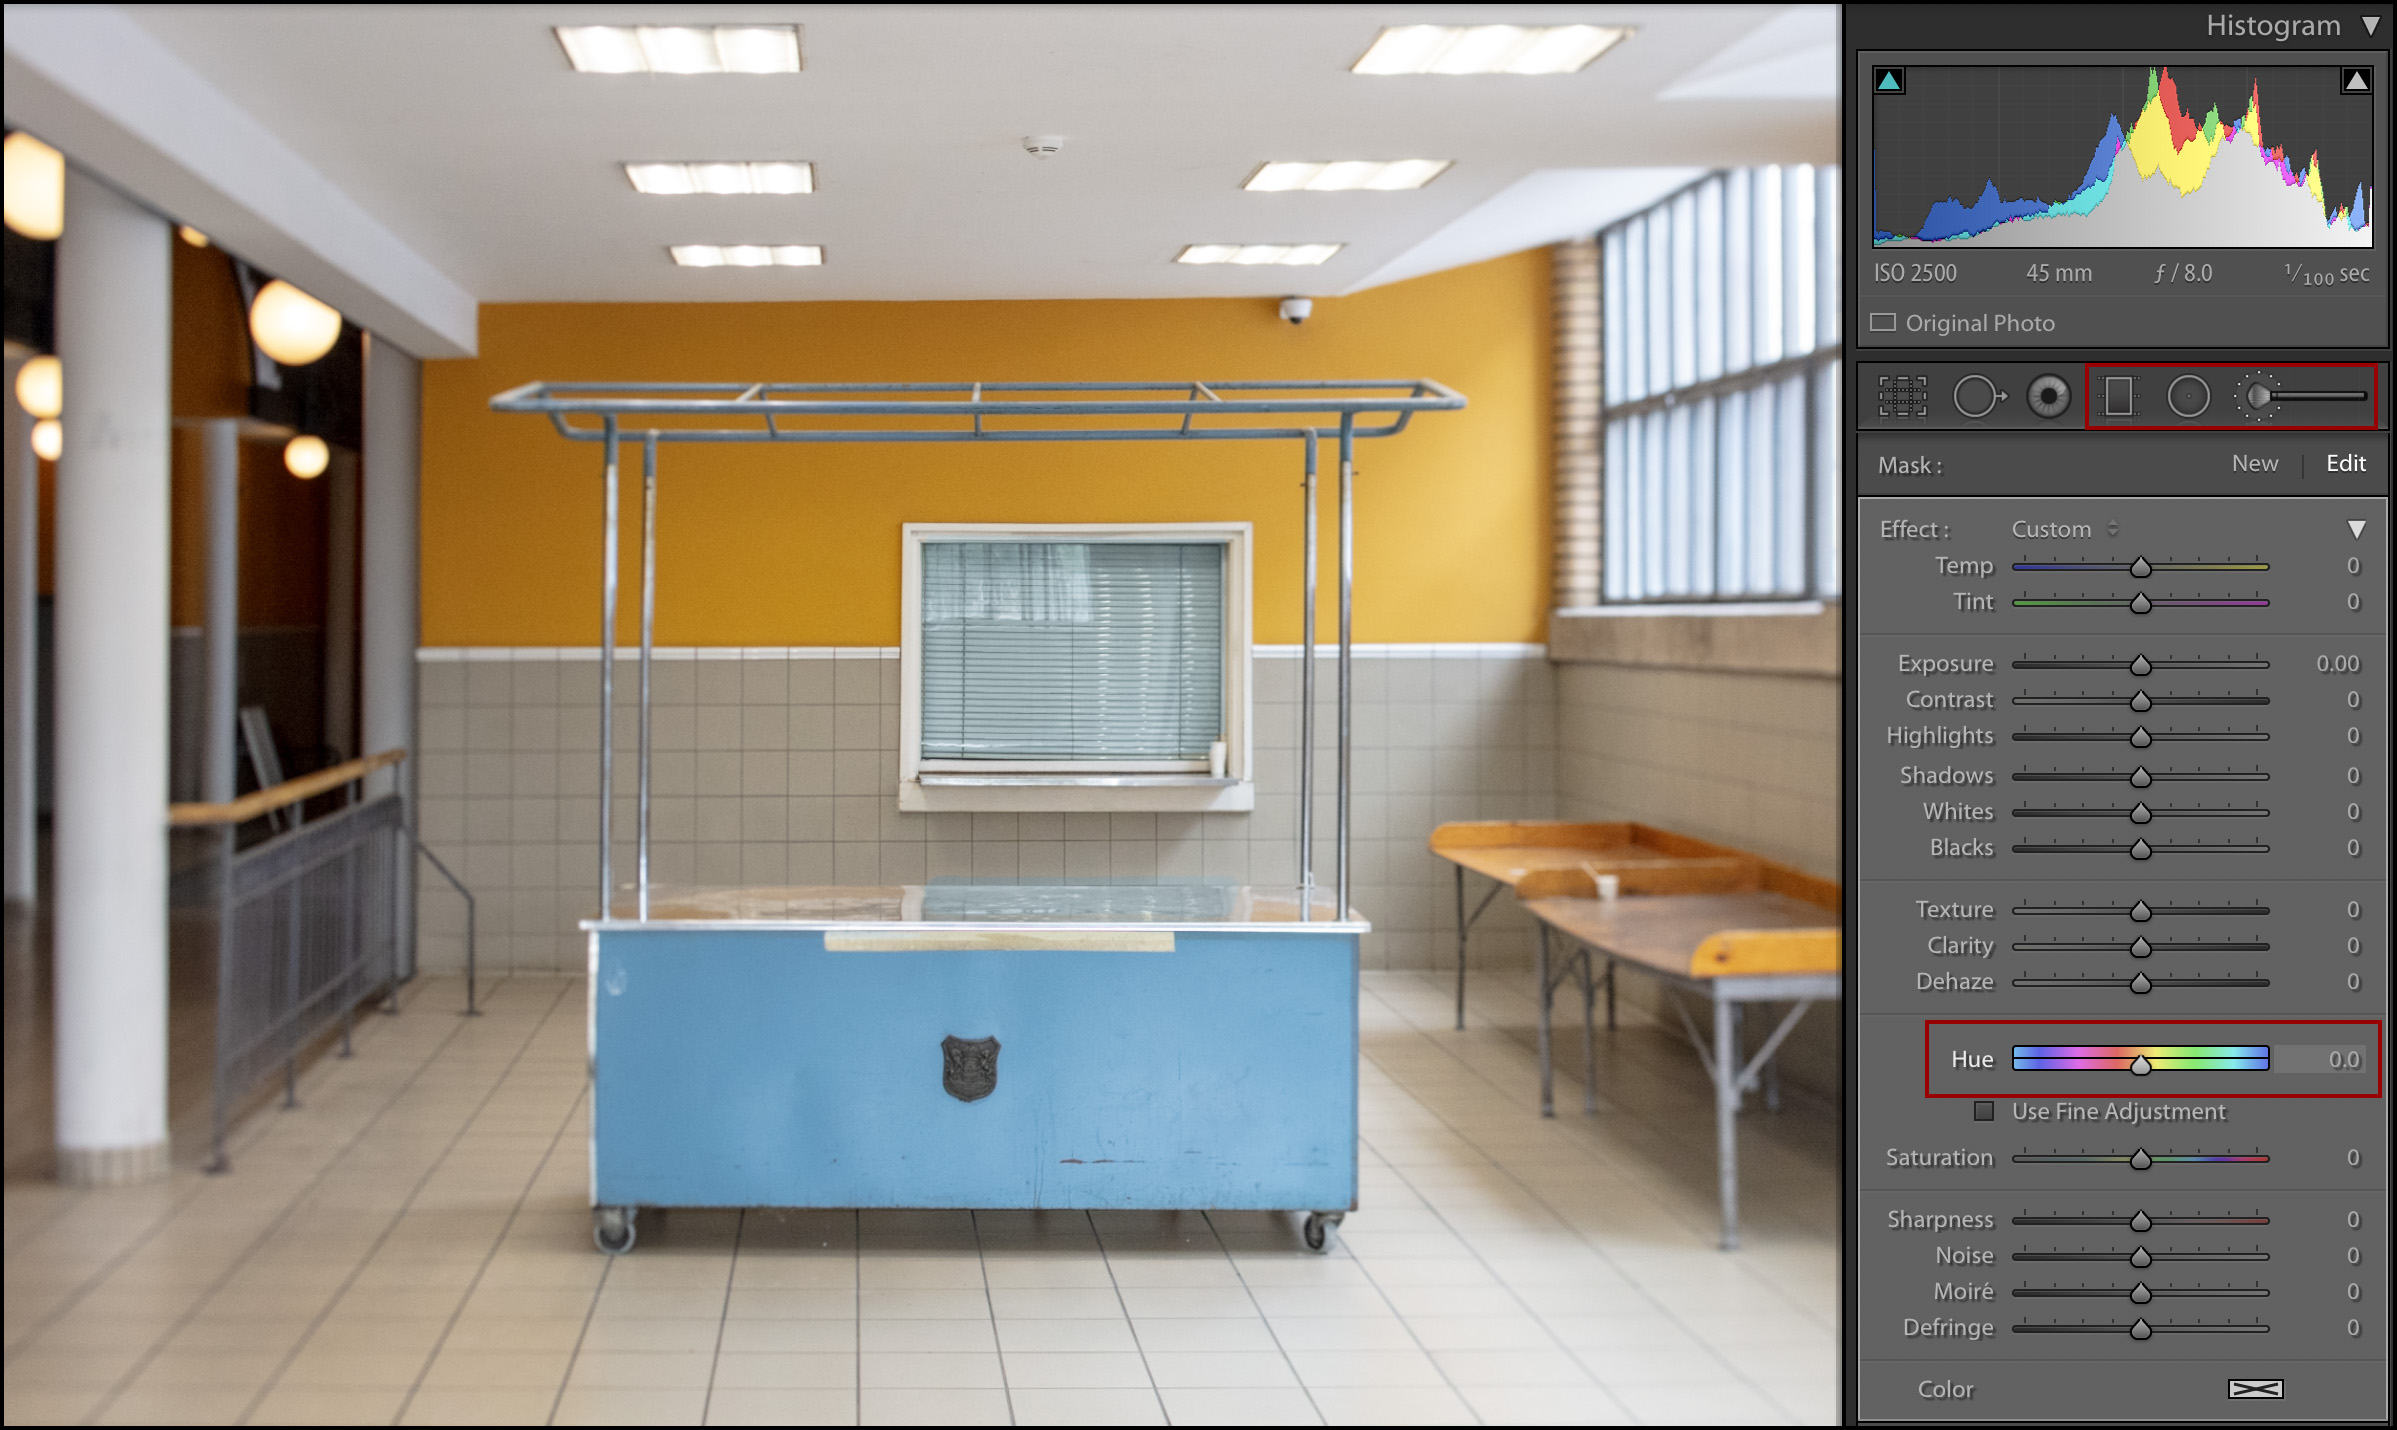
• The two gradient bars can be used to help visualize the color shift in either direction. The gradients will shift to display the primary color from the selected (masked) area. As the Hue slider is repositioned, the hues in the image (as well as the bottom gradient bar) shift to reflect the change. In the illustration below, I selected (masked) the orange portion of the back wall using the Adjustment Brush so the gradient displays orange in the center.

• As the Hue slider is moved to the right, the image is updated and the slider points to the newly appointed hue (cyan/blue) in the top color bar.

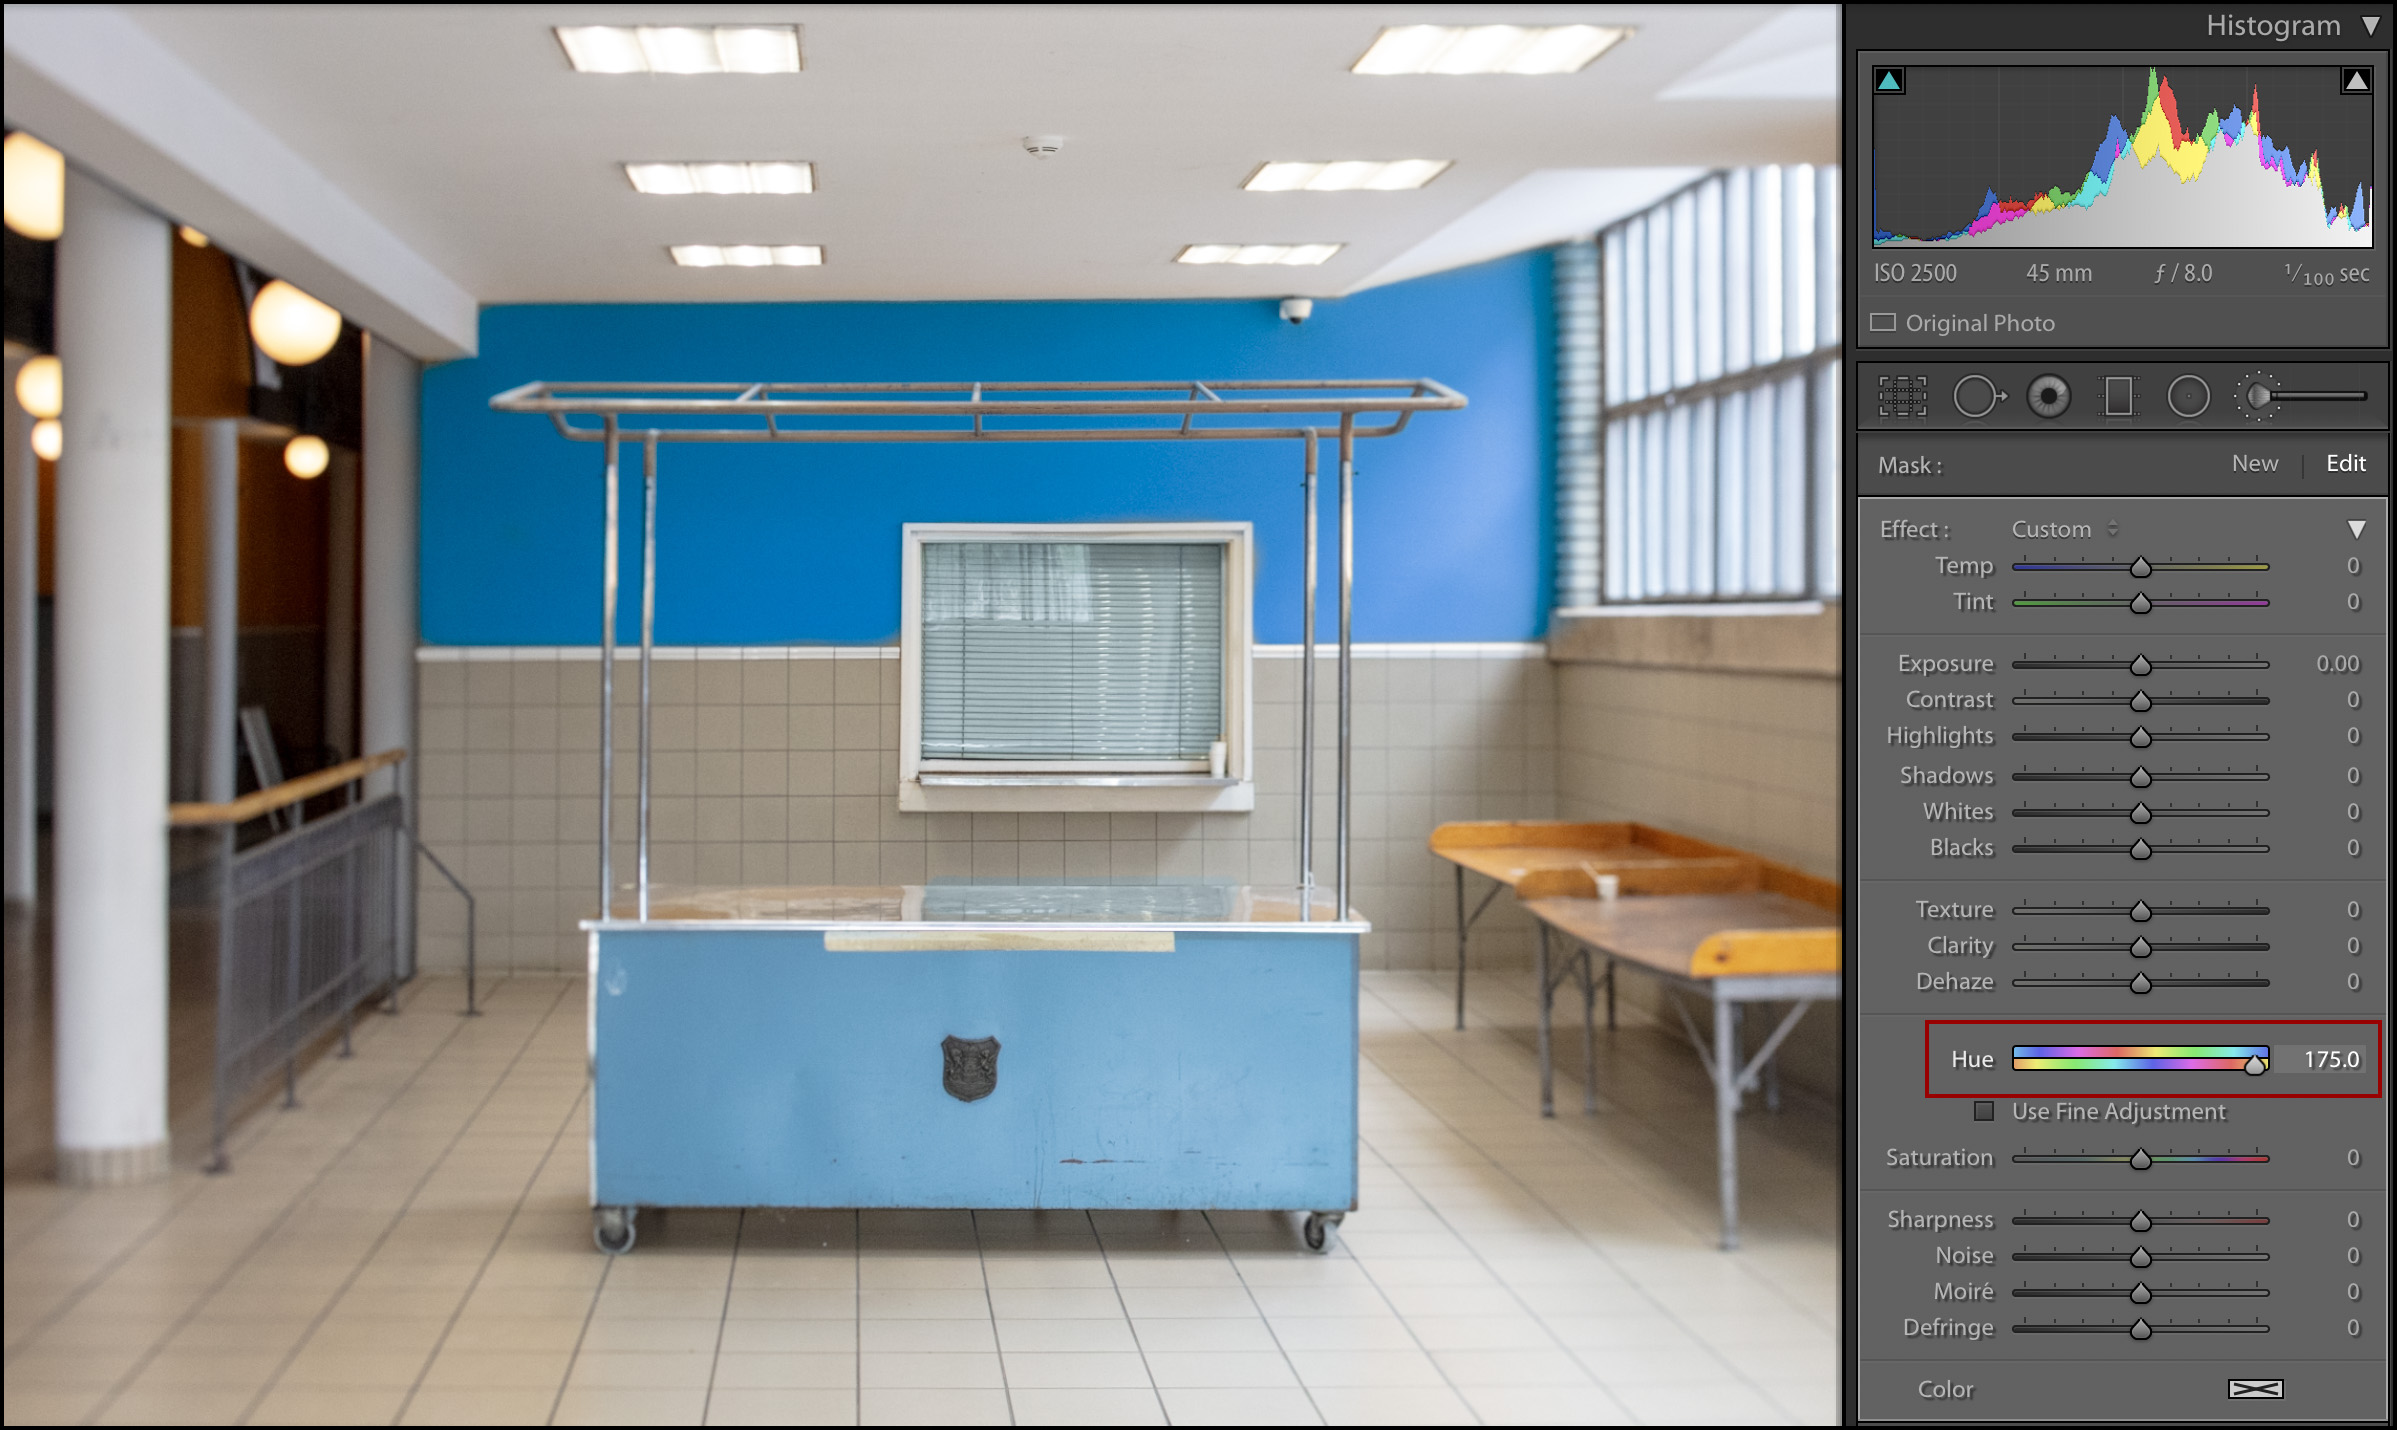
• For more control, enable “Use Fine Adjustment” to slow the rate of change as the slider is scrubbed left/right.
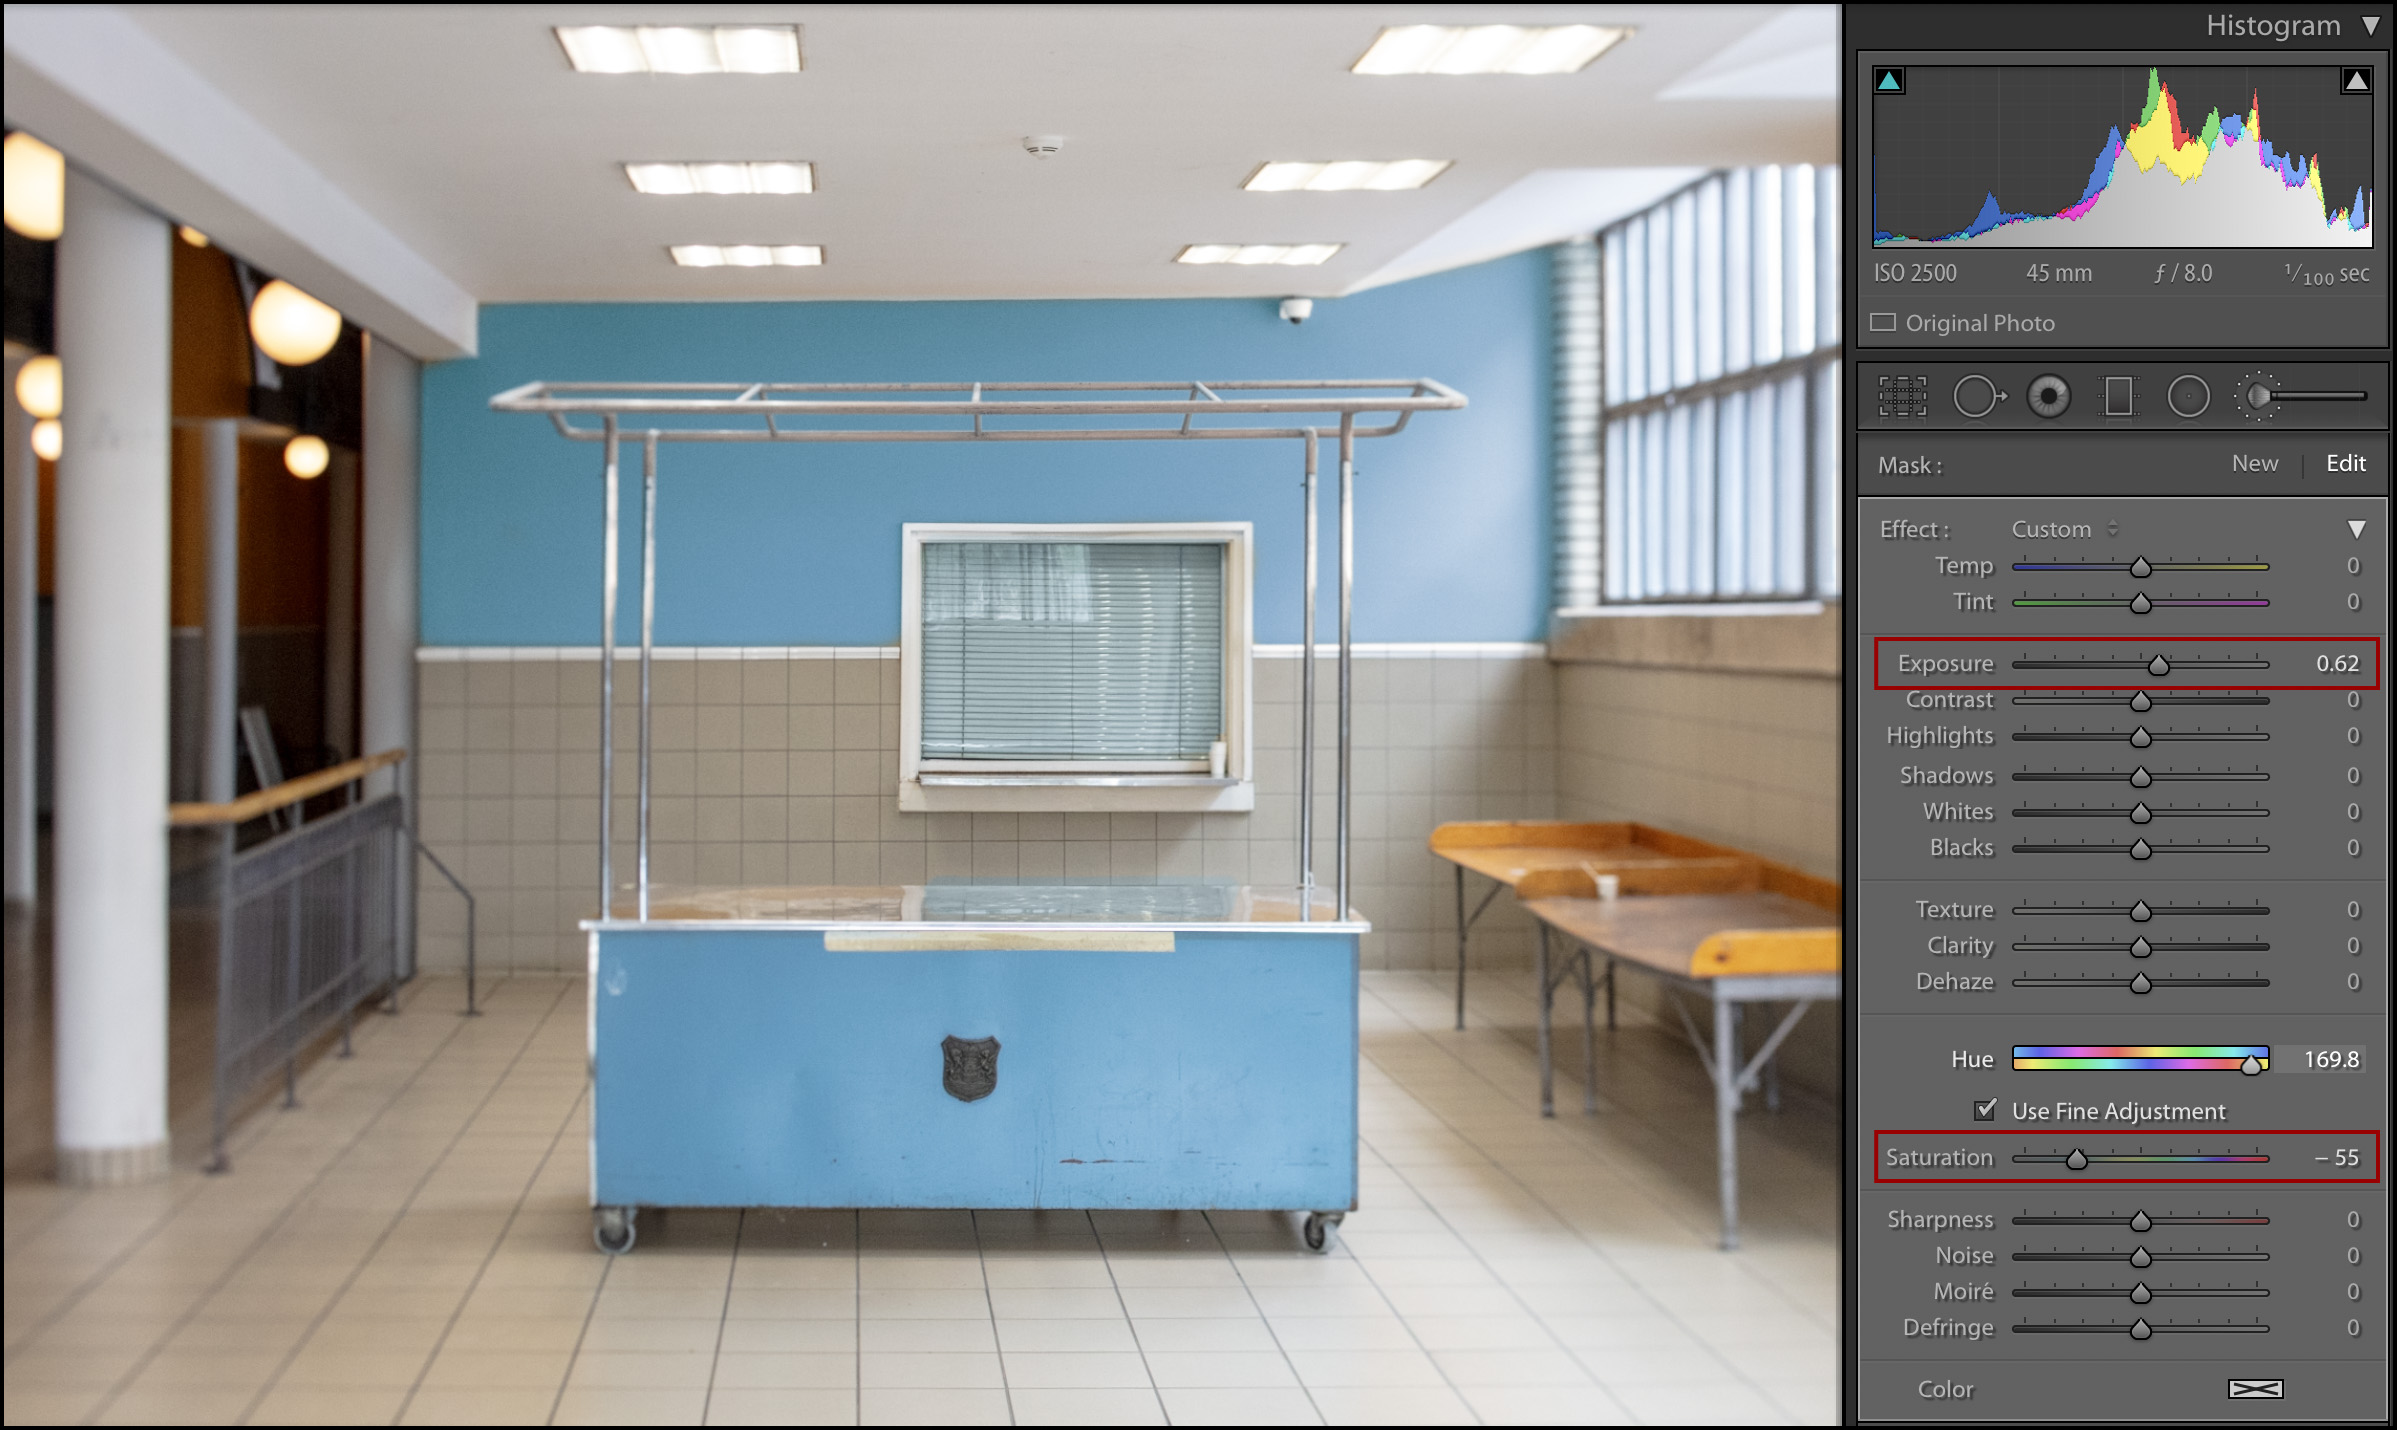
• In this example, because our eyes can perceive colors brighter or more saturated relative to others (and because I wanted to more closely match the blue wall with the blue cart), I chose to also adjust the exposure and saturation.
• In more complex scenarios, or if the initial mask isn’t as precise as the one above, you can use the Hue adjustment in combination with Range Masking to refine which hues are effected. The video below Making Selective Edits Using the Masking Tools in Lightroom Classic shows you how.
This came as really good news as I was scrambling to learn another platform as kept reading posts that Adobe was ditching classic. But hopefully this means classic is here to stay and hopefully the price won’t go up as it’s already a little expensive for hobbyists. But I still prefer Lightroom Classic over everything else, plus I have all my film emulation presets that only work in Lightroom. And if they ever add Linux support I’d probably really never leave them haha.