I’m pleased to announce pattern rotation, automatic font activation, updates to Select Subject, Match Font, and more in Photoshop v21.2!
Rotate Pattern Fills
You can now rotate Pattern Fills in Photoshop using the new Angle control. Rotations are nondestructive and can be easily updated or reset at any time without any loss of quality. Rotations can be applied to Pattern Fill Layers, the Patter Overlay and Stroke Layer Effects/Styles, Shape Layers (including both Fill and Stroke patterns), and the Frame tool (Stroke > Pattern via the Properties panel). Photoshop ships with a number of preset patterns which you can use (Window> Patterns) or, you can create and apply your own.
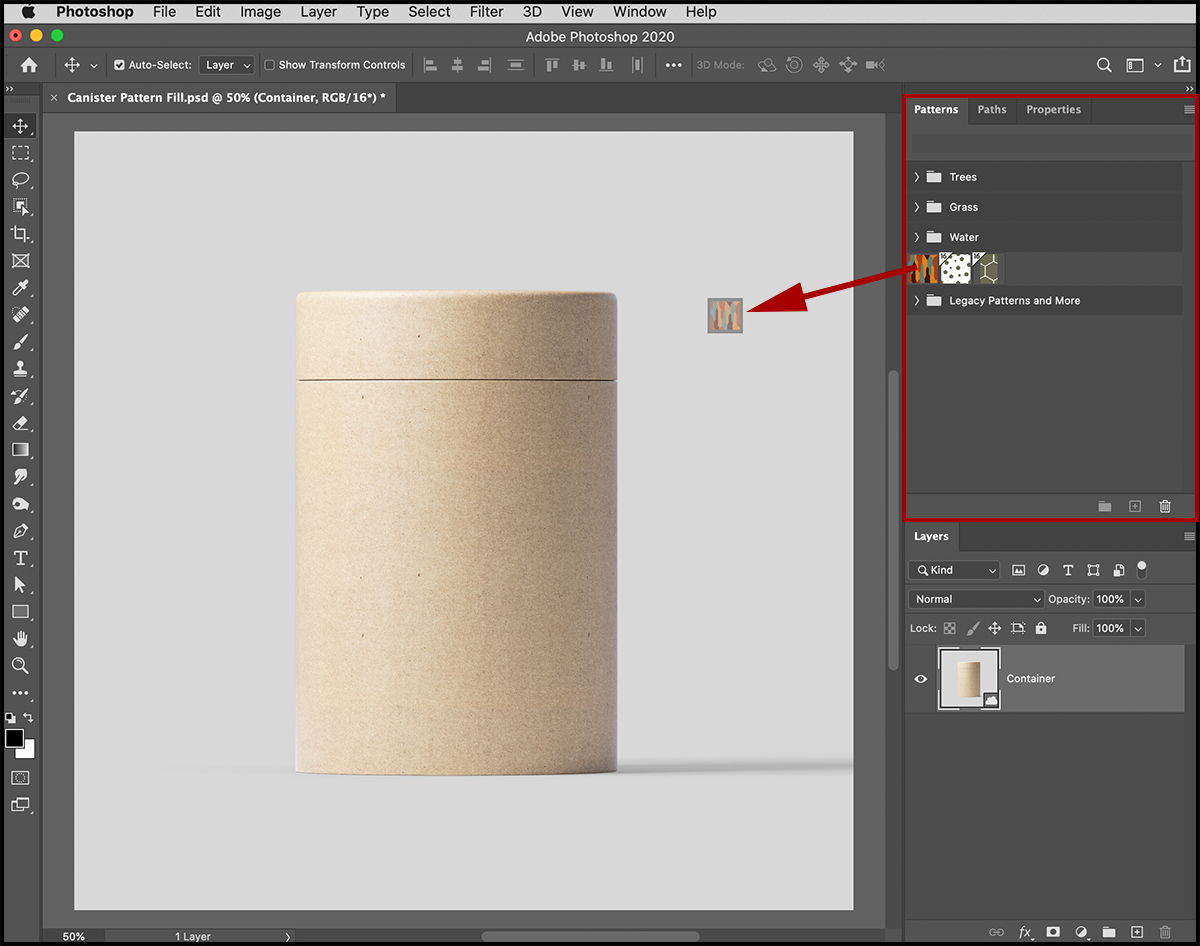
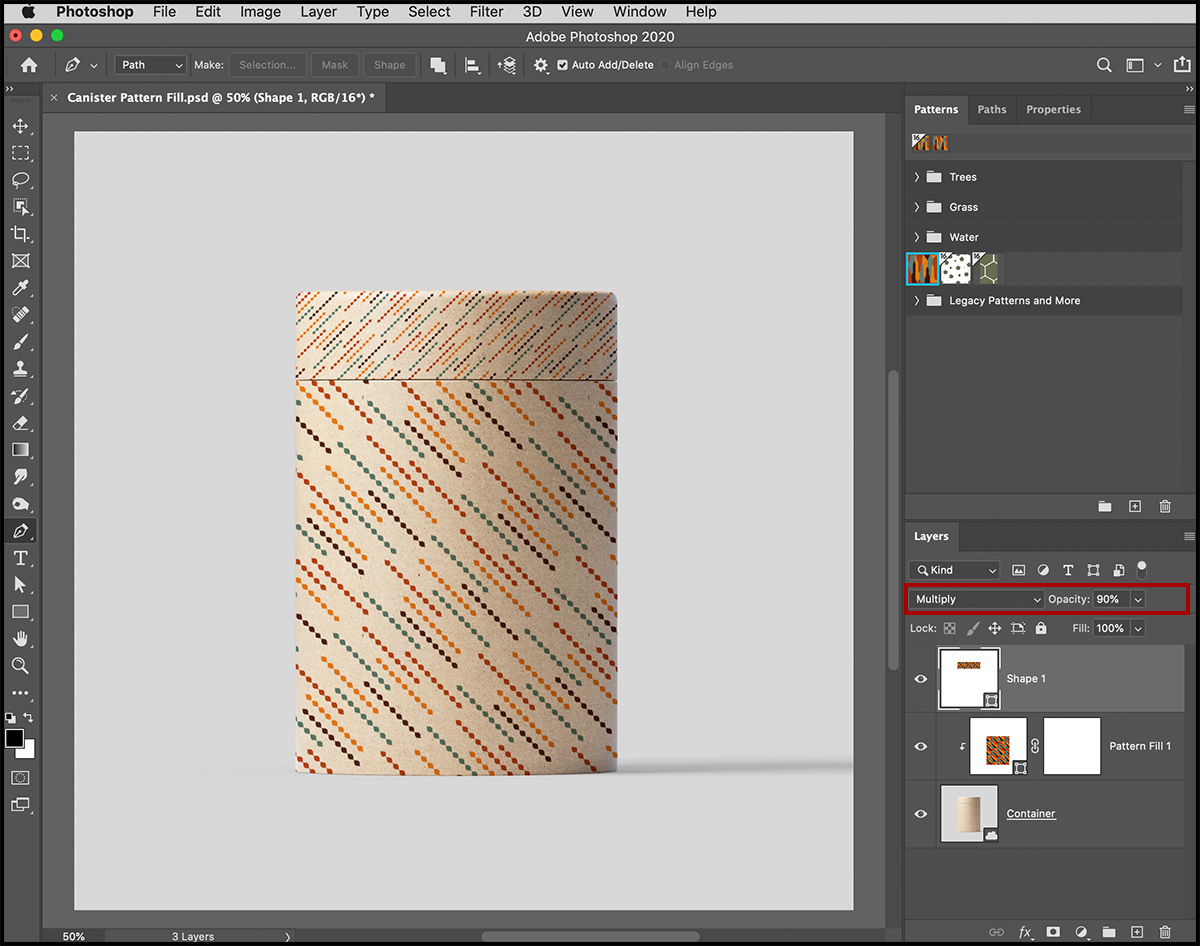
In the example below I will show using a Fill layer as well as a Shape layer to add a pattern to the canister and rotate it.
• Add a Pattern Fill Layer by dragging a dropping a pattern from the Pattern panel into the canvas area.
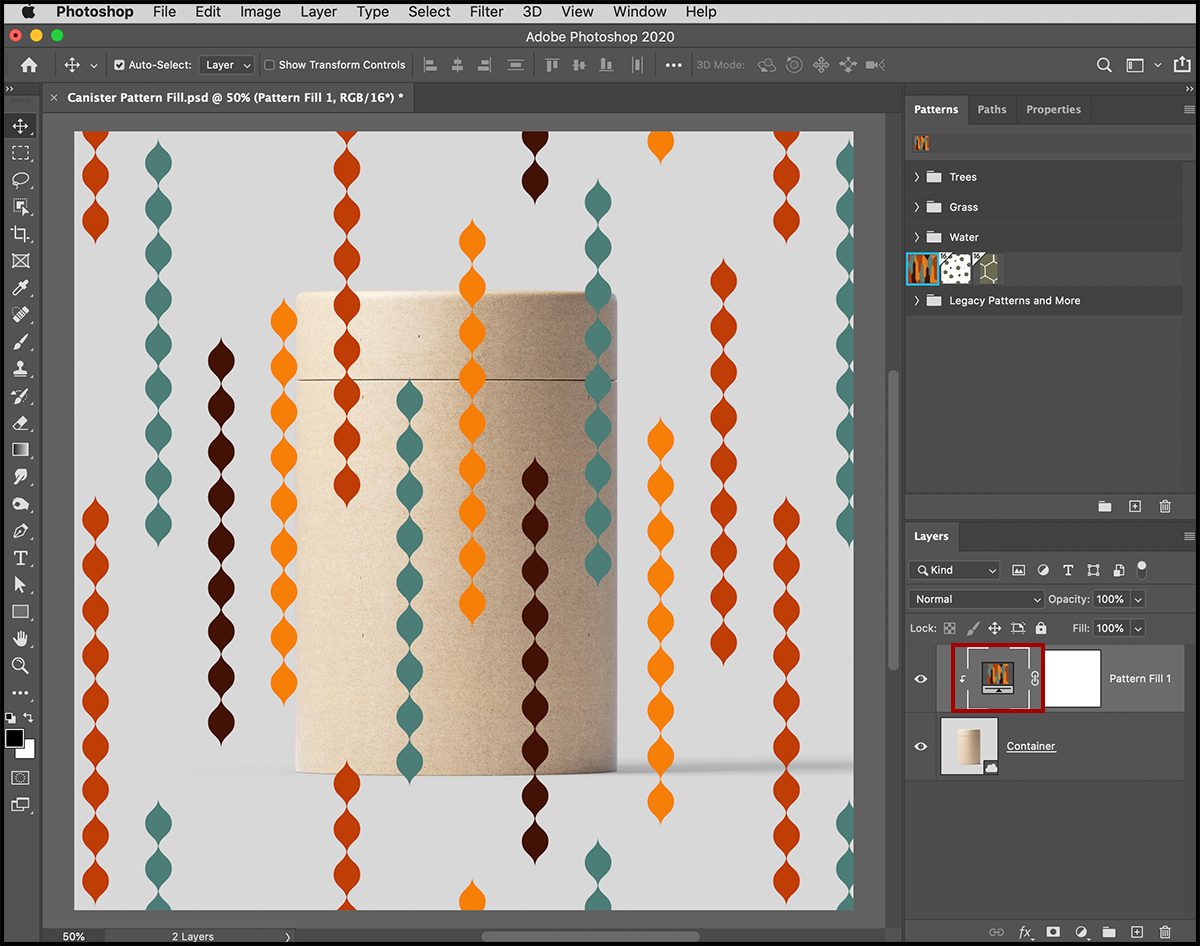
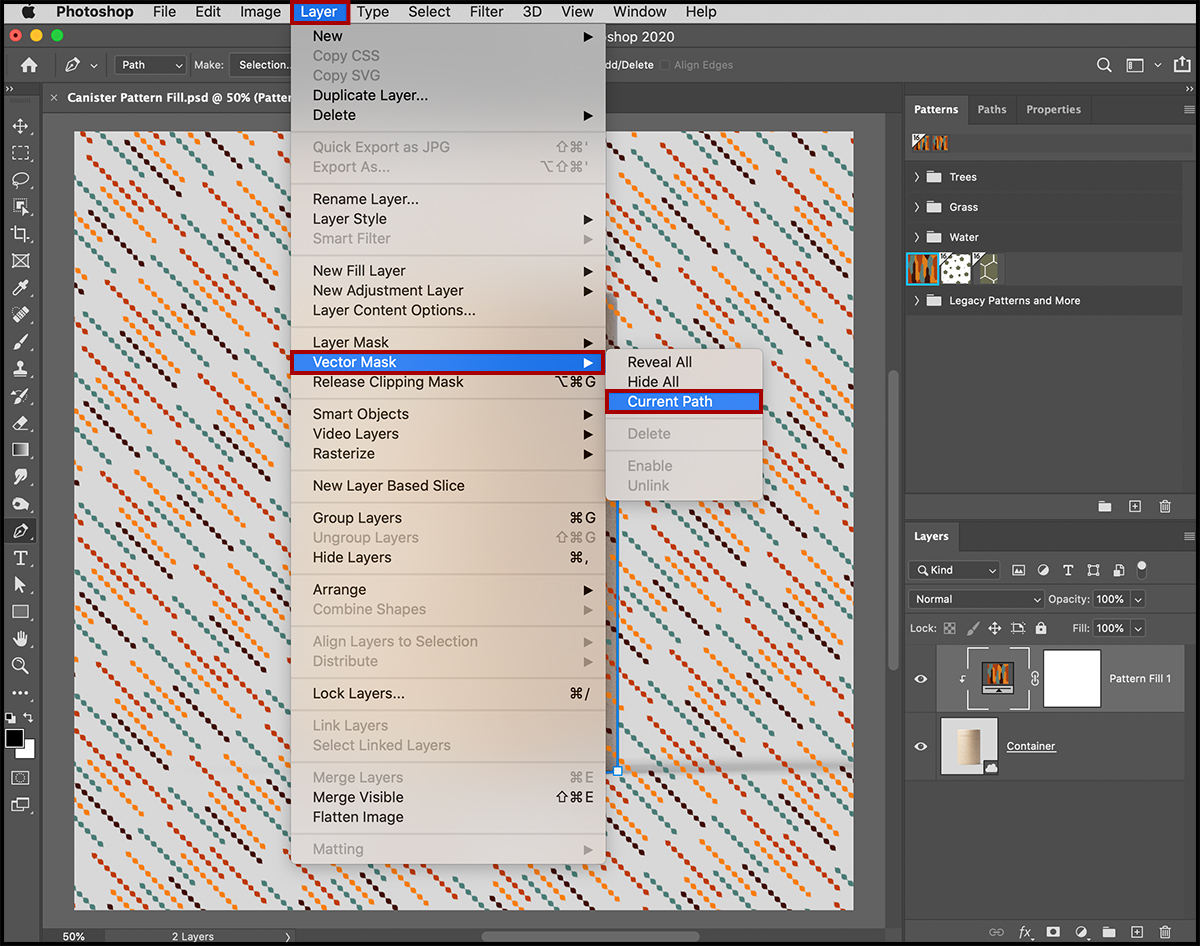
• To rotate the pattern (and access additional options), double click the Pattern Fills thumbnail in the Layers panel. Note: by default Photoshop clips the Pattern Fill layer with the photo layer which, in this example, doesn’t make a difference. If, however, you need to “unclip” the layer, target the layer and choose Layer > Release Clipping Mask.
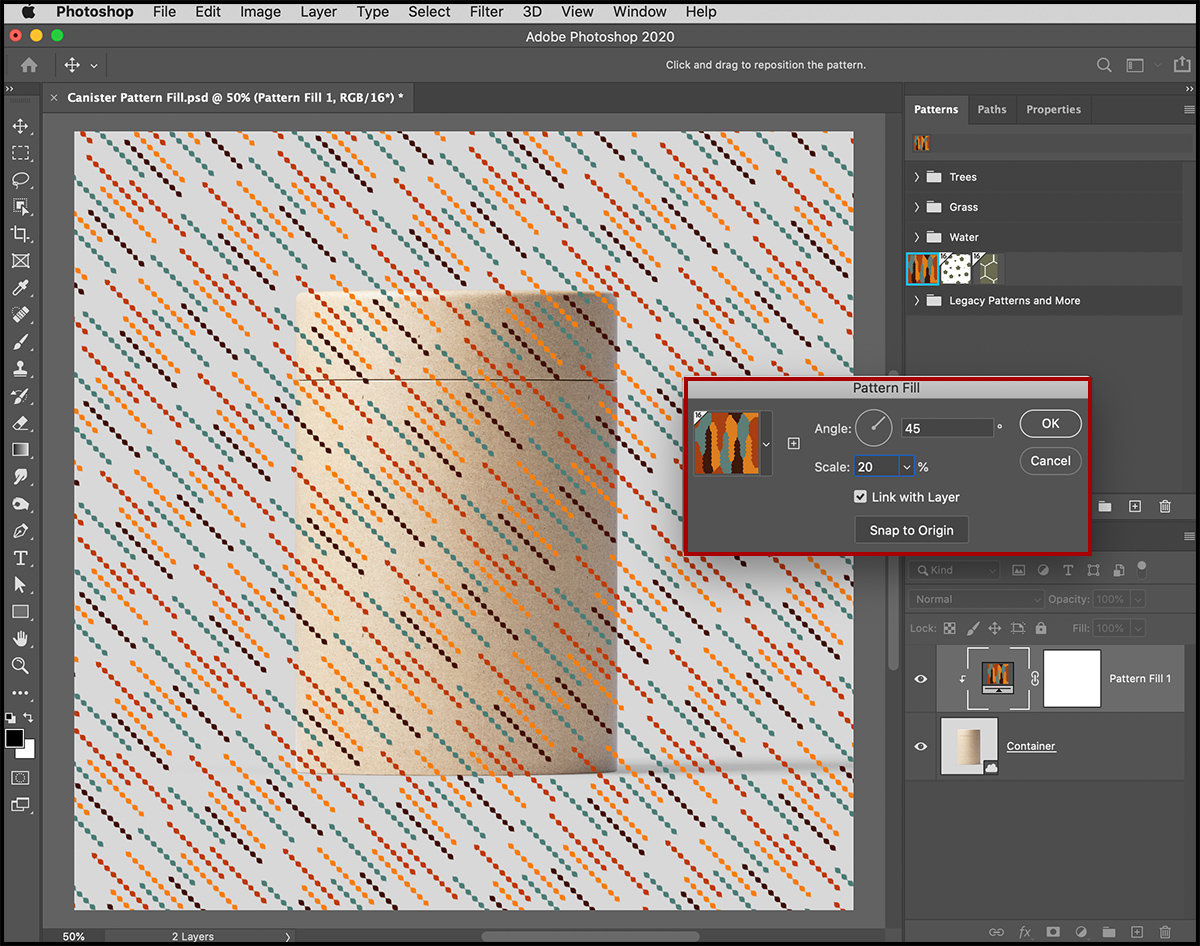
• In the Pattern Fill dialog, drag the Angle control (or enter a value) for the rotation, make any additional changes (such as scale), and click OK to apply.
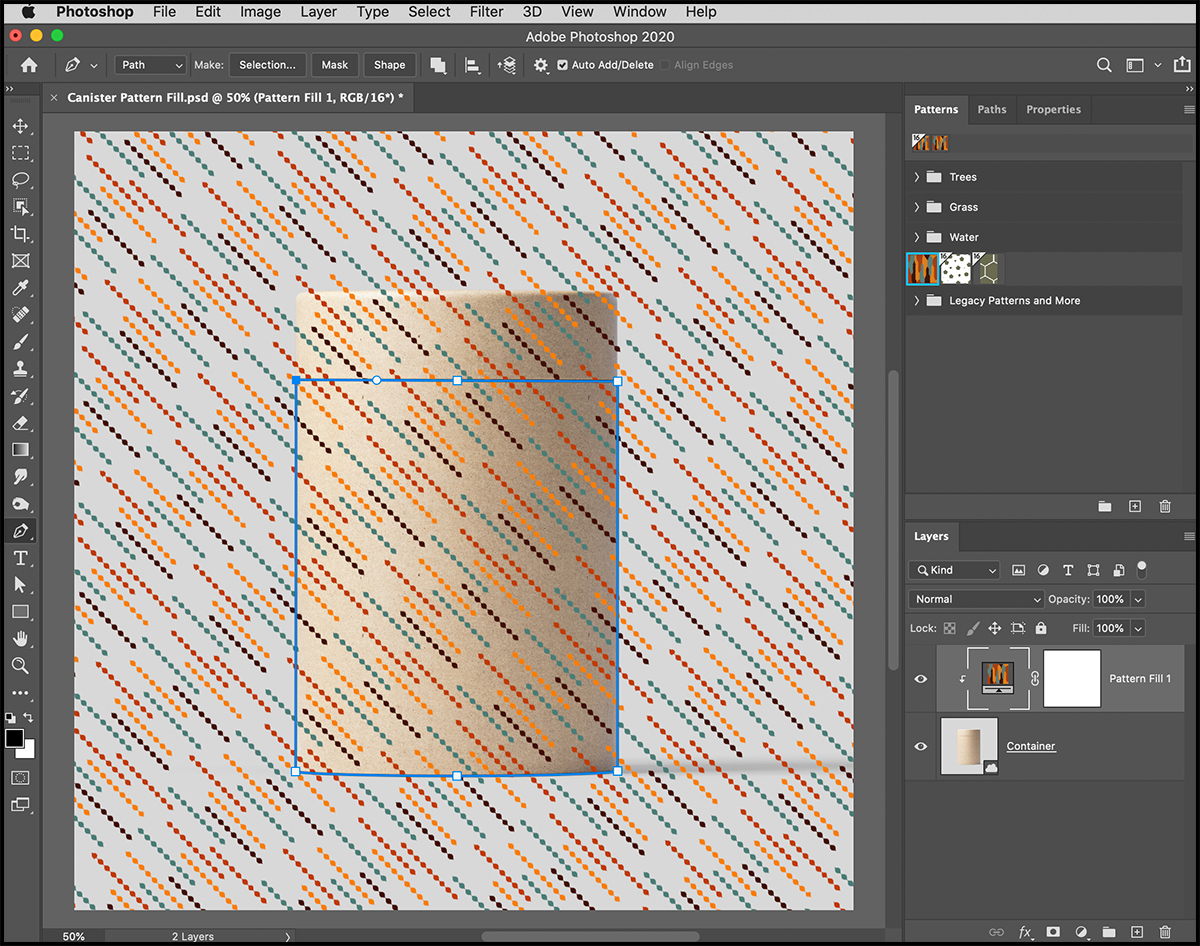
• Because the cylinder is a hard edged object, I used the Pen tool, create a path around the bottom portion.
• Then, to convert the pattern into a Shape layer (masking the pattern from the rest of the image), I selected selet Layer > Vector Mask > Current Path .
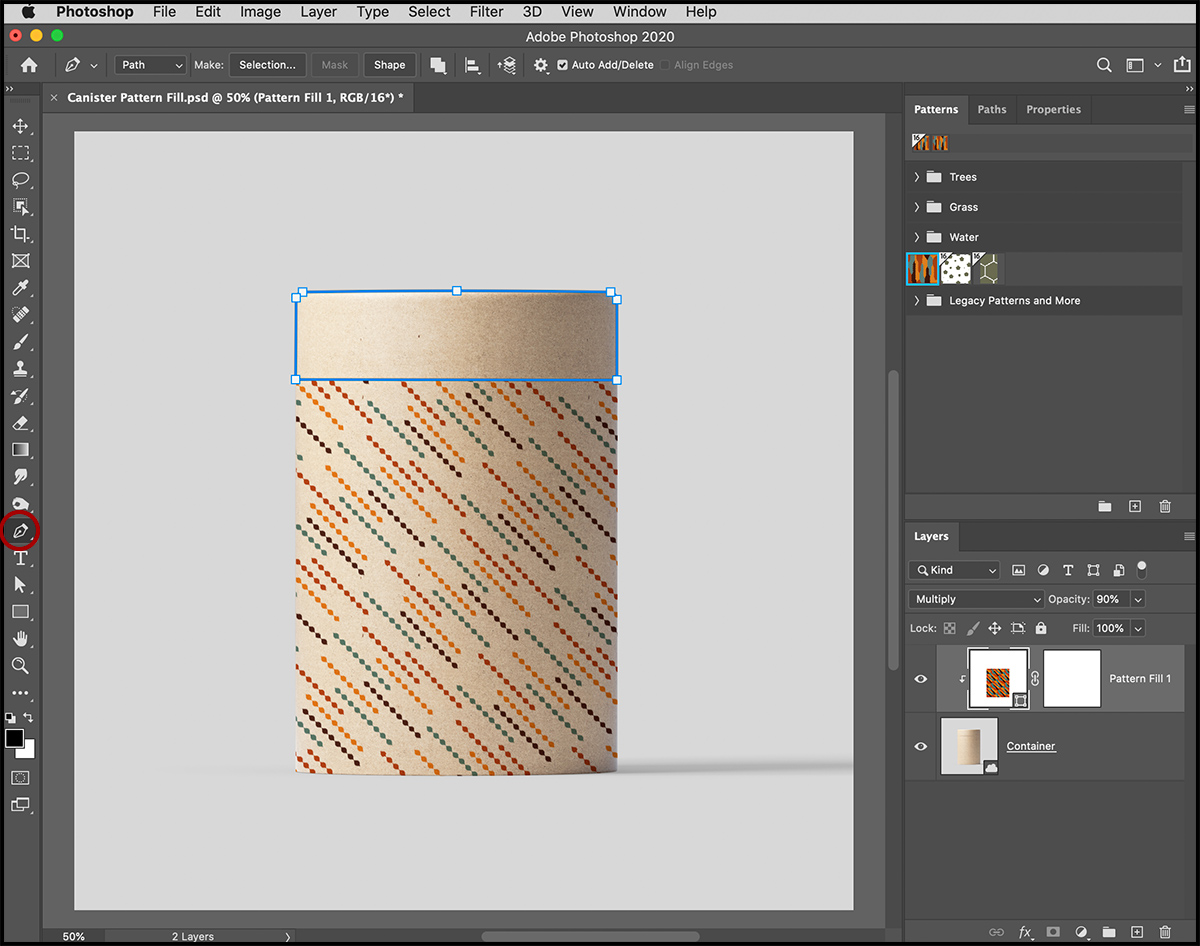
• Change the Blend mode to Multiply and decreased the Opacity of the layer as needed (to better combine the pattern with the photograph).

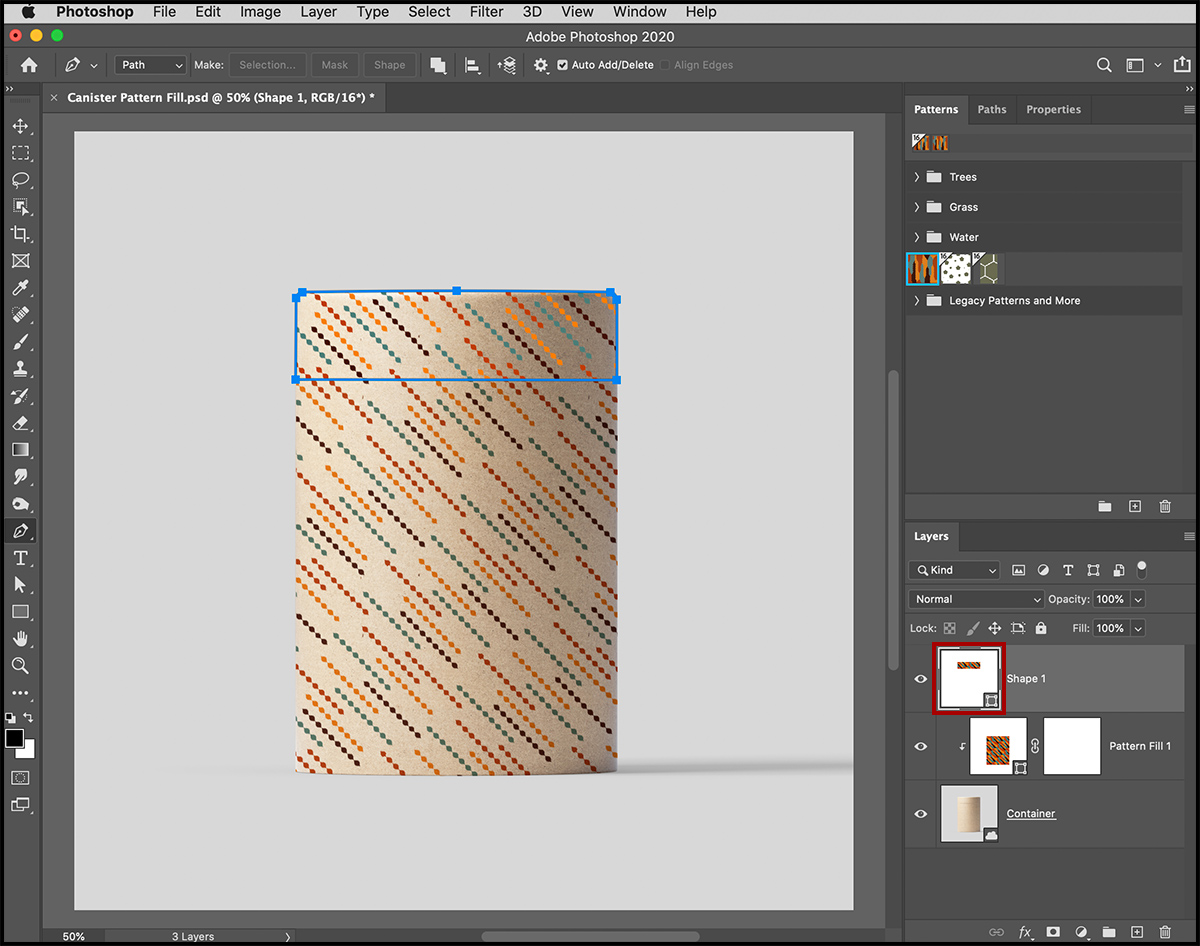
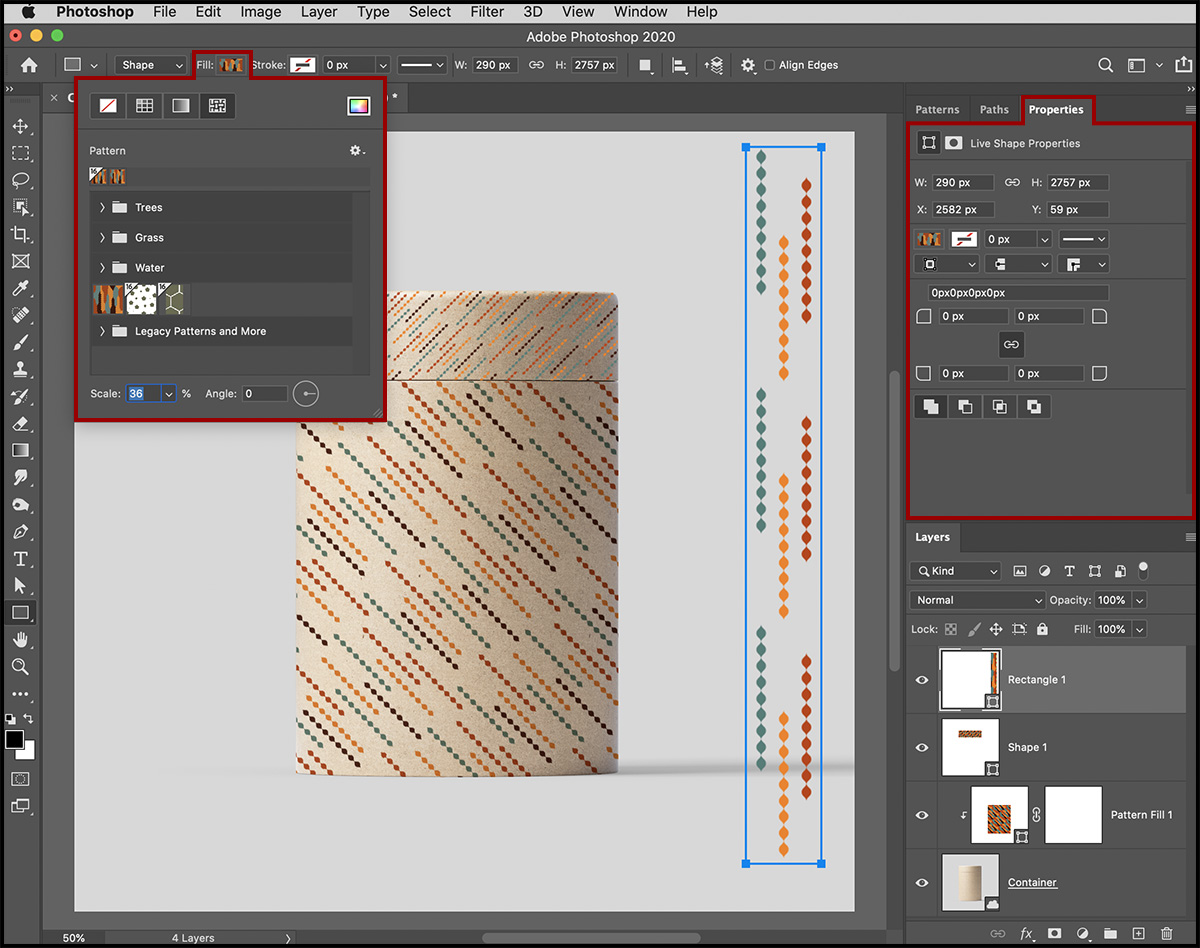
To use a Shape layer to add a second pattern to the top portion of the canister, I selected the Pen tool and drew the shape.
• With the Pen tool still selected, click Shape on the Options bar to convert the path into a Shape layer.

• Double click the Shape layers thumbnail in the Layers panel to edit the pattern.
• Drag the Angle control (or enter a value) for the rotation, make any additional changes, and click OK to apply.
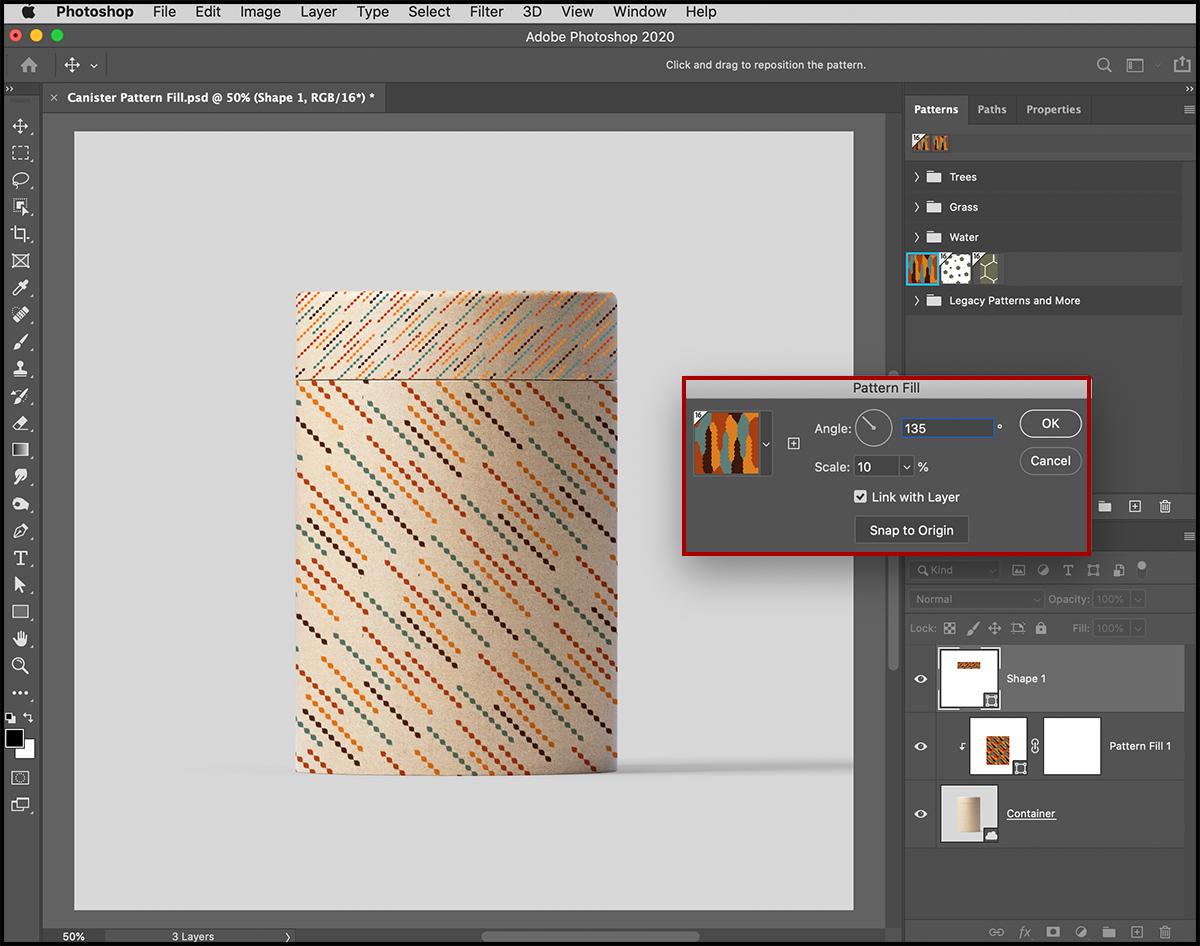
• Change the Blend Mode to Multiply and decreased the Opacity of the layer as needed (to better combine the pattern with the photograph).
When using the Shape tools (Rectangle, Ellipse etc.) to create Shape layers, you can use the Fill and Stroke controls in the Options bar or the Properties panel to change Pattern attributes (in addition to being able to change the the attributes of the shape layer by double clicking on the thumbnail in the Layers panel).
You can also adjust the angle of a pattern when adding Patter Overlay and Stroke Layer Styles/Effects.
Note: If you are unfamiliar with how to create a seamless pattern in Photoshop, this video can help (How to Capture Patterns, Shapes, Colors and Gradients From Images in Photoshop).
Adobe Fonts Auto-Activation
Adobe Fonts are now automatically activated when you open a Photoshop document. In other words, when you open a document that contains Adobe fonts that are not installed on your machine, Photoshop will automatically find, download (sync), and install the fonts. This feature is really about what you won’t have to do anymore – you won’t have to see that missing fonts dialog on open, and you won’t have to select and relink fonts!

Here’s how it works:
• When you first open the file, in the Layers panel, you may see the old, familiar yellow warning icon on the offending Type layer(s), notifying you that a font used in the document is not installed.

• Adobe Fonts auto-activation will automatically start. You’ll see a blue download-in-progress icon when your missing font starts downloading. When the font has finished downloading, the download-in-progress icon will disappear and the type layer is ready for editing.
• If the font that’s missing is not a part of the Adobe Font Library, you won’t be bothered with the “missing font” messaging until you try to edit the respective type layer at which time you will have the option to substitute a font.
• If you have both Adobe Fonts and non-Adobe fonts missing in your document, Adobe Fonts auto- activation will still happen automatically for the missing Adobe Fonts and, if the font is not a part of the type library, you will have the option to substitute the font when you try to edit the respective layer. Note: for a large number of non-adobe fonts, you can also select Type > Manage Missing Fonts.
Select Subject
The Select Subject feature has a new artificial intelligence and machine learning model which has been optimized for portraits (which happen to be the most-selected subject in Photoshop). If it identifies a person in the image, it will run this new model which is trained for difficult-to-select attributes (such as hair), creating a more accurate selection than ever before.
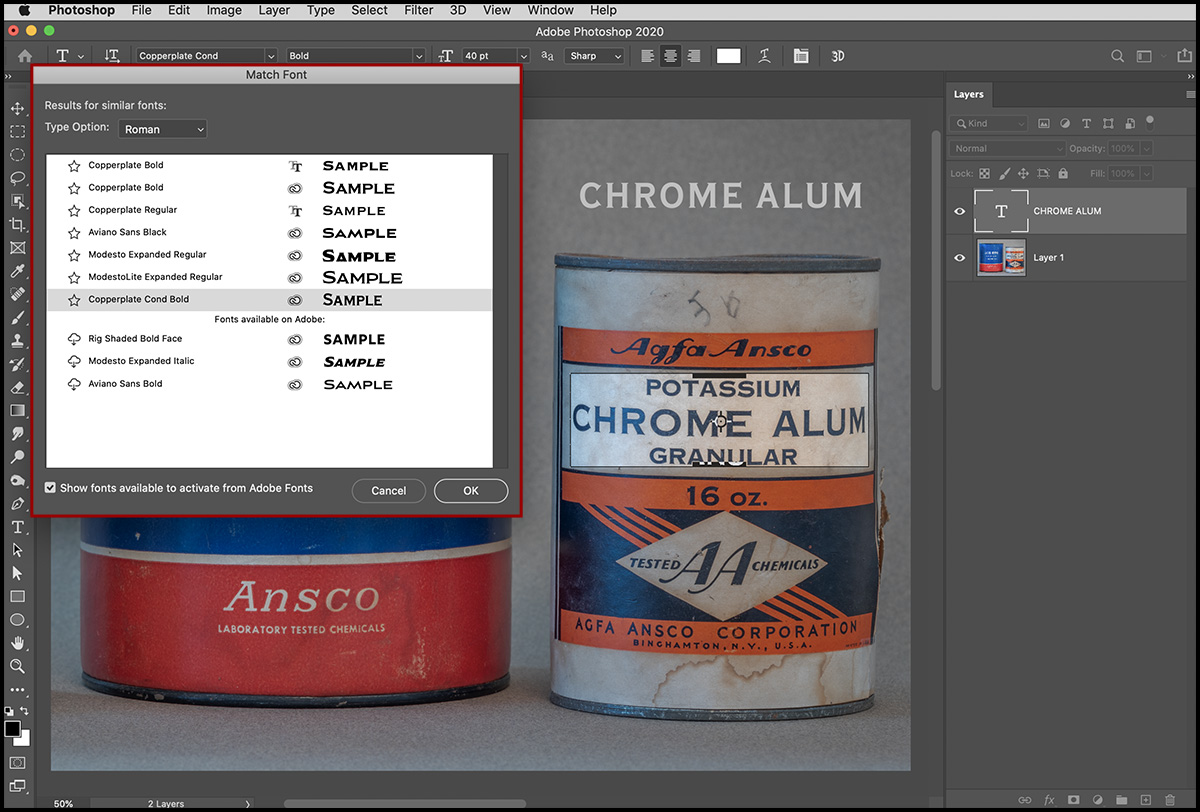
Match Fonts
The Match Fonts feature has been updated with a new artificial intelligence and machine learning model to support a greater number of fonts, vertical text, and detection of multiple lines of type. (Match Fonts automatically determines which pixels in the image are text, figures out what font it is, and then searches through your fonts to find the best match for that text.)
To preview the results while using the Match Fonts command, create a Type layer with the desired text.
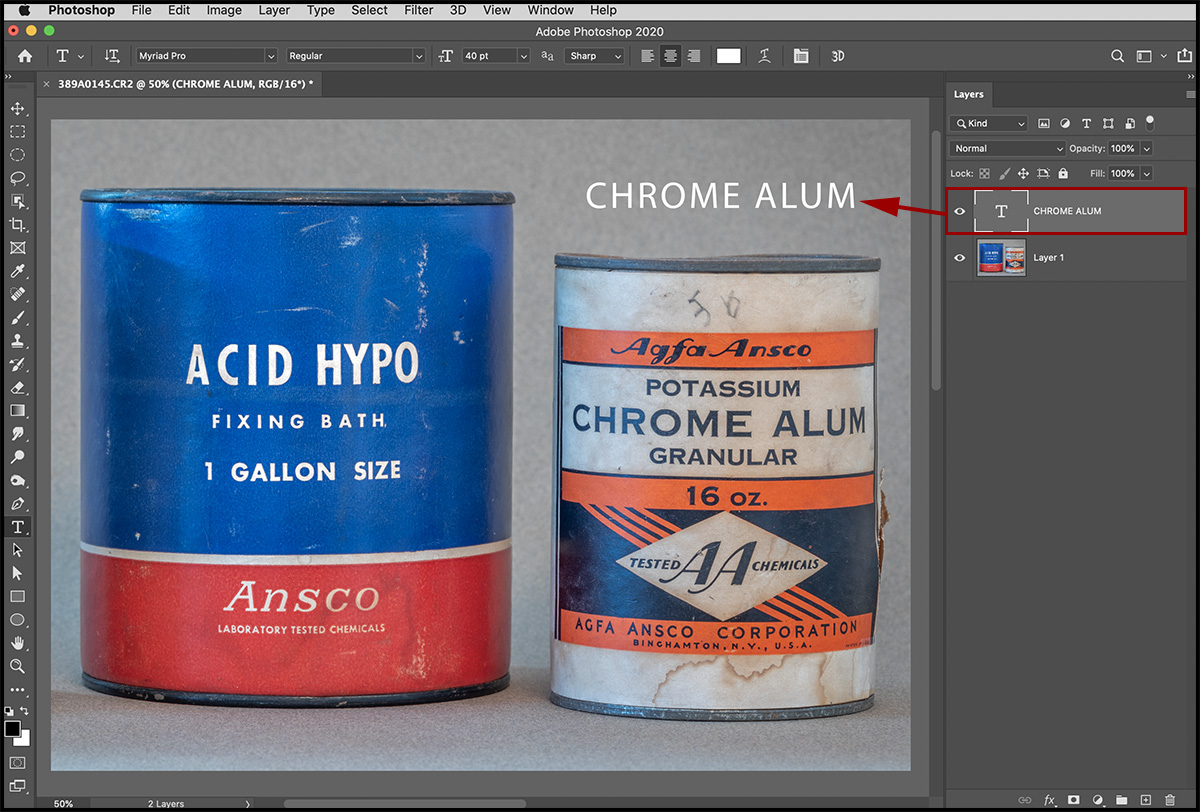
Then, with the Type layer selected, choose Type > Match Font. Adjust the text selection box in the image area to include the text that you want to match.
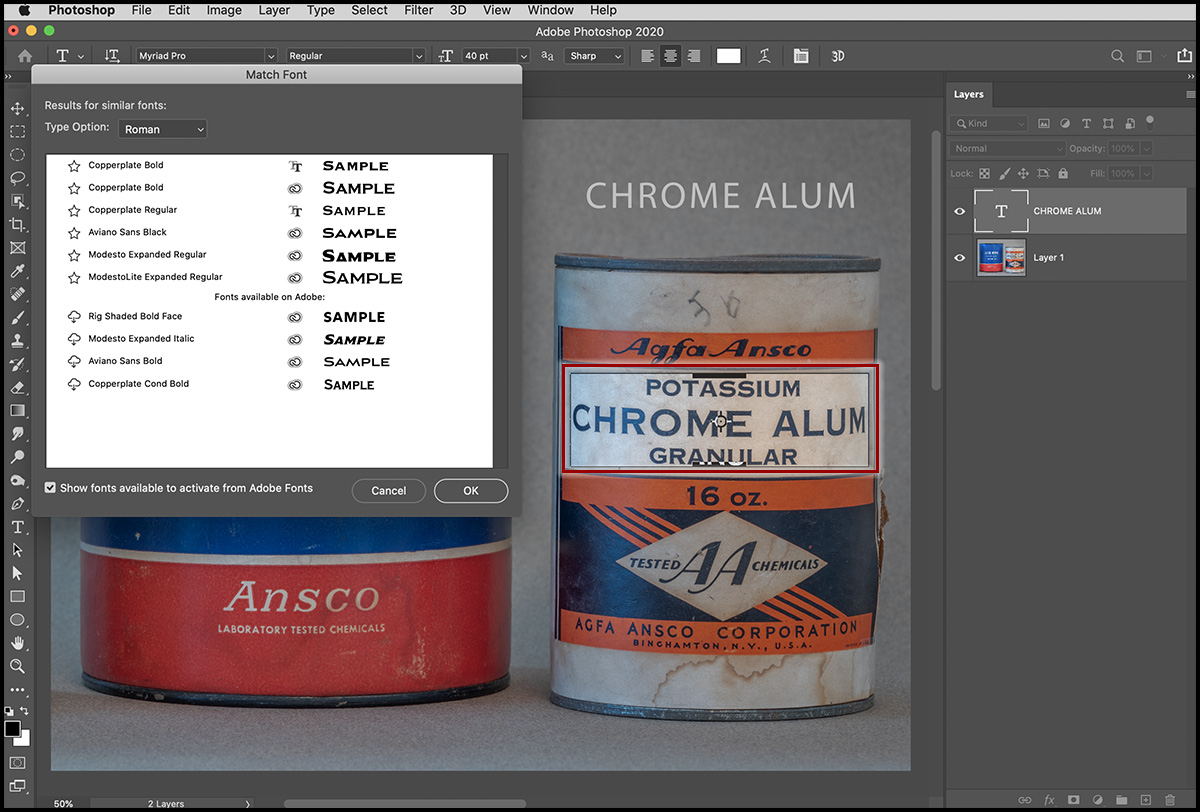
The Match Fonts dialog displays matching (similar) fonts. Selecting a font will update the type layer (installed fonts appear at the top of the list). To install fonts from the Adobe Font Library, click the cloud icon to the left of the font (Photoshop will install, activate, and apply the font to the Type layer.
Adobe Camera Raw v12.3
Adobe Camera Raw has a new, modernized interface, ISO Adaptive Presets, Local Hue Editing and more. For more information, please see this blog post on Adobe Camera Raw v12.3.
Help Improve Adobe Products
If you would like to help Adobe improve the machine learning and Sensei features of Photoshop you can opt in to contribute your images and data to the program. By using real world examples for machine learning, Adobe can build better models for creating selections using Select Subject and Object Select (for example). To opt in, select Preferences > Privacy and enable the check box next to “Yes – I am willing to participate”. Then quit and restart Photoshop. You can opt out at any time by unchecking the opt in box and restarting Photoshop. Please note that images and data may be viewed by researchers.
Click here to see the entire list of new features for Photoshop.