I’m excited to announce several new features and enhancements to Camera Raw v14 including: reimagined local adjustment tools, the new Masking panel, Premium Presets, and a preset Amount slider.
Local Adjustment Tool Updates and Masking Panel — In this video (Camera Raw v14 – The New Masking Tools), you’ll discover how easy it is to make selective adjustments to your photographs using Adobe Camera Raw’s local adjustment tools including the all new Masking panel, Select Subject, Select Sky, Radial and Linear Gradients, Brush, Color and Luminance Range Masking tools.
In addition, here are several tips for using the new Masking features that I didn’t have time to include in the video:
• Tool Shortcuts:
Brush – K
Linear Gradient – G
Radial Gradient – J
Color Range – Shift + C
Luminance Range – Shift + L
Depth Range – Shift + D
• When using the Brush tool, tap “W” to toggle the Auto Mask option.
• Tap “N” to create a new mask of the same type as the currently selected component.
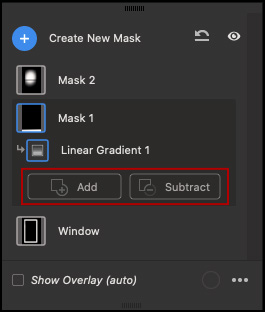
• Use the Shift key to add a new Brush, Linear Gradient, or Radial Gradient component and Option (Mac ) | Alt (Win) to subtract a component. For example, Shift + K adds a brush component to the current mask, and Option +K (Mac ) | Alt +K (Win) subtracts a brush component from the current mask.
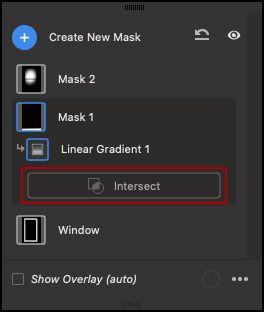
• Hold Shift to toggle the Add and Subtract buttons in the masks panel to Intersect (or, use the More Options icon (…) to select the Intersect Mask With command). Note: Intersect automatically creates a mask component in Subtract + Invert mode. For example, use a brush to get a rough selection around part of the scene, then use Intersect to create a color range mask that further limits the brush mask to just the color(s) selected by the range mask.
• With the Radial Gradient tool selected, tapping the “X” key toggles the Invert feature. When inverted, the adjustment affects the area outside of the ellipse (instead of the inside). The same shortcut applies to the Linear Gradient (the adjustment will affect the opposite side of the gradient). Note: the brush has been removed from the Linear and Radial gradients – instead use the tools in Add /Subtract/Intersect mode to combine mask components.
• When using the Brush tool, tap “W” to toggle the Auto Mask option. Hold Option (Mac) | Alt (Win) to toggle between the Brush and the Eraser.
• Y toggles the visibility of the Mask overlay. Shift+ Y cycles through the different mask overlays (Color, Color Overlay on B&W, Image on B&W etc.).
• V toggles the visibility of mask pins and tools. Option + V (Mac) | Alt + V (Win) toggles Show Unselected Mask Pins. Hold the “A” key to temporarily display the pins for unselected mask. Click on a Mask’s pin in the image area to quickly select another mask (without having to use the Masks panel).
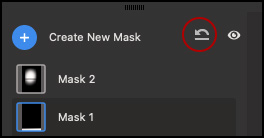
• To reset all masks, click the reset icon in the upper right of the Masks panel.
• When using a Color Range Mask, click to sample a color, Shift-click to sample up to 5 colors. Shift-drag to sample an area of colors. Option -drag (Mac) |Alt -drag (Win) the Refine slider to preview the targeted range as a greyscale mask in the image area.
• Select the Luminance Range Mask option to create a selection based on the brightness values in an image. To select the desired range of values to adjust:
– Use the eyedropper tool to select a specific value.
– Use the eyedropper tool to drag-select a range of values.
– Use the Luminance Range interface (in the panel) and drag to resize and/or reposition the rectangle to define the range that is being effected. The area within the rectangle will be fully adjusted. To avoid abrupt transitions between the areas that are adjusted and those that are not, drag the vertical line (the outer marker) to adjust the smoothness of the fall off (how quickly the selection transitions from the selected tonal range to the unselected range).

The arrows indicate the fall-off range.
Option -drag (Mac) |Alt -drag (Win) the in the Luminance range options to see the Luminance map in the image area (or enable Show Luminance Map).
Note: Luminance Range Masks created using older versions of Camera Raw will display a warning message in the Panel track. These masks must be updated to latest version by clicking on Update button before edits can be made to the mask.

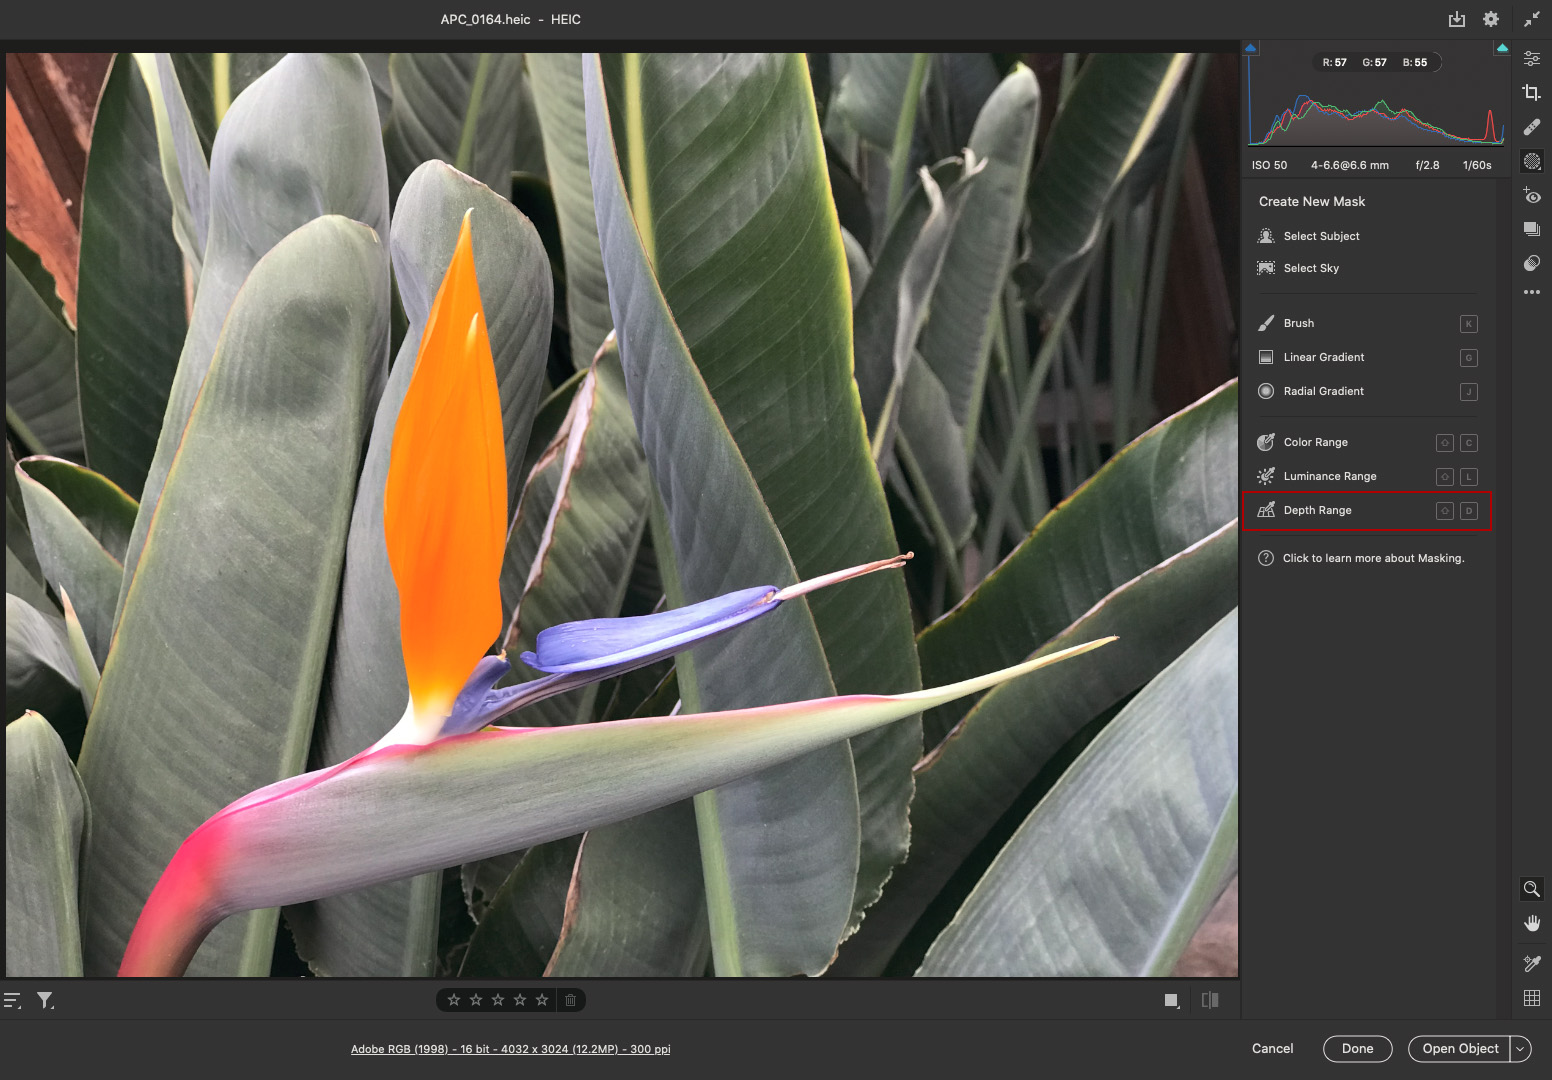
• Depth Range masks select ares in an image based on their distance from the camera and are available only for those photos that have embedded depth map data. As of now, this is limited to HEIC files captured on Apple iPhone using the Portrait mode in the built-in iOS camera app. Note: if there is no available depth info for an image, the Depth Range option is disabled.
Select Depth Range as the Mask type.
To select the desired depth range to adjust:
– Use the eyedropper tool to sample a single area.
– Click-drag with the eyedropper to sample a depth range.
– Use the Depth Range interface to select the area to be masked. The area within the rectangle will be adjusted. To avoid abrupt transitions between the areas that are adjusted and those that are not, drag the vertical line to adjust the fade range.
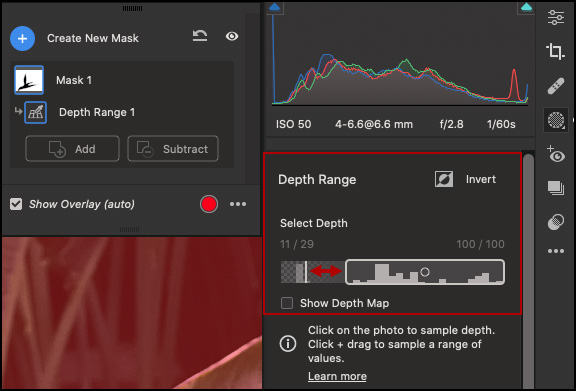
The red arrows show the transitional area between the areas that are completely adjusted and those that are not (the fade range).
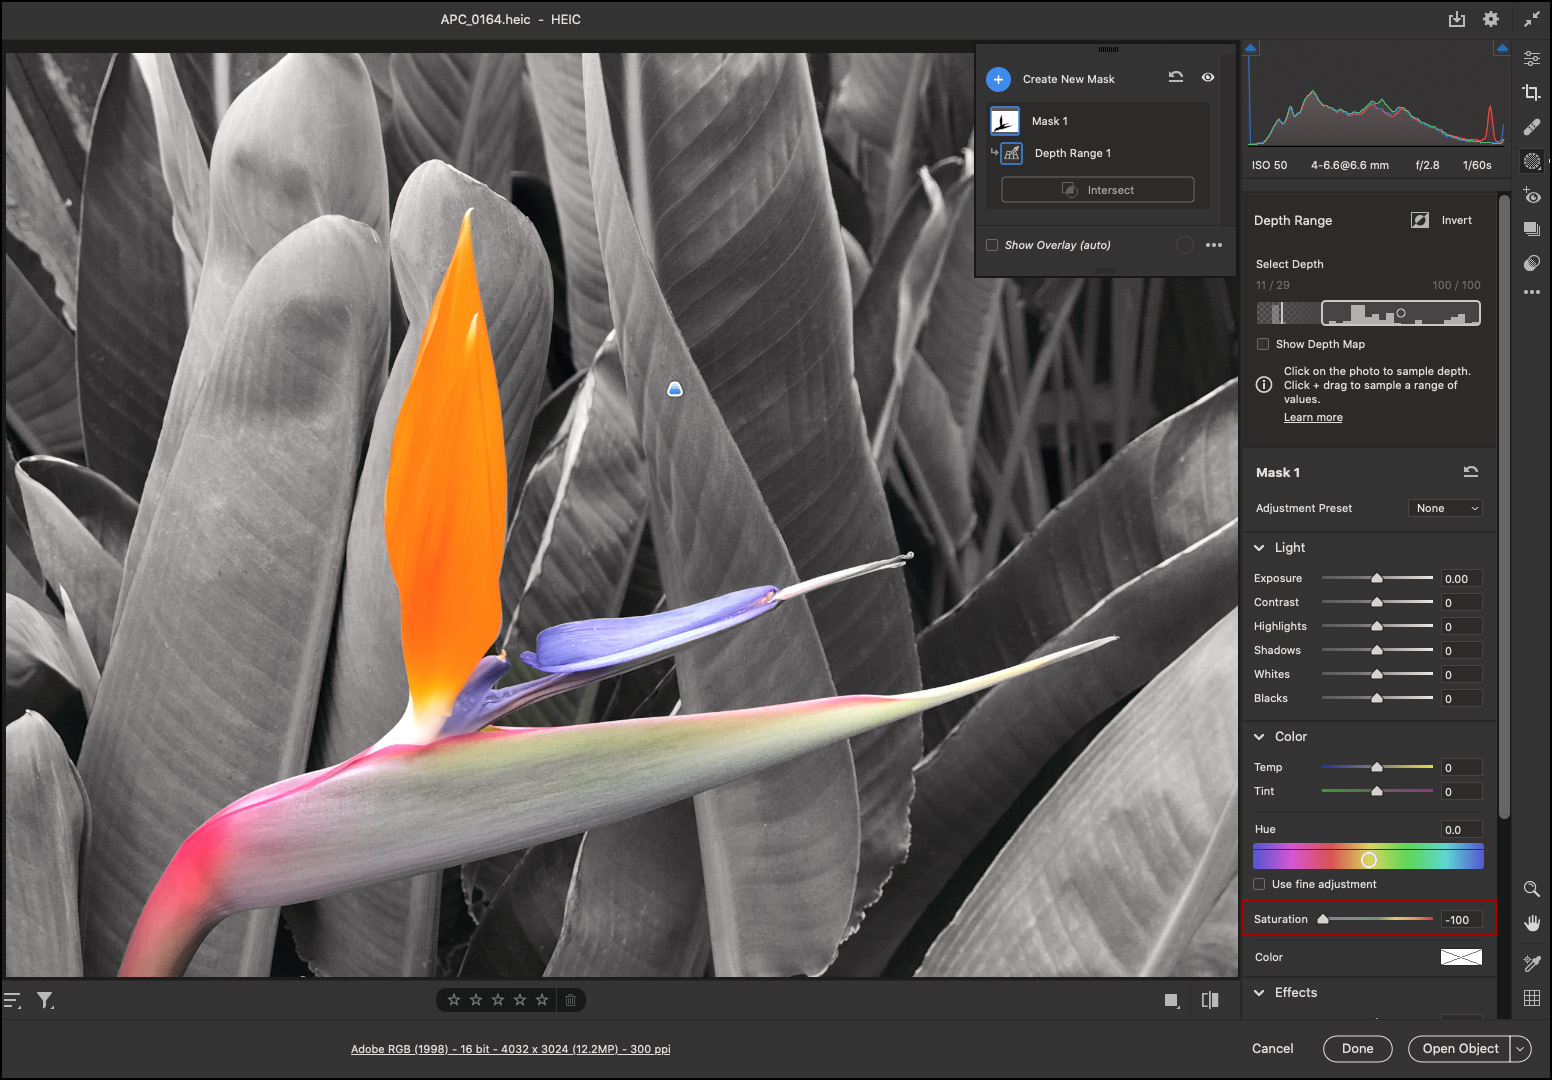
In this example, because the depth range that was selected was farthest from the camera, the adjustment (decreased saturation) was applied to the leaves in the background but not to the flower in the foreground.
Note: Adjustments that included Depth Range Masks created using older versions of Lightroom Classic will display a warning message in the Panel track. These masks must be updated to latest version by clicking on Update button before making additional edits to the Depth Range Mask.
• The following shortcuts can be used to navigate the Masks panel:
– Option + up/down arrow (Mac) | Alt + up/down arrow (Win) targets the mask above/below. When you reach the top or bottom of the list, it will wrap around. If a mask only has a single component, it will be selected automatically.
– If a mask has more than one component, use Option + right Arrow | Alt + right arrow (Win) to select the first component. Then, use Option + up/down arrow (Mac) | Alt + up/down arrow (Win) to move through the components
– Deselect the selected mask or component by pressing Option + left arrow (Mac) | Alt + left arrow (Win).
– Hold Option + Y (Mac) | Alt + Y (Win) to temporarily enable the mask overlay for the currently selected mask component. Note: this shortcut can be combined with the up/down arrow keys to display the mask overlay while targeting different masks.
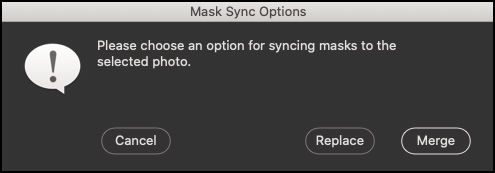
• When you copy and paste a mask to a different image, if the destination image has any masks, you will have the option to Merge the masks (add the pasted masks to the existing masks) or replace the masks (deleting any existing masks).
• You can copy and paste Select Subject and Select Sky masks, but the masks will need to be recomputed in the new image (click the Update button in the panel track).
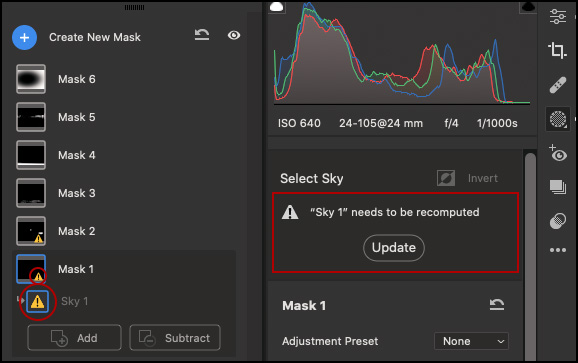
• Masks can be saved in presets. Select Subject and Select Sky will need to be recomputed on the new image (click the Update button in the panel track). If there are masks in the image prior to adding a preset, the masks will be merged.
This blog post by Josh Bury Masking Reimagined has even more information about the new masking features direct from the Adobe Camera Raw team!
Premium Presets — Camera Raw has added several new Premium Presets including Auto + Retro, Black & White, Cinematic II, Food, Landscape, Lifestyle, Travel II, and Urban Architecture. Presets are an excellent starting point and are a great way to try out different “looks” on your images.
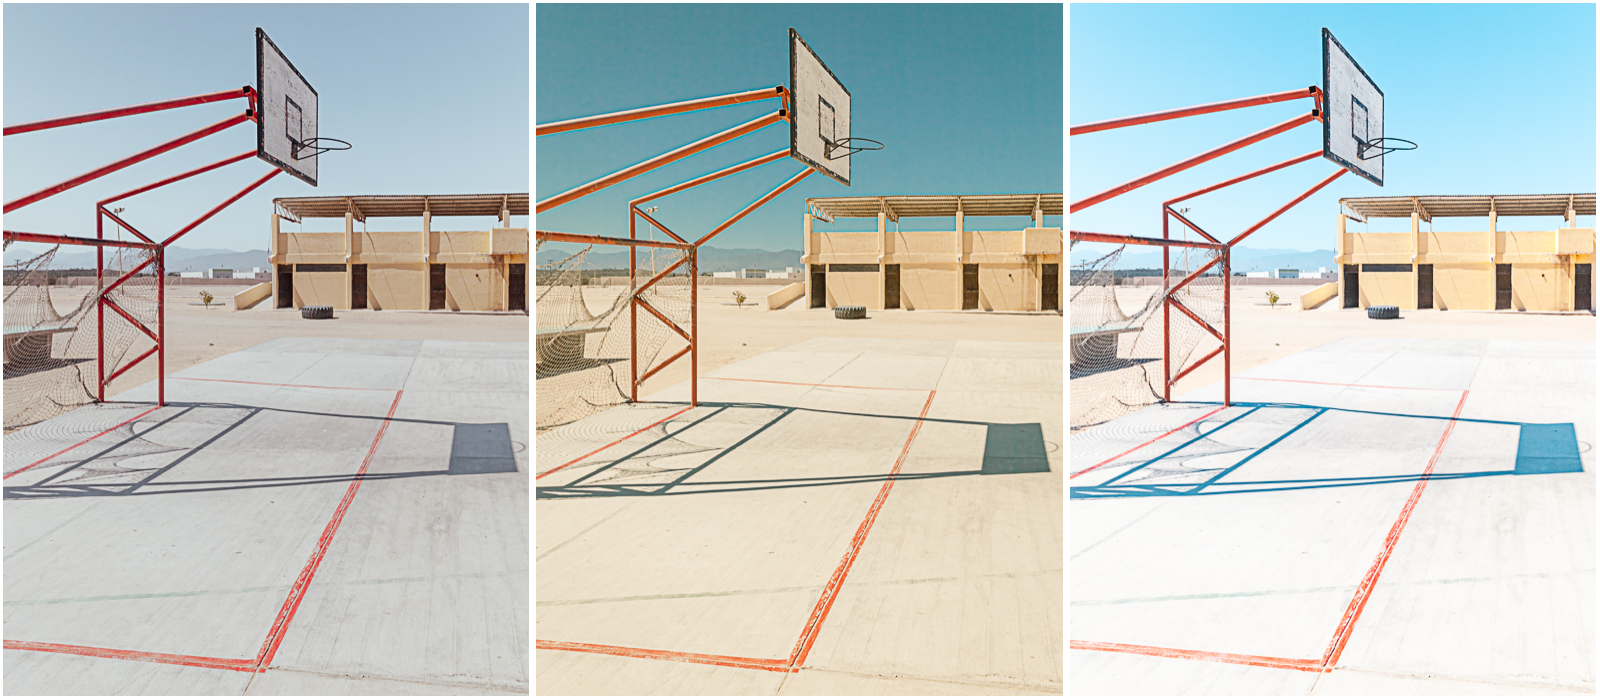
Three Premium Presets applied to create different looks (LF06, CN14, UA01).
If you’re interested in spending some time studying what changes the Premium Presets make to a color chart (as well as to your images), I’ve created two “template” files in Photoshop that you can download. One includes the Portrait and Black & White presets and the other includes all of the remaining Premium Presets. Note: I split them because the file size of the document was getting really large.
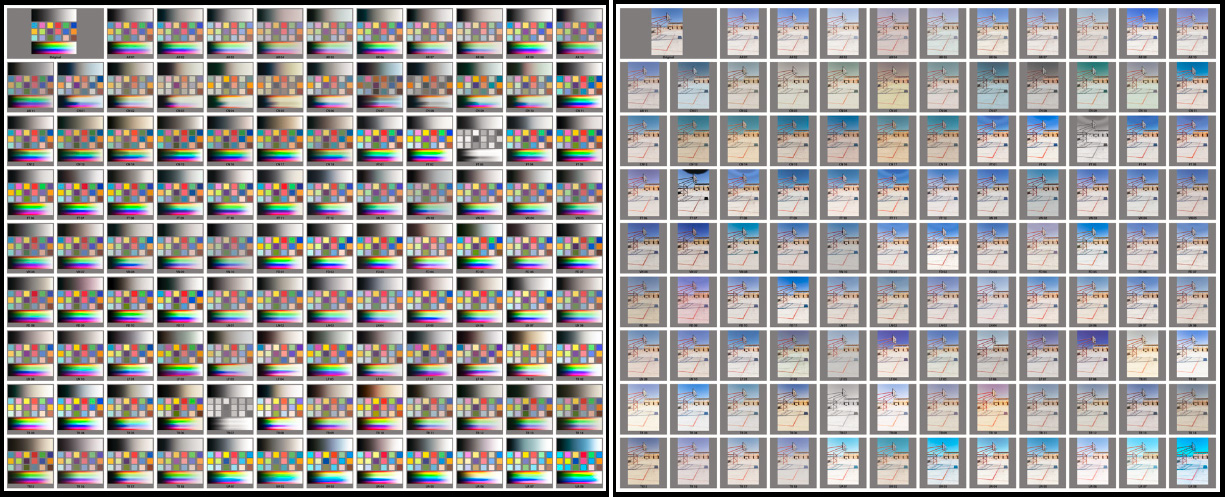
The original template file (left) and after replacing the color chart with an image (right).
Because I duplicated a Smart Object to create all of the instances of the image and applied the Premium Presets using Camera Raw as a filter, you can easily replace the contents of the Smart Object with your own image. Here are the links to download each of the templates:
01Portrait_BWDistribute.psd and 02SpecialEffectsDistribute.psd
And here are the instructions for replacing the contents of the smart object with your own image:
• Open the template file in Photoshop and, in the Layers panel, target (click on) the “Original” layer.
• Select Layer > Smart Objects > Edit Contents. This will open the “Original” layer in its own window named ColorTest.psb. or ColorTest1.psb (depending on the template).
• Copy and paste (or drag and drop) your image into the ColorTest.psb. or ColorTest1.psb document.
• Choose Edit > Free Transform and scale your image to fit within the document as needed (both .psb files are 600 pixels x 600 pixels).
• Save the changes to the ColorTest.psb and close it. Photoshop will update all copies of the Smart Object (applying the different Premium Presets via the Camera Raw Filter). Note: the template is a very complex document – depending on your system, it may take a few moments to process and update the contents of the Smart Objects!
• Once you’ve chosen your preferred preset, note the name of the preset, return to your original image in Camera Raw, and apply it!
Note: There might be very slight differences in color/tone between the Preset applied in Camera Raw and Photoshop depending on the workflow settings chosen to open the file from Camera Raw into Photoshop.
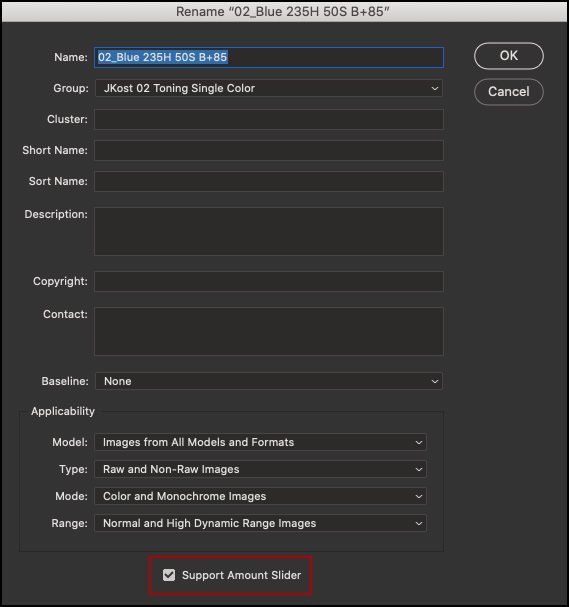
Preset Amount Slider (Beta) — When creating a preset, you can decide whether or not to allow the preset to be “amplified” or “toned down” by adjusting a single, “Amount” slider. Note: the Amount slider moves all of the individual sliders that were saved as a part of the preset a relative amount – sliders that were not saved as part of the preset will not be changed.

To enable/disable the Amount slider for an existing preset, Option + right-click (Mac) | Alt +right-click (Win) on the preset and select Rename Preset from the context sensitive menu.
The Crop tool – When leaving the Crop tool, the image will reset to Fit View.
Aloha Julieanne,
I’m working in ACR 14.0.0.950 with our Canon 5Ds cameras with 11-24, 24-70, 70-200, 100-400 lenses and our DJI Air 2S. For some reason, I can’t get the moiré slider with the canons and it works with the DJI. I have had similar issues in the past, usually with dehaze. Any ideas?
Mahalo,
J.D. Wacker
Sorry, but I don’t know what the issue is. I would suggest posting your question here for additional support: https://community.adobe.com/t5/lightroom-classic/bd-p/lightroom-classic
Yet again, an awesome post with extremely useful information that is not found anywhere else. Thank you so much for your knowledge and effort, Julieanne! You’re my hero 😊
Hi Julianne, Great information. But I have a few questions.
In the past Camera RAW version, you could choose the radial masking filter and linear masking filter with one click. Now I have to click twice to access the feature. It might not mean much but when I open more than 100 raw images that need radial and linear masking two clicks cost a lot of extra time. The shortcuts are not working for me. (in photoshop a brush is B but in Camera Raw, the shortcut for the brush is K that is not intuitive.
Is there a way to add the radial and linear filters to the right screen toolbar so that I can select them directly? Can I change the shortcuts in Camera raw?
Thank you in advance,
Guillaume
Hello Guillaume, although you cannot change the shortcuts, tapping the “J” or “G” keys (even if you’re elsewhere- like the basic panel or cropping), Camera Raw will select the radial/linear gradient – you don’t have to select the mask first.
Great video, Julianne. Great coverage of the new tools in combination and lots of excellent pointers on how to improve usability.
My questions:
How do you use Select Subject where there are two or more subjects and you want separate masks for each.
Following on that, how do you use Select Subject when the subject initially identified by LR isn’t the one you want to mask?
Thanks,
Alec
The vignette adjustment in Camera Raw 14.0 has changed. There is no mid-point size adjustment, feathering, etc. Where did they go?
Hi Tom, in the Effects panel, use the disclosure triangle (the arrow) to the right of the Vignetting slider to expand the panel and view the midpoint/roundness/feather/highlights options.
Hi Julieanne,
Why can’t we have the same keyboard shortcuts in lightroom as photoshop?
Especially, for me anyway, the shortcut for quickly enlarging and reducing brush sizes in lightroom as in photoshop, i.e. holding down control alt while clicking and dragging the tool left and right for hardness and up and down for size? This also gives a great representation in red to show the changes to the brush.
When one is going backwards and forwards between ps and lr it constantly trips me up!
Regards,
Tony.