Lightroom Classic v11 — Local Adjustment Tools, Masking, Premium Presets, Metadata Updates and More!

Adobe Lightroom Classic

I’m excited to announce several new features and enhancements to Lightroom Classic v11 including:  re-envisioned local adjustment tools, the new Masking panel, Premium Presets, updates to the Metadata panel and more!

Local Adjustment Tool Updates and Masking Panel — in this video (Lightroom Classic v11 – The New Masking Tools), you’ll discover how easy it is to make selective adjustments to your photographs using Lightroom Classic’s reimagined local adjustments tools including the all new Masking panel, Select Subject, Select Sky, Radial and Linear Gradients, Brush, and Range Masking tools.

Below are several additional tips for using the new Masks panel and adjustment tools that I didn’t have time to include in the video:

• To see all of the shortcuts associated with masking click the question mark icon at the top right of the Masks panel.

• With the Radial Gradient tool selected, tapping the ‘ (apostrophe) key toggles the Invert feature. When inverted, the adjustment affects the area outside of the ellipse (instead of the inside). The same shortcut applies to the Linear Gradient (the adjustment will affect the opposite side of the gradient). Note: the brush has been removed from the Linear and Radial gradients – instead use the tools in Add /Subtract/Intersect mode to combine mask components.

• When using the Brush tool, tap “A” to toggle the Auto Mask option. Hold Option (Mac) | Alt (Win) to toggle between the Brush and the Eraser.

• Tap “N” to create a new mask of the same type as the currently selected component.

• Option + O (Mac ) | Alt + O (Win) cycles through the different mask overlays (Color, Color Overlay on B&W, Image on B&W etc.). Shift + O cycles through the mask colors (red, green, white, black).

• When Show Edit Pins is set to Selected, hold the “S” key to temporarily display the pins for unselected masks. Click on a Mask’s pin in the image area to quickly select another mask (without having to use the Masks panel).

• Use the Option + arrow keys (Mac) | Alt + arrow keys (Win) to navigate the mask panel. These shortcuts take a bit of getting used to because they depend on whether or not a mask has more than one component (tool) that makes up the mask:

– If you have a mask with only one component (tool), the component is automatically selected as you navigate through the masks. This means that in order to navigate to another mask (above or below the currently selected mask) you need to first use the Option/Alt + left arrow key to deselect the component, then use the Option/Alt + up/down arrow to move to the next mask.

– If a mask has more than one component, then none of the components are selected as you move from one mask to another using the Option/Alt + up/down arrow keys. As a result, with a multi-component mask selected, use Option/Alt + right arrow to select a component, then use the Option/Alt + up/down arrow to move from one component to another within a mask. Use Option/Alt + left arrow to deselect all components for a mask (so that you can use Option/Alt + up/down arrow to move to the next mask).

• Hold Option Mac) | Alt (Win) to toggle the Add and Subtract buttons in the masks panel to Intersect (or, use the More Options icon (…) to select the Intersect command). Note: Intersect automatically creates a mask component in Subtract + Invert mode. For example, use a brush to get a rough selection around part of the scene, then use Intersect to create a color range mask that further limits the brush mask to just the color(s) selected by the range mask.

• When applying a Color Range mask, Option -drag (Mac) | Alt -drag (Win) the Refine slider (in the Panel track) to preview the targeted range as a greyscale mask in the image area.

• Select the Luminance Range mask option to create a selection based on the brightness values in an image. In the example below, I’ve added a Linear Gradient to darken the sky, but it also darkens the tops of the trees.

To remove the trees from the mask, choose Subtract, then select Luminance Range.

To select the desired range of values to adjust:

– Use the eyedropper tool to select a specific value.

– Use the eyedropper tool to drag-select a range of values.

– Use the Luminance Range interface to select the area to be masked.

The area within the rectangle will be fully adjusted. To avoid abrupt transitions between the areas that are adjusted and those that are not, drag the vertical line (the outer marker) to adjust the smoothness of the fall-off (how quickly the selection transitions from the selected tonal range to the unselected range).

The arrows indicate the range of the fall-off.

Option -drag (Mac) | Alt -drag (Win) in the Luminance range options to see the Luminance map in the image area (or enable Show Luminance Map).

Note: Range Masks created using older versions of Lightroom Classic will display a warning message in the Panel track. These masks must be updated to the latest version by clicking on Update button before making additional edits to the Range Mask.

• Depth Range masks select ares in an image based on their distance from the camera and are available for photos that have embedded depth map data. As of now, this is limited to HEIC files captured on Apple iPhone using the Portrait mode in the built-in iOS camera app. Note: if there is no available depth info for an image, the Depth Range option is disabled.

Select Depth Range as the Mask type.

To select the desired depth range to adjust:

– Use the eyedropper tool to sample a single area.

– Click-drag with the eyedropper to sample a depth range

– Use the Depth Range interface to select the area to be masked. The area within the rectangle will be adjusted. To avoid abrupt transitions between the areas that are adjusted and those that are not, drag the vertical line to adjust the fade range.

In this example, because the depth range  that was selected was farthest from the camera, the adjustment (decreased saturation) was applied to the background leaves but not the foreground flower.

Note: Adjustments that included Depth Range Masks created using older versions of Lightroom Classic will display a warning message in the Panel track. These masks must be updated to latest version by clicking on Update button before making additional edits to the Depth Range Mask.

• When you copy and paste a mask to a different image, if the destination image has any masks, you will have the option to “Merge” the masks (add the pasted masks to the existing masks) or “Replace” the masks (deleting any existing masks).

– Applying “Previous” Settings will always replace the masks in the destination image.

– Auto-Sync and Presets will always merge masks.

• You can copy and paste Select Subject and Select Sky masks, but the masks will need to be recomputed in the new image. Click the Update button in the panel track to update the mask.

• Masks can be saved in presets. Select Subject and Select Sky will need to be recomputed  on the new image (click the Update button in the panel track).

This blog post by Josh Bury Masking Reimagined  has even more information about the new masking features direct from the Adobe Camera Raw team!

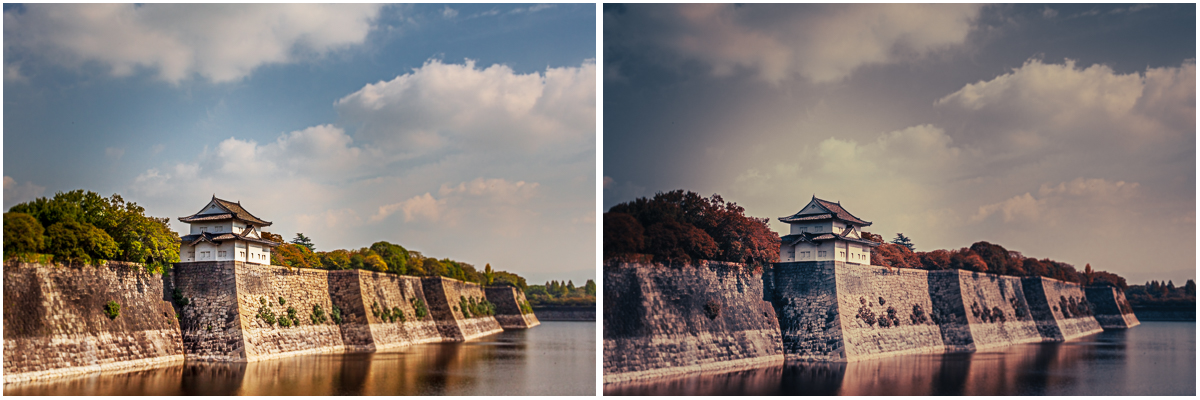
Premium Presets — Lightroom Classic has added several new Premium Presets including Auto + Retro, Black & White, Cinematic II, Food, Landscape, Lifestyle, Travel II, and Urban Architecture. Presets are an excellent starting point and are a great way to try out different “looks” on your images.

Three Premium Presets applied to create different looks (LF06, CN14, UA01).

If you’re interested in spending some time studying what changes the Premium Presets make to a color chart (as well as to your images), I’ve created two “template” files in Photoshop that you can download. One includes the Portrait and Black & White presets and the other includes all of the remaining Premium Presets. Note: I split them because the file size of the document was getting really large.

The original template file (left) and after replacing the color chart with an image (right).

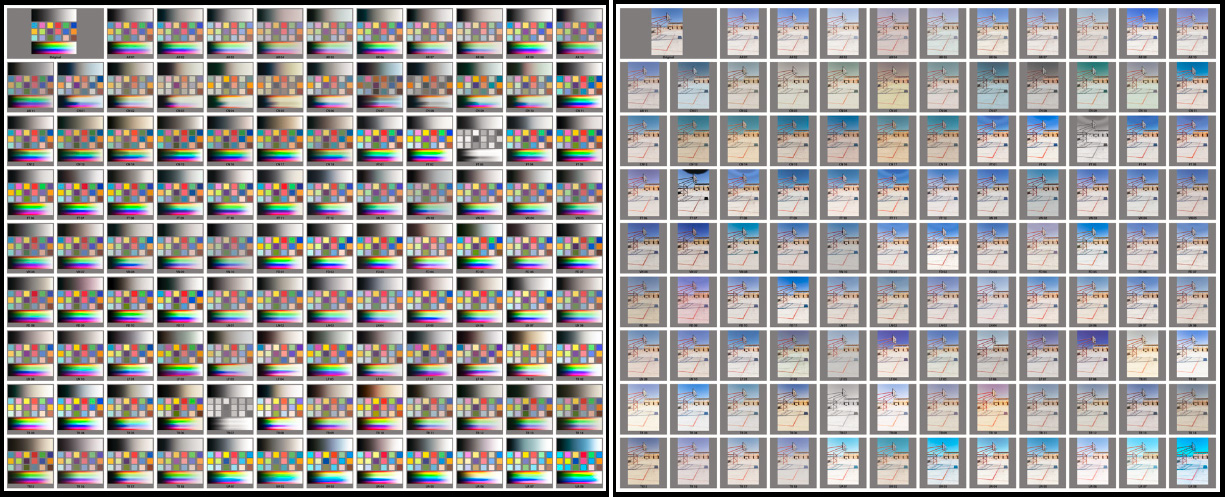
Because I duplicated a Smart Object to create all of the instances of the color chart and applied the presets using Camera Raw as a filter, you can easily replace the contents of the Smart Object with your own image. Here are the links to download each of the templates:

01Portrait_BWDistribute.psd  and 02SpecialEffectsDistribute.psd

And here are the instructions for replacing the contents of the Smart Object with your own image:

• Open the template file in Photoshop and, in the Layers panel, target (click on) the “Original” layer.

• Select Layer > Smart Objects > Edit Contents. This will open the “Original” layer in its own window named ColorTest.psb. or ColorTest1.psb (depending on the template).

• Copy and paste (or drag and drop) your image into the ColorTest.psb. or ColorTest1.psb document.

• Choose Edit > Free Transform and scale your image to fit within the document as needed (both .psb files are 600 pixels x 600 pixels).

• Save the changes to the ColorTest.psb and close it. Photoshop will update all copies of the Smart Object. The template is a very complex document – depending on your system, it may take a few moments to process and update the contents of the Smart Objects! 

• Once you’ve chosen your preferred preset, note the name of the preset, return to your original image in Lightroom Classic, and apply it!

Note: There might be very slight differences in color/tone between the Preset applied in Lightroom Classic and Photoshop depending on the settings chosen to export the file from Lightroom Classic as well as the Color Settings set in Photoshop.

Customize the Default Metadata Panel — In Default view, click the Customize button at the bottom of the Metadata Panel to access the Customize Metadata Default Panel dialog.

• Use the check-boxes to toggle the visibility of  the desired metadata fields. Then, click the Arrange button to rearrange the order of metadata fields.

• By default, with multiple photos selected, Lightroom Classic displays the metadata for the the target photo.  Use the Target Photo | Selected Photo option at the top of the Metadata panel to show the metadata for either the Target Photo or for all Selected Photos.

• To increase performance, when editing metadata for large volumes of images, use the Page icon on the Metadata panel to toggle Edit-Only mode. In Edit-Only mode, all fields that are not editable are hidden (making it easier to find and edit the desired metadata fields). One word of caution — In Edit-Only mode, Lightroom Classic doesn’t the load metadata values from the selected file(s) into the metadata fields in the Metadata panel. This means that if, for example, you have an image (or multiple images) selected and the image(s) have metadata applied, you will not see it in the metadata field and, if you enter new metadata into the field, Lightroom Classic will replace any existing metadata.

Updates to “Automatically write changes into XMP” — Edits made in the Develop module will be saved into XMP only after the active image selection changes (in other words, when you move to another image), unlike previous versions where every single edit would be saved into XMP. Note: Automatically write changes to XMP must be enabled in Catalog Settings for Lightroom Classic to write the settings to the files (or to an external sidecar file for proprietary raw files).

New Metadata Filters — Two new Library Filters (Month and Day) have been added to the Metadata options.

Batch Edit Improvements ­— Previews should update faster in Grid, Secondary Grid, Survey mode and in the filmstrip (Library and Develop modules) after settings are applied to multiple images.

Catalog Upgrade — Because this is a full upgrade (v11) and not just an update, Lightroom Classic will need to upgrade your catalog.  Upgrading your catalog creates a new copy of your catalog, so your existing catalog remains intact in the unlikely event that you would want to return to the previous version. When prompted to upgrade, Lightroom Classic displays a window where you can rename the catalog as desired. You can choose to keep the default name for the upgraded catalog: (currentCatalogName)-lrcV11 or, choose a name of your own. All of Lightroom’s companion files (lrdata packages/folders for Previews and Sync for example), will automatically be renamed based on name of the upgraded catalog. In addition, a new <CatalogName>.lrcat-data file will appear next to your catalog (on the hard drive) which stores Smart Selection generated masks along with the 3D LUT (from profiles) and will be included (within the zip archive) when backing up a catalog.


Adobe Lightroom Classic

Posted on 10-26-2021


Comments

  • By James Laird - 7:32 AM on October 26, 2021  

    Great stuff. Very informative. It will take a while to absorb it all. I look forward to receiving the update!

  • By Carl - 7:48 AM on October 26, 2021  

    Updated color profiles for Canon R5?

  • By Josh S - 7:56 PM on October 26, 2021  

    Thanks, this is very helpful. I’m trying to wrap my head around the changes. There used to be a way to set a range mask within a mask, but I can’t figure out how to do that in the new system. For example, if I brush an area of the photo, how do I set a color range mask that only affects the colors within the brushed area, and not the rest of the photo?

    • By Julieanne Kost - 8:10 PM on October 26, 2021  

      Hi Josh, If I understand what you’re asking, I believe that you want to use the Intersect option… Use the brush to paint over the area, then hold the Option/Alt key and choose Intersect (instead of Add or Subtract) – then add the secondary component (like the Color range mask) to have the adjustment only effect the color areas within the initial brush area. (Intersect automatically creates a mask component in Subtract + Invert mode.)

  • By Bob McCormac - 8:22 AM on October 28, 2021  

    Deeply disappointing the the straightforward way to use the Linear Gradient, Radial Gradient, and Local Adjustments Brush is now so convoluted to use. Adobe need to rpovide a way to go back to the original interface while still rpoviding the new tools.

  • By Hal - 12:27 PM on October 28, 2021  

    I’m using the object or subject selection tool. Often it misses some of either. How to I add to the selection so I can do actions such as invert on the repaired selection.
    Thanks,
    Hal

    • By Julieanne Kost - 3:43 PM on November 1, 2021  

      Hal, you can use the Add or Subtract button and then select a tool to use to refine the mask.

  • By Bosse Kinnås - 1:02 PM on October 31, 2021  

    At last a way to customize the metadata panel (without going to 3rd party plugins). But I guess there is still no way to save different metadata panels for different uses? Sometimes I only need a few fields and other times more.

    And still no way to customize keyboard shortcuts..? For example; the useful left and right brackets cannot be used on a computer with Swedish OS, Swedish keyboard layout and English applications which is a very common way to run Lightroom and Photoshop etc in Sweden.

  • By Ewan Mathers - 4:23 AM on November 1, 2021  

    LR CC 11 – Mac 12.0.1 Radial Filter.

    1. Any way to fix the Invert check box on rather than off?
    2. When I drag the cursor over the image to create a radial mask it stops at the edge of the LR box. I used to be able to drag ‘beyond the screen’ on the initial drag so that the radial filter could act more as an overall vignette rather than just a small area. It gets really fiddly to adjust the filter size once drawn now. Is there a way around this? I did try reducing the size of the image on screen but this is not very satisfactory either 🙁

    Thanks!! Ewan

  • By RogerM. - 9:46 AM on November 1, 2021  

    Can you please advise what may have happened to brush presets? The brush button is gone and so are my many brush presets. Thank you in advance!!

    • By Julieanne Kost - 2:38 PM on November 1, 2021  

      Hi Roger, I still see my brush presets when I click on the Masking icon and select the brush. In the panel track on the right, under the brush options, and above all of the sliders, I see “Effect:” and to the right of that, when I click on Exposure, the presets for the tool appear in the drop down menu. If you still aren’t seeing yours, I would suggest posting your question here for additional support: https://community.adobe.com/t5/lightroom-classic/bd-p/lightroom-classic

  • By Roger Styles - 10:35 AM on November 1, 2021  

    Very impressive masks, but I have tried the spot removal tool after doing some masking adjustments and it doesn’t seem to work properly. Any ideas?

  • By Debbie - 10:58 AM on November 1, 2021  

    Are the premium presets mentioned actually free? Should they be listed in presets after the upgrade because I do not see them anywhere. Maybe they aren’t really free ??
    Thanks for any guidance. I love following your blog btw.

    • By Julieanne Kost - 2:30 PM on November 1, 2021  

      Hi Debbie – They are free and should be installed by default with the upgrade to LrC v11. Could it be that they are hidden? Try clicking on the plus icon next to the Presets panel and select Manage Presets – are they disabled (unchecked) in the dialog?

      • By Debbie - 1:04 PM on November 2, 2021  

        Thank you so much. Indeed they were the only presets unchecked. Appreciate your response.

  • By Steve Zimmermann - 3:37 PM on November 1, 2021  

    I’ve got LR Classic running on my iMac at home and on my MacBook Pro for when I’m in the field (both use the same Adobe account). The Creative Cloud app on my MacBook Pro allowed me to update v10.3 to v11, but on my iMac it says my apps are all up to date, even though I’m running LR Classic v10.3. This is a problem, because I’ve got a catalog I built in v11 on my MacBook Pro this weekend that I can’t import to my iMac because it’s not running v11 and gives me the error “Lightroom cannot import from this catalog. The catalog has been created by a newer version of Lightroom.”

    How can I force the update to v11 on my iMac?

  • By Bruce Titus - 1:45 PM on November 2, 2021  

    It’s very disappointing that you can’t simply duplicate a mask and then invert the entire mask instead of individual sub-masks. I attempted to invert all the sub-masks one at a time, but that didn’t work.

    It would be very helpful if you could collapse the sub-masks like you can layers in Photoshop.

    • By Julieanne Kost - 3:59 PM on November 3, 2021  

      Sometimes you need to invert one of the components that make up a mask and then change the other mask component from “Add” to “Subtract” or even “Intersect” depending on the mask that you’re trying to create.

  • By kari - 4:22 AM on November 3, 2021  

    Great selection tools. Unfortunatelly you can’t invert edited mask. Hope that wd be possible in next version

    • By Julieanne Kost - 3:58 PM on November 3, 2021  

      Yes, you can invert a mask! Click the “More Options”icon (the three dots) next to the component that you want to invert (you can’t invert the “mask”, but you can invert the components that make up the mask, because you don’t always want to invert all components (more powerful!).

      • By kari - 5:18 AM on November 4, 2021  

        I tried and tried, but didn’t got the right result. If I want invert components separately, I can create all the components in their own mask.

  • By Vatii Mutki - 9:40 PM on November 5, 2021  

    Excellent and informative tutorial. I just want to say ”Awesome”. Excellent work. Keep it up. Thanks for sharing.

  • By Jim C - 3:27 PM on November 8, 2021  

    I’m stunned. I’ve been using the adjustment brush for YEARS. My lightroom classic updated today and the adjustment brush is gone. If I wanted to do masking I would export the image to Photoshop and play there. I just want “lighten” “darken” “skin smoothing” etc. Who does this stuff?

    • By Julieanne Kost - 1:34 PM on November 16, 2021  

      Hi Jim, click on the mask icon (or use the keyboard shortcut) to access the local adjustment tools.