Here are my favorite tips to quickly align and distribute layers in Photoshop.
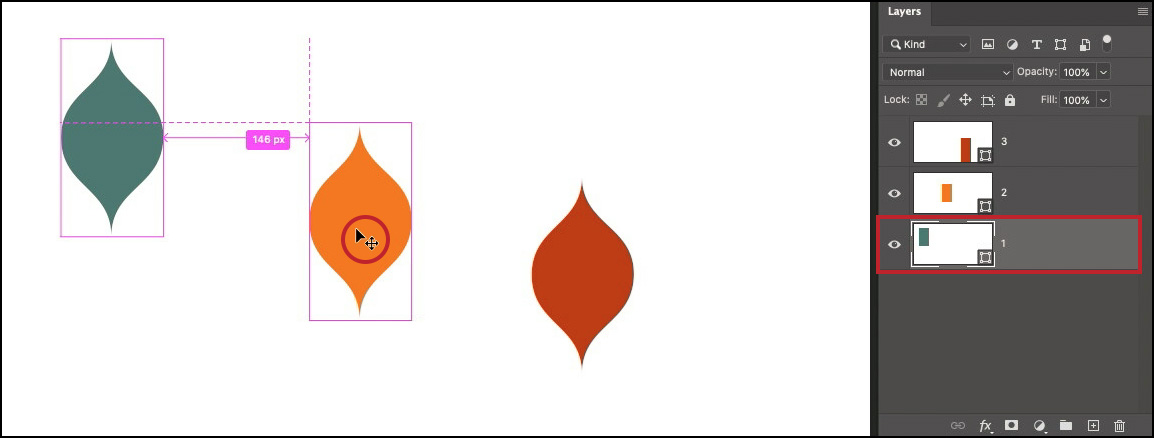
Aligning Layers using Smart Guides — As you reposition layers in a document, Photoshop displays Smart Guides to help align and distribute the contents. In the illustration below, the horizontal smart guides show that the center of the gold shape is in alignment with the top of the rust shape and the bottom of the gold shape is in alignment with the center of the rust shape. Note: the Smart Guides forming the rectangle around the gold shape define the bounding box of the shape.

• With the Move tool selected:
Hold Command (Mac) | Control (Win) and reposition the curser outside of the targeted layer to display the distance between the edge of the currently selected layer’s bounding box and the edge of the canvas.
Holding Command (Mac) | Control (Win) and positioning the curser over the contents of another layer will display the distance between the content in the layers. You can then use the Move tool to reposition the active layer, you can also use the arrow keys to nudge the selected layer until you get the exact distance you want between layers (while referencing the Smart Guide’s measurement). Note: When using the arrow keys, the distance that Photoshop moves the layer is based onto zoom percentage so, if you want to move a layer in single pixel increments, be sure to zoom to 100%.
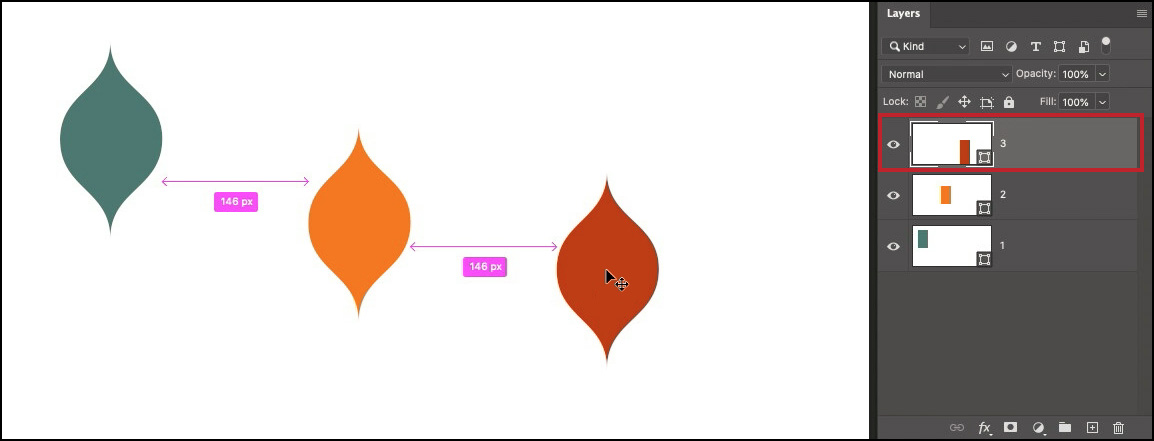
When repositioning a third layer, if the distance between the third layer and the distance between the other layers is close to being the same, Smart Guides will snap the content of the selected layer to equally distribute the layers.
• When working with multiple shapes on the same layer, use the Direct Selection tool (with the same shortcuts as above) to help align and distribute layers.
• Select Preferences > Guides, Grid & Slices to change the color of Smart Guides.
• Select View > Show > Smart Guides to toggle the visibility of Smart Guides or, use the shortcut Command +H (Mac) | Control + H (Win) to toggle the visibility of all Extras.
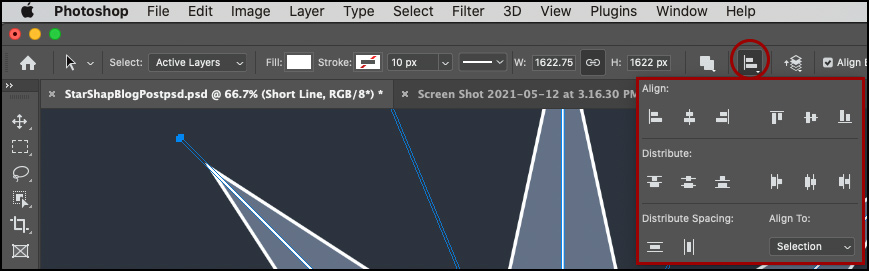
Aligning the Contents of Multiple Layers — Select two or more layers (or Layer Groups or linked layers) and, with the Move tool selected, use the Align icons in the Options bar. Note: the Align and Distribute options are also menu items (Layer > Align and Layer > Distribute).
Use the icons on the Options bar to align and distribute layers. Click the more icon (the ellipse) for additional options.
By default, layers are aligned based upon their location within the canvas.

In this first illustration all of the shapes are on different layers and all of the layers are selected.
Then, with the Move tool selected, the Align Center option was chosen in the Options bar. The three shape layers are aligned based on the center of their original locations.
If you want to align the layers to a specific location, use a selection tool to select the location and then choose the desired alignment option.
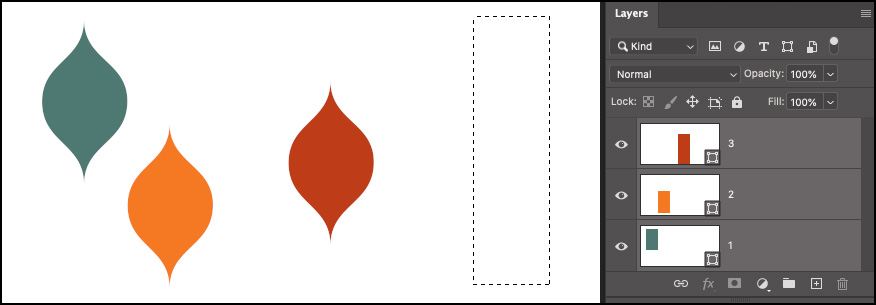
The three shape layers are targeted in the Layers panel and a selection was made with the Rectangular Marquee tool on the right side of the canvas.
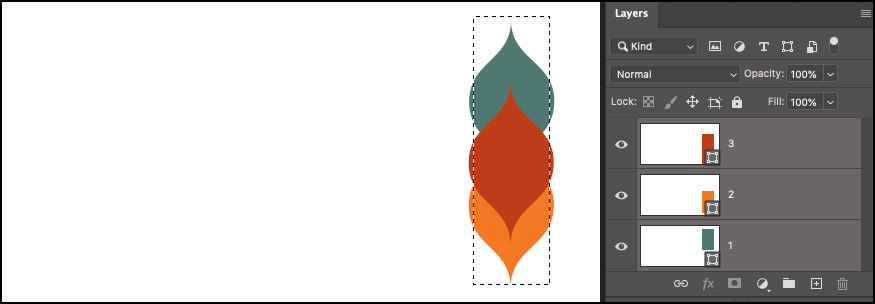
When the Align Center icon is selected, the three shape layers are center aligned within the marquee selection.
To align layers based on the canvas, click the More icon (the three dots) to choose Canvas.
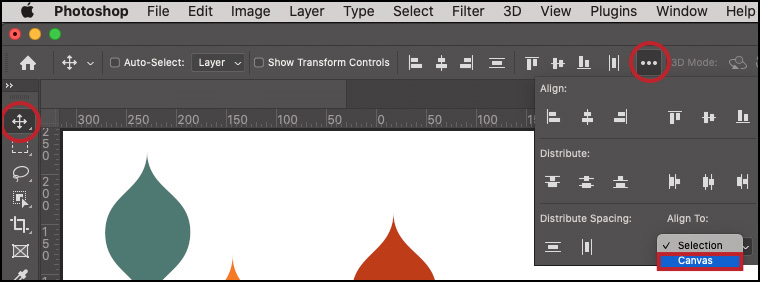
The three shape layers are targeted in the Layers panel and with the Move tool selected, click the More icon to access the Canvas option.
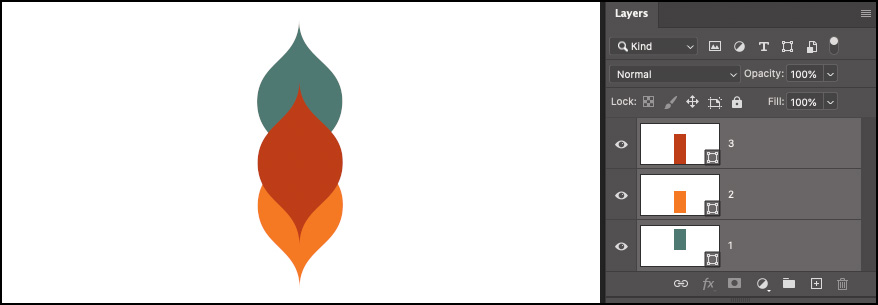
When Align Center icon is selected, three shape layers are aligned in the center of the canvas.
Distributing the Contents of Multiple Layers — Photoshop can quickly distribute layers (horizontally or vertically) based on either the spacing between layers (regardless of the size of each layer’s content), or the center of each layer’s content. The first illustration shows the original image with 6 photos – each on their own layer with a random amount of spacing/overlap between them.

To distribute the layers with equal spacing between each layer, Select the Move tool and click the Distribute Horizontally icon to distribute the images.

To distribute the layers based on the center of each layer’s content, target the layers in the Layers panel and, with the Move tool selected, click the More icon (the three dots) in the Options bar and click the Distribute Horizontal Centers icon. As you can see in the illustration below, this is not the optimal choice in this instance because the photos on the layers are different sizes.

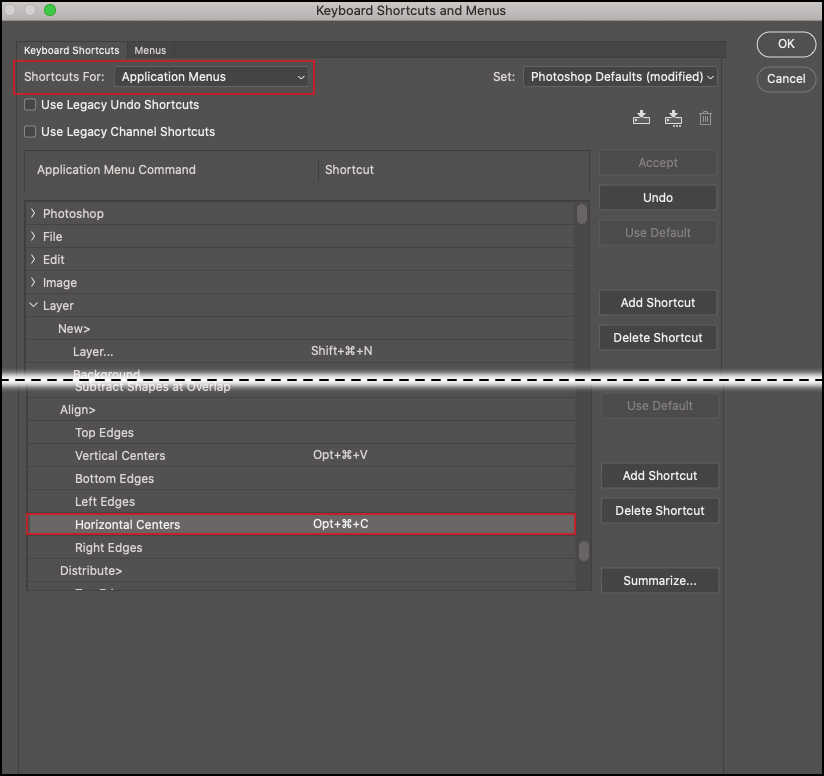
Assigning Custom Keyboard Shortcuts — If you use the Align and Distribute options often and want to assign a custom keyboard shortcut to them, choose Edit > Keyboard Shortcuts, Choose Shortcuts For: Application Menus, use the disclosure triangle next to Layer to show the menu commands and enter a shortcut next to the desired commands. Note: These menu items can also be recorded as a part of an action.
Align and Distribute Multiple Shapes on a Single Layer — Use the Path Selection tool to select multiple shapes (on the same layer). Then, use the Path Alignment icon in the Options bar to align and distribute the selected shapes.
Quickly Centering a Layer — Using the Move tool with “Smart Guides” and “Snap” enabled (View > Show > Smart Guides and View > Snap), makes it easy to reposition a layer in the center of the canvas. If, however, you have a very complex document with a number of overlapping layers near the center of the image, it can be difficult to “Snap” to the correct location. When this is the case, don’t forget that you can quickly Select > All (Command + A (Mac) | Control + A (Win) and, with the Move tool chosen, click the “Align Vertical Centers” and “Align Horizontal Centers” icons in the Options bar.