Here’s how to quickly create a “smoke-flake” by duplicating, rotating, and flipping multiple copies of a photograph of smoke: How to Create a Smoke-Flake in Photoshop.
If you’re familiar with (and prefer to use) an action to create/automate this effect, I have included a link to download the action as well as a practice file below. For those of you that prefer a written step-by-step, I’ve included that as well. Enjoy!
How to Create a Smoke-flake in Photoshop
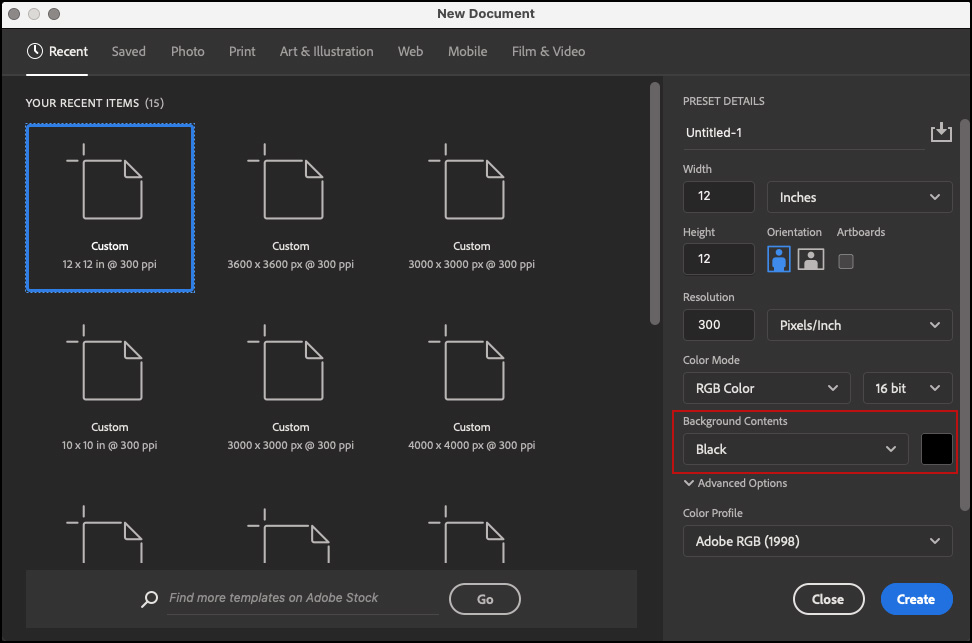
• Create a new document at the desired size. In this instance I entered 12 x 12 inches and 300 pixels/inch. Be sure to set the Background Contents to Black.
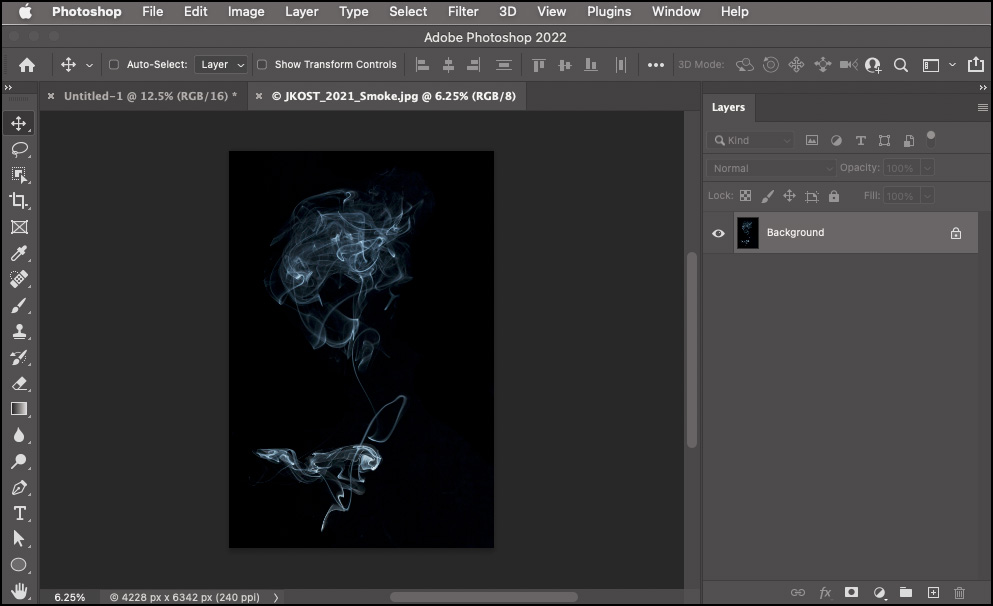
• Open an image of smoke. You can download and use this JPEG file to practice with (JKOST_2021_Smoke.jpg).
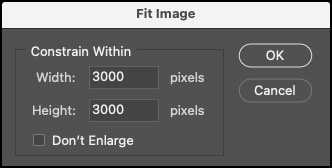
• Choose File > Automate > Fit Image. In order for the entire “smoke” image to be visible on the canvas when rotated, it needs to be smaller than the New Document’s canvas. In this example, I entered 3000 x 3000 in the Fit Image dialog to constrain the smoke image’s longest edge to 3000 pixels.
• Choose Select > All (to select the contents of the smoke image).
• Choose Edit > Copy (this will copy the contents of the smoke image to the clipboard).
• Choose File > Close (and close the smoke image without saving changes).
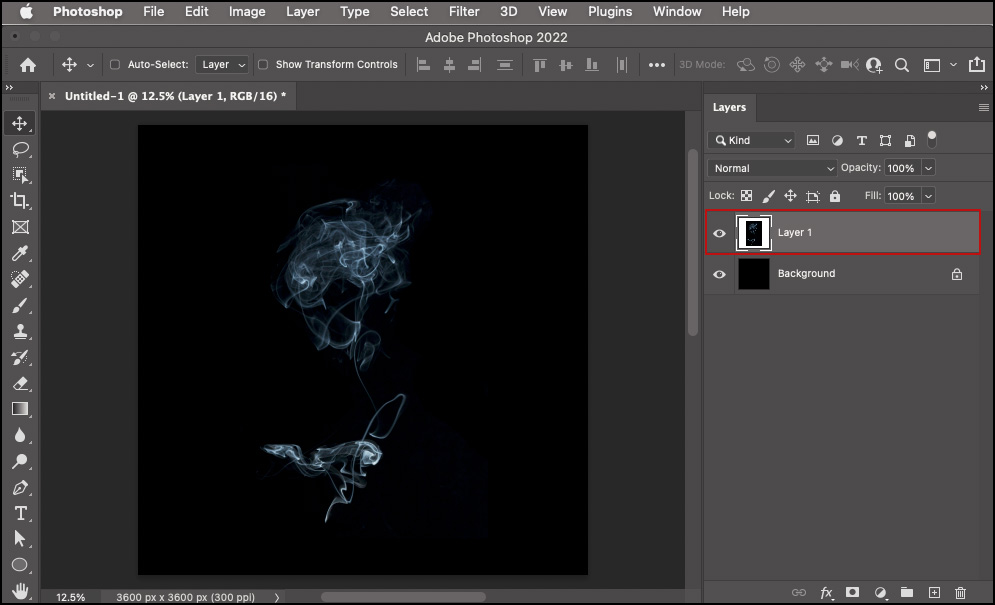
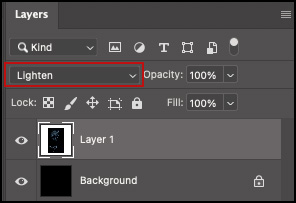
• Choose Edit > Paste (this will paste the contents of the clipboard into the new document as “Layer 1”).
• On the Layers panel, change the blend mode for “Layer 1” to Lighten.
• Duplicate the “Layer 1” five times using Layer > New > Layer Via Copy (or use the shortcut Command + J (Mac) | Control + J (Win)).
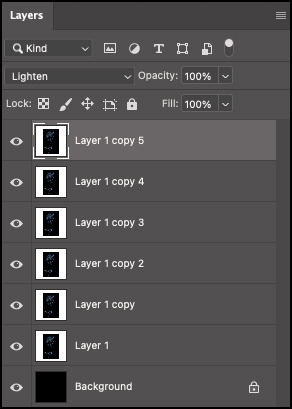
• In the Layers panel, select “Layer 1 copy”. Choose Edit > Transform > Rotate and enter 15 degrees in the Option bar.
![]()
• In the Layers panel, select “Layer 1 copy 2”. Choose Edit > Transform > Rotate and enter 30 degrees in the Option bar.
• In the Layers panel, select “Layer 1 copy 3”. Choose Edit > Transform > Rotate and enter 45 degrees in the Option bar.
• In the Layers panel, select “Layer 1 copy 4”. Choose Edit > Transform > Rotate and enter 60 degrees in the Option bar.
• In the Layers panel, select “Layer 1 copy 5”. Choose Edit > Transform > Rotate and enter 75 degrees in the Option bar.
• In the Layers panel, select all 6 smoke layers (“Layer 1” through “Layer 1 copy 5”).
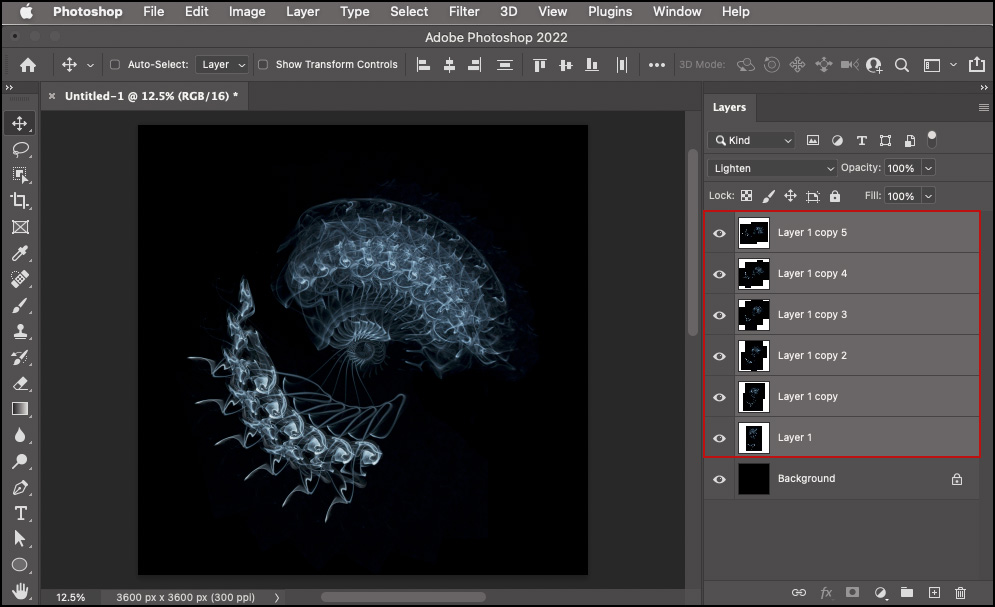
• Choose Layer > New > Group from Layers. Leave the name set to the default (Group 1) and click OK.
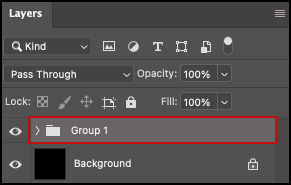
“Group 1” created.
• With “Group 1” targeted in the Layers panel, select Layer > New > Layer Via Copy (this will create “Group 1 copy”).
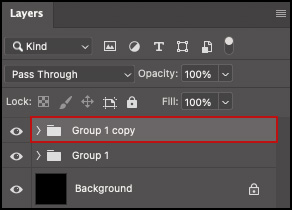
“Group 1 copy” created.
• In the Layers panel, target “Group 1 copy” and choose Edit > Transform > 90º Clockwise.
After transforming “Group 1 copy” 90º clockwise.
• In the Layers panel, target “Group 1” and “Group 1 copy” and choose Layer > New > Layer Via Copy (this will create “Group 1 copy 2” and “Group 1 copy 3”).
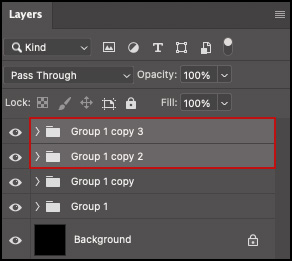
“Group 1 copy 2” & “Group 1 copy 3” created.
• In the Layers panel, target “Group 1 copy 2” and “Group 1 copy 3” and choose Edit > Transform > 180º.
After transforming “Group 1 copy 2” and “Group 1 copy 3” 180 degrees.
• In the Layers Panel target all 4 groups and select Layer > New > Layer Via Copy (this will create “Group 1 copy 4”, “Group 1 copy 5”, “Group 1 copy 6” and “Group 1 copy 7”).
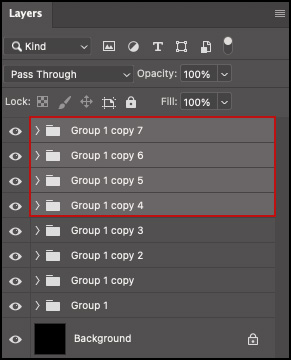
“Group 1 copy 4” – “Group 1 copy 7” created.
• In the Layers panel, target “Group 1 copy 4”, “Group 1 copy 5”, “Group 1 copy 6” and “Group 1 copy 7” and choose Edit > Transform > Flip Horizontal.
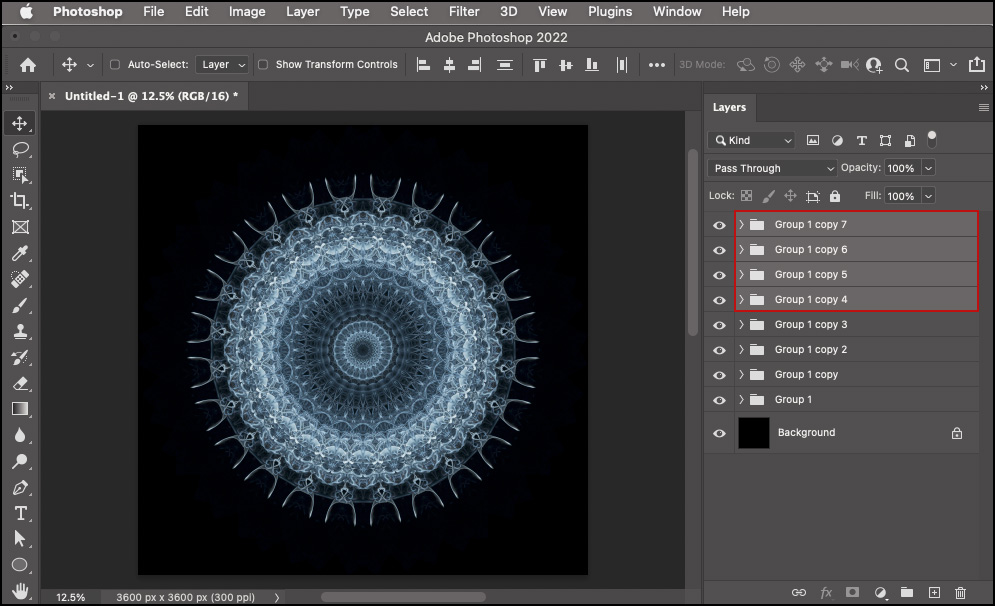
After flipping “Group 1 copy 4”- “Group 1 copy 7” horizontally.
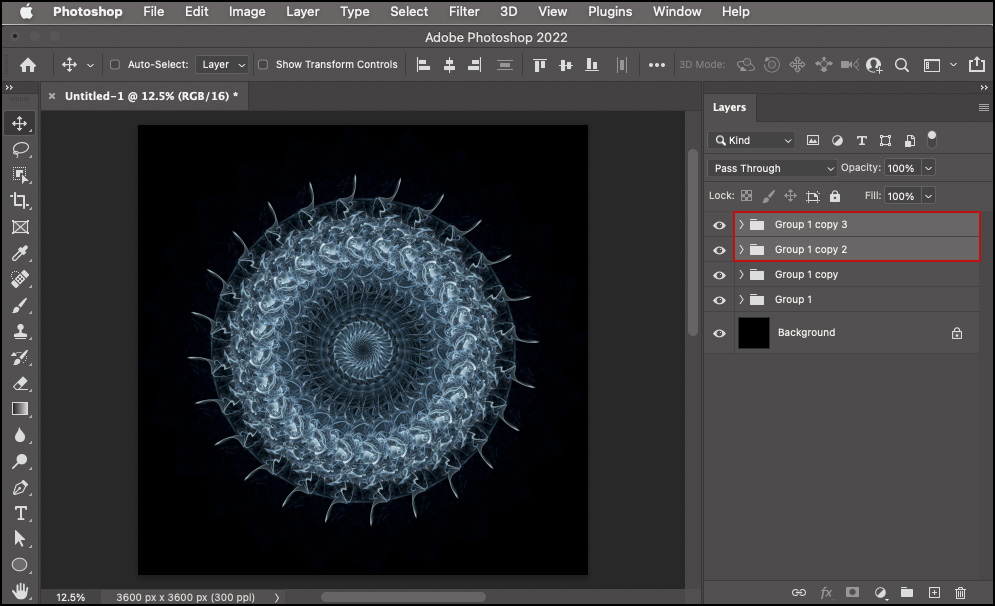
Voila, you are done!
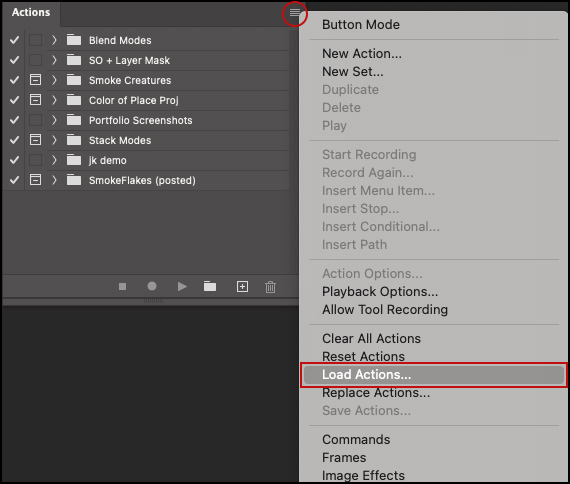
Note: Because I wanted to create several different “smoke-flakes”, I recorded these steps in an action (SmokeFlakes.atn) for you to download. To load the action into Photoshop, use the fly-out menu on the Actions panel and choose Load Actions. Then, navigate to the SmokeFlakes action and select it. As you play the action, when it reaches the Open state either use the practice image (which you can download above) or, use your own photo. Have fun!
I’ve been a Ps student now for around fifteen years. Although I have a lot a favorites, (you probably know them all,} you are about the best. Love your sense of humor. You leave no ambiguity. Your artwork leaves me a tad envious. Thanks with gratitude.
This is really good staff. Thank you for sharing.
This is amazing, thank you so much for creating these instructions – I can see I’m going to be having so much fun!
Thanks a lot Julieanne I really enjoy your tutorials. I have downloaded your action to create smokeflakes but unfortunately, as my Photoshop is in set up in another language, it does not work, the action stops and shows an error message every time it tries to find a layer with the name written in English. Is there anyway I could edit the commands? Thanks very much in advance.
Oh drat, I didn’t think of that. Yes, you can edit the commands: Playing Single Commands in Actions—Double clicking on a single command in the Actions panel will play the command if there are no options associated with the command (Select> All or Edit > Copy for example). If, however there are options associated with the command (such as Image > Image Size), Photoshop will display the necessary dialog box. This is an excellent feature if you want to make changes to that command – but beware, whatever you enter in the dialog box will now become the recorded value in the action. To bypass the dialog (playing the command using it’s recorded options), add the Command (Mac) | Control (Win) key when double clicking the name of the recorded command.
Or, it might be easier to simply rerecord the action on your part. This post might help https://jkost.com/blog/2020/11/using-actions-to-increase-your-productivity-in-photoshop.html or this video https://youtu.be/JzzHPPnUWzA
Hi Julieanne,
I have been following you for years and want to tell you how much I appreciate your teaching style and especially your very precise step by step instructions…so many other educators take for granted that we all know the little nuances of PS. Your detailed teaching really makes it fun and easy for me to follow along and create without getting frustrated because a small bit of critical info was left out….thanks for being a mentor that helps me understand some very complex editing issues….really appreciate all the time and work you put in for us.
Thank you Jack, I’m glad to hear that you’re enjoying the content!