In the video below , you’ll learn how to create, save, and apply edit presets in the Develop module in Lightroom Classic.
Below are Tips and Information about Edit Presets in Lightroom Classic:
Finding Presets — use the Search bar at the top of the Presets panel to quickly find presets (and preset groups) by name. Note: this was added Ito Lightroom Classic in version 13.
Creating Presets — Command + Shift + N (Mac) | Control + Shift + N (Win) to create a New Preset.
Applying Presets — Presets can be applied to images in the Develop module, the Library module using Quick Develop and the Painter Tool as well as when Importing files (in the Apply During Import panel) and when using Auto Import.
Presets with While Balance Settings — If you include White Balance settings in a preset applied to a Raw file, and apply that preset to a JPEG file, Lightroom Classic tries to apply the equivalent white balance adjustment (but using the JPEG scale). Therefore, the White Balance adjustment on a JPEG (using a preset based on a raw file) is necessarily an approximation and results will vary from image to image.
Importing Presets — to import a preset, click the “+” (plus) icon on the Presets panel and choose Import Presets. Select the .zip file to have Lightroom Classic automatically place the presets in the right location. Presets are saved as XMP files, making them compatible and accessible across all of the Lightroom products, Camera Raw, and Camera Raw as a filter in Photoshop.
If you attempted to import (or create) presets with the same name into a group, Lightroom Classic presents the following three options:
- “Replace” the existing preset (only the latest preset with the same name will exist in the group).
- “Duplicate” the preset (there will be two presets with the same name now listed in the group).
- “Rename the preset” (by default a numeric extension is applied to the name or, you can rename it yourself).
Exporting Presets — To export a preset (or a group of presets, Control -click (Mac) | right -click (Win) on a preset/preset group (excluding the defaults), and choose Export Group.
Favorite Presets — If you have a lot of presets, but only use a few of them on a regular basis, right-click (Control -click Mac) the name of the preset and choose “Add to Favorites”. A Favorites group appears at the top of the Presets panel making them easy to find.
Renaming Presets — To rename a preset, right -click (Control -click on Mac) and choose Rename Preset.
Updating Presets — To update a preset, first make the necessary changes to the image, then right -click (Control -click on Mac) and choose “Update with Current Settings”. Use the checkboxes to select the settings to save within the preset and choose Update.
Preset Amount Slider — When creating a preset, you can decide whether or not to allow the preset to be “amplified” or “toned down” by adjusting the “Amount” slider located above the Presets panel. Note: the Amount slider moves all of the individual sliders that were saved as a part of the preset a relative amount – sliders that were not saved as part of the preset will not be changed.
Previewing Presets — If you don’t want presets to preview in Loupe view, choose Preferences > Performance and uncheck “Enable hover preview of presets in Loupe”. Presets will still preview in the Navigator panel.
Managing Presets — To selectively hide and show groups of presets, click on the ‘+’ icon on the Presets panel and select Manage Presets. In the Manage Presets dialog, use the checkbox to toggle the visibility of preset groups.
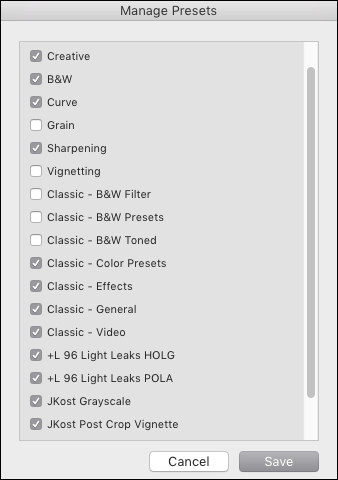
- To reset the visibility of all presets, Control -click (Mac) | Right-click (Win) on the Preset group (not an individual preset), and select Reset Hidden Presets.
Locating Custom Presets — To quickly navigate to the Develop module’s preset folder, choose Preferences > Presets and click “Show Lightroom Develop Presets”. Or, right -click (Control -click Mac) on any custom preset in the Preset pane and choose Show in Finder (Mac ) | Reveal in Explorer (Win).
Process Version — When creating presets, include the Process Version to ensure that the presets will not change if a feature is upgraded in future versions of Lightroom Classic.
Non-Compatible Presets — if a preset isn’t meant to work with the selected image (camera profiles that aren’t applicable to the current photo or presets that only apply to raw files vs. JPEGs for example), they will appear faded and italicized in the Presets panel. Note: To hide non-compatible presets, choose Preferences > Presets > Visibility > and uncheck “Show Partially Compatible Develop Presets”.
Store Presets with Catalog — The option to store presets and templates with a specific catalog is particularly useful when there is a need to work on several different computers. For example, in an educational “lab” environment, a student might have all of their images and catalog on an external drive making it easy to move from one machine to another during each “open lab” session. If they choose Preferences > Presets > Location and check the “Store Presets with Catalog” option, any user-created preset (such as metadata templates, develop presets etc.) will be stored within the same folder as the associated catalog (instead of in the default location on the lab machine). The advantage is that which ever computer they launch their Lightroom catalog upon, they will see their presets (and only their presets). When working on a single computer however, I would suggest NOT checking the “Store Presets with Catalog” option. Instead, save the presets (and templates) to the default location so that they are accessible if working with multiple catalogs. Note: in Preferences > Presets > Lightroom Defaults, there are several options for restoring presets to their defaults which may also be useful in teaching environments.
Batch Cropping Images — Presets can’t contain cropping information, but you can change one image and then copy and paste and/or synchronize the crop setting between images.
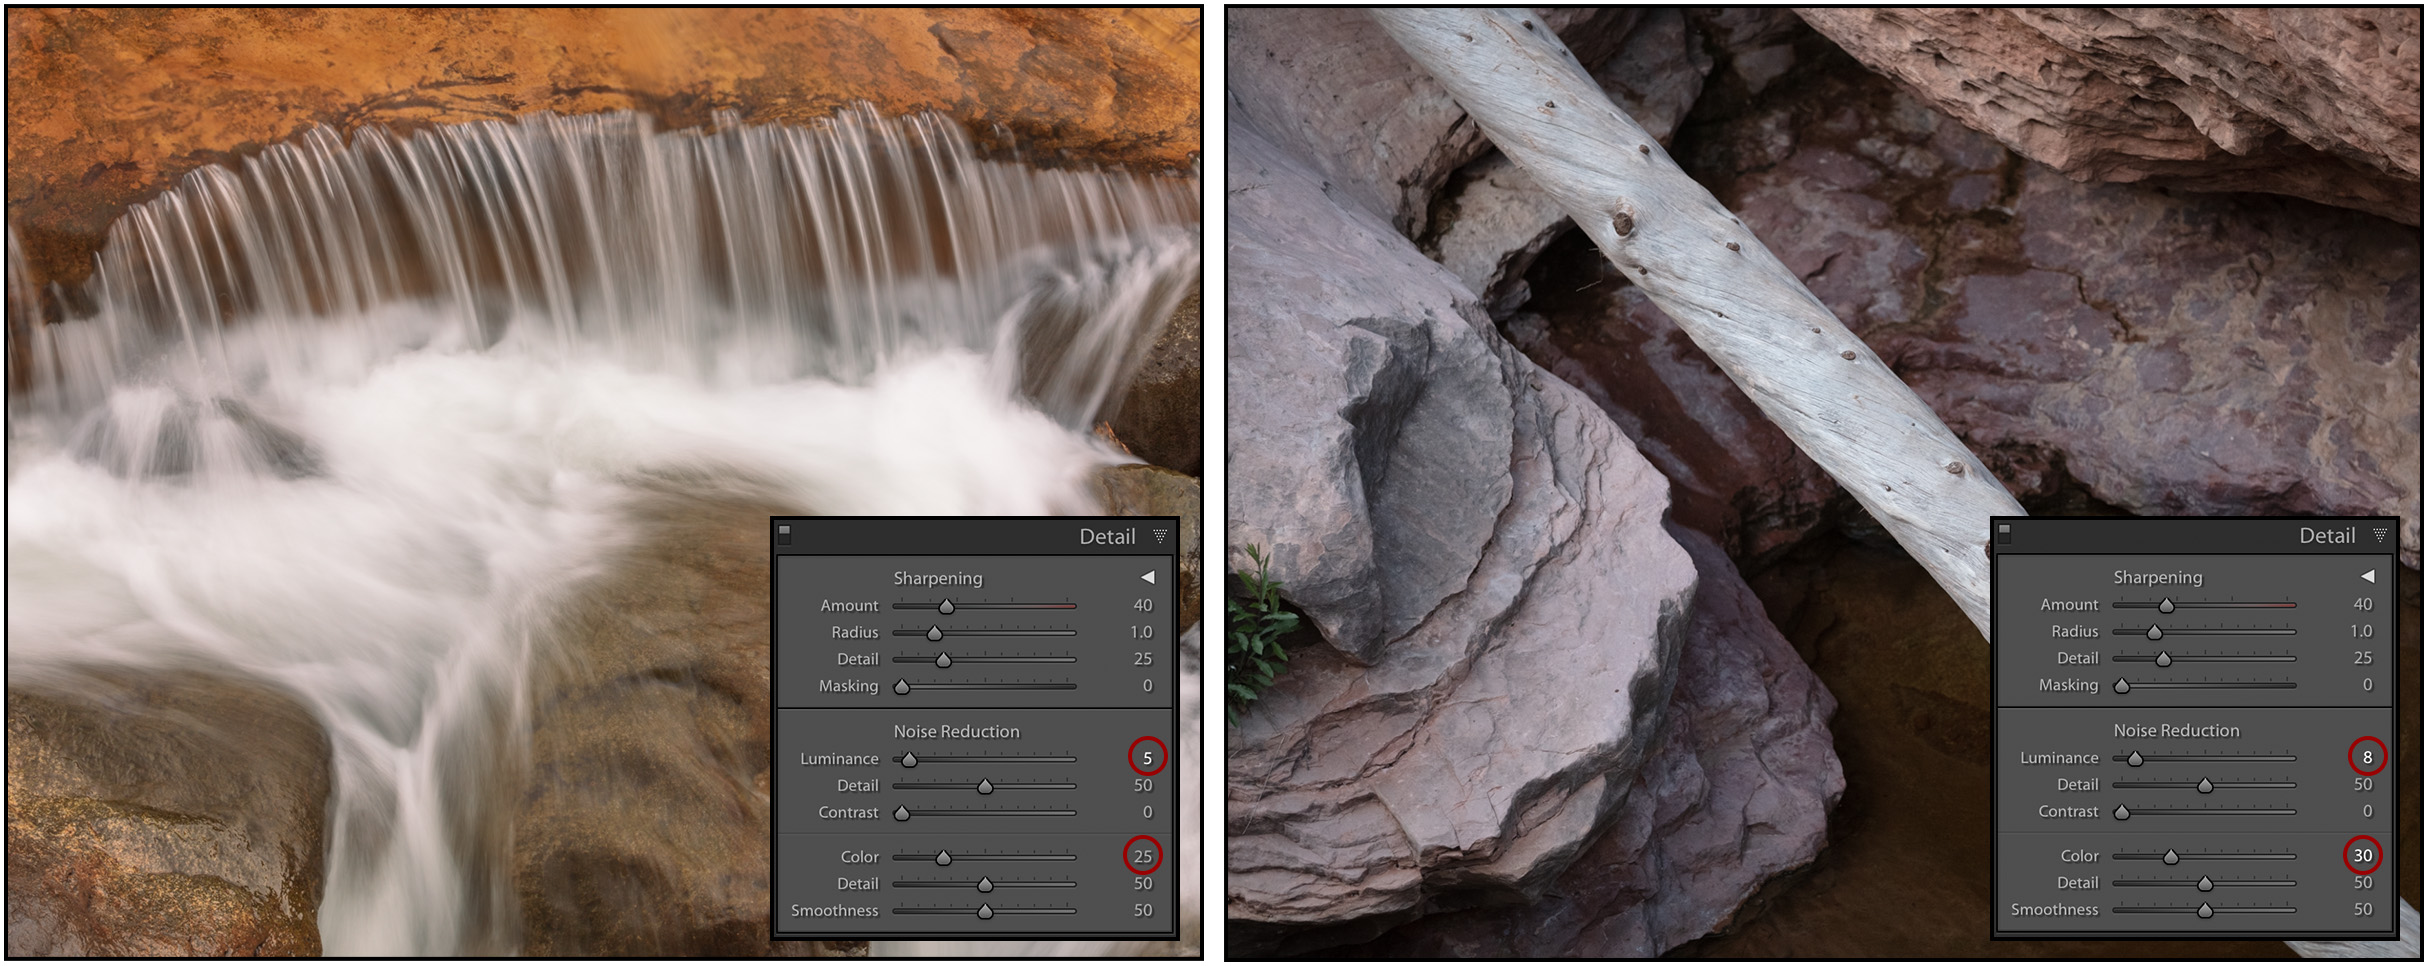
Creating ISO Adaptive Presets — You can create ISO Adaptive Presets which allow a single preset to apply different edit settings to different photos depending on their ISO settings. For example, you can create an ISO Adaptive Preset that applies different levels of noise reduction or sharpening to high ISO verses low ISO images. Note: Creating your own ISO adaptive preset is really only necessary only if you prefer different values than Adobe’s default settings.
With ISO adaptive settings, you only need to assign the values to two or more images from the same camera. Those values will be interpolated based on the actual image’s ISO. Lightroom ships with four Adaptive ISO presets (found in the Defaults presets folder) – specifically designed to be applied as Raw Defaults which apply different Noise Reduction values based on the ISO of the image.
To create your own ISO Adaptive Preset, do the following:
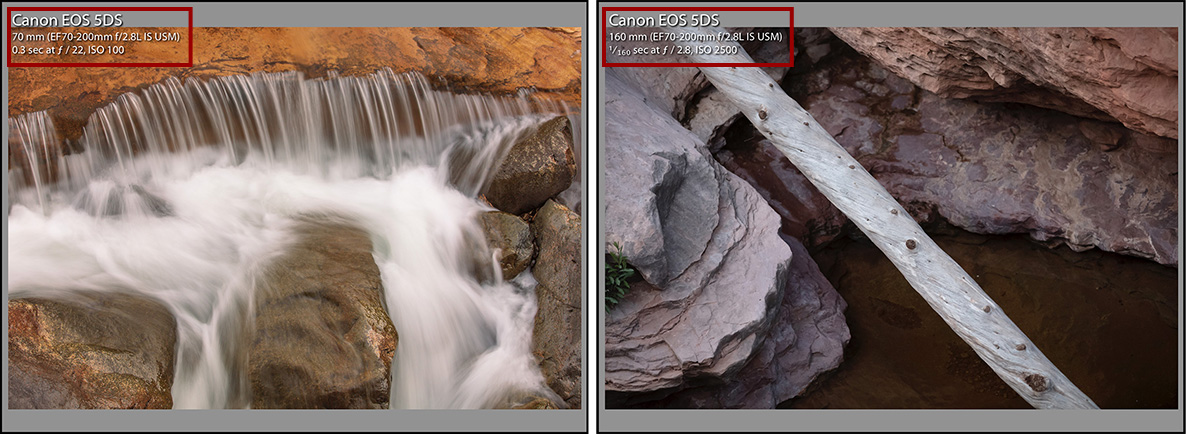
- Select two or more images, with different ISO values that were taken with the same camera. (That’s the only way in which an ISO adaptive preset is meaningful and practical).
- Edit the setting for the images as desired.
- With the images still selected, click the Plus (+) icon on the preset panel and choose Create Preset.
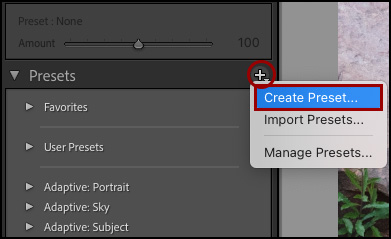
- In the New Develop Preset dialog, select the desired settings to include in the preset and be sure to enable “Create ISO adaptive preset” under ISO Settings. Note: as ISO adaptive presets aren’t visually different, you may want to include ISO as part of the name or place the ISO adaptive presets in their own preset group.

- Click “Create ISO adaptive preset” to make the ISO Adaptive preset. Note: If two or more images, with different ISO values, are not selected, “Create ISO adaptive preset” will be disabled. When applying the preset, Lightroom Classic will automatically interpolate the correct amount of noise for images with different ISO values.
Raw Defaults Presets — To learn how to use presets to customise Lightroom Classic’s Raw Defaults, please see this post: How to Customize Lightroom Classic’s Raw Defaults (v9.3).
This video demonstrates 12 ways to Automate Your Workflow Using Presets in Lightroom Classic (in addition to the Develop module)!