In the video below, you’ll learn the difference between the three Presence sliders: Texture, Clarity, and Dehaze and how they can be used to add edge contrast to an image.
Because Texture, Clarity, and Dehaze can all be used to increase or decrease contrast (including edge contrast) in an image, it’s important to understand the subtle differences between the features in order to combine the enhancements to achieve the results that you’re after.
The Texture Slider — The Texture slider (available as both a global as well as a local adjustment), can be used to decrease or increase the appearance of “texture” in a photograph while still retaining fine details. Moving the Texture slider to the left will reduce unwanted, medium-sized details (for minimizing skin texture or smoothing surfaces for example), while moving the Texture slider to the right enhances medium-sized details in a photograph (for intensifying the texture of foliage or hair for example). In the animation below, I’ve moved the texture slider from -100 to +100.

When first using the Texture sider, it may be helpful to compare it with the Sharpening sliders as they produce significantly different results. In the animation below, we can see the how the sharpening controls adds contrast to the finest details (also referred to as high-frequency areas) in the image (not the medium sized details as the Texture slider does).
Because the Texture slider works at medium sized details, be sure to check the amount of texture at different zoom levels (not just 100%) to avoid over or under enhancing the image when outputting to different size files. Note: When photographing using high ISO settings, high levels of “noise” in an image might start crossing into the medium-sized details in which case it can be helpful to use the Noise reduction slider to minimize the noise.
The Clarity Slider — The Clarity slider (available as both a global as well as a local adjustment), can also be used to decrease or increase the appearance of edge contrast in a photograph. However the Clarity slider decreases/increases contrast which is intentionally biased towards the midtones of an image (in other words, Clarity isn’t effecting the “full-range” or overall contrast in the image). The amount of contrast is also applied over a wider radius of pixels (imagine a “thicker” edge) than the Texture slider. Clarity also effects the luminance and saturation in an image more than the Texture slider (Texture does have “some” effect on them, but not nearly as much as Clarity).
The Dehaze Slider — The Dehaze technology is based on a physical model of how light is transmitted, and tries to estimate light that is lost due to absorption and scattering through the atmosphere. When moving the slider, there is relitively little change in the highlight area (on the right side of the Histogram), while the shadows and lower portion of the histogram are more dramatically altered.
When using Dehaze, Option -drag (Mac) | Alt -drag (Win) the slider to display the black point clipping visualization (clipped areas will appear as black in the image area). Note: for the best results, set the white balance for the image before using Dehaze.
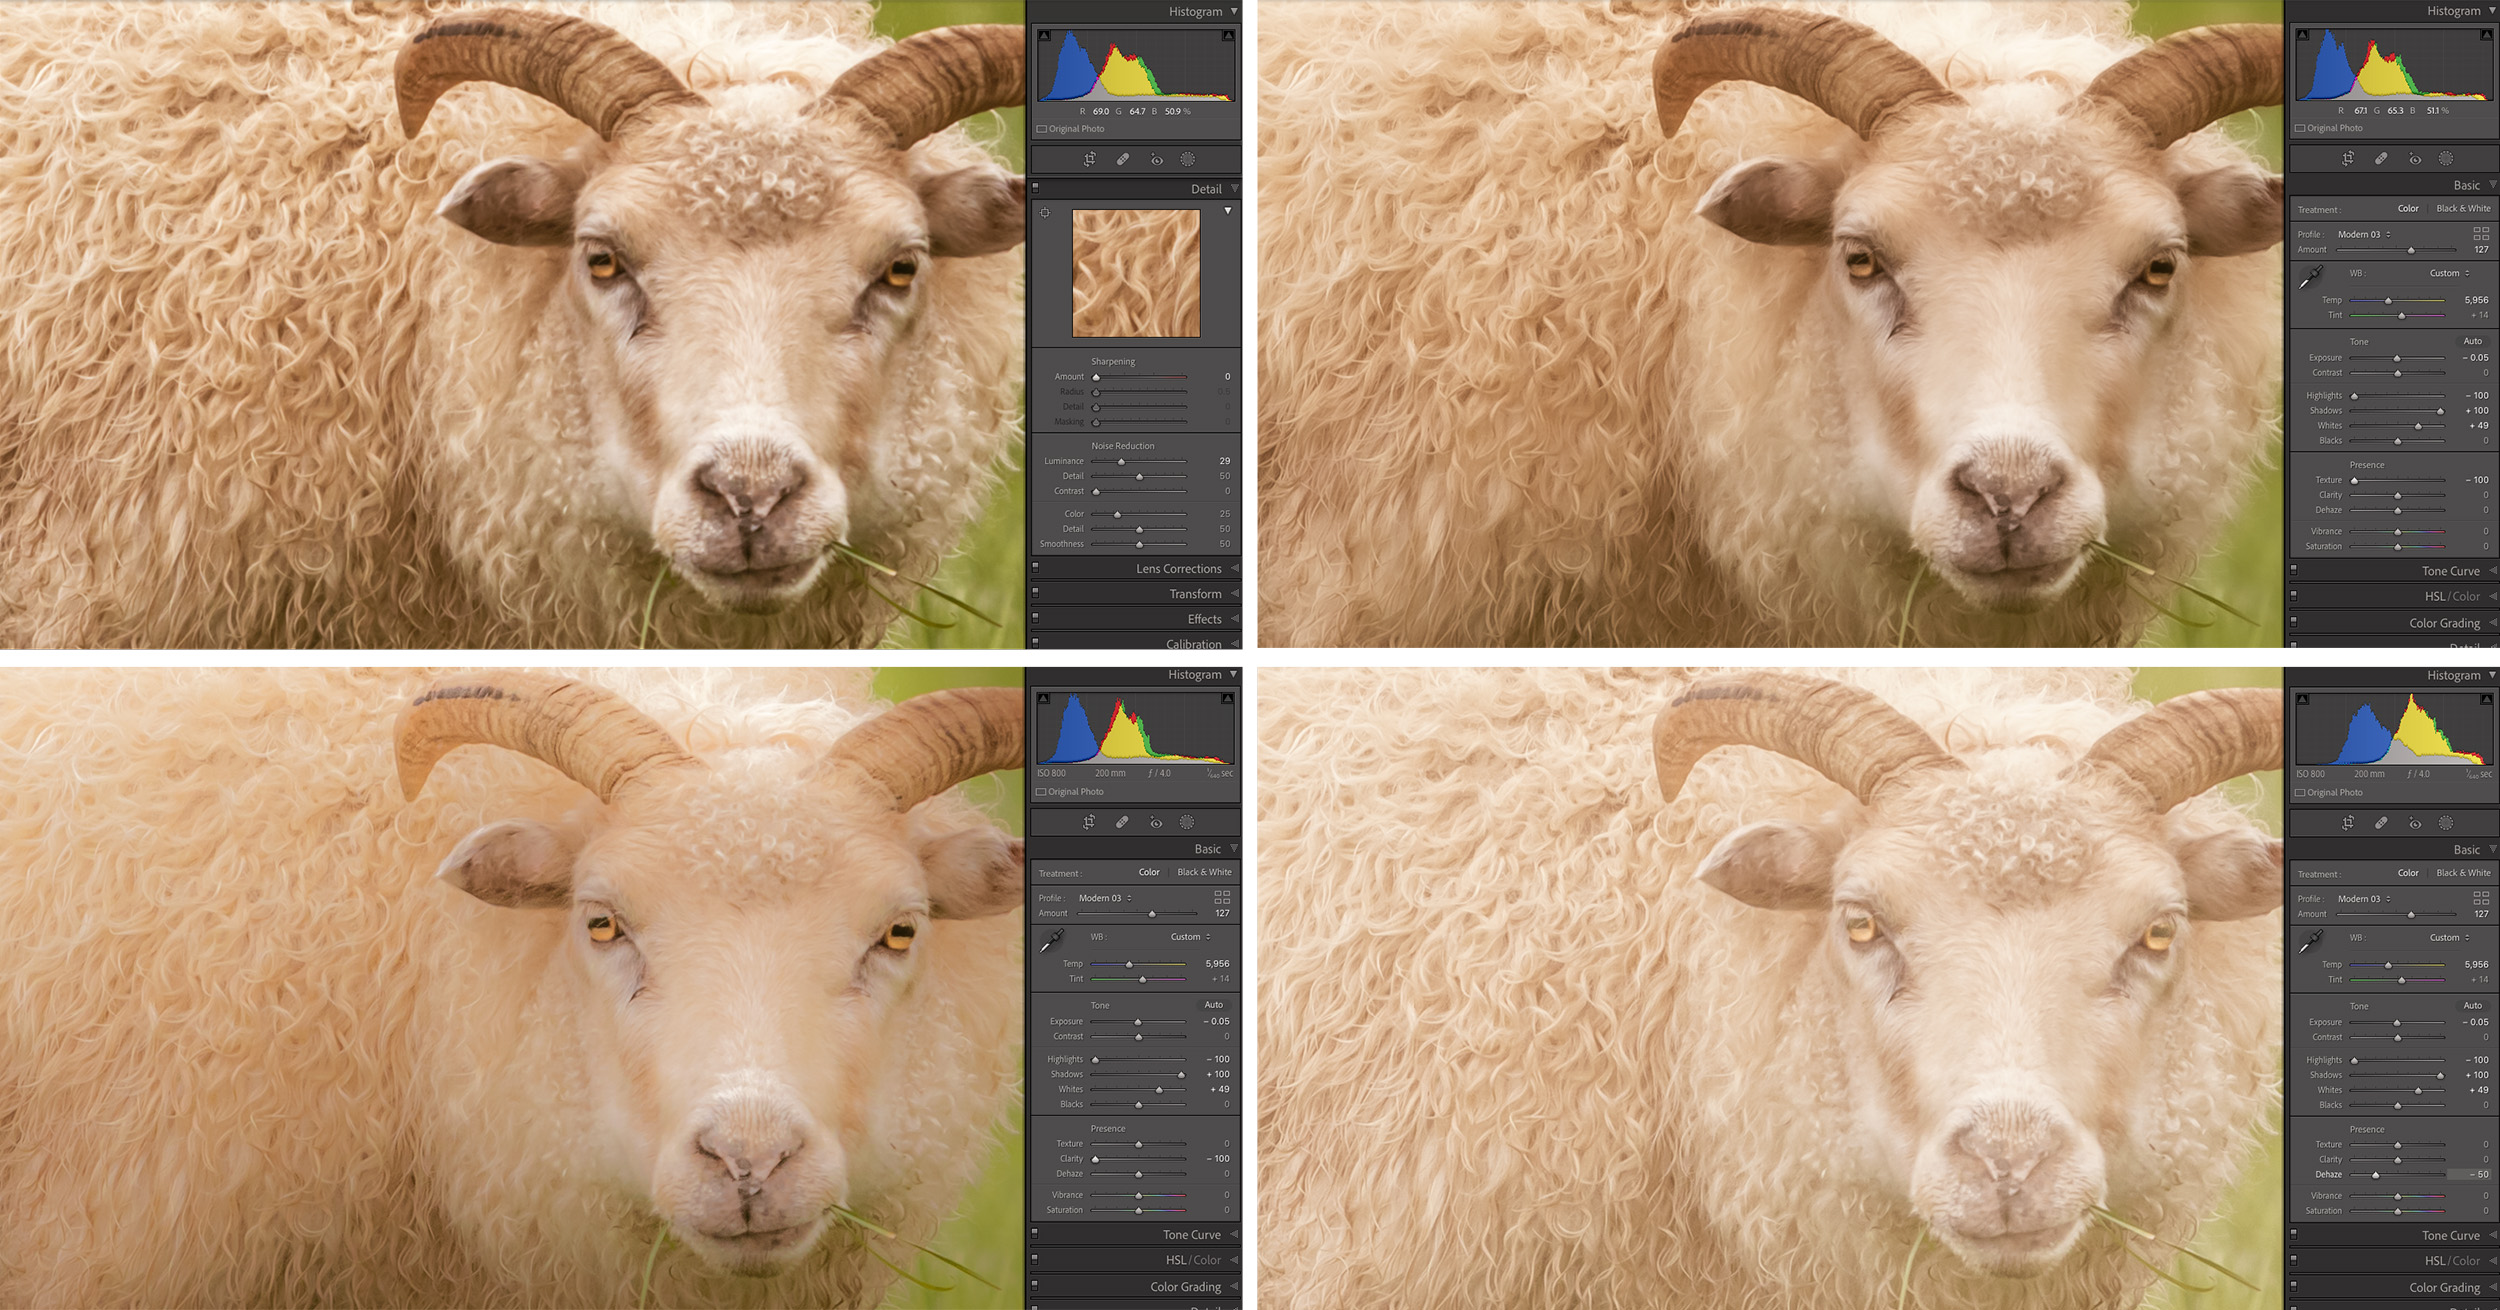
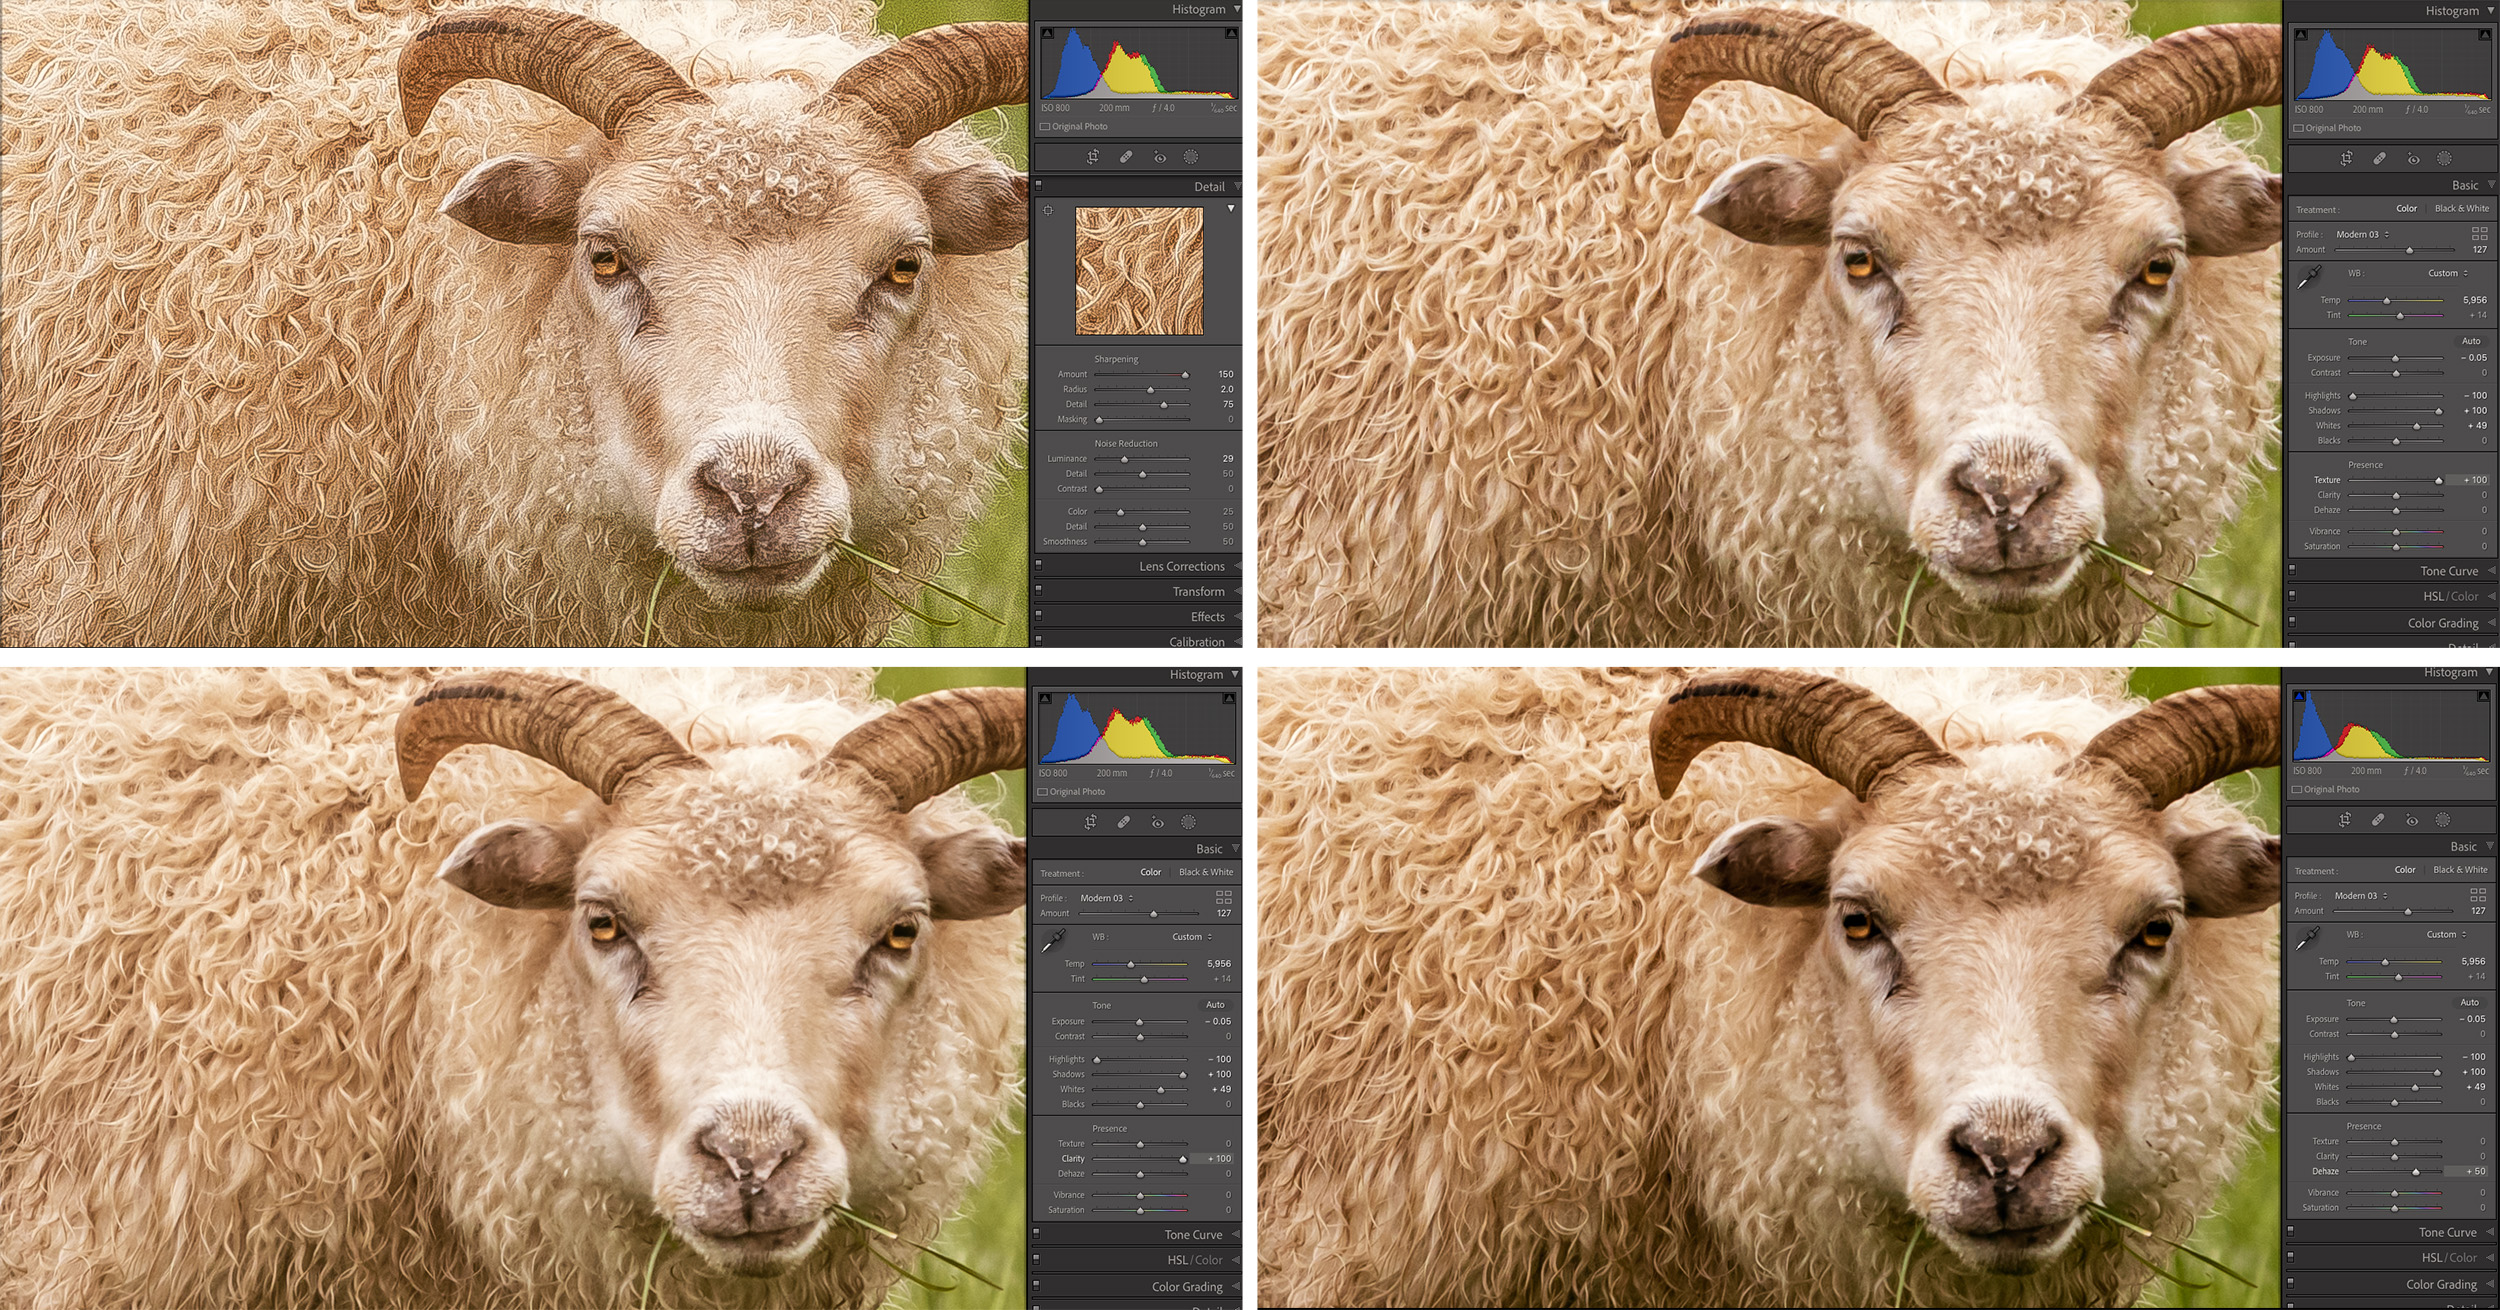
Image Comparisons — Below are two still image comparisons of Sharpening, Texture, Clarity, and Dehaze all set to lower and then higher values. Click on any image to see a higher resolution version.
Selective Adjustments — To apply any of these features selectively, click the Masking icon and select from the Brush, Graduated or Radial Filter, dial in the amount, and apply. In my portrait below, I used the Brush to increase the amount of Texture in my hair and eyes, and decrease the amount of Texture in my skin. Like many of the local corrections, you can add multiple, overlapping adjustments in an image to further reduce or enhance the amount of Texture, Clarity and Dehaze in an area if you need to go beyond the slider’s range from -100 or +100.