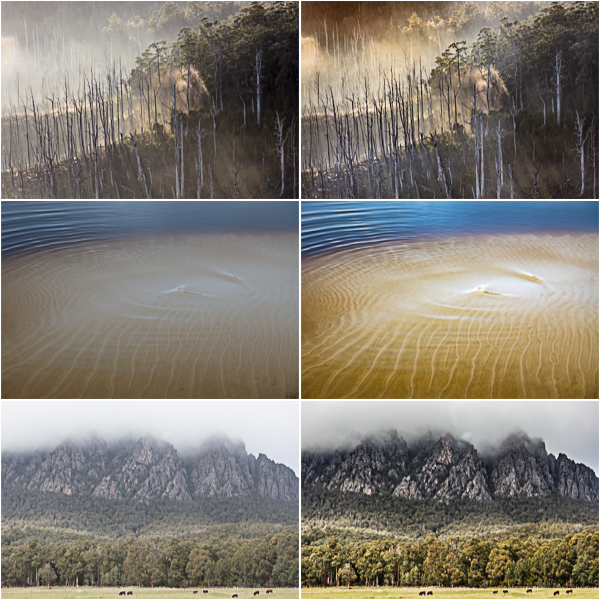
I had time over the weekend to sit down and retouch some images from Tasmania and thought it might be interesting to write up a quick overview of the workflow. In a nutshell, the majority of edits were done in Lightroom Classic with a bit of retouching done in Photoshop . On the left are the original raw captures, the final images on the right.
First, for all three of the photographs, I used the Lens Correction panel to Remove Chromatic Aberration and Enable Profile Corrections. Then, I cropped as needed. From there on, each image needed slightly different settings, so I will walk through each image separately.
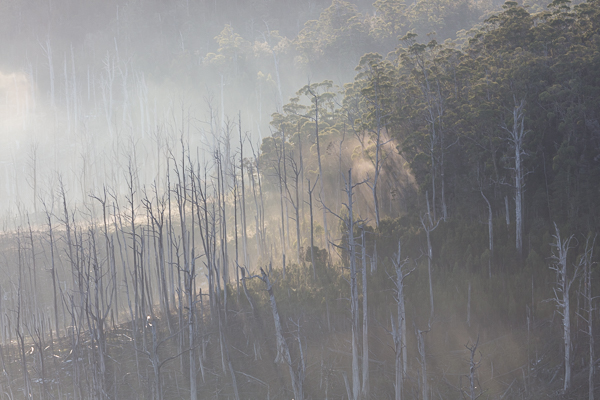
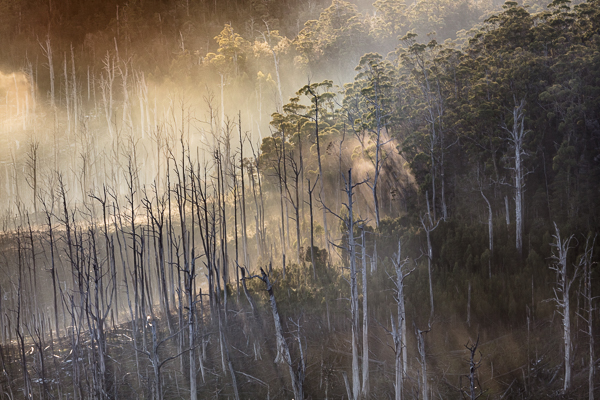
My experience of photographing the dead trees along the waterline at Lake Gordon, felt far more dramatic when I was there, so my intent was to impart that same dramatic feeling through post processing. Below is the original, raw capture.
I made the following “global” changes using the Basic, Effects, and Details panels:
- Increased the Temperature value to add warmth to the image.
- Set new white and black points to extend the dynamic range of the original “flat” photograph.
- Increase Clarity to exaggerate edge contrast in the midtones.
- Increased the Dehaze value, however this pushed some of the shadow areas too dark, so I returned to the Basic panel to refine the black point.
- Increased the amount of Luminance and Color Noise Reduction in the Details panel.
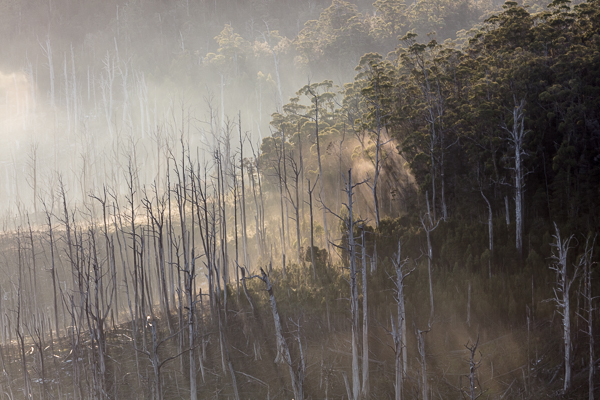
Moving to the local adjustment tools, I started by adding three separate Graduated Filters:
- The first one (starting in the upper left, and reaching almost into the center of the photo), decreases exposure and shifts the Temperature towards yellow.
- The second one (starting in the lower left and moving slightly into the image), “burns” the edge by lowering the Exposure value.
- And infamy, the last one (starting at the bottom and moving upwards towards the center pf the photograph), adds Contrast and lightens Highlights (helping to separate the tree trunks from the background).
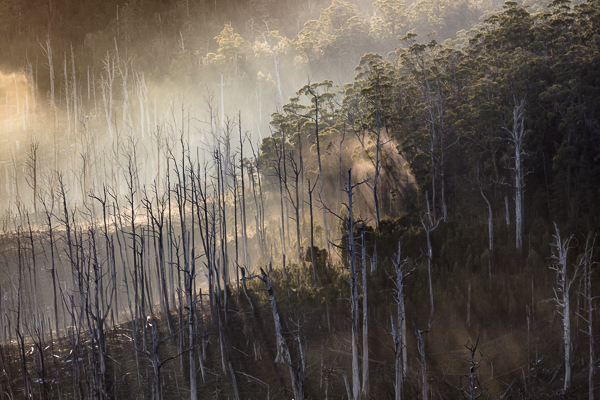
Finally, I selected the Adjustment Brush and made several small local adjustments:
- The first one decreases the Exposure to darken the top left corner.
- The second emphasizes the rays of light using Dehaze and Contrast.
- The third increases Exposure the shadows in the tree area on the right.
- And the fourth and final one shifts the temperature slider towards yellow in the center of the photograph.
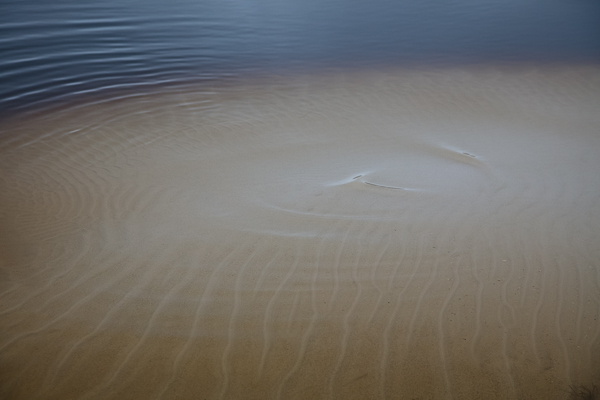
When photographing the second location, I was impressed by the patterns made by the water flowing over the sandbar. At the time, there was a bird singing nearby, and I remember wondering what the bird’s audio waves would look like if we could see them in the water. Regardless, my goal was to accentuate the waves and patterns in Lightroom.The original raw capture below, was admittedly underexposed .
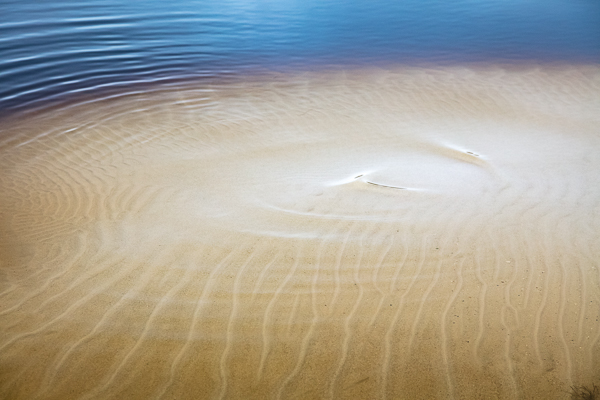
After applying Lens Corrections, cropping, and setting new black and white points, I decreased the Highlights (to retain detail in the sand), add a bit of Dehaze, and decreased Saturation. I find that when using Dehaze on an image such as this one (when I’m using it more “creatively” and not necessarily to remove atmospheric haze), the image becomes overly saturated so I tend to lower the Saturation – but of course it’s a personal choice.
Then, I added two local adjustments using the Adjustment Brush:
- The first darkens the top right area of the water by decreasing Exposure.
- The second adds additional Dehaze to the sandbar.
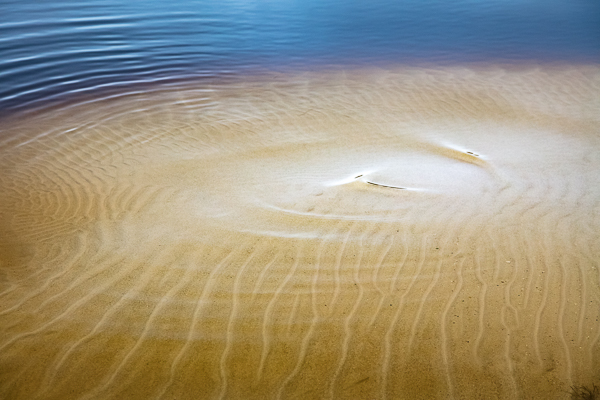
I then opened the file into Photoshop (16-bit, Adobe RGB, PSD file at 300 PPI). Using a combination of the Healing Brush and the Clone Stamp tool, I proceeded to remove the distracting flecks of sand as well as the plant in the lower right of the image.
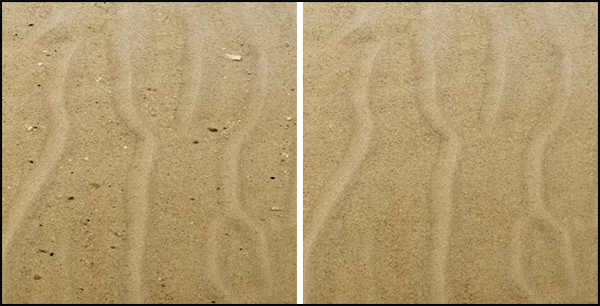
Before and after retouching the sand in Photoshop.
I prefer to work with the Healing Brush as it’s typically faster when removing small elements. However if the edges of the “healed” area soften the grain/noise pattern in the image (or make it “mushy”), I’ll switch to the Clone Stamp tool (even though in some instances it may take longer to match the colors/tone in the photograph).

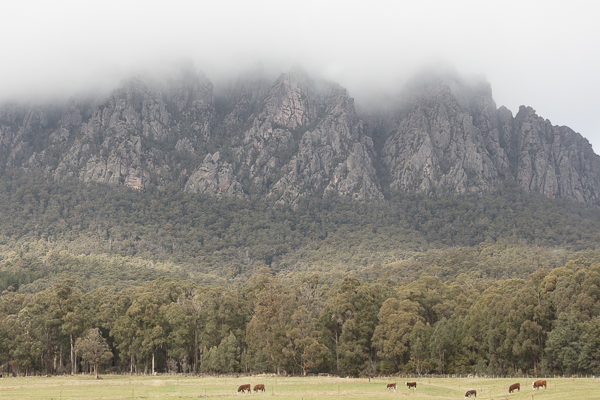
The third photograph was taken from the passenger seat of a car. While I know that this isn’t optimal, if we stopped every time we saw a opportunity for a photograph, we would never have made it to our final destination! In this image, I wanted to accentuate the clouds over the mountains, the sunlight on the trees and, and mooo-ve a cow to higher ground. Below is the the original, raw capture.
After using the Lens Correction panel to remove distortions, cropping, and setting black and white points, I adjusted the White Balance – increasing the Temperature and decreasing the Tint sliders to remove the colder, blue cast. Then, I decreased the Highlights (to bring back detail in the clouds) and increased the Shadows (to reveal details in the trees). I refined the midtones by decreasing Exposure and increasing Contrast and added a slight increase in Clarity, while decreasing Saturation.
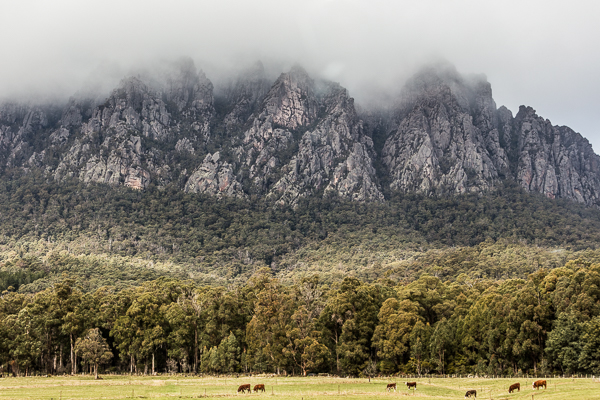
Then, I added two local adjustments:
- Using the Adjustment Brush with an increased Exposure value, I lightened the front view of the trees.
- I also used the graduated filter over the mountains and clouds (set to increase Dehaze and reduce Saturation), however this adjustment also amplified the reflection from the car window (above the mountain – center frame).

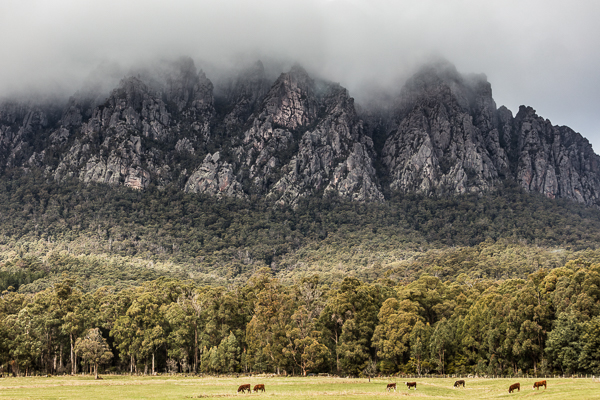
In Photoshop, I copied, pasted, and repositioned a “good” area of cloud to cover the reflection and used a Curves Adjustment layer to match the tonal values of the surrounding clouds (to restrict the effects of the Curves Adjustment Layer, I selected it and chose Layer > Create Clipping Mask). I then removed the distracting fence posts and, because the lonely cow at the bottom of the image was so close to the edge, I repositioned it a bit higher in the frame.
Please check out my additional images from Tasmania, on Behance, as well as my Portfolio page, in an Adobe Spark.
Amazing transformations! Thank you for the blow by blow
commentary. Very helpful.
Thank you
Julieanne …
All very interesting and useful, as are all your tutorials. Thanks for taking the time to post.
A question: in the sandbar image, why did you choose the PS Healing Brush instead of its LR equivalent?
Thanks again.
I particularly appreciated the work in the final image–luminosity balance is very attractive. Being color-challenged I’m particularly sensitive to haloing and this is an unattractive byproduct of dehaze. You can see this on the far right-hand side of the image between the sky and the mountains. Most viewers wouldn’t react to this at all and it would most likely disappear in a print.
Thank you so much for your complete explanations of post work on your photographs
These were helpful lessons. Thanks!
I’ve never been clear on whether you should always change the mode to 16 bit before doing any filtering or if Photoshop/Lightroom is smart enough to apply everything internally at high bit count so it makes no difference during editing. ??
Very interesting read, thanks for the article.
[…] 7 Wildlife techniques – Julianne Kost edits three images from Tasmania in detail This is as helpful for what she does as how she does it. – Get out of a creative rut – […]