The new non-destructive Texture slider (available as both a global as well as a local adjustment) in Adobe Camera Raw, can be used to decrease or increase the appearance of “texture” in a photograph while still retaining fine details. Moving the Texture slider to the left will reduce unwanted, medium-sized details (for minimizing skin texture or smoothing surfaces for example), while moving the Texture slider to the right enhances medium-sized details in a photograph (for intensifying the texture of foliage or hair for example).
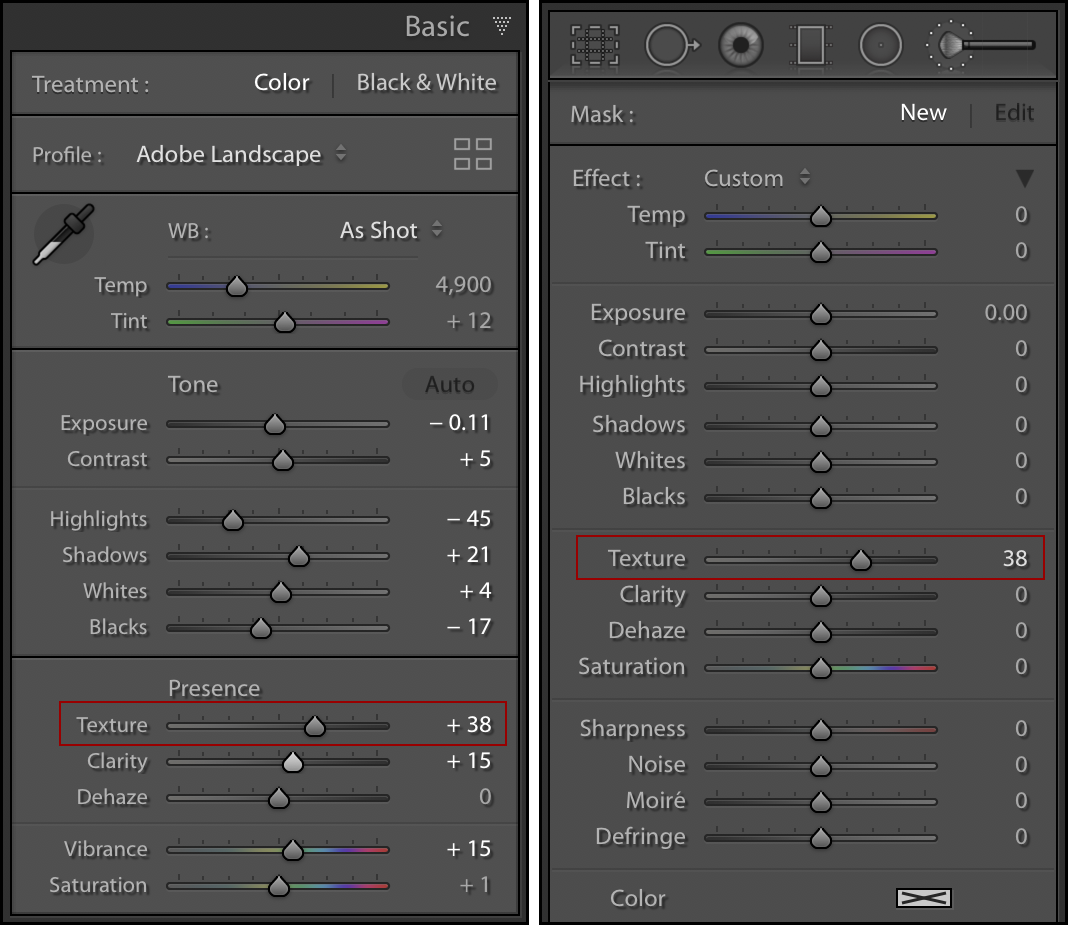
The global and local Texture sliders.
When first using the Texture sider, I found it helpful to compare it with both the Sharpening and Clarity sliders as they all produce significantly different results. First (without making any changes to the Texture slider), view your image at 100% and scrub the Sharpening sliders. Notice how the sharpening controls affect the finest details (also referred to as high-frequency areas) in the image.
Animation of increasing levels of sharpening enhancing fine detail.
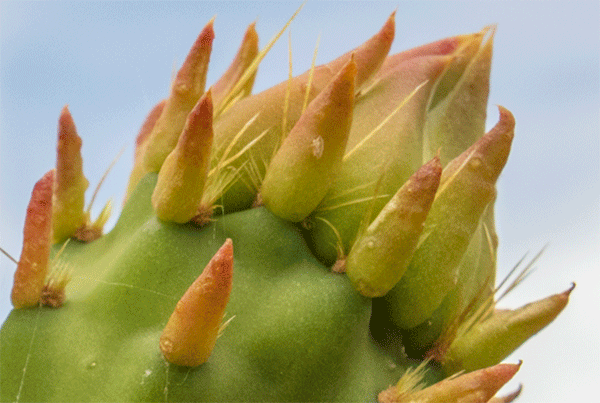
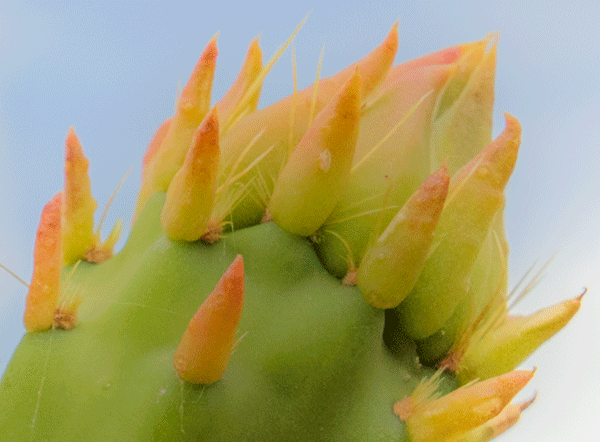
Then, set the Sharpening Amount slider to 0, and scrub the Texture slider from 0 to +100. Notice how Texture increases/decreases the contrast of the medium-sized details in the image (not the finest details).
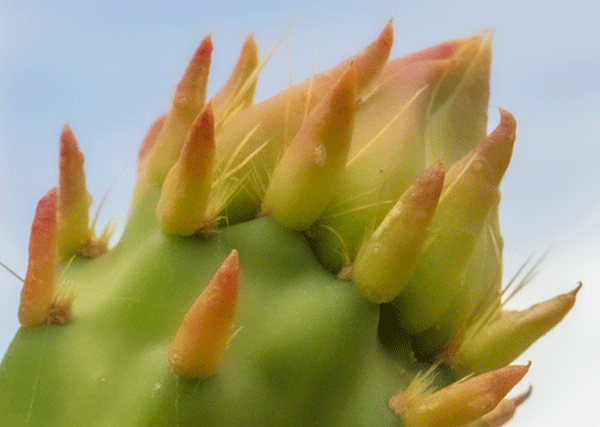
Animation of Texture set to -100, -50, 0, 50, and 100.
Then, reset the Texture slider and scrub the Clarity slider from 0 to +100. Notice how it increases/decreases the contrast of edge detail especially in the midtone areas, creating a very different effect from the Texture slider. Clarity also effects luminance and saturation more than the Texture slider does (Texture does have “some” effect on them, but not nearly as much as Clarity).
Animation of Clarity set to -100, -50, 0, 50, and 100.
Once you have a good feeling for the medium-sized details that will be effected by the Texture slider, view your image at 100% and apply the desired amount of Sharpening to your image. Then, increase/decrease the Texture and Clarity sliders as needed. Because the Texture slider works at medium sized details, be sure to check the amount of texture at different zoom levels (not just 100%) to avoid over or under enhancing the image.
To apply Texture selectively, choose one of the local adjustment tools (Graduated Filter, Radial Filter or Adjustment Brush), dial in the amount of Texture, and apply. In my portrait below, I used the Adjustment Brush to amplify the amount of texture in my hair and eyes, and diminish the amount of texture in my skin. Like many of the local corrections, you can add multiple, overlapping adjustments in an image to further reduce or enhance the amount of Texture in an area if you need to go beyond the slider’s range from -100 or +100.
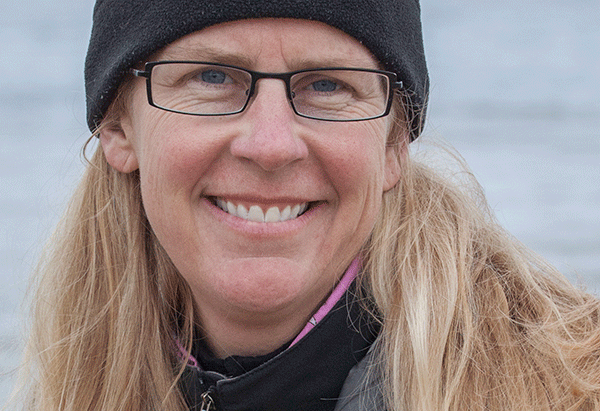
Texture applied using the Adjustment Brush set to negative values to soften skin and to a positive value to enhance eyes and hair.
I would strongly encourage you to experiment using several adjustments in combination with one another. In the image below, I was able to enhance the boiling mud using Sharpening, Texture, Clarity, Dehaze, and Noise Reduction. (When photographing using high ISO settings, high levels of “noise” in an image might start crossing into the medium-sized details in which case I have found it helpful to use the Noise reduction slider to minimize the noise.)
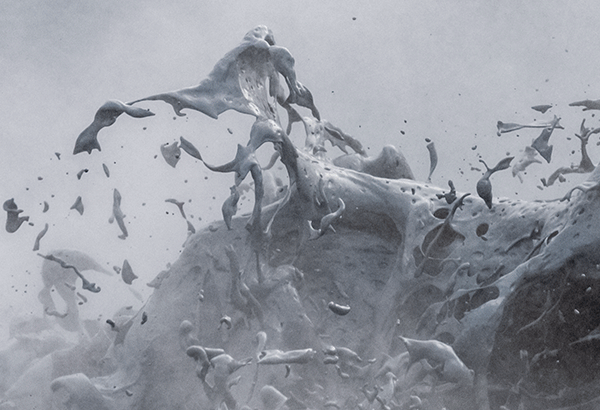
Animation of original image, increased sharpening, increased Texture and Clarity, increased Dehaze and increased Luminance Noise Reduction values.
For additional information on the Texture control, view this article from Max Wendt, a Senior Computer Scientist on ACR and the lead engineer of the Texture project.