Todays update to Lightroom includes new ways to edit using Texture and Defringe and new ways to collaborate using Group Albums.
Texture Control — The new non-destructive Texture slider (available as both a global as well as a local adjustment) in Lightroom, can be used to decrease or increase the appearance of “texture” in a photograph while still retaining fine details. Moving the Texture slider to the left will reduce unwanted, medium-sized details (for minimizing skin texture or smoothing surfaces for example), while moving the Texture slider to the right enhances medium-sized details in a photograph (for intensifying the texture of foliage or hair for example).
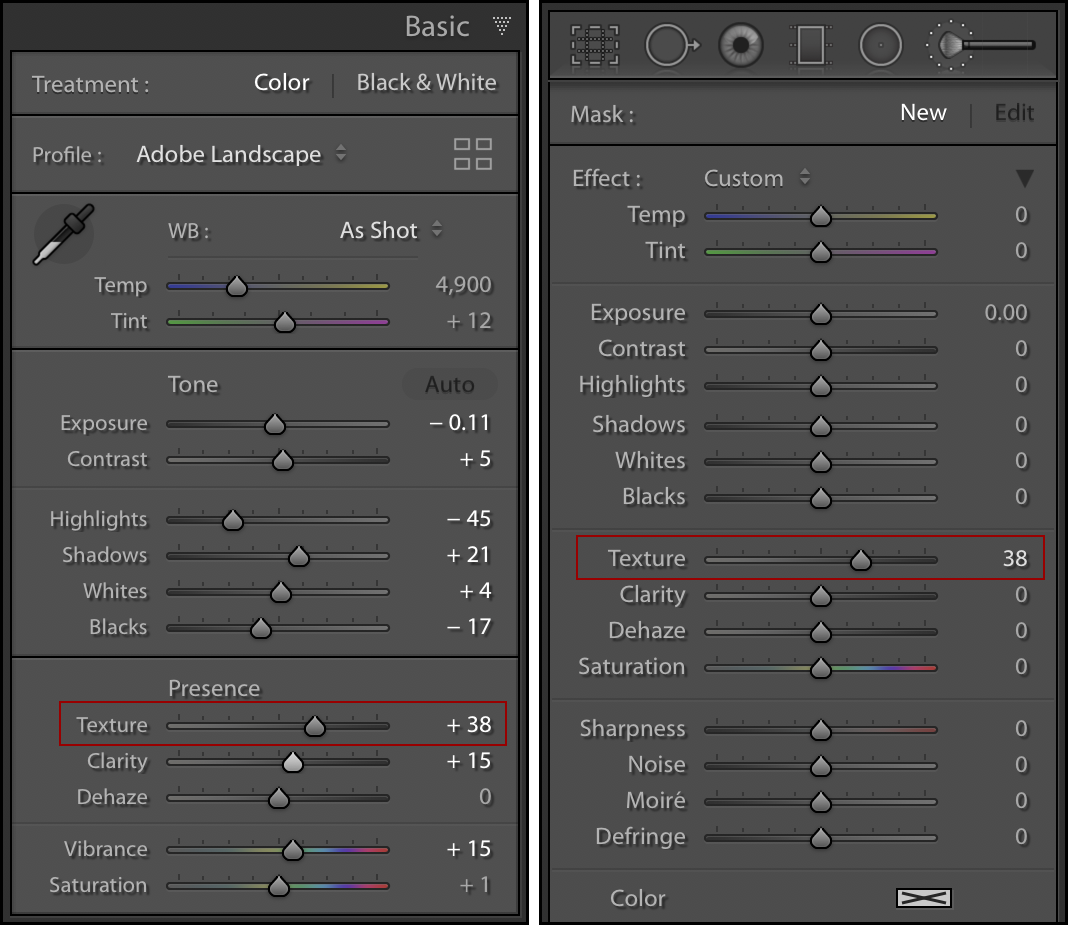
The global and local Texture sliders.
When first using the Texture sider, I found it helpful to compare it with both the Sharpening and Clarity sliders as they all produce significantly different results. First (without making any changes to the Texture slider), view your image at 100% and scrub the Sharpening sliders. Notice how the sharpening controls affect the finest details (also referred to as high-frequency areas) in the image.
Animation of increasing levels of sharpening enhancing fine detail.
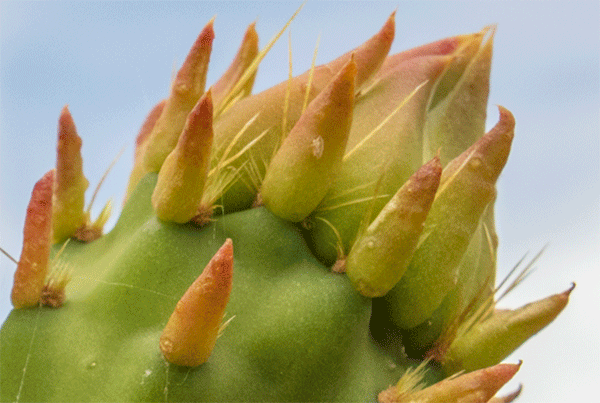
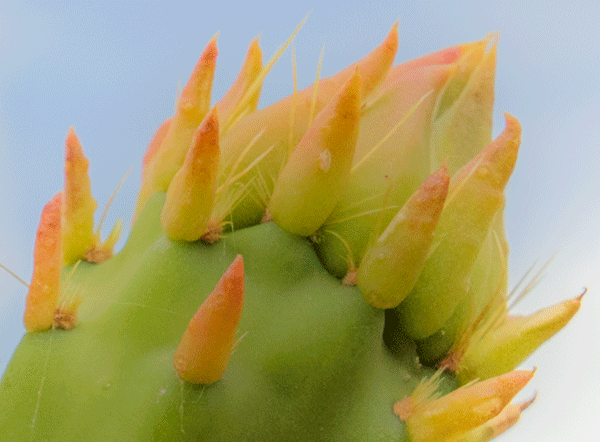
Then, set the Sharpening Amount slider to 0, and scrub the Texture slider from 0 to +100. Notice how Texture increases/decreases the contrast of the medium-sized details in the image (not the finest details).
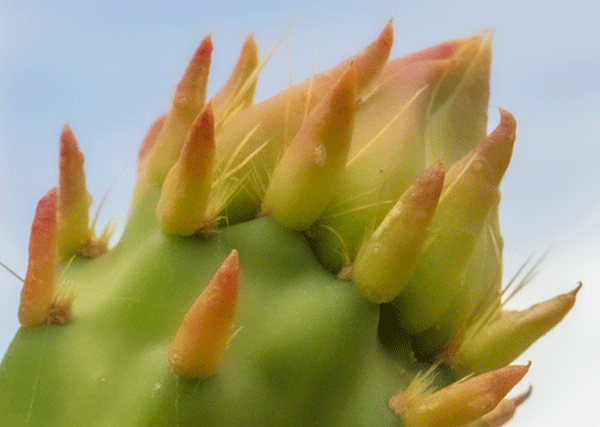
Animation of Texture set to -100, -50, 0, 50, and 100.
Then, reset the Texture slider and scrub the Clarity slider from 0 to +100. Notice how it increases/decreases the contrast of edge detail especially in the midtone areas, creating a very different effect from the Texture slider. Clarity also effects luminance and saturation more than the Texture slider does (Texture does have “some” effect on them, but not nearly as much as Clarity).
Animation of Clarity set to -100, -50, 0, 50, and 100.
Of course all of Lightroom’s sliders can be used in combination with one another. Once you have a good feeling for the medium-sized details that will be effected by the Texture slider, view your image at 100% and apply the desired amount of Sharpening to your image. Then, increase/decrease the Texture and Clarity sliders as needed. Because the Texture slider works at medium sized details, be sure to check the amount of texture at different zoom levels (not just 100%) to avoid over or under enhancing the image.
To apply Texture selectively, choose one of the local adjustment tools (Graduated Filter, Radial Filter or Adjustment Brush), dial in the amount of Texture, and apply. In my portrait below, I used the Adjustment Brush to amplify the amount of texture in my hair and eyes, and diminish the amount of texture in my skin. Like many of the local corrections, you can add multiple, overlapping adjustments in an image to further reduce or enhance the amount of Texture in an area if you need to go beyond the slider’s range from -100 or +100.

Texture applied using the Adjustment Brush set to negative values to soften skin and to a positive value to enhance eyes and hair.
I would strongly encourage you to experiment using several adjustments in combination with one another. In the image below, I was able to enhance the boiling mud using Sharpening, Texture, Clarity, Dehaze, and Noise Reduction. (When photographing using high ISO settings, high levels of “noise” in an image might start crossing into the medium-sized details in which case I have found it helpful to use the Noise reduction slider to minimize the noise.)

Animation of original image, increased sharpening, increased Texture and Clarity, increased Dehaze and increased Luminance Noise Reduction values.
For additional information on the Texture control, view this article from Max Wendt, a Senior Computer Scientist on ACR and the lead engineer of the Texture project
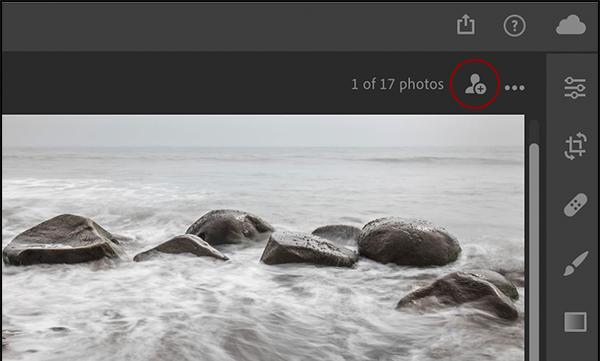
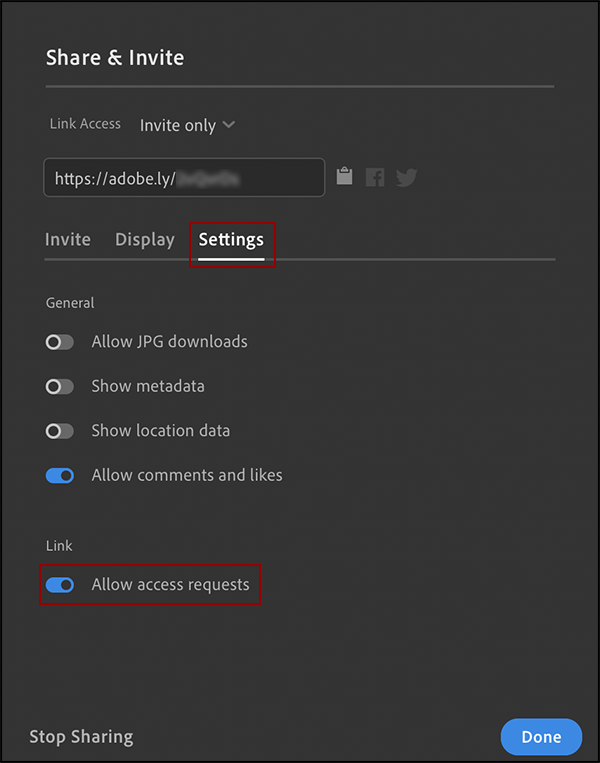
Group Albums – Lightroom now gives you control over who can view and contribute to your shared albums. With a collection selected, click the Share and Invite icon.
Click the Enable Sharing button to share the Album. Then, use the Link Access options, to determine who can view the album: “Anyone can view” creates a link which can be viewed by anyone, “Invite only” enables you to control (via email) who is allowed to view and contribute to the album.
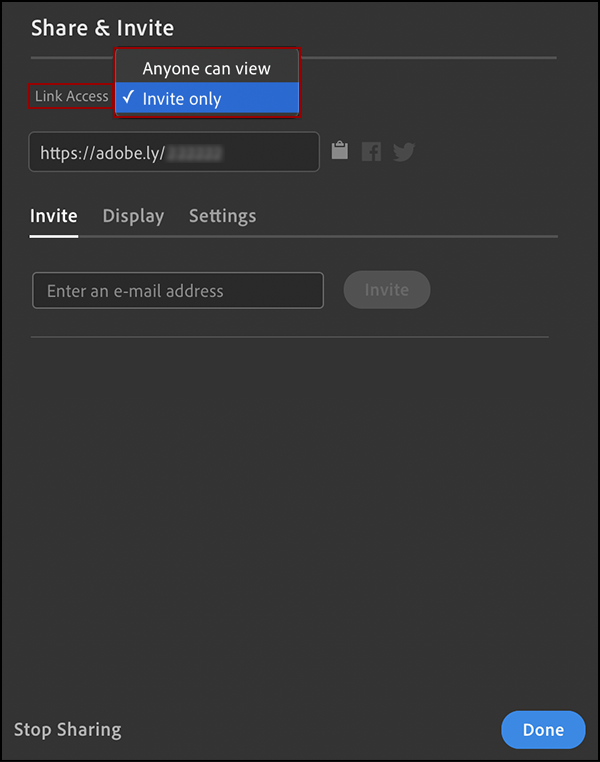
Lightroom creates a link for the album which you can quickly copy to the clipboard. Note: the buttons to post the link to Facebook and Twitter are only active if you have selected “Anyone can view” as your Link Access option.
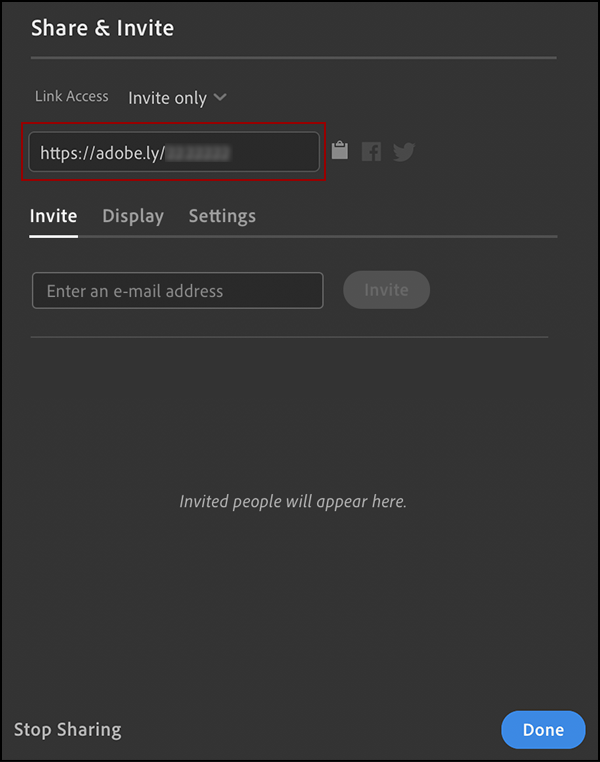
If you choose to limit the visibility of the album by selecting “Invite only”, enter the recipients email address. An email will be sent and the invited person can “accept” the invite.
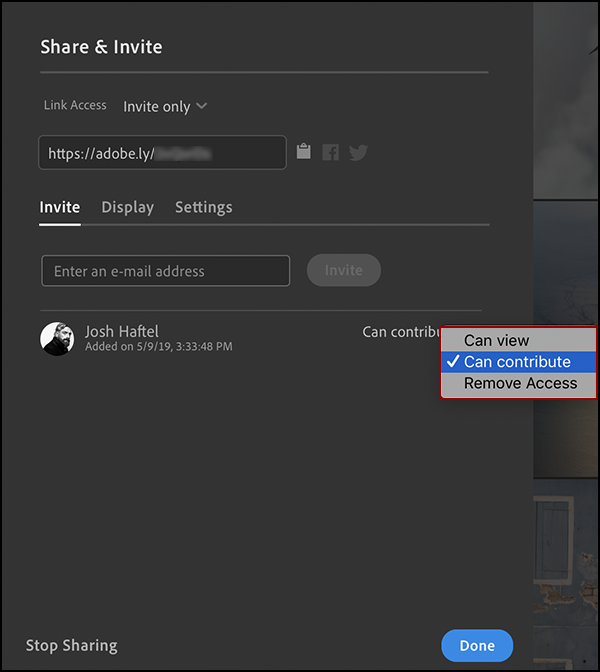
Once a person has been added, selecting “Can contribute” from the drop-down menu next to their name enables contributors to add photos to the album (by clicking the link in the email and uploading via lightroom.adobe.com). Once someone contributes a photo or video to the album, the owner of the Group Album has access to the full resolution file (including raw files).
If you want to share an album publicly, but restrict who can contribute images to the album, use the Link Access option: “Anyone can view”, and then enter the email address for those people that you want to be able to contribute photos to the album. Or, if it’s easier, you can share an album publicly (using the Link Access option: “Anyone can view” option), and then enable “Allow access requests” in the sharing tab. This allows anyone to request to be a contributor (perfect if you don’t know the email address of potential contributors or if the list of contributors is long).
Defringe — While the Remove Chromatic Aberration option in the Optics panel corrects most red-green and blue-yellow fringing in images (which are the result of lateral chromatic aberration), Defringe has been added to Lightroom in order to remove the more stubborn purple to green fringes in an image (which result from axial chromatic aberration – wavelength-dependent focus shift, aberrations in sensor microlenses, and flare). First, enable both the Remove Chromatic Aberration and Enable Lens Corrections options, then, if a purple or green fringe still remains in the photograph, click the Defringe icon, select the eyedropper and click on the fringe color in the image, and adjust the Amount slider and Hue range to remove the unwanted colors.

Note: In most cases, purple fringes appear in front of the plane of focus, and green fringes appear behind the plane of focus. The aberrations can happen anywhere in the image, not just the image periphery. Axial CA affects nearly all lenses, from inexpensive cell phone lenses to very expensive top-of-the-line lenses. It is particularly pronounced with high-speed lenses at wide apertures.
Contextual Help — Lightroom’s help system has been greatly expanded in this release to include contextual help for tools and features, new search capabilities and in app tutorials to instruct and inspire.
Also in this release, you should seen an increase in performance when applying the Auto command to large volumes of images, 20 camera matching profiles for the Nikon Z6 and Z7, and the ability to migrate from the same Apple Photos Library multiple times if needed (to address re-migration in a sub- library situation).