In this video “Five Reasons to Use Fill and Adjustment Layers in Photoshop” I demonstrate the top 5 reasons that I prefer to use Fill and Adjustment layers. In a nutshell:
- Adjustment and Fill layers are nondestructive and can be edited at any time without any loss of quality.
- You can change blend mode of Adjustment and Fill layers.
- Adjustment and Fill layers have their own Layer masks which can be used to selectively hide and show the adjustment in the image.
- You can change the opacity of Adjustment and Fill layers at any time.
- Adjustment and Fill layers can be clipped to effect the contents of a single Layer or Layer Group.
However, I didn’t have time to share the following shortcuts:
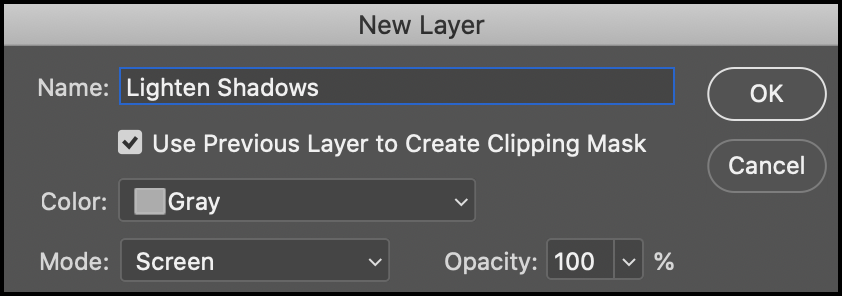
Display the New Adjustment/Fill Layer Options — Holding the Option key (Mac) | Alt key (Win) before selecting the Adjustment Layer icon on the Layers panel will display the New Layer dialog enabling you to change options such as blend modes, opacity, flayer naming and color coding before adding the layers.
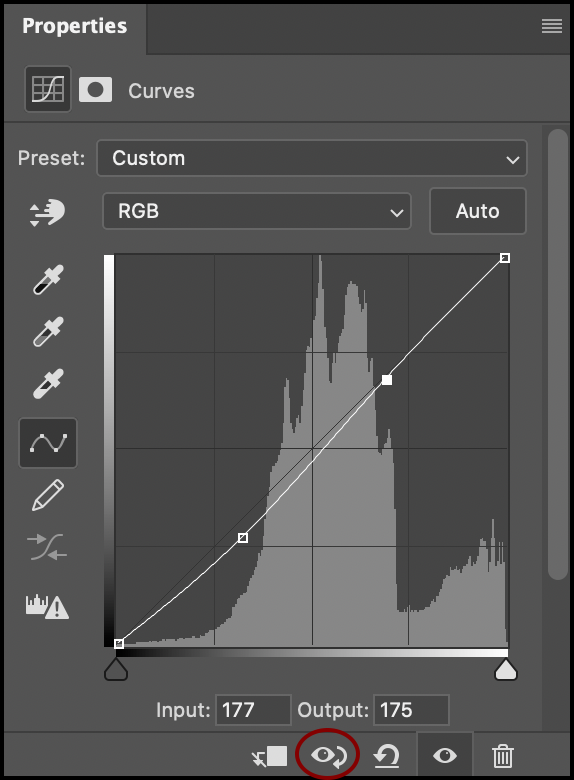
Preview the Adjustment — After adding an adjustment layer and making a change to it, press and hold the backslash key to display a preview of the unadjusted state of the document. Release the key to return to the current state. Note: because of the need to distinguish a tap from a hold, there’s a slight delay before the results of the hold behavior become visible.
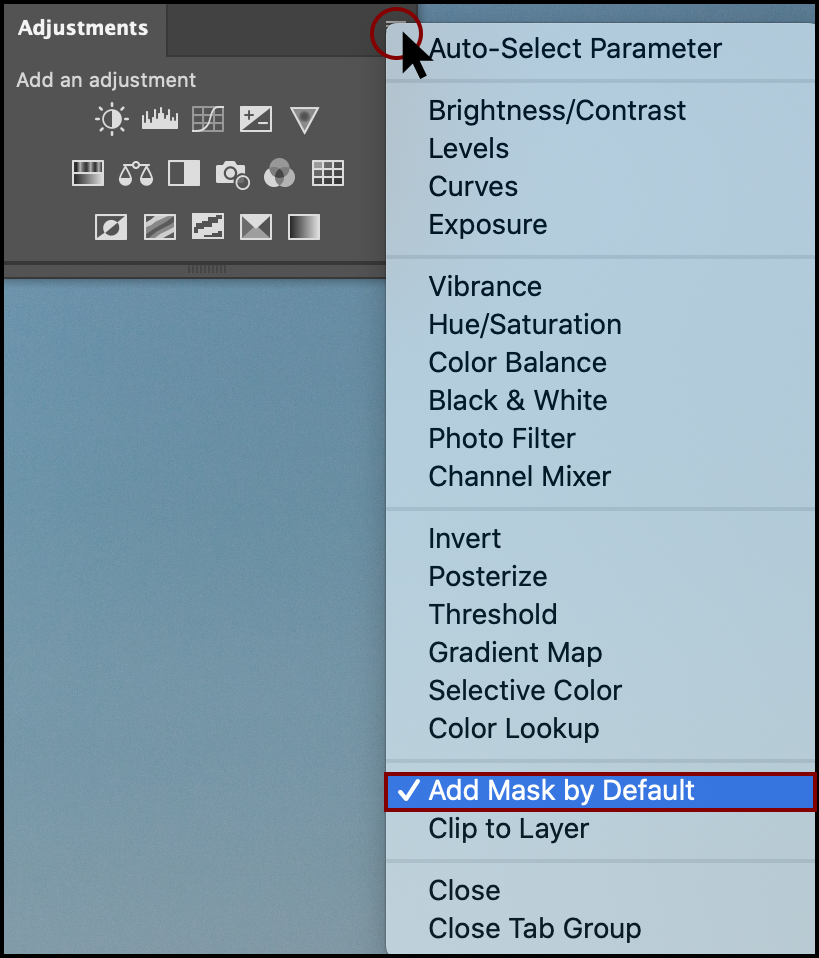
Adjustment Layer Masks — Photoshop’s default behavior is to add a layer mask whenever an adjustment layer is created. You can however use the fly-out menu on the Adjustments panel to enable/disable this behavior (Add Mask by Default).
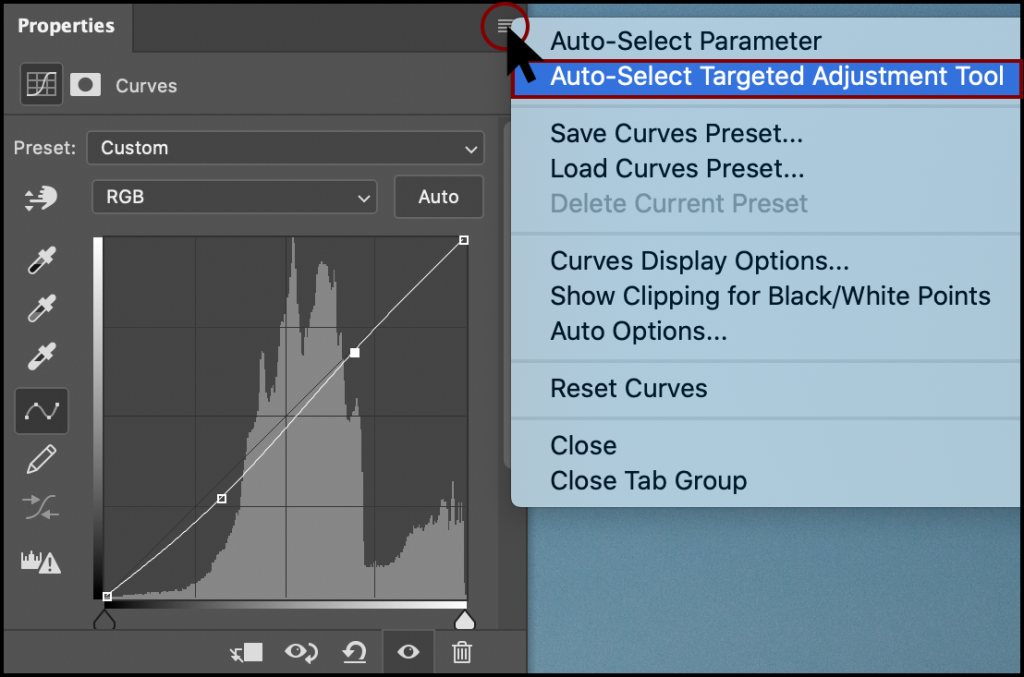
Auto-Select Targeted Adjustment — To automatically select the Targeted Adjustment Tool when adding an adjustment layer such as Curves, Hue/Saturation, or Black & White, use the fly out menu in the Properties or Adjustments panel to enable “Auto-Select Targeted Adjustment”. Note, in order for the Auto-Select Targeted Adjustment menu item to appear in the drop-down, you have to first add an Adjustment layer that has the Targeted Adjustment tool.
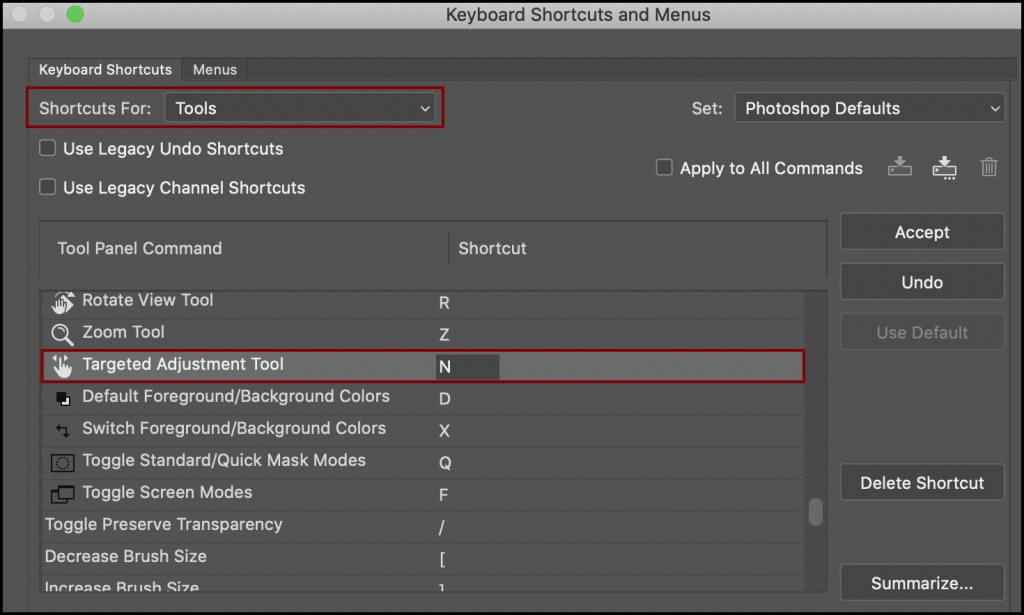
Custom Targeted Adjustment Tool Shortcut — To use a keyboard shortcut to select the Targeted Adjustment Tool while using a Hue/Saturation, Curves, or Black & White adjustment layer, choose Edit > Keyboard Shortcuts. Under the Shortcuts for “Tools” scroll the towards the bottom of the list to locate the “Targeted Adjustment Tool“ line item and enter in your own custom keyboard shortcut.
Auto-Select Parameter — In order to automatically put the keyboard focus onto the first field in the Adjustment panel, use the fly out menu in the Adjustments panel, and select Auto-Select Parameter. Or, after adding an adjustment layer, tap Shift + Return (Mac) | Shift + Enter (Win) to put the keyboard focus onto the first field in the Adjustment panel.
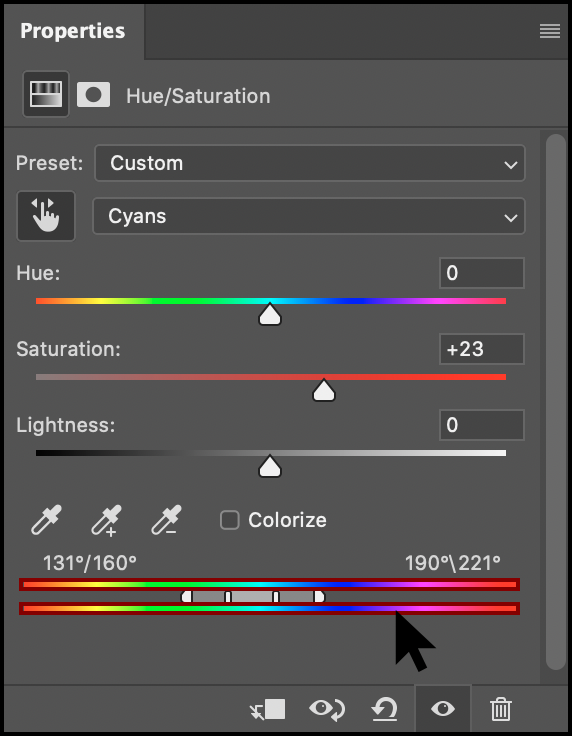
The Hue/Saturation Adjustment Layer — When adjusting the color bars at the bottom of the Hue/Saturation Adjustment Layer, sometimes it’s awkward when they “wrap-around” form one side to another. To reposition the color bar, Command-drag (Mac) | Control -drag (Win) either of the Color Bars above the Color and Fade range icons.
The Curves Adjustment Layer — Click the Auto Button in Curves (or Levels or Black & White) to make an auto correction in the image. If you select an area in your image (a person’s face for example), and then add an adjustment layer (such as Curves), clicking the Auto button, will make the Auto-adjustment based on the selected area. Then, you can always disable or delete the mask to apply the effect over the entire image. For more information about Curves, see this post “Working with Curves in Photoshop”.
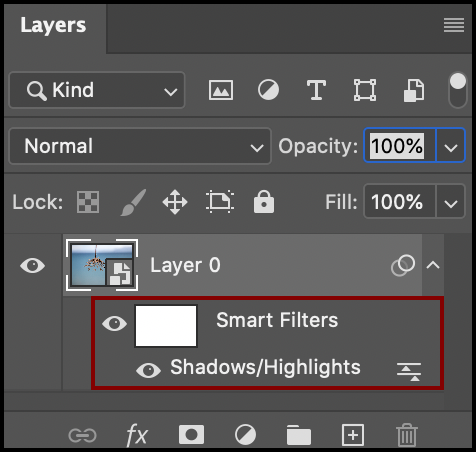
Shadow Highlights Adjustment — The Shadows/Highlights adjustment (found under the Image > Adjustments menu) is not available as an Adjustment Layer. If however, you convert a layer(s) into a Smart Object and then apply Image > Adjustments > Shadows/Highlights, Photoshop will add the adjustment nondestructively as a Smart Filter.
Fill, Pattern, and Gradient Fill Layers — It might be easier to add Fill, Pattern, and Gradient fill layers using the Swatches, Patterns and Gradient panels. See this video “How to use the New Presets in Photoshop” for additional information on working with the “preset” panels.
The Posterize Adjustment Layer — This video (Posterizing Image with Control and Flexibility” demonstrates how to use the Posterize adjustment layer to make an illustration from a photograph. (It’s an old video so you might want to play it at double speed!) : )
Thank you for continuing to share content and blogs during the current climate. I hope you are safe and well. Amit https://www.ghelanistudios.com/