Adobe Camera Raw 13.3 includes Premium Presets, changes to shortcuts for the Zoom tool, and performance enhancements.
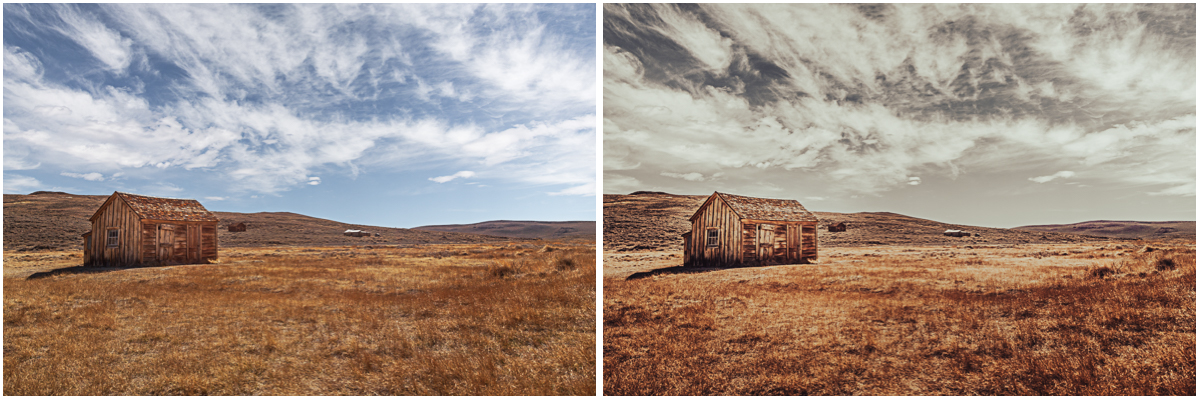
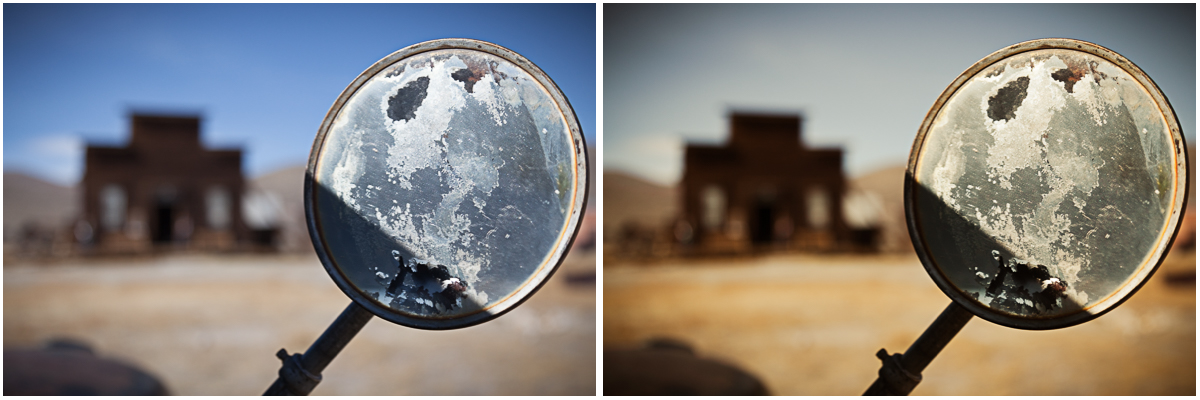
Premium Presets — Adobe Camera Raw includes more than 70 new, hand-crafted Premium Presets designed to help you achieve your creative vision faster than ever before. Carefully crafted by professional photographers, Premium Presets can help give a photograph a unique look and feel, create a more uniform look across multiple photos, and streamline editing workflows. The presets revolve around 5 themes: Portraits, Cinematic, Futuristic, Vintage, and Travel. Applying a preset can certainly be a “one-click solution”, but they can also be easily (and nondestructively) adjusted to match the needs of your images. Below are examples of presets that I applied which I feel take my editing in new and interesting directions.
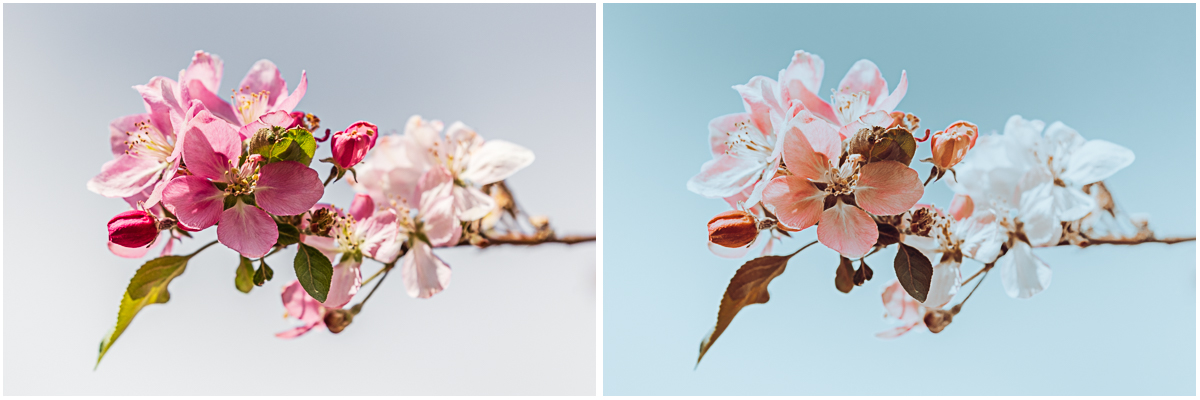
Original image and Premium Preset CN03 applied.
Original image and Premium Preset TR01 applied.
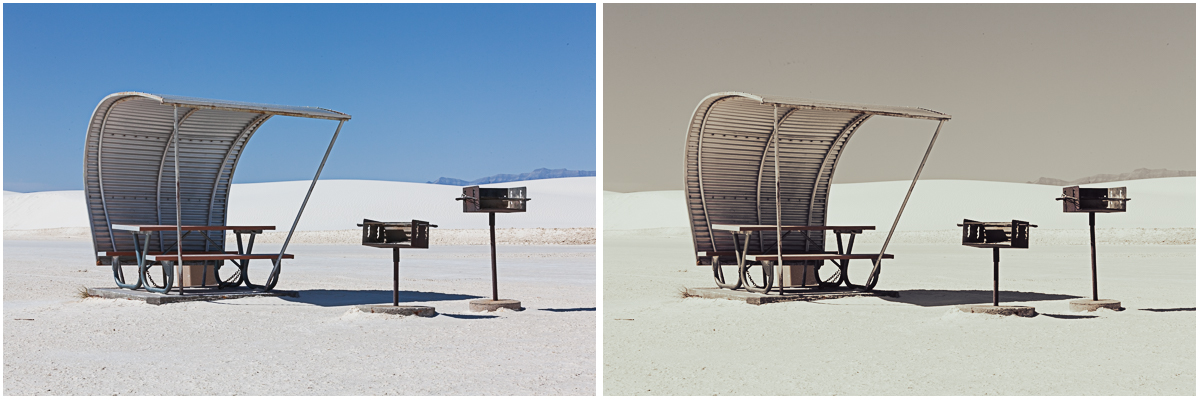
Original image and Premium Preset CN03 applied.
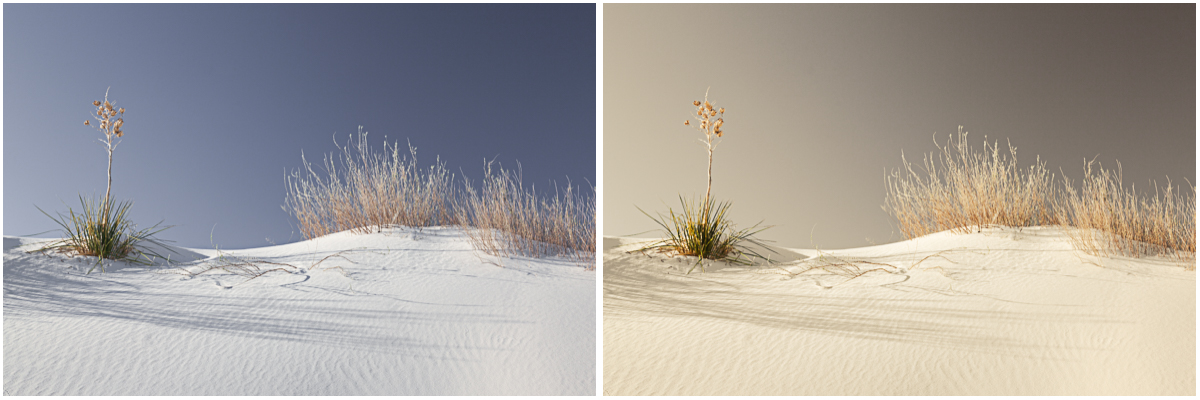
Original image and Premium Preset TR01 applied.
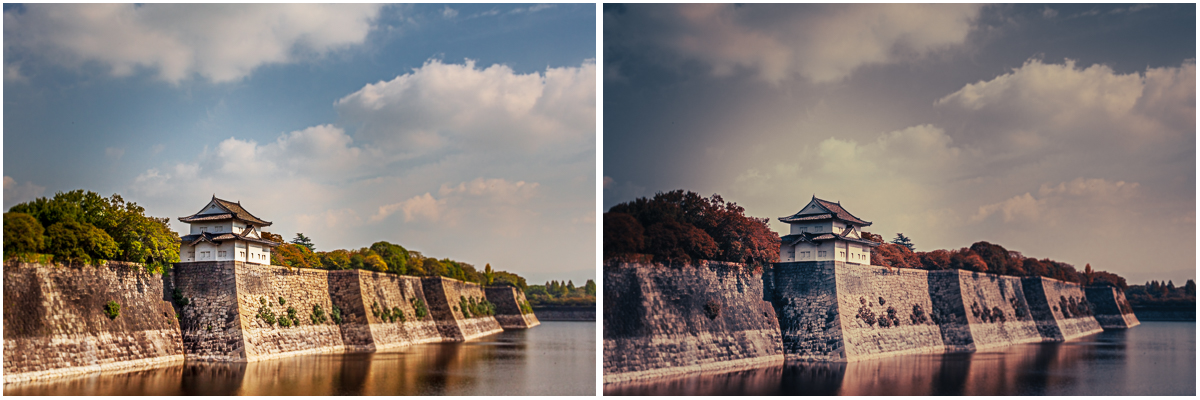
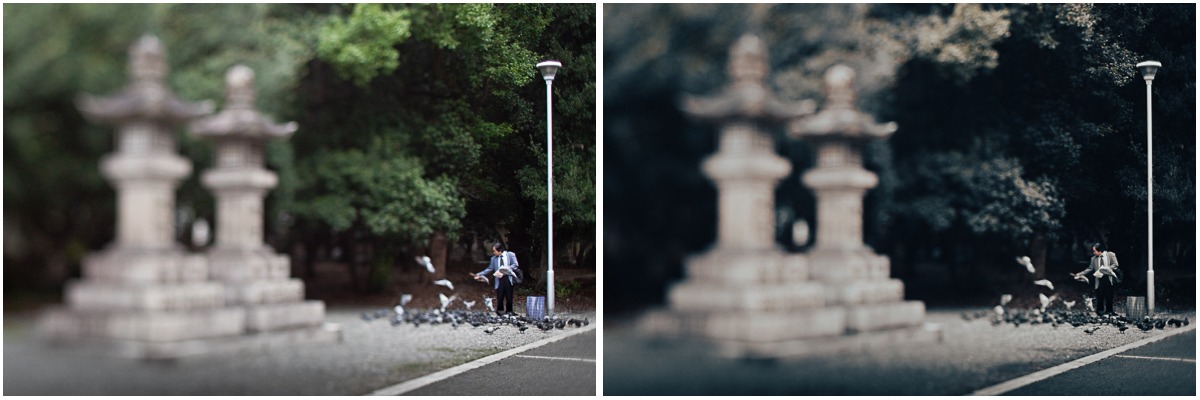
Original image and Premium Preset CN07 applied.
Original image and Premium Preset CN08 applied.
Original image and Premium Preset CN07 applied.
I created the illustration below to gain a better understanding of how each preset adjusts color and tone. Click this link (PremPresetTemplate3K.jpg) to view a larger version.
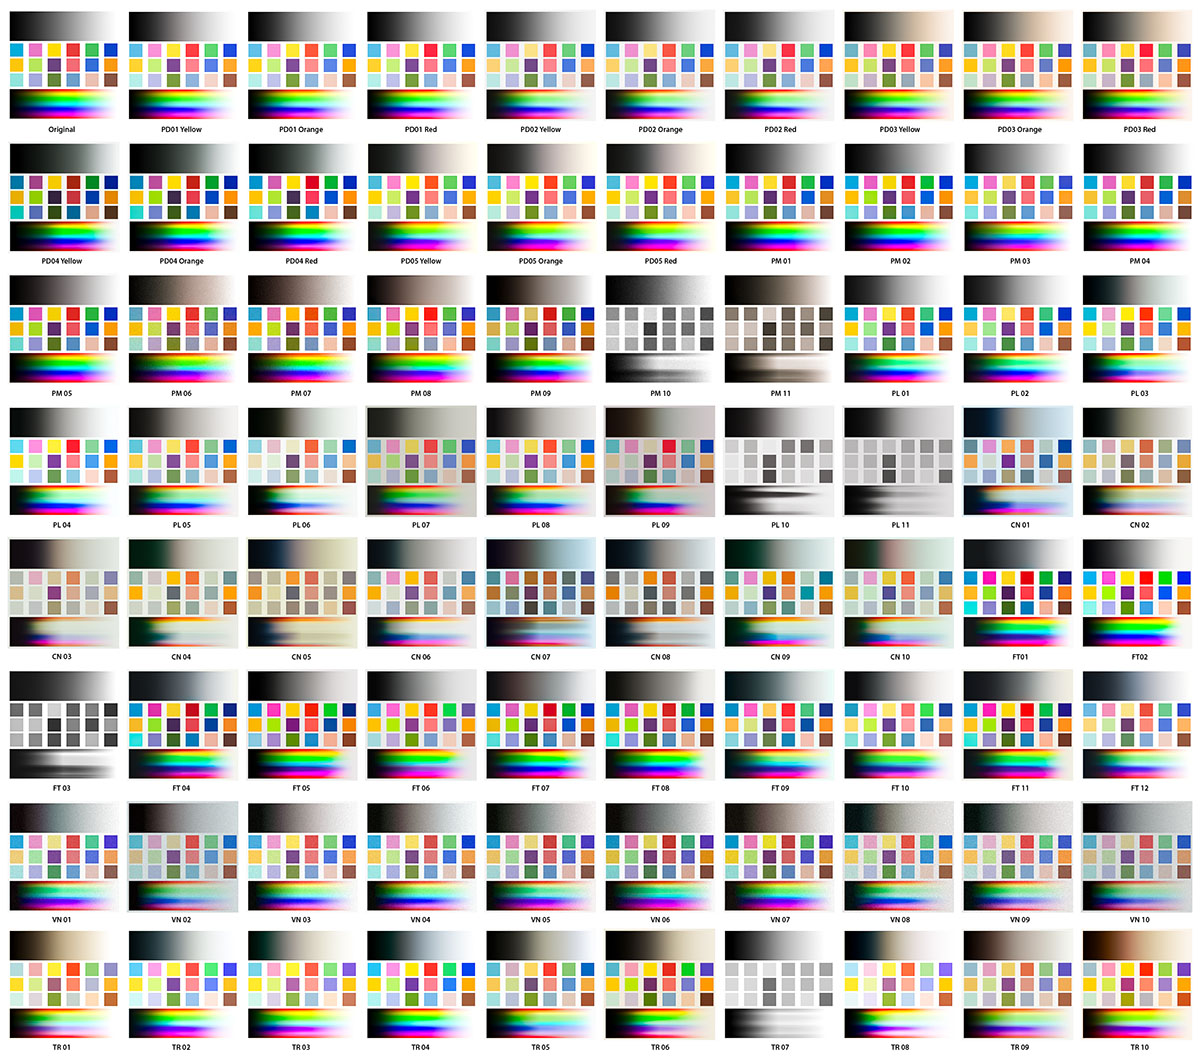
If you would like to download the template that I used to create the illustration above and swap out the image with one of your own, download this layered Photoshop file (PremPresetTemplate3K.psd.zip) and follow the instructions below. Note: While you can easily apply the individual presets to images in Camera Raw, I created this template as a way to preview all of the different presets at once (to compare them) as well as enable me to quickly swap to a different image by replacing the contents of a single Smart Object.
• Download and open the PremPresetsTemplate3K.psd file in Photoshop and, in the Layers panel, target the “Original” layer.
• Select Layer > Smart Objects > Edit Contents. This will open the “Original” layer in its own window named ColorTest1.psb.
• Copy and paste (or drag and drop) your image into the ColorTest1.psb window.
• Choose Edit > Free Transform and scale your image to fit within the canvas as needed.
• Hide (or delete) the background layer.
• Save the changes to the ColorTest1.psb and close it. Photoshop will update all copies of the Smart Object (applying the different Premium Presets via the Camera Raw Filter). Note: the template is a complex document with 70 layers each with its own Camera Raw filter applied – depending on your system, it may take a few moments to save the contents of the Smart Object and update the parent document after saving ColorTest1.psd!
• Once you’ve chosen your preferred preset, open your original image in Camera Raw and apply it!
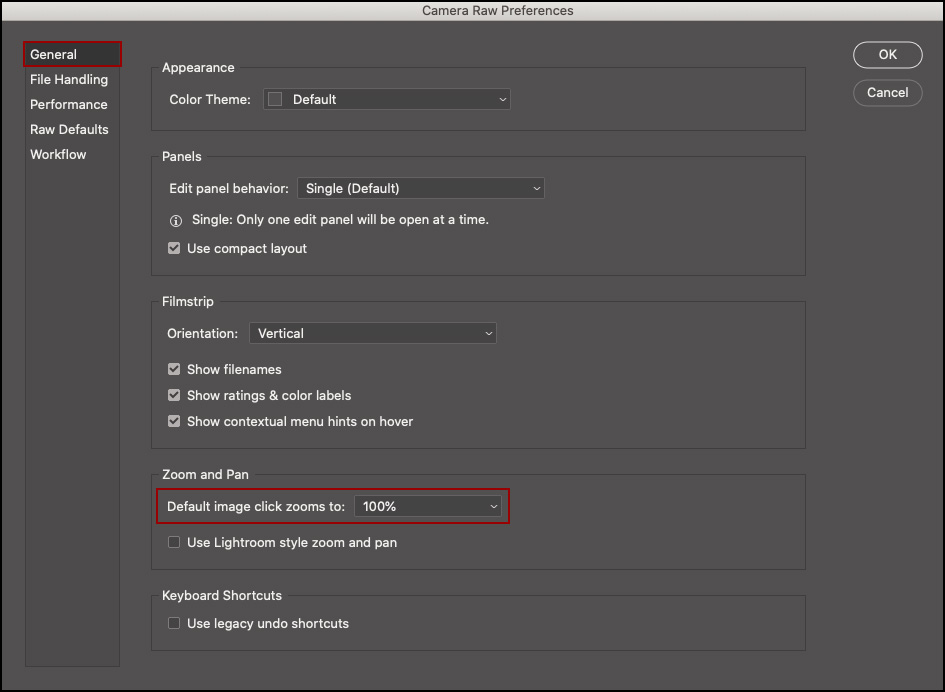
Enhancements to the Zoom Tool — Click the gear icon to access the new Zoom and Pan preferences to choose the default zoom percentage. Once set, Command + Option + 0 (Mac) | Control + Alt + 0 (Win) will zoom to the percentage set in the Zoom and Pan preferences.
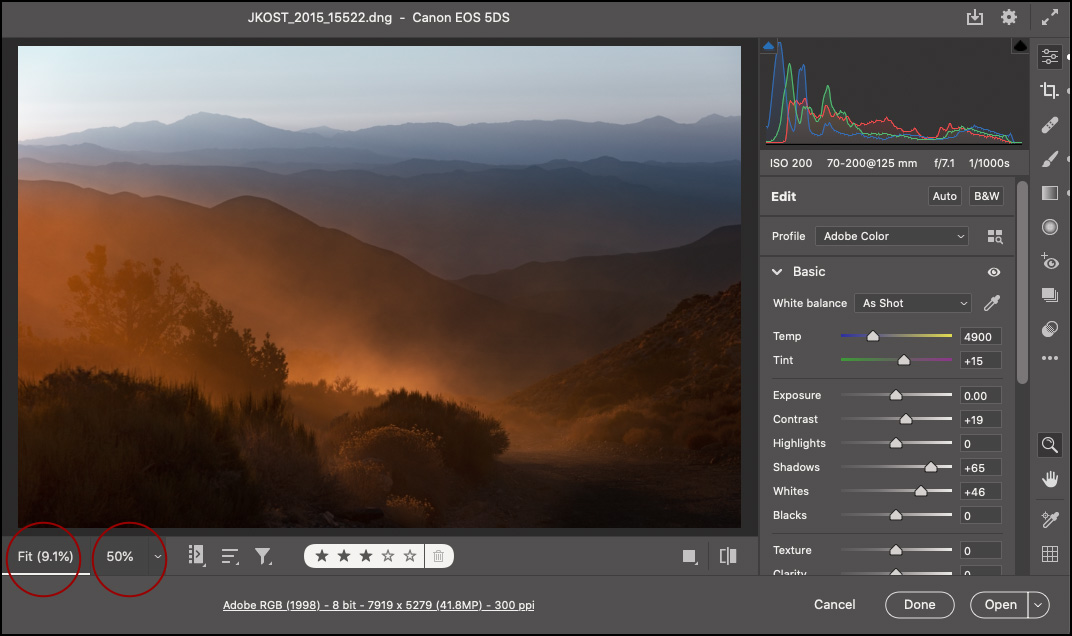
Likewise, Command + Shift -click (Mac) | Control + Shift -click (Win) will zoom to the percentage set in Preferences > General > Zoom and Pan. Note: Without the shortcut, one-click zoom toggles the zoom between Fit in View and whatever zoom percentage is shown in the right zoom button (see illustration below).
This release also includes performance enhancements (faster fill of edges on panoramas, better GPU memory management, and quicker processing of Enhance Details and Super Resolution on NVIDIA RTX GPU), additional camera raw support, lens profile support, and addresses bugs that were introduced in previous releases of Adobe Camera Raw.
Enjoy!
Hi Julieanne,
Can you please tell me where these new presets are held on my Macbook pro running Catalina.
Regards
macOS – /Users/[user name]/Library/Application Support/Adobe/CameraRaw/Settings
Windows – C:\Users\[user name]\AppData\Roaming\Adobe\CameraRaw\Settings