I’m happy to announce updates for Photoshop desktop including free Sky Preset Packs for Sky Replacement, improvements to Transform Warp, additional Discovery content, and the addition of the Healing Brush, Magic Wand, and Canvas Projection in Photoshop on the iPad.
Photoshop Desktop
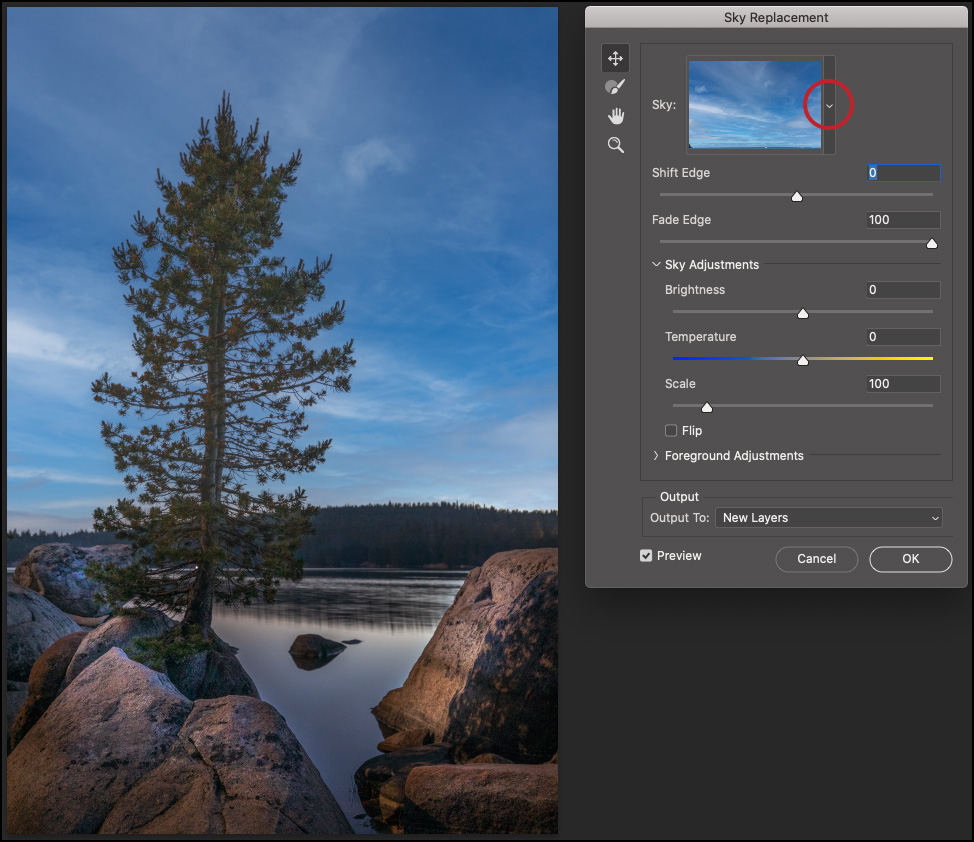
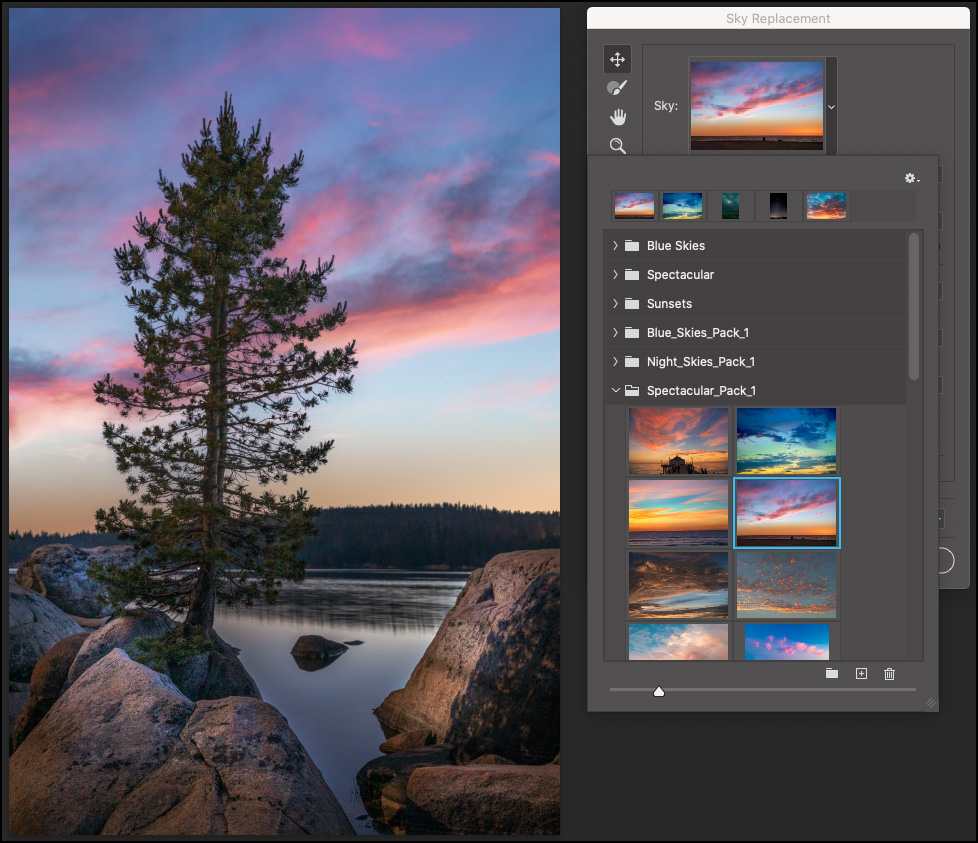
Sky Replacement — Replace dreary skies with the help of Photoshop’s Sky Replacement feature and five free Sky Preset packs available on Adobe’s Discover site. These presets include more than 45 photographs of sunsets, night skies, blue skies, storms, and spectacular skies to use in your images. To download the preset packs, choose Edit > Sky Replacement and click the downwards pointing chevron next to the sky thumbnail.
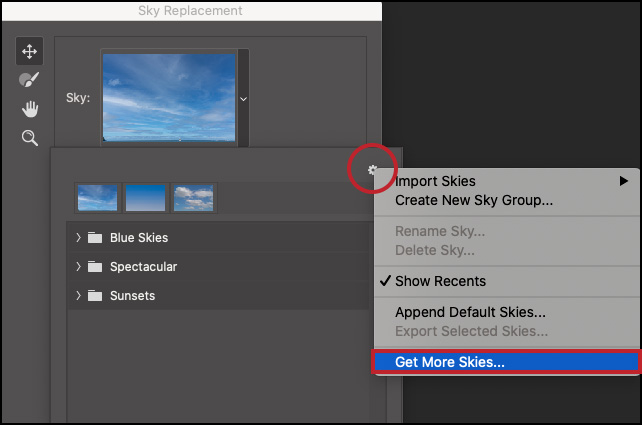
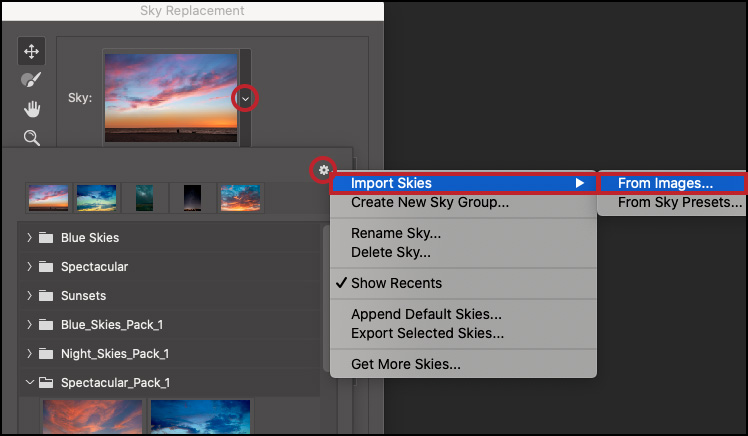
Click the gear icon and choose Get More Skies…
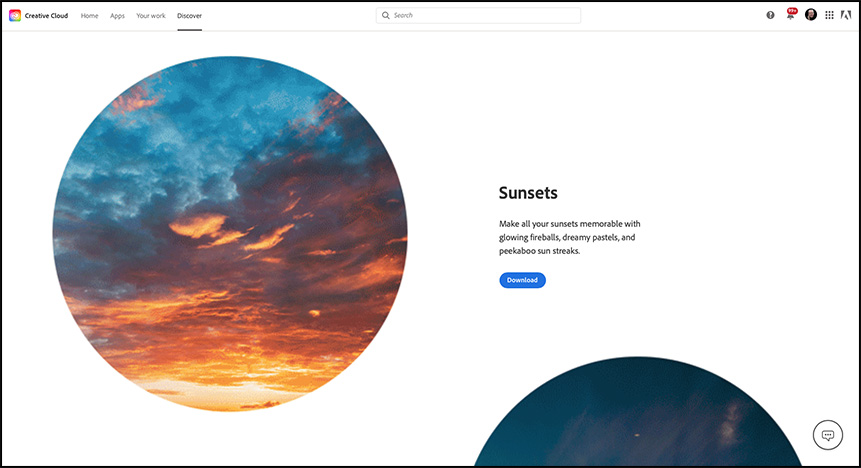
On the Creative Cloud Discover site, click the Download button next to the desired preset pack(s).
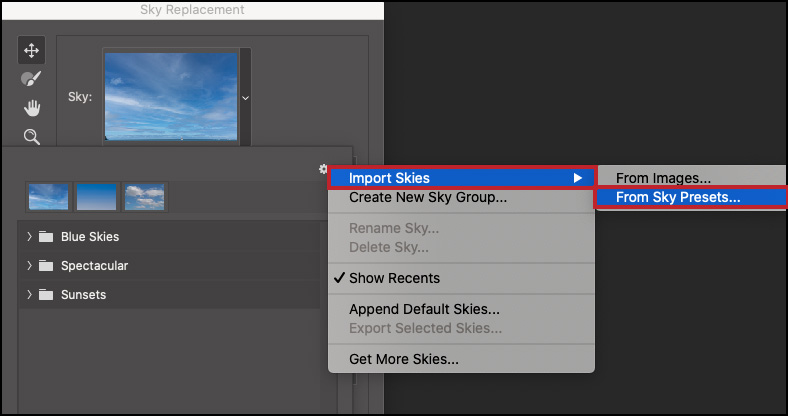
To access the downloaded skies within Sky Replacement, return to the gear icon and choose Import Skies > From Sky Presets… and select the downloaded preset pack(s).
Once imported, skies will be available via presets window.
If you prefer to use your own skies, you can now import up to 5000 skies at once! In the Sky Replacement window, click the downwards pointing chevron next to the sky thumbnail. Then, use the gear icon to select Import Skies > From Images… and select your images (skies need to be saved in the JPEG format).
For more detailed information on the Select > Sky and Sky Replacement features in Photoshop, please see this post Adobe Announces Updates to Photoshop 2021 (v22) and Adobe Camera Raw (v13).
Free Transform Warp — To enable more precise transformation when using Transform Warp, Photoshop has added several new refinements:
Bezier control points can now be moved independently of one another. Option -click (Mac) | Alt -click (Win) to toggle between moving in unison or moving independently (or, right-click (or control -click Mac) on an anchor point and choose “Convert Warp Anchor Point” from the context sensitive menu). Shift -click to select multiple anchor points and change the state for all selected points. Note: the icon for the Bezier control point is a circle when when all handles move in unison and a square when moving independently. By default:
• Corner points are set to independent movement.
• Edge anchor points are set to unison movement of the vertical/horizontal pair.
• Interior/inner anchor points are set to unison movement for each handle.
To quickly add additional split lines in a warp without returning to the menu bar:
• Command -click (Mac) | Control -click (Win) anywhere the warp mesh to split the warp crosswise at that location.
• Command -click (Mac) | Control -click (Win) near the edge of an existing horizontal or vertical grid line and click to split the warp vertically/horizontally at that location.
Click the gear icon in the Options bar to customize the color and opacity of warp guidelines making warp handles and lines easier to see against the color of your image. You can also tailor other settings such as when (auto/always/never) and how many (density) warp guides to display.
Hidden Gems — The Photoshop team also made hundreds of small improvements and fixes across the application that improve performance, updated several of the Neural Filters (including Style Transfer and Superzoom), improved the Discover panel making it easier to find and explore relevant content from directly within the application, added additional Quick Actions in the Properties panel to help expedite tasks with a single click, and introduced the new Photoshop Beta program (available via the Creative Cloud desktop application) to enable customers (like you!) to give feedback to the Photoshop team.
Photoshop on iPad
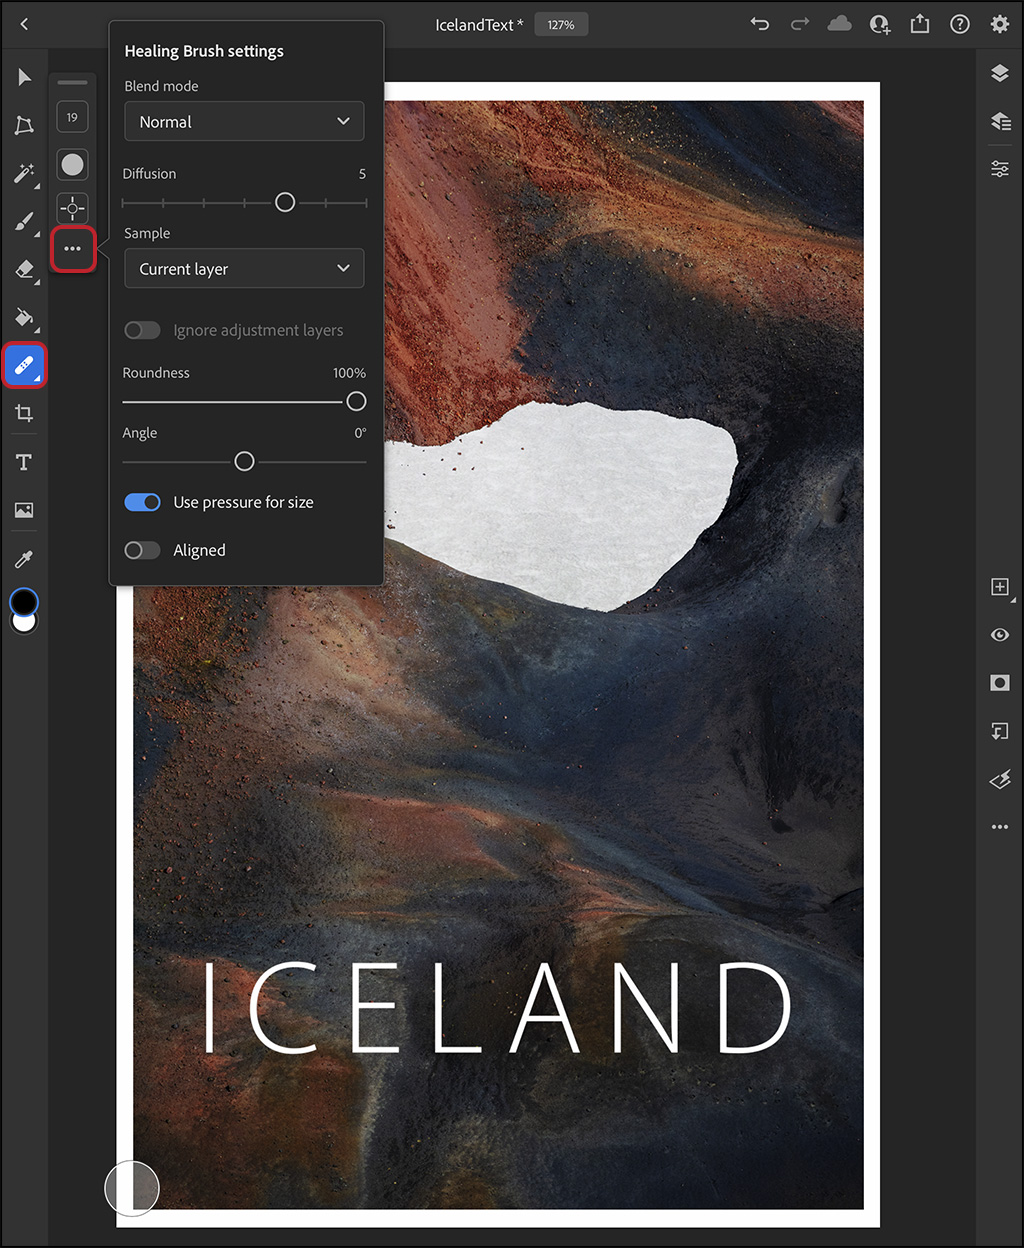
Healing Brush — The same, powerful retouching technology that we love to use in Photoshop on the desktop is now available on the iPad! Using a tap of the finger – or the Apple Pencil, you can use theHealing Brush to quickly remove distracting elements and retouch your images with precision and control.
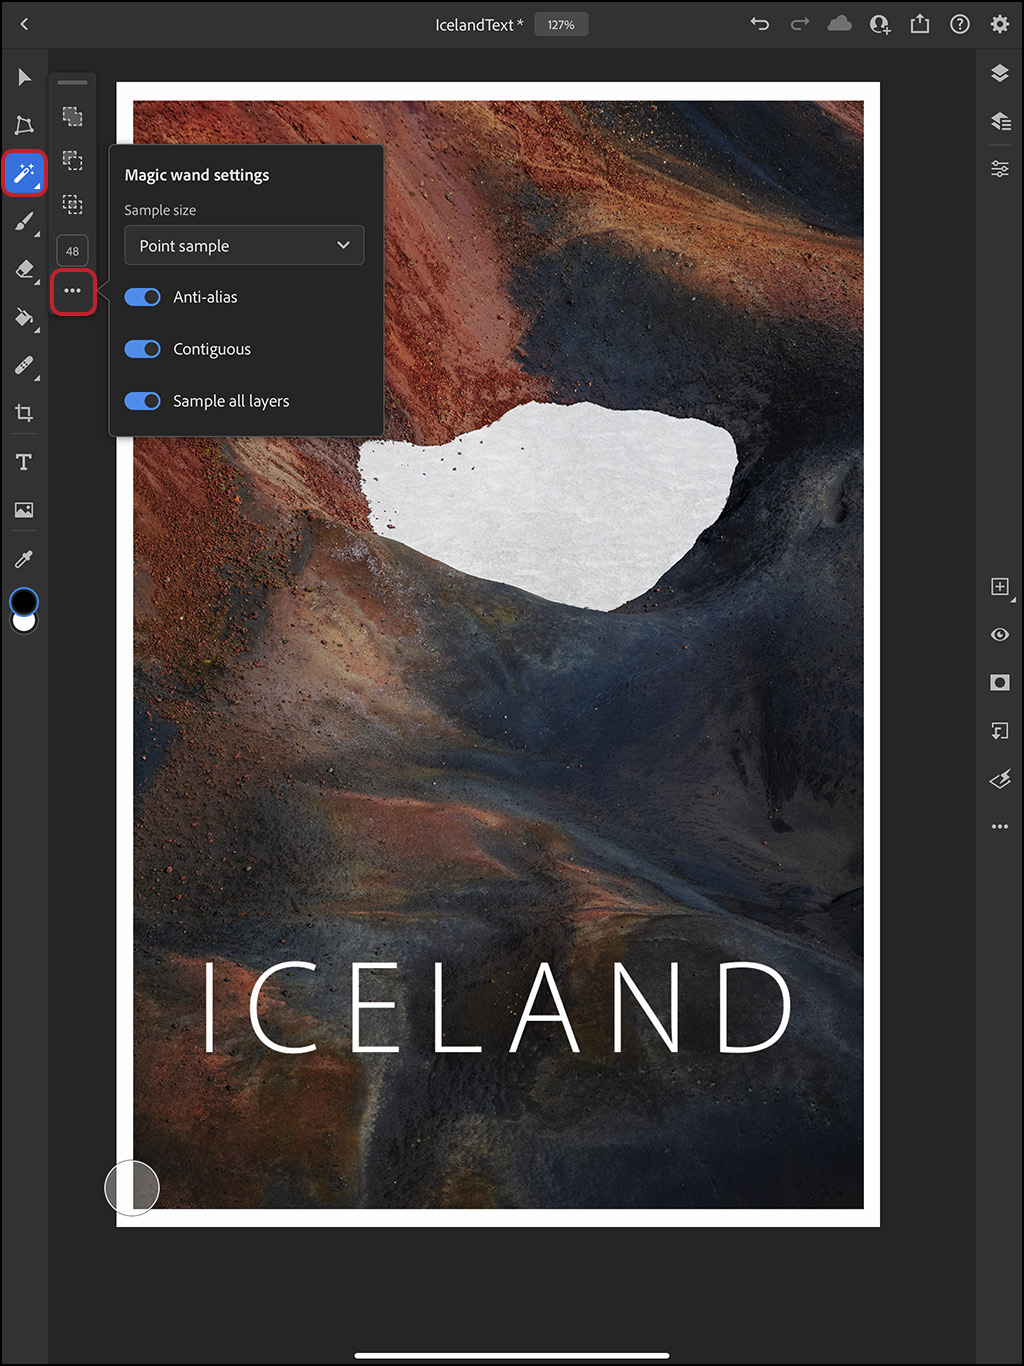
Magic Wand Tool — This highly requested tool can help select areas that are similar in color and tone. To increase (or decrease) the selected color range, use the Tolerance option. Tap the more icon (three dots) to enable/disable the Contiguous option (when enabled, similar colored pixels must be adjacent to one another in order to be selected, when disabled, similar colors are selected throughout the image), and Sample All Layers (when enabled, colors are selected using data from all visible layers – when disabled colors are selected from the active layer only).
Canvas Projection — Enable Canvas Projection (General > Advanced Settings) to share your canvas (without the Photoshop UI) to any external monitor or TV with HDMI or USB-C .
Enjoy!
Thank you…