I’m excited to announce several new features and enhancements to Photoshop CC 2019 including a new Content-Aware Fill workspace, Frame tool, Color Symmetry options, color picker, live Blend Modes and much, much, more!
Photoshop CC’s Content-Aware Fill feature has been updated to include new controls for selecting source information as well as adapting content based on rotation, scale, and mirroring in order to create a better match when filling in areas of a photograph. Check out the video below to learn more.
The Radial and Mandala Paint symmetry have been fully integrated into the symmetry options for painting in Photoshop CC. Watch the video below to see how easy it is to mirror and repeat paint strokes around your desired axis as well as access the new Color Wheel in Photoshop CC.
The new Frame tool enables quick “clipping” of content to a shape. In the video below, see how to place images, drag and drop form the OS or other applications such as Lightroom or, use the Libraries panel to quickly add a photo within a rectangle, ellipse, or any shape converted to a frame.
Note: the Frame tool is a fast and easy way to clip an image within a shape and will be very useful – especially for those that are new to Photoshop. However for more advanced users looking for the ultimate in flexibility, clipping masks are still an excellent way to clip content (photos, adjustment layers, Layer Groups etc. to shapes and type because once a shape is converted to a frame, the frame is no longer editable. Click here to read more about clipping masks, or, click here to watch a video.
Here are 10 additional improvements made to make Photoshop CC easier to use:
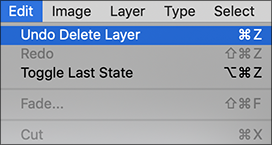
1) The Undo command has been updated to provide consistency between Adobe applications such as Illustrator and InDesign.
Command + Z now continues to step back in time
Command + Shift + Z move forward in time
Command + Option + Z toggles the last state off/on (after the most recent command)
Note: it might take a bit to re-train your “muscle memory” so if you’re under deadline at the moment or prefer not to change your shortcuts, can select Edit > Keyboard shortcuts > and enable Use Legacy Undo Shortcuts.

2) Dragging any anchor point while in Transform will transform proportionally by default. To distort the transformation, add the Shift key. Note: Transforming shapes and paths are the exception – they will be left un-proportional by default).
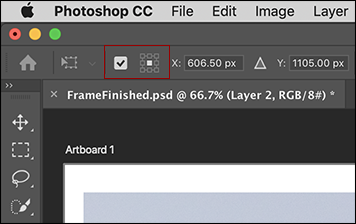
3) When in Transform, the reference point is hidden by default to prevent accidental repositioning. Quickly show/hide the reference point using the Options bar or use Edit > Preferences > Tools > Show reference point when using Transform.
4) It’s easier than ever to commit to (apply changes) made by Tools that have modal states (including Type, Crop, Transform, and Content-Aware Scale). Simply select another tool or layer, click outside the canvas or click inside the canvas, but away from the bounding box. Note: when using tools such as Puppet Warp, the team didn’t want to make to too easy to “accidentally” apply a warp so some of these “commit” shortcuts may not apply).
5) To edit Type layers more quickly, just double click on the text with the Move tool to automatically select the Type tool and the text on the layer.
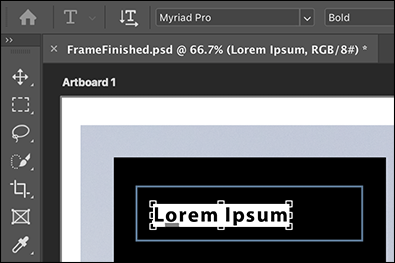
6) Clicking with the Type tool in the image area automatically displays placeholder text to preview font, size, color etc. The placeholder text is replaced as soon as you start to type. To disable, choose Preferences > Type > Fill New Type Layers With Placeholder Text.
7) To help make on-canvas controls easier to see, select Preference > Guides Grid & Slices. Use the Path options to change color and width of paths and shapes and the Control option to change the color of on-canvas controls such as Transform and Warp commands, Blur Gallery and Liquify filters and Gradient and Eyedropper tools.
8) To change the font size for the interface, choose Preference > Interface > UI Font size and enable Scale UI To Font. Note: changes won’t take effect until the next time you restart Photoshop.
UI Font size set to Large.
UI Font size set to Small.
9) The Crop tool now displays the handles outside of the cropped area, no longer obscuring the edges of the document.
10) For additional control over your workspaces, choose Panel > Workspace > Lock workspace. You can still add additional panels, but locking them prevents you from inadvertently moving them.
Are here are my favorite 10 Hidden Gems in Photoshop CC.
Live Blend Modes Hovering your cursor over any blend mode in the Layers panel previews the results instantly in the image area.
New Layer Alignment Options Easily distribute objects of different sizes based on the spacing between them (not their size). Choose Layer > Distribute > Horizontally or Vertically. Or, with the Move tool selected, click the More icon (three dots) in the Options bar and click the desired Distribute Spacing icon. Note: this menu item can be recored as part of an action.

Three shape layers.

Distributed via centers of objects.

Distributed via Spacing between objects.
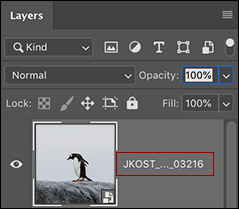
Long Layer Names When displaying layers with long names, the Layers panel now truncates the middle of the name (not the end) making it easier to identify the layer.
Math Calculations Photoshop now supports addition (+), multiplication (*), subtraction (-) and division(/) in text entry fields.
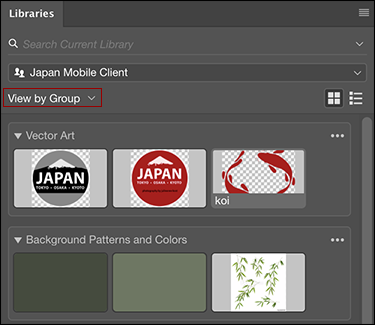
Custom Groups in Libraries Panel While you can still view your assets in a Library by Photoshop’s default view based on element type, you can also create your own groups of mixed assets depending on your needs.
Flip Canvas View Selecting View > Flip Horizontal quickly flips the document view which can help provide a new perspective on the document or troubleshoot why an image isn’t working as planned. Note: to actually flip the document (not the view) choose Image > Image Rotation > Flip Canvas…
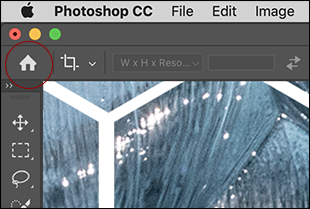
Toggle the Visibility of the Home Screen Click the new Home icon in the Options bar in Photoshop at any time to access the Home screen (to create new or open recent files, discover Learn content and access LR Photos).
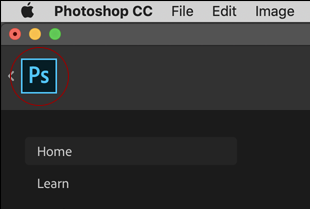
 Click the PS icon on the Home screen to return to Photoshop. Note, to assign a custom keyboard shortcut to toggle the Home screen choose Edit > Keyboard Shortcuts > Help > Home.
New Product Tour and Learn Content When you first launch PS, the Home screen will display the New Product Tour and additional Learn content. The contents of Home screen will evolve over time, but you can always access the product tour by choosing File > Open Recent > Clear Recent File List.
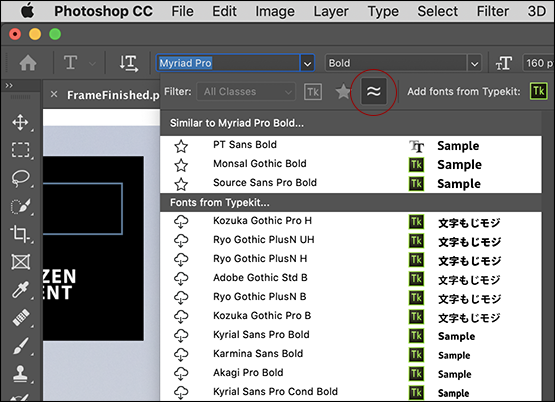
Japanese Characters and Fonts. Show Similar Fonts now includes Japanese characters.And, when using Match Font, you can choose between Roman and Japanese characters.
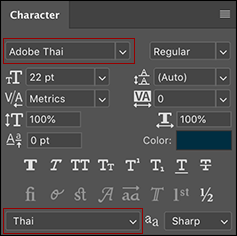
Middle Eastern and South Asian Layout Paragraph Composer Photoshop now has support for entering text using 5 new Southeast Asian languages —Thai, Burmese, Lao, Sinhala, and Khmer. Choose Edit > Preferences > Type to choose the Middle Eastern and South Asian text engine option and create a new document. Create a new Type layer and, in the Character panel, choose the desired language. Choose your font (Adobe Thai or Noto Sans Thai for Thai, for example) and Copy & Paste the Thai text. Or, if you have a Thai keyboard set up, simply type away.
Note: On Windows, to use these languages properly, you will have to install the Language and Font packs for the particular language you want to use. Microsoft has all the information on this. Just Google something like “Windows Thai Language Pack”.
One of the features that looks great is quilt warp. Edit > Transform > Warp allows options to split to vertical and change the grid from 3 x 3. I saw in a video demo but it’s not working in the version that install today? Thanks in advance for your help Julieanne. Much appreaciated!
That feature was not released in this version of Photoshop.
That is really attention-grabbing, You are an overly skilled blogger.
I’ve joined your feed and look ahead to seeking more of your
excellent post. Additionally, I have shared
your website in my social networks
Could you please add Grain Merge Blend Mode like in GIMP?
It will be really practical in many use for retouchers.
Hi Rori, that’s a good suggestion. It would be great if you could post it here so that the product management team sees it as well!
http://feedback.photoshop.com/photoshop_family
Thank you for a great insight
Please bring back the transform nodes… they’re incredibly useful and I’m very upset that you’ve taken them away! Change the centre point back to how it was before – removed this annoying magenta blob from my sight!!!
YES!!!!! Its crazy…..when you are used with some commands working with the speed of light and then you see your car its different and reacts different pushing the same buttons, you lose the race.
Please give at least the option for those who were used with the old Transform commands to have them again!!!!!
How do you disable the lame Shift to Constrain Proportions when transforming. It is lame. It isn’t just a matter of adjusting muscle-memory either. It is inconsistent with almost every other similar case. There needs to be a way out of this.
Hello Julieanne,
Is there a toggle to prevent the Home Screen from appearing when I open Photoshop?
Thanks!
Preferences > General > Disable the Home Screen
Is there a way to change the transform proportionally set by default?. I like the distort transformation and adding the shift key to scale proportionally.
How do I change it back??
Cesar, there are instructions here: https://helpx.adobe.com/photoshop/using/whats-new.html#user-experience-improvements
Scroll down until you see: How do I turn off the new proportional scaling by default behavior while transforming layers?”
Just watching you tube by Bring Your Own Laptop – What’s New in Adobe Photoshop CC 2019 Updates and he shows Quilt Warp. I updated my paid subscription yesterday to the latest and my version does not show this feature. Could you please advise why?
Thanks in advance.
That feature was not released in this version of Photoshop.
I really do not like the way the Perspective Crop tool now operates. I now have to hold down the Shift key to be able to move corners freely in any direction, and also to move the crop bounding lines independently of each other.
What is the reasoning behind this change?
How do I hide the New Product Tour start screen?
Click the PS icon in the upper left. Or, use Preferences > General > Disable the Home Screen.
When adjusting verticals in Skew mode, dragging a new guide turns Skew off.
It works if the guide is already there, but not if you want to add a guide after
Could you please report the issue on the Photoshop Forum? https://forums.adobe.com/community/photoshop
I love the new color wheel but can’t figure out how to display it instead of the Hue Cube in the Color Picker. I can display it in the Color Panel, just not in the Color Picker.
I tried changing my HUD Color Picker to Hue Wheel but that didn’t change the Color Picker UI.
It is only available in the Color Panel, not the Color picker.
Where is the center point indicator when I crop? I need that!!!
The reference point is now hidden by default, but you can toggle it’s visibility using the Options bar (once you toggle it on, it will remain on). There is also a preference.
the new version freezes up. Won’t let me do anything.
Does anyone know how to drag and drop one layer from one PSD file to another and place it in the same position without having to move the layer? I could do this before in all previous versions of Photoshop. But I can’t do it in this Photoshop CC 2019 version. Please let me know! I’m desperate.
Something I’m struggling with, with the new update (that i can’t find addressed anywhere) is how to edit vector smart objects. You used to be able to just double click the layer and it would open in Illustrator and then I would edit, save and then it would be changed in photoshop. Now, It just opens up as an ai. file in photoshop, but I can’t edit vectors. Am I missing something? Is there somewhere to read up on this? Thanks for your help.