In the video below, you’ll learn how to undo edits made in the Develop module and compare different History states using the Before & After View in Lightroom Classic.
Lightroom Classic’s Before & After View in combination with the History panel provide a powerful way to compare and apply preferred edits and adjustments that have been made to an image. Below are several tips to help get the most out of these two features.
Enable Before & After View — To enable Before & After view click the “Y | Y” icon below the image preview area in the Develop module or, tap “Y” to display the default Before & After (left/right) view.
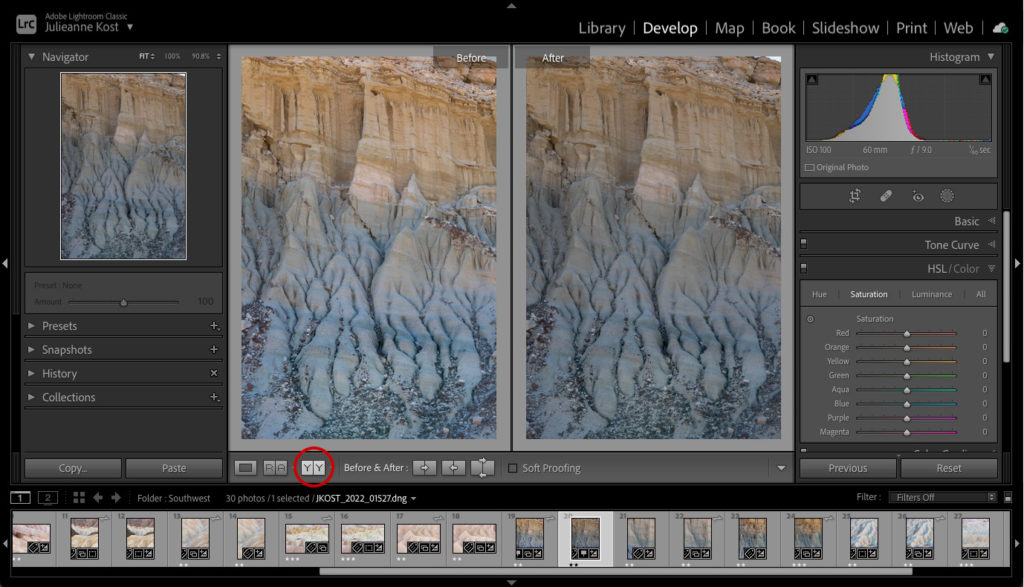
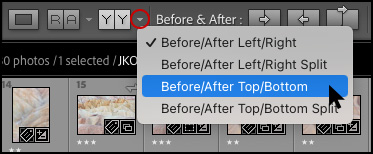
Choose From Additional Before & After Views — Click the disclosure triangle next to the Y | Y icon to select a different Before & After view.
Or, use the following shortcuts:
- Option + Y (Mac) | Alt + Y (Win) displays Before & After in top/bottom view.
- Shift + Y displays Before & After in split screen view.
Swap and Copy Settings — Click the icons in the tool bar or use the following three shortcuts to copy and/or swap different settings between the before and after states:
- Command + Option+ Shift + right arrow (Mac) | Control + Alt + Shift + right arrow (Win) copies the Before state to the After state.
- Command + Option+ Shift + left arrow (Mac) | Control + Alt + Shift + left arrow (Win) copies the After state to the Before state.
- Command + Option+ Shift + up arrow (Mac) | Control + Alt + Shift + up arrow (Win) swaps the Before and After state.
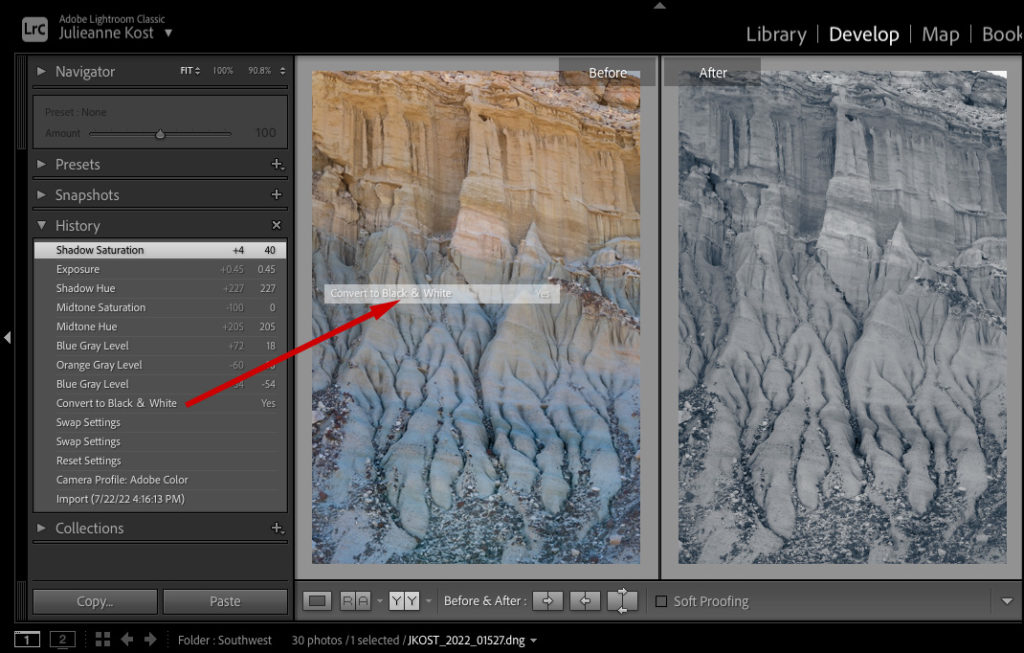
Setting a Custom “Before” State — Often, I find that the default “Before” state (which is automatically created when the file is imported), is not the state that I want to compare to the “After” (current) state. Fortunately, to compare a different “Before” state, you can simply drag and drop the desired state from the History panel into the “Before” preview area. Note: don’t click on the state in the History panel – that will select that state as your current or “after” state: click -drag the state to the Before image.
In addition, you can set a Snapshot as the “Before” state by right -clicking (or Control -click on Mac) on a Snapshot in the Snapshots panel and choosing “Copy Snapshot Settings to Before”. See this post Working with Snapshots in Lightroom Classic for more information about Snapshots.
Before & After Loupe View — Tap the “\” (backslash) key to toggle between the Before and After view in Loupe view (this enables a larger view as there is only one view showing at a time).
Clearing History — Rollover the “X” in History panel header and click “Clear All” to clear history. For more control, right -click (or Control -click on Mac)and choose “Clear History Above this Step”.
Clearing the History in the Develop module can help decrease the size of the catalog so that it has less impact on memory, storage, backup time and backup size. To batch delete the History from multiple files, select the photos in Grid view, then got to the Develop Module and choose Develop> Clear History. You will get a warning with the option to delete history from the Active photo or from all Selected Photos.
Saving History — Changes made to images in the Develop module are not saved in the image’s metadata – they are saved solely in the Lightroom catalog.