In this video, you’ll discover how to adjust the White Balance of a photograph as well as learn the difference between the Vibrance and Saturation sliders in Lightroom Classic.
Here are six of my favorite shortcuts for setting an image’s White Balance in Lightroom Classic:
Selecting the White Balance Tool — Tap “W” to select the White Balance Selector tool.
• Tapping the “W” key in another module (such as the Library) will automatically switch to the Develop module and select the White Balance Selector tool.
• By default, the White Balance Selector tool is dismissed (put away) after a single click in the image preview area. To disable the “Auto Dismiss” feature, uncheck it in the toolbar. If “Auto Dismiss” is disabled, tap the Escape key (or the “W” key again) to dismiss the tool.
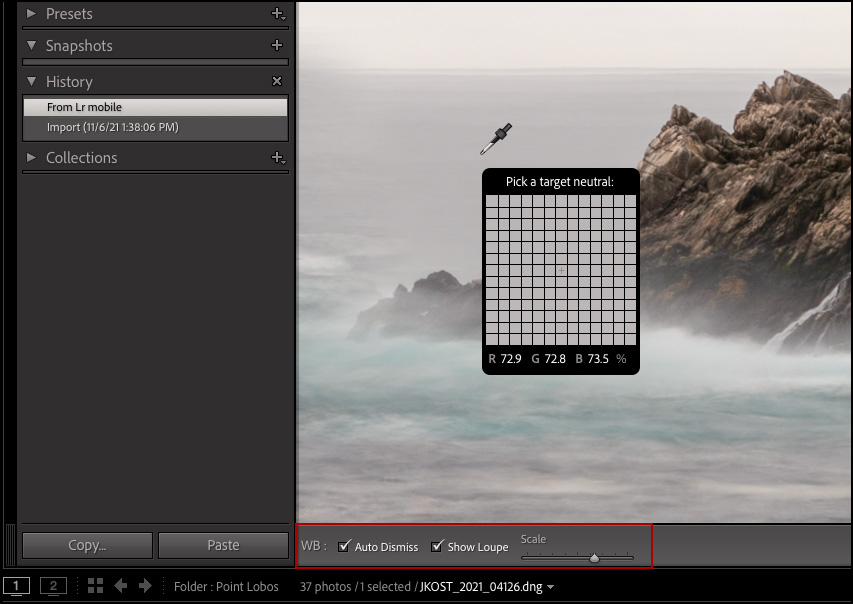
Show and Hide the Loupe — While using the White Balance Selector tool, use the Loupe checkbox in the Toolbar to hide/show the Loupe.
White Balance Sample Area — The White Balance Selector Tool’s sample area is dependent on zoom level (zoom in to sample a smaller area).
Auto White Balance — Command + Shift + U (Mac) | Control + Shift + U applies an Auto White Balance correction.
Temperature and Tint Sliders — Shift -double click the Temperature or Tint adjustment sliders to apply Auto Temperature and Auto Tint controls separately from one another.
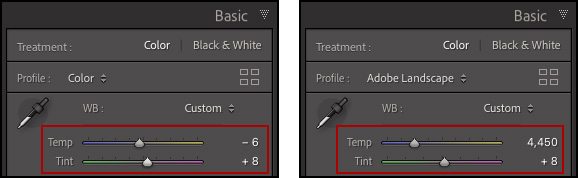
Raw vs JPEG Files — The White Balance values displayed for RAW and JPEG files will differ. The Temperature and Tint sliders will display numeric values from -100 to +100 for JPEG files as opposed to Temperature (2000-50000) and Tint (-150 – +150) values for RAW files.
Note: If you include White Balance settings in a preset applied to a Raw file, and then apply that preset to a JPEG, Lightroom tries to apply the equivalent white balance adjustment (but using the JPEG scale). Therefore, the White Balance adjustment on a JPEG (using a preset based on a raw file) is necessarily an approximation and results will vary somewhat on a case by case basis.
The Saturation and Vibrance Sliders — The difference between the Saturation and Vibrance sliders in Lightroom Classic is that the Saturation slider makes absolute adjustments that affects all colors equally. Moving the slider to -100 will remove all saturation from an image (making it appear monochrome), where as moving the slider to +100 will fully saturate the colors in an image.
The Vibrance slider is relative. Moving the slider towards -100 decreases the amount of saturation relative to how much saturation there was in the color to begin with. Moving the slider towards +100 increases the relative amount of saturation while trying to avoid pushing saturated colors to full saturation (to help minimize clipping colors to the same value as they approach full saturation). The Vibrance slider is also biased: it adjusts orange, red, and yellow values less than other colors. This can be helpful when trying to increase saturation in a blue sky and green grass in an image for example, while avoiding shifting skin-tones, preventing them from becoming over saturated.


You can use the Saturation and Vibrance sliders in combination with one another. Below I’ve set Saturation -50 to lower the overall saturation of the colors, and then set the Vibrance to +100 to increase saturation in the non skin-tone colors (magenta, purple, blue, aqua, and green).


While these illustrations demonstrate increasing/decreasing Saturation and Vibrance using a gradient, I would encourage you to experiment with the sliders on your own images to get a better feel for how they will adjust the colors in you photographs.
When using the Quick Develop panel in the Library module, press Option (Mac) | Alt (Win) to toggle the Vibrance to Saturation. See this post (The Power of Quick Develop) for additional information on the Quick Develop panel in Lightroom Classic.
And here are links to several additional tools in Lightroom Classic that you can use to change colors including the Color Mixer panel, the Color Grading panel, and Masking.
This is very helpful. Thanks so much Julieanne.