In this video, you’ll discover how easy it is to use Photo Merge in Lightroom Classic to combine bracketed exposures into a High Dynamic Range, DNG file that contains all of the quality and flexibility of a raw file.
Here are several tips to use when creating high dynamic range (HDR) images with Lightroom Classic’s PhotoMerge commands.
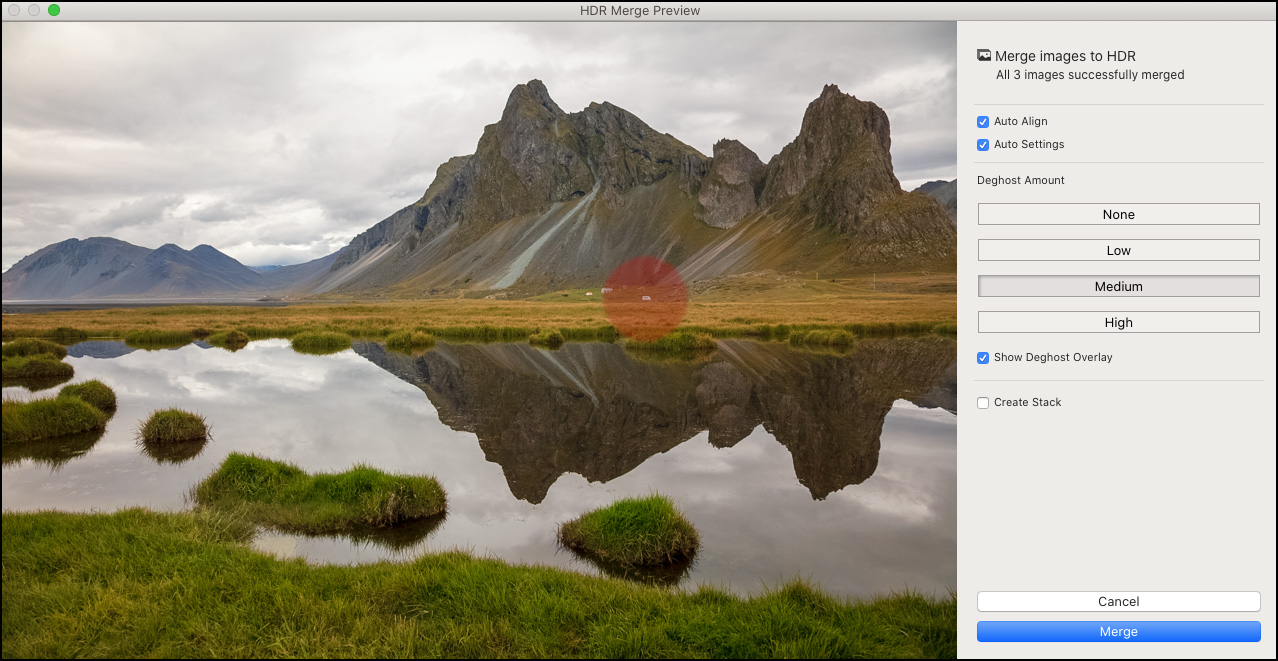
• Control + H (Mac and Win) displays the HDR Merge Preview window. For performance reasons, the maximum preview size is 2048px.
• Option + Shift + H (Mac) | Alt + Shift + H (Win) bypasses the HDR Merge Preview window and creates a HDR image based on the last used HDR merge settings.
Lens Correction — For best results, in the Lens Correction panel, enable Remove Chromatic Aberration and Enable Profile Corrections to all individual images before running Photo > PhotoMerge > HDR or, make sure that the corrected image is the “most selected”image before selecting the Photo Merge command (see illustration below).

Applying Adjustments — I prefer to merge the images first, then make tonal and color adjustments to the resulting merged HDR file as not all adjustments made to individual images are applied when merging to HDR. The settings that are not applied include the primary tone settings in the Basic panel (Exposure, Contrast, Highlights, Shadows, Whites, and Blacks – as the HDR Photo Merge uses it’s own calculations to expand the tonal range), Tone Curve, Local Adjustments, Red Eye, Upright, and Crop.
• To apply adjustments such as Profiles, Spot Healing, Color Grading etc. (which can be applied during the HDR Photo Merge), make sure that the adjustments are made to all images or, that the image with the adjustments is the “most selected” image before choosing PhotoMerge > HDR.
Auto Align — Enable Auto Align if there was camera movement between the sequence of exposures (if the images were taken without a tripod for example). Lightroom will automatically align the images and crop any uneven edges.
Auto Settings — Enable Auto Settings to automatically enhance the combined exposures (even if the Auto Settings feature is applied in the HDR Merge dialog, settings can be modified/removed from the resulting file using the Develop module’s Basic panel after merging – without any loss of quality.
Deghost — Enable Deghost if there was movement within the photo between the sequence of images (blowing leaves, moving cars, people walking etc. ). “O” toggles the Deghost Amount mask, Shift + O cycles through the mask overlay colors.
Stacking Images — Check Create Stack to automatically stack the source and resulting HDR image. The merged HDR image will appear at the top of the stack.
File Naming — Lightroom Classic adds -HDR to end of the file name of the merged HDR making them easy to find using the Text filter in Grid view.
Process Version — The resulting (merged) DNG files will always default to Process Version (PV) 2012 or later, despite any differing PV settings applied to the source images (PV2012 or later is required for the extended Exposure range (+/- 10 stops), previous PV’s are restricted to (+/- 4 stops).
Note: The merged HDR is a 16-bit floating point image due to the significant (and painful) file size that would result if the HDR merge was 32-bit.
This Adobe Helpx article discusses the optimum number of exposures/images for an HDR photo merge.
